BLACKMORE BJC-15X2BT User manual

Samson Electronics Inc.
3400 E. Slauson Ave.
Maywood, CA 90270
Ph: 323.585.6393
Fax: 323.585.6202
Web: http://www.blackmoremobile.com
BJC-15X2BT Portable Amplified
Loudspeaker System
Introduction:
The BJC-15X2BT is a professional amplified PA system that includes 2 speaker cabinets made of durable molded ABS
plastic, one wired dynamic microphone and 2 collapsible tripod style speaker stands. The amplified speaker system has
an integrated music player capable of playing audio files from USB drives and SD Cards as well as Full Bluetooth
capabilities. The system also has XLR and ¼” microphone inputs as well as RCA and XLR audio inputs with separate
volume control for each input. The speakers are comprised of a 15” woofer and titanium domed tweeter behind a
molded horn for each cabinet making up a total of 3000W of musical power.
Features:
Self contained Amplified system
Dual speakers
Speaker Stands Included
Wired Microphone included
Bluetooth connectivity
XLR, RCA and ¼” Jack inputs
Integrated MP3 player with SD Card and USB inputs
Wireless remote control
Speakon and RCA audio cables included
Weight : 80 lbs total package
Dimensions : 17” x 14” X 26” (each speaker)
Power Supply AC 110-240V 50/60 Hz
Caution:
Please read All Operating Instructions before using this product
Avoid electrical shock, DO NOT OPEN THIS UNIT, THERE ARE NO REPLACEABLE PARTS INSIDE. Please refer to
your warranty information for service.
Do not Expose this product to Moisture, Water, Rain or Snow. Keep away from direct heat sources. Damaged
items will not be accepted for warranty
Do not clean this unit with solvents or chemicals
Insure that all volume and gain controls are set to “0”when connecting source units
Only line level Signals should be used for source
Speaker Stands:

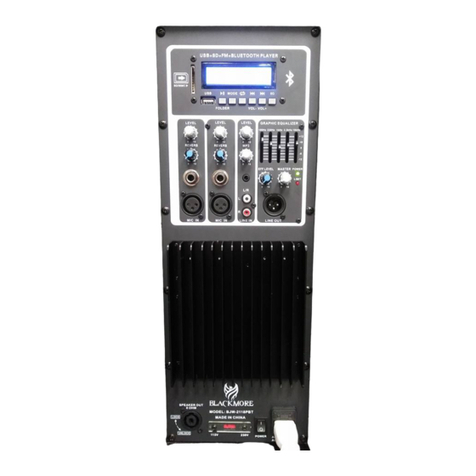
1.LCD Display 2. Stop Track Button 3. Play/Pause 4. Previous Track 5. Next track 6. U/S selector 7. SD Card input 8. USB input
9.U/S gain level
10. XLR Mic Input
11. MIC Gain level
12. ¼” Mic Input
13. Line in gain level
14. RCA Stereo Input
15. XLR line input
16. Master Volume Control
17. Master Treble Control
18. Master Bass Control
19. ¼” Line Output
20. XLR line out
21. Speaker out(speakon)
22. Amplifier Heatsink 23. Input Voltage Selector
24. Master Power Switch
25. AC power connection
Master Unit

26. Speaker input (female Speakon)
27. Speaker Pole input and locking screw
SLAVE UNIT

28. Speaker Input
30. Compression lock(height)
29. Locking safety pin
31. Compression lock(tripod)
Speaker Stand (x 2)

Functions:
1. LED Display: The display shows track information and menu options
2. Stop Button: Stops the current track being played by the onboard mp3 player.
3. Play /Pause : Press this button to start or stop an MP3 track played via USB or SD
4. Previous track: Press this button to play the previous track from your music file.
5. Next track: Press this button to play the next track from your music file.
6. U/S Selector: Press this button to toggle between USB playback or SD card playback.
7. SD Card input: This is a standard size SD card input with a read capacity of 8GB.
8. USB Input: This is a full size USB2.0 female input. It has a read capacity of 4GB. Music files must
be formatted as MP3 in order to be played via USB
9. U/S Gain Level: This controls the signal output of the onboard MP3 player. (USB and SD Card)
10. XLR Input: This connection allows the use of professional microphones with XLR terminals.
Microphone gain control: This controls the amount of electrical signal received from the
microphone.
11. MIC gain control: This controls the level of signal of the microphone.
12. ¼” Microphone input: This connection allows the use of microphones and playback devices
with ¼” audio plugs.
13. Line In gain control: This controls the amount of signal received from the line in source.
14. RCA Stereo line in: These connections provide an input for playback devices equipped with RCA
Stereo connections.
15. XLR Input: This connection allows the use of professional source units with XLR terminals.
16. Master Volume Control: This controls the overall output of the speakers. This volume control
supersedes all other built in volume controls.
17. Master Treble Control: This controls the treble level of the overall output.
18. Master Bass Control: This controls the bass level of the overall output.
19. ¼” Line out: This provides audio signal for exterior amplifiers and processors in ¼” audio jack
format.
20. XLR line out: This provides audio signal for exterior amplifiers and processors in MALE XLR
format
21. Speaker Out: This is the connection used to connect the satellite speaker of this model to the
master unit. Please use the provided cable.
22. Amplifier heat sink: This component is responsible for dissipating the heat generated by the
built in amplifier. It is normal for this item to become hot after hours of continual use at high
volume.
23. Input Voltage selector: This switch allows the unit to be compatible with 120V and 240V power
sources. Ensure that the correct position is selected for your power source. Improper selection
will severely damage this unit and could cause an electrical fire.
24. Master power switch: use to power on or off the unit
25. AC Power Connection: Please use the supplied AC power cable.
26. Speakon input: This is where you hook up the signal from the Master unit.
27. Speaker stand input and tightening screw. Please ensure that the compression screw is tightly
secure.
28. Speaker input
29. Locking Safety Pin: This pin is inserted through the tube via one of the pin slots drilled into the
speaker pole. Ensure that the safety pin is always engaged prior to mounting the speaker.
Failing to use the safety pin correctly could cause severe injury from falling speakers.
30. Compression lock: Use this compress lock to hold the speaker pole at height position. *Caution
31. Compression lock: Use this compress lock to hold the tripod legs in position.

Operation:
Setup:
1. Ensure that the unit is connected to the appropriate power source using the provided AC
power plug.
2. Ensure that the master and all gain controls are turned to the “0”position before connecting
any audio source.
3. Place the speaker in a location that is away from any direct heat source, moisture, or extreme
humidity.
Playback:
*Use the Mode select button (7.) to choose between SD Card, USB, or Bluetooth*
1. Using a USB storage device: The player can accept thumb drives and storage devices in USB 2.0
or less format. Files can be played back formatted as MP3 only. The USB connection can read
devices up to 4GB.
2. Using a SD card: The player can accept thumb drives and storage devices in USB 2.0 or less
format. Files can be played back formatted as MP3 only. The SD Card input can read devices up
to 4GB.
3. Using Bluetooth: Ensure that your audio source has bluetooth enabled, next turn your speaker
on and the bluetooth module will attempt to connect. You will hear a beep and a message that
confirms connectivity. Once connected please select the model form your Bluetooth device for
connection.
4. Using Line in: Ensure that your line In RCA connections is securely connected to the speaker
and audio source before powering on this unit. Ensure that the line in gain control (19.) is in the
“0”position. Once connected ensure the selector button (17.) is in the extended position. Once
selected set the gain control (19.) to #5. If your music source has a volume control ensure that
the volume is set to 75%. Begin playing music and adjust the master volume to your desired
level.
5. Using Microphones: Ensure that the Microphone gain control (11. / 14.)is set to “0”. Connect
your microphone to the XLR, or ¼” Jacks located on inputs one and two. (12., 13. 15. 16.).
Ensure that your microphone is turned on. Adjust the Gain (11./14.) to the “5”position and
adjust master volume control (20.) to desired volume.
Setting up the speaker stands:
1. Extend the tripod legs to 22-26” leg to leg and tighten the compress screw (31.) place the
stands on a smooth level surface.
2. Extend the speaker pole to your desired height using the safety pin holes in the pole as a guide,
find your desired height and place your Locking safety pin(29.)through the position hole. Next
tighten the compress screw(30.)
3. Loosen the compression lock on the speaker, carefully lift the speaker so Speaker pole input
and speaker input (27.28.) connect. Once fully inserted position your speaker and tighten
compression lock (27.)
Connecting to other speakers and amplifiers:
To connect to other external audio amplifiers please use the RCA Stereo Outputs (17.) as an
audio source.
Connecting to Slave speaker:
Use provided “Speakon”cable, Connect one end to (21.)and one end to (26.) Insert and turn
clockwise to engage and counterclockwise to disengage.

Maintenance and care:
Store and use in a dry environment away from direct heat sources and moisture.
Do not clean with solvents or detergents. Only use a mildly damp cloth to dust or clean.
Use on a flat stable surface or with a Blackmore speaker stand. (BJST-60KG). This unit
will vibrate when played at high volume and will shift position. Please use caution
when placing this on any surface
Use only the correct power source. AC 110-240V 50/60 Hz
Maintain all gain controls at correct levels. Excessive gain controls coupled with high
volume can damage the speaker drivers
Troubleshooting:
Music files not read: Ensure that your music files are encoded as MP3 Audio Files.
No Sound: Please ensure that all volume and gain controls are not in the “0”position
and that all source units are on and producing volume. Check volume controls at
source units
Bluetooth not connecting: Ensure that the Bluetooth devise you are connecting has
Bluetooth on and is discoverable.
No Power: please ensure that your AC power connection is fully engaged and
connected to a non surging power source.
Sound is distorted: Please ensure that your source volume and input gains on the
speaker are even and balanced. Also check that your connecting cables from source
units are not damaged or broken.
No sound from Microphone: Ensure that the MIC gain control (11. 14.) is not set to “0”
ensure that the microphone is turned on and that all connecting cables are fully
engaged and working properly.
If you are still having technical issues with your product and could use some assistance please contact
Table of contents
Other BLACKMORE Speakers System manuals
