BlindShell Classic 2 User manual

1 1
1 1

2
Contents
1 BlindShell Classic 2 User Guide 4
2 Getting started 5
2.1 Package contents 5
2.2 Phone description 5
2.3 Taking off the back cover 6
2.4 Inserting SIM card, SD memory card, and battery 6
2.5 Charging 7
2.6 Turning the phone on 8
3 Controlling the phone 9
3.1 Volume 9
3.2 Navigation 9
3.3 Action buttons 10
3.4 Numeric keypad 11
3.5 Text input 11
3.6 Voice control 12
3.7 SOS button 13
3.8 File transfer from PC to BlindShell 13
4 BlindShell functions 14
4.1 Main screen 14
4.2 Call 14
4.3 Messages 16
4.4 Contacts 18
4.5 Applications 20
4.6 Settings 36
4.7 Manual 43
4.8 Turn off the phone 43
4.9 Missed notifications and information about phone status 44
4.10 Favorite applications 44
5 Technical specification 45
5.1 Connectivity 45
5.2 Hardware 45
5.3 Sensors 45
5.4 Certifications 46
6 Regular use and safety information 47
2 2
2 2

4
1 BlindShell Classic 2 User Guide
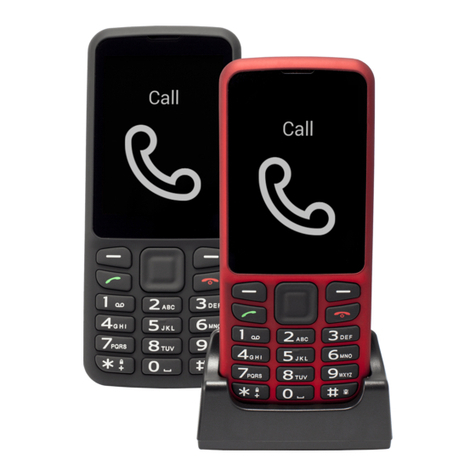
BlindShell Classic 2 is a button phone for blind and visually impaired people. The phone
is controlled via the physical keypad or by voice commands. Feedback is provided by
the built-in synthetic voice, vibrations, and additional acoustic signals.
Important notice: If you let your phone’s battery discharge completely, it may appear
that the phone is not able to charge at all. In such a case, leave the phone on the
charger for several hours. Afterward, the phone should start charging again. Leaving
a discharged battery in the phone for a longer period of time might lead to damaging
the battery. Such a case is not covered by the phone’s warranty. We recommend you
remove the battery from the device when you are not using it for more than a week.
4 4
4 4

5
2 Getting started
2.1 Package contents
• BlindShell Classic 2 phone.
• Battery - a at rectangular object.
• Earphones - on one end of the earphones, there is a 3.5MM connector (jack), the
other end has two earbuds.
• USB wall charger - standard USB charger, input 100V~240V AC, 50/60Hz, output
4.7V-5.3V DC 0-2A.
• USB cable - a USB Type-C cable, with standard male USB Type-A on the other
end.
• Charging cradle - a stand for charging the phone. There is also a adhesive pad
that enables the cradle stick on a place.
• NFC tag (3x) - a sticker for object tagging. These tags can be read by a phone
application.
• Lanyard - a strap that can be attached to the phone. It comes with a little hook
that helps you to push the lanyard through the lanyard hole.
2.2 Phone description
Front side of the phone
The front side of the phone consists of the following parts. They are listed as they are
placed on the phone from top to bottom.
• Earpiece - line-shaped protrusion used as a speaker during a phone call.
• LCD screen - the smooth area of the phone used for displaying information.
• Keypad - buttons used for controlling the phone and inputting text.
• Microphone - placed in between the buttons of the keypad. Used for voice input.
• Loudspeaker - line-shaped notch used for voice and audio output.
Rear side of the phone
The rear side of the phone consists of the following functional parts. All of them are
located in the upper part of the rear side.
5 5
5 5

6
• Camera - highlighted by a tactile edge. Used for image taking in phone applications.
• Camera LED ashlight - the round-shaped notch next to the camera. It assists the
camera in low-light settings.
• SOS button - the round-shaped button under the camera. Used in emergencies to
call an assigned emergency contact.
Edges of the phone
On the top edge, there are:
• Earphones socket.
• LED ashlight.
On the bottom edge from left to right, there are:
• Lanyard hole.
• USB Type-C connector - used for charging the phone and connecting the phone
to a computer.
• Opening slit - used for taking the back cover o the phone.
On the left side edge, there are volume buttons used for controlling the volume of the
voice and audio output.
On the right side edge, there is a side action button used for opening favorite appli
cations list and invoking voice control.
2.3 Taking off the back cover
To remove the back cover of the phone, hook your ngernail into the opening slit
located on the bottom-right edge of the phone and pull the back cover away from the
device. When returning the back cover on the phone, make sure all edges of the cover
t the phone.
2.4 Inserting SIM card, SD memory card, and battery
To insert a SIM card, SD memory card, or battery, take o the back cover rst.
When the back cover is o, the rectangular hollow space in the phone is the battery
compartment. Slots for cards are placed in this space.
Inserting SIM cards
The phone has two micro SIM card slots placed in the upper part of the battery
compartment. Next to them, on the right side, there is a slot for an SD memory card.
6 6
6 6

7
To insert a SIM card, place it in a way that card contacts are facing downwards, and
its beveled edge is its upper left corner. Then slide the card into the slot.
Removing a SIM card
To remove a SIM card from a slot, place a tip of your nger on the edge of the SIM
card, push down on it and slide your nger with the SIM card out of the SIM card
slot.
Inserting an SD memory card
The SD memory card slot is the rightslot in the upper part of the battery compartment.
To insert an SD memory card, place it in a way that card contacts are facing downwards
and slide it into the slot. Push the card to overcome small resistance. Click sound will
signal that the card is xed in the slot.
Removing an SD memory card
To remove an SD memory card, push the card into the slot until the clicking sound
signals that the card is released. Then slide the card out of the slot.
Inserting the battery
To insert the battery, locate a protrusion on the edge of the battery. This protrusion
should point towards the top corner of the battery compartment. Slide the battery
from the top to the bottom into its compartment, it should t snugly.
Removing the battery
To remove the battery, use a groove located in the top right corner of the battery
compartment. Pull the battery upwards.
2.5 Charging
The phone can be charged via a USB cable or charging cradle. To use the charging
cradle, connect the USB Type-C cable to the cradle’s socket, which is on the back-
bottom part of the cradle. Place the phone in the cradle. The phone’s USB socket
should be face down. The rear side of the phone should rest on the cradle.
7 7
7 7

8
2.6 Turning the phone on
To turn on the phone, long press the back button. The phone will play a start-up
melody after a while. The phone is ready when it starts speaking. Registration to the
mobile network may take up to a minute after the phone turns on.
8 8
8 8

9
3 Controlling the phone
3.1 Volume
Volume buttons are on the left side edge of the phone. The volume up button increases
the current volume of voice or audio output. The volume down button decreases it.
3.2 Navigation
Navigation buttons are in the upper part of the keypad. Their usage is to navigate
through phone menus and item lists.
Moving through menu or list of items
Menus or lists of items are designed as cyclic lists. That means if the last item is
reached, moving to the next item jumps to the rst item of the list. And vice-versa,
while being on the rst item moving to the previous item jumps to the last item of
the list. A beep tone lets you know you are at the rst or last item. Navigation in a
menu or list of items follows:
• To move to the next item, press the down button.
• To move to the previous item, press the up button.
• To enter a menu item or select the item, press the conrm button.
• To leave the current menu or item list, press the back button.
Tip: Long press the up button to jump to the rst item in the menu. To jump to the
last item, long press the down button. It is possible to jump to a specic position in the
menu by pressing the relevant numbers on the keypad. Multiple digits are accepted.
Find function
The long lists of items may have a nd function as the last item of the list. It can be
quickly accessed by pressing the up button while being on the rst item of the list.
Down button
The down button is the line-shaped button placed in the middle in the second row of
buttons. The down button does the following:
9 9
9 9

10
• Press to move to the next item in a menu.
• While writing a message or other text input, press to move to the next character.
• While being on the main screen, press to open the main menu.
Up button
The up button is the line-shaped button placed in the middle in the rst row of buttons.
The up button does the following:
• Press to move to the previous item in a menu.
• While writing a message or other text input, press to move to the previous char
acter.
• While being on the main screen, press to open the main menu.
Confirm button
The conrm button is the big green dot-shaped button placed on the left in the second
row of buttons. The conrm button does the following:
• Press to enter a menu item, select list item, conrm actions or accept calls.
• While being on the main screen, press to open the main menu.
Back button
The back button is the red slash-shaped button placed on the right in the second row
of buttons. The back button does the following:
• Press to go back in a menu, cancel actions, reject or hang up calls.
• While writing a message or other text input, press to delete the previous character.
Long press to delete the whole text.
• Anywhere else, long press the back button to return to the main screen.
3.3 Action buttons
Action buttons trigger the same specic action anywhere on the phone.
Left action button
The left action button is the dot-shaped button placed on the left in the rst row of
keypad buttons. Press to show information about the state of the phone, such as time
and date, battery level, information about networks, or missed notications.
10 10
10 10

11
Right action button
The right action button is the dot-shaped button placed on the right in the rst row
of keypad buttons. Press to repeat the last utterance. Long press to spell the last
utterance.
Side action button
The side action button is the oblong button on the right side edge of the phone. The
following actions can be performed:
• Press to open your favorite applications list.
• Long press to invoke voice control.
• While writing a message or other text input, long press to invoke voice dictation
of the text.
3.4 Numeric keypad
The numeric keypad consists of four rows of convex buttons. The rst row contains
buttons one, two, and three. The second row contains buttons four, ve, and six.
The third row contains buttons seven, eight, and nine. The last, fourth row, contains
buttons asterisk (star), zero, and hash (number sign).
Asterisk button
The asterisk button is the left button in the bottom row of the numeric keypad. Long
press the asterisk button to lock the phone. To unlock the phone, long press the
asterisk again. This feature can be disabled in Settings.
Hash button
The hash button is the right button in the bottom row of the numeric keypad. Long
press to open a menu with sound prole options (silent, vibration, loud, airplane mode).
3.5 Text input
Text input by numeric keypad
While writing a message or other text input, the numeric keypad buttons are used to
input text, numbers, and special characters. Each button, except the hash button,
11 11
11 11

12
contains a group of characters. You can cycle through the group of characters by
pressing the respective button multiple times.
For example button two contains characters A, B, C, and number 2. To enter the
letter B – press the button twice. To enter the number 2 – press the button four times
or long press the button.
• Button one contains punctuation special characters.
• The asterisk button contains the rest of the special characters.
• Button zero contains the number 0 and space.
• The hash button changes the capitalization of the letters and switches between
numeric and alphanumeric keyboard entry.
• The long press of the hash button opens a menu with emojis. Press the conrm
button to input the selected emoji.
• To move in the text, press the down or up button. To select between moving by
character or by word, press the left action button.
Tip: The writing of a specic character can be nalized by pressing the down button.
This allows writing another character of the same button immediately (without waiting
for the click sound, which indicates that the character was entered).
Text input by voice dictation
While writing a message or other text input, voice dictation can be invoked by pressing
the side action button. After a beep tone, start dictating the text. After each dictated
segment, the phone slightly vibrates. At this moment, text dictation can be manually
nished by pressing the conrm button, back button, or the side action button. Voice
dictation nishes automatically if no text is dictated for a few seconds.
Time input
While entering time in applications such as Alarm, Calendar, or setting phone’s time,
use numeric keypad buttons to input four time digits. The rst pair of digits represents
hours and the second pair of digits represents minutes.
3.6 Voice control
The phone can be alternatively controlled by voice commands. To invoke voice control,
press the side action button. After a beep tone, start dictating the command. The
voice control has the following functionality:
12 12
12 12

13
• Opening any application by simply saying its name. For example, to open the
application messages, start the voice control and say "messages".
• Dialing contact from the contact list. For example, to call Michael, start the voice
control and say "call Michael".
• Write message to contact from the contact list. For example, to write a message
to Michael, start the voice control and say "send message to Michael". Afterward,
the text can be inputt by the numeric keypad or voice dictation.
3.7 SOS button
Long press the SOS button to call the assigned emergency contact. Conrmation is
required. If no contact is assigned to the SOS button, then the long press of the
button opens a menu for assigning an emergency contact.
3.8 File transfer from PC to BlindShell
Windows machines
The phone should be recognized as an external device. Afterward, les can be copied
via any le explorer application from the computer to the phone. If the device is not
recognized by the computer, please install the latest updates and check if there is an
MTP driver present.
Apple machines
To copy les from a Mac device to the phone, Android File Transfer software is required.
This software can be downloaded here: https://www.android.com/letransfer/.
Linux machines
The phone should be automatically recognized by the computer. Copy the les to the
phone with a le explorer application.
13 13
13 13

14
4 BlindShell functions
4.1 Main screen
The main screen is a starting point when using the phone. It provides the current
time information and brief information about the number of missed notications such
as unread messages, missed calls, etc., if there are any. The following actions can be
done from the main screen:
• To open the main menu, press the conrm button, up button, or down button.
• To dial a number, press the appropriate numbers on the numeric keypad and dial
by pressing the conrm button.
• To activate the quick dial, long press the relevant number on the numeric keypad.
If no quick dial is assigned to the number, the long-press opens a menu for assigning
a quick dial.
• To open call history, long press the conrm button.
To return to the main screen from anywhere on the phone, long press the back button.
4.2 Call
The Call menu item allows making phone calls to numbers or contacts in the contact
list. It also contains call history, statistics, and blocked numbers settings.
Answering an incoming call
• To answer an incoming call, press the conrm button.
• To reject or hang up a call, press the back button.
Caller's name announcement
To announce the caller’s name, press the right action button. The automatic caller’s
name announcement can be turned on in the sound and voice output settings of the
phone.
Dial contact
The Dial contact menu item opens the list of contacts. Move through the list and
press the conrm button to dial the selected contact. While going through the list
14 14
14 14

15
of contacts, type the letter on the keypad to move to the contacts starting with that
letter.
Dial number
The Dial number menu item opens a place where you can input numbers. Type the
phone number and press the conrm button to initiate the call.
Call history
The Call history menu item contains a list of all incoming and outgoing calls and their
details. Press the conrm button on the selected call item to open a menu with the
following options:
• Dial the contact/number.
• Write a message.
• Information about the length of the call.
• Save the number to contacts (if it is not already saved).
• Add the number to the existing contact (if it is not already saved).
• Block number.
• Delete the call from the call history.
• Delete all history. This will delete all calls from the call history.
Call statistics
The Call statistics menu item opens a list of call statistics of the last month. The last
item allows setting a monthly cycle start day. It sets the starting day of the month
from which the statistics are recorded.
Blocked numbers
The Blocked numbers menu item opens a list of contacts and phone numbers that
are prevented from making phone calls to your device. To add a new blocked number
or contact, select the Add blocked number item. To unblock the number or contact,
press the conrm button on the selected number or contact.
Recording a phone call
To record a phone call, press the conrm button during an active phone call. Select the
Start recording call menu item. To stop recording, press the conrm button and select
15 15
15 15

16
Stop recording call. The recorded phone call is saved in the BlindShell/recordings
folder and can be found in the Records list of the Voice recorder application.
Turn on speakerphone during a phone call
To turn on the speakerphone during a phone call, press the conrm button during
an active phone call. Select the Turn on speakerphone menu item. To turn o the
speakerphone, press the conrm button and select the Turn o speakerphone. The
automatic speakerphone can be turned on in the sound settings of the phone.
Mute microphone during a phone call
To mute the microphone during a phone call, press the conrm button during an active
phone call. Select the Mute microphone menu item. To unmute the microphone, press
the conrm button and select Unmute microphone.
Answering second incoming call
The second incoming call during an active call is signaled by repeated beeps. Press
the right action button to announce the caller’s name of the second incoming call.
Press the conrm button to answer the second call and hold the current call. Press
the back button to hang up an active call.
4.3 Messages
The Messages menu item allows writing messages to numbers or contacts in the
contact list. It also contains past conversations (incoming and outgoing messages),
drafts, and messaging settings.
Note: While writing a message, press the right action button to read back the whole
message and the number of remaining characters to the next message.
Write SMS to contact
The Write SMS to contact menu item opens the list of contacts. Move through the
list and press the conrm button to select the contact. Write the text of the message
and send it by pressing the conrm button.
Write SMS to number
The Write SMS to number menu item opens a form menu with the following items:
16 16
16 16

17
• Number - enter the recipient’s phone number.
• Text - enter the text of the message.
• Send message - select to send the message.
Write SMS to multiple recipients
The Write SMS to multiple recipients menu item opens a form menu with the following
items:
• Recipients - add recipients of the message. More recipients can be added. To
delete the recipient from the list, move to the recipient in the list and press the
conrm button.
• Text - enter the text of the message.
• Send message - select to send the message.
Conversations
The Conversations menu item opens the list of conversations with contacts and num
bers. Select the conversation to list incoming and outgoing messages to related contact
or number. Press the conrm button on the selected message item to open a menu
with the following options:
• Reply - opens text input. Type the message and press the conrm button to send
it as a reply.
• Forward - allows forwarding the message. Select a contact, number, or e-mail
address to forward the message to.
• Call - dials the contact or the phone number.
• Delete - deletes the message.
• Delete conversation - deletes all incoming and outgoing messages of this conver
sation.
• Save as a new contact - saves the number to contacts (if it is not already saved).
• Add to contact - adds the number to the existing contact (if it is not already
saved).
• Numbers in this message - lists numbers contained in the text of the message.
Press the conrm button to perform an action with the selected number.
Drafts
The Drafts menu item opens the list of messages saved as drafts. A draft is an
unnished message which was not sent. Press the conrm button on the selected
draft to nish it, send it, or save it as a draft again.
17 17
17 17

18
Messaging settings
The Messaging settings menu item opens the menu to set notifying about message
delivery or to turn on and o sending messages with diacritics.
4.4 Contacts
The Contacts menu item allows browsing contacts, adding new ones, or editing existing
contacts. It also contains setting up the quick dial and backing up and importing
contacts.
Contacts list
The Contacts list menu item opens the list of contacts stored in the phone and SIM
card. While going through the list of contacts, type the letter on the keypad to move
to the contacts starting with that letter. Press the conrm button on the selected
contact to open a menu with the following options:
• Dial - calls the contact.
• Send message - opens a text input of the message. After text input, press the
conrm button to send the message to the contact.
• Send e-mail - opens new e-mail form, the eld Recipients is pre-lled with contact’s
e-mail address (only available when contact has e-mail address lled).
• Edit contact - opens a form for editing contact’s details.
• Assign ringtone - opens a list of ringtone melodies. Move through the list and
press the conrm button to assign a ringtone to the contact. This melody will play
during an incoming call from this contact.
• Send contact as a business card - opens a menu to select either a contact or a
phone number, to which the current contact will be sent as a business card.
• Delete contact - deletes the contact from the contacts list.
SIM card contacts
Contacts stored on SIM cards are displayed in the contact list. If a contact is deleted
from the contacts list, it will also be deleted from the SIM card. When a SIM card’s
contact is edited, it will be saved as a new contact to the phone and the original one
will be removed from the SIM card.
Add new contact
The Add new contact menu item opens a form for adding a new contact. The following
contact information can be stored: rst name, surname, mobile phone number, home
18 18
18 18

19
phone number, work phone number, another phone number, e-mail address, and postal
address. Select the Save contact menu item to save the contact.
Single button dialing
The Single button dialing allows setting quick-dial contact for each number on the
keypad. The quick dial is used for quick dialing of up to 10 selected contacts. To
assign a quick dial contact to a number, move through the list of numbers (0-9)
and press the conrm button on the chosen number. To remove a quick dial of the
number, select the assigned number. An emergency contact for the SOS button can
be assigned here, too.
While being on the main screen, long press the number on the keypad to quickly dial
the assigned contact.
Importing contacts
The Import contacts from le menu item will import of contacts from the le to the
phone’s contacts list.
• To import contacts, copy .vcf le to the root folder of the SD memory card, if
present, or to the root folder of the internal phone’s internal storage. The le has
to be named Contacts.vcf.
• If Contacts.vcf is present in both storages, the le located on the SD memory card
will be used.
• Contacts in the Contacts.vcf le identical to contacts already stored in the contacts
list will be skipped during import.
• After the contact import nishes the Contacts.vcf le is renamed to Contacts-
imported.vcf.
Backing up contacts
The Backup contacts to le menu item runs a backup of contacts to Contacts.vcf le.
• If the SD memory card is present in the phone, the Contacts.vcf le is created in
the root folder of the SD memory card.
• If no SD memory card is present in the phone, the Contacts.vcf le is created in
the root folder of the phone’s internal storage.
Contact settings
The Contact settings menu item opens a menu with the following options:
19 19
19 19

20
• Sort contacts - changes contact sorting, the contacts list can be ordered alphabet
ically by given name or by surname.
• Display order - changes the order of reading the contact items. Either a given
name or a surname can be announced rst.
• SIM contacts visibility - allows hiding or displaying contacts stored on SIM cards
in the contacts list.
• Delete all contacts.
4.5 Applications
Tools
Alarm
The alarm application allows creating alarms at specic times and days. To dismiss
an active alarm, press the conrm button or the back button.
New alarm
To create a new alarm, select the New alarm menu item, which opens a form with the
following options:
• Set time - opens number input which accepts 4 digits as a time. The rst pair of
digits represents hours and the second pair of digits represents minutes.
• Set repeating - opens a list of days of the week. Select the days the alarm should
go o. If none of the days is selected, the alarm will go o daily.
• Save alarm - saves the alarm and activates it.
Editing the alarm
Select the existing alarm from the list to open a menu with the following options:
• Activate/deactivate alarm - an inactive alarm is stored in the phone but will not
go o because it is no longer an active alarm.
• Change alarm - opens a form menu to change the alarm’s time and days.
• Delete alarm - deletes the alarm.
Calculator
The Calculator allows performing basic arithmetic operations - addition, subtraction,
multiplication, and division.
20 20
20 20
Other manuals for Classic 2
1
Table of contents
Other BlindShell Cell Phone manuals

