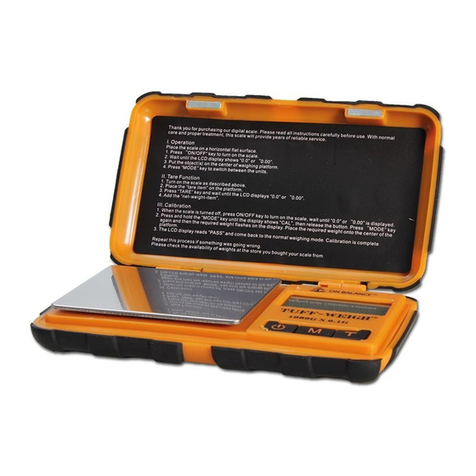
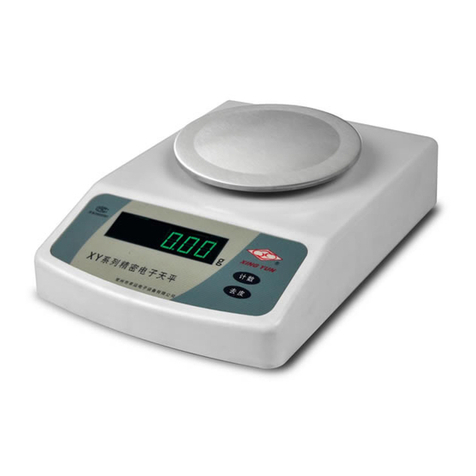
BLscale Notebook User manual

ENGLISH
Thank you for purchasing our digital scale. With normal care and proper treatment, this
scale will provide years of reliable service.
General Maintenance and Care
1. Avoid exposure to extreme heat or cold. Also avoid any kind of moisture. Always allow
your scale to acclimate to normal room temperature before use.
2. Keep your scale in a clean and dry environment. Dust, dirt, moisture, vibration, air
currents and proximity to other electronic equipment may have an adverse effect on the
accuracy and reliability of the scale.
3. Handle the scale with care. Gently apply all items to be weighed on the tray top.
Although this scale is designed to be quite durable, avoid rough treatment, as this may
permanently damage the internal parts. Always avoid shaking and dropping. This is a
precision instrument and should be handled with extreme care.
Specification and Function
1. Capacity: 2000g/100g,Accuracy: 0.1g/0.01g
2. Units: g, oz, ozt, dwt, ct, gn
3. Key function: ON/OFF, TARE, LIGHT, MODE, PCS
4. Display: LCD display with blue backlight
5. Auto off: 30 seconds of inactivity.
6. Power: 2 AAA batteries
7. Operation Temp: 10 to 30 deg C
Operation
1. Place the scale on a leveled surface & press “ON/OFF” key to turn on the scale or
power it off.
2. Wait until the LCD display shows zero, then press “MODE” key to choose the weighing
unit.
3. Place the item to be weighed on the surface and wait until the reading is stable.
4. Backlight can be turned on or off by pressing the “LIGHT” key.
Tare Function
1. Turn on the scale as described above.
2. Place the “tare item” on the platform. Press “TARE” key and wait until the LCD displays
zero.
3. Scale can now be used for weighing. Add the “net-weight-item”.
Calibration
1. Place the scale on a leveled surface & power it on.
2. Press and hold the “MODE” key until the display reads “CAL”, then release the key.
3. Press the “MODE” key again and the display will show the required calibration weight.
4. Place the weight on the center of the platform. The LCD display will read “PASS” and
then return to normal weighing mode. Remove the weight and turn off the scale.
Counting Function
1. Place the scale on a leveled surface & power it on.
2. Sampling: Prepare a sample quantity (25, 50, 75 or 100 pcs) of the item you want to
count. Put the items on the platform, press and hold the “PCS” key until the scales shows
“25”, “50”, “75” or “100”. Press the “MODE” key to switch the above figures to match the

quantity of the items on the platform. Press the “PCS” key again and the display will show
“pcs”in the upper right hand corner. Sampling is completed.
3. Put the items you want to count on the platform and the display will show the quantity of
these items.
Warning
1. “LO”: Low voltage. Please replace the batteries.
2. “EEEEE”: Over load. Please remove item quickly to protect the scale.
Guarantee
The product is protected by a 1-year-guarantee from the date of purchase. For warranty
replacement please return your product to the point of purchase. Near Dark GMBH
reserves the right to final determination of validity of all warranty claims.
Near Dark GmbH
53773 Hennef
Germany
www.neardark.de
FRENCH
Merci d'avoir acheté notre peseur numérique. L'entretien normal et un traitement
approprié doit faire de cette peseuse fiabilité du service pendant de nombreuses années.
Entretien quotidien et les soins
1. Évitez d'exposer dans un environnement très chaud ou de froid. Évitez également tout
type d'humidité. Toujours permettre à votre peseur de s'acclimater à la température
ambiante normale avant d'utiliser.
2. Gardez le peseur dans un environnement propre et sec. La poussière, la saleté,
l'humidité, les vibrations, d'air et à proximité d'autres équipements électroniques peut
avoir un effet néfaste sur la précision et la fiabilité de la peseuse.
3. Manipulez le peseur avec soin. Appliquer délicatement tous les éléments à peser sur le
couvercle du bac. Bien que cette pesée est conçu pour être tout à fait durable, d'éviter un
traitement rude, car cela pourrait endommager de façon permanente les parties
intérieures. Évitez de serrer et de tomber sur le sol. Il s'agit d'un dispositif précis et doit
être manipulé avec grand soin.
Spécifications et aux fonctions
1. Capacité: 2000g/100g, Précision: 0.1g/0.01g
2. Unités: g, oz, ozt, dwt, ct, gn
3. Principales fonctions: ON/OFF, TARE, LIGHT, MODE, PCS
4. Ecran: Ecran LCD avec rétro-éclairage bleu
5. Automatique DE: pas de 30 secondes de fonctionnement.
6. Alimentation: 2 AAA piles
7. Température de travail: 10-30 ℃
Opération
1. Placez la peseuse sur une surface plane et appuyez sur "ON/OFF" pour allumer la
peseuse ou éteignez-le.

2. Attendez que l'écran LCD affiche zéro, puis appuyez sur "MODE" pour choisir l'unité de
pesage.
3. Placez l'élément à peser sur la surface et attendre jusqu'à ce que la lecture est stable.
4. Rétro-éclairage peut être activé/désactivé en appuyant sur le "LIGHT".
Fonction Tare
1. Tournez sur la peseuse que la méthode décrite ci-dessus.
2. Placez le "POINT DE TARE" à la surface. Appuyez sur "TARE" et attendez que l'écran
LCD affiche zéro.
3. Peseuse peut être utilisé pour la pesée.Ajouter le “net-weight-item".
Étalonnage
1. Placez la peseuse sur une surface plane et allumez-le.
2. Appuyez et maintenez la touche "MODE" jusqu'à ce que l'écran affiche “CAL”, puis
relâchez la touche.
3. Appuyez sur la touche "MODE" à nouveau et l'écran affichera le poids de calibrage
requis.
4. Placer le poids sur le centre de la surface. L'écran LCD affiche "PASS", puis revenir au
mode de pesage normal. Retirez le poids et éteindre le peseur.
Fonction de comptage
1. Placez la peseuse sur une surface plane et allumez-le.
2. D'échantillonnage: Préparer une quantité d'échantillon (25, 50, 75 ou 100 pièces) de
l'élément que vous souhaitez compter. Mettre les points sur la surface, appuyez et
maintenez le "PCS" jusqu'à ce que la peseuse indique "25", "50", "75" ou "100". Appuyez
sur la touche "MODE" pour modifier les chiffres ci-dessus pour correspondre à la quantité
des articles sur la surface. Appuyez sur "PCS" nouveau sur la touche et l'écran affichera
"PC" dans le coin supérieur droit. L'échantillonnage est terminé.
3. Mettre les points sur la surface et l'écran affiche la quantité de ces articles.
Avertissement
1. "LO": basse tension. S'il vous plaît remplacer les piles.
2. "EEEEE": surcharge. S'il vous plaît supprimer élément rapidement pour protéger la
peseuse.
GERMAN
Vielen Dank für den Kauf unserer digitalen Waage. Bei normaler Instandhaltung und
sachgemäßer Behandlung wird Ihnen diese Waage viele Jahre zuverlässige Dienste
leisten.
Allgemeine Wartung und Pflege
1. Vermeiden Sie extreme Hitze oder Kälte und jegliche Art von Feuchtigkeit. Lassen Sie
Ihre Waage sich an die Raumtemperatur anpassen, bevor Sie diese in Gebrauch
nehmen.
2. Lagern Sie die Waage in einer sauberen und trockenen Umgebung. Staub, Schmutz,
Feuchtigkeit, Vibration, Luftströme und die Nähe anderer elektronischer Geräte kann
schlechteAuswirkungen auf die Genauigkeit und Zuverlässigkeit der Waage haben.
3. Behandeln Sie die Waage vorsichtig. Legen Sie alle zu wiegenden Gegenstände
vorsichtig auf die Wiegefläche. Obwohl diese Waage auf Langlebigkeit konzipiert ist,

sollten Sie eine grobe Handhabung vermeiden, da dies dauerhaft die inneren Teile
schädigen kann. Vermeiden Sie Erschütterungen und Fallenlassen auf dem Boden. Dies
ist ein Präzisionsgerät und sollte mit großer Vorsicht behandelt werden.
Daten und Funktionen
1. Kapazität: 2000g/100g, Genauigkeit: 0.1g/0.01g
2. Einheiten: g, oz, ozt, dwt, ct, gn
3. Tastenfunktionen: ON/OFF, TARE, LIGHT, MODE, PCS
4. Display: LCD-Display mit blauer Hintergrundbeleuchtung
5. AutomatischeAusschaltung: 30 Sekunden ohne Bedienung.
6. Stromversorgung: 2 AAA Batterien
7. Betriebstemperatur: 10-30 ℃
Betrieb
1. Platzieren Sie die Waage auf einer ebenen Fläche und drücken Sie die
"ON/OFF"-Taste auf der Waage zum Ein- oder Ausschalten.
2. Warten Sie, bis das LCD-Display Null zeigt und drücken Sie Taste "MODE", um die
Wiegefunktion zu wählen.
3. Legen Sie das zu wiegende Objekt auf die Oberfläche und warten Sie, bis der
Messwert stabil ist.
4. Die Hintergrundbeleuchtung kann ein/ausgeschaltet durch Drücken der "LIGHT"-Taste.
Tara-Funktion
1. Schalten Sie die Waage wie oben beschrieben ein.
2. Legen Sie die "TARA-Gegenstand" auf die Wiegefläche. Drücken Sie die "TARA"-Taste
und warten Sie, bis die LCD-Anzeige Null zeigt.
3. Die Waage kann nun zum Wiegen verwendet werden. Fügen Sie das "Netto-Gewicht"
hinzu.
Kalibrierung
1. Stellen Sie die Waage auf eine ebene Fläche und schalten Sie sie ein.
2. Halten Sie die "MODE"-Taste, bis der Bildschirm "CAL" anzeigt und lassen Sie dann die
Taste los.
3. Drücken Sie die "MODE"-Taste wieder und der Bildschirm wird das erforderliche
Kalibriergewicht zeigen.
4. Stellen Sie das Gewicht auf die Wiegefläche. Der LCD-Bildschirm zeigt "PASS" an und
wechselt dann wieder in den normalen Wiegemodus. Entfernen Sie das Gewicht und
schalten Sie die Waage ab.
Zählfunktion
1. Stellen Sie die Waage auf eine ebene Fläche und schalten Sie sie ein.
2. Sampling: Bereiten Sie eine Probenmenge (25, 50, 75 oder 100 Stück) der
gewünschten zu zählenden Gegenstände vor. Legen Sie die Gegenstände auf die
Oberfläche und halten Sie die "PCS"-Taste gedrückt, bis die Waage "25", "50", "75" oder
"100" zeigt. Drücken Sie die "MODE"-Taste, um die Menge der Gegenstände auf der
Wiegefläche entsprechend einzugeben. Drücken Sie wieder die "PCS"-Taste und der
Bildschirm wird "PCS" in der rechten oberen Ecke anzeigen. Sampling ist fertig.
3. Legen Sie die zu zählenden Gegenstände auf die Wiegefläche und der Bildschirm wird
die Menge dieser Gegenstände anzeigen.

Warnung
1. "LO": Niederspannung. Bitte ersetzen Sie die Batterien.
2. "EEEEE": Überlastung. Bitte entfernen Sie den Gegenstand schnell, um die Waage zu
schützen.
Garantie
Das Produkt ist durch eine einjährige Garantie ab Kaufdatum (Beleg beifügen) geschützt.
Wir geben zwei Jahre Gewährleistung auf Verarbeitungs- und Materialfehler. Bitte
wenden Sie sich im Garantiefall an Ihre Verkaufsstelle. Die Near Dark GmbH behält sich
das Recht vor, zu beurteilen, ob der Garantiefall eingetreten ist.
Near Dark GmbH
53773 Hennef
Germany
www.neardark.de
SPANISH
Gracias por comprar nuestra báscula digital. El mantenimiento normal y el tratamiento
adecuado harán que la báscula tiene un servicio confiable durante muchos años.
El mantenimiento y el cuidado diario
1. Evite la exposición en el ambiente muy frío o el calor. También evitar cualquier tipo de
humedad. Siempre permita que su báscula para aclimatarse a la temperatura ambiente
normal antes de usar.
2. Mantener la báscula en un ambiente limpio y seco. El polvo, suciedad, humedad,
vibración, flujo de aire y cerca de otros equipos electrónicos puede tener un efecto
negativo sobre la exactitud y fiabilidad de la báscula.
3. Maneje la báscula con cuidado. Aplique suavemente todos los artículos a ser pesado
en la parte superior de la bandeja. Aunque esta báscula está diseñada para ser muy
duradero, evitar el trato rudo, ya que puede dañar permanentemente las piezas internas.
Evite agitar y colocar en el suelo. Este es un dispositivo preciso y debe ser manejado con
mucho cuidado.
Especificaciones y funciones
1. Capacidad: 2000g/100g, Precisión: 0.1g/0.01g
2. Unidades: g, oz, ozt, dwt, ct, gn
3. Funciones clave: ON/OFF, TARE, LIGHT, MODE, PCS
4. Pantalla: Pantalla LCD con retroiluminación azul
5.Automático DE: 30 segundos de ninguna operación.
6. Alimentación: 2 AAA pilas
7. Temperatura de trabajo: 10-30 ℃
Operación
1. Coloque la báscula en una superficie plana y pulse "ON/OFF" para encender la
báscula o apagarlo.
2. Espere hasta que la pantalla LCD muestra cero, a continuación, pulse "MODE" para
seleccionar la unidad de peso.

3. Coloque el objeto a ser pesado en la superficie y esperar hasta que la lectura es
estable.
4. Luz de fondo se puede activar/desactivar pulsando la tecla "LIGHT".
Función de tara
1. Encienda el pesador como el método descrito anteriormente.
2. Coloque el "PUNTO DE TARE" en la superficie. Pulse el botón "TARE" y espere hasta
que la pantalla LCD muestra cero.
3. Pesador se puede utilizar para el pesaje. Agregue el "net-weight-item".
Calibración
1. Coloque la báscula en una superficie plana y vuelva a encenderlo.
2. Mantenga oprimida la tecla "MODE" hasta que la pantalla muestra el mensaje "CAL", a
continuación, suelte la tecla.
3. Pulse la tecla "MODE" de nuevo y la pantalla mostrará el peso de calibración requerida.
4. Coloque el peso en el centro de la superficie. La pantalla LCD mostrará "PASS" y luego
volver al modo de pesaje normal. Retire el peso y apagar la báscula.
Contar Función
1. Coloque la báscula en una superficie plana y vuelva a encenderlo.
2. Muestreo: Preparar una cantidad de muestra (25, 50, 75 o 100 piezas) del elemento
que desea contar. Ponga los artículos en la superficie, presione y mantenga presionado
el "PCS" hasta que la báscula muestra "25", "50", "75" o "100". Pulse la tecla "MODE"
para cambiar las cifras antes mencionadas para que coincida con la cantidad de los
elementos en la superficie. Pulse el botón "PCS" de nuevo y la pantalla mostrará "PCS"
en la esquina superior derecha. El muestreo ha terminado.
3. Ponga los artículos en la superficie y la pantalla mostrará la cantidad de estos artículos.
Advertencia
1. "LO": baja tensión. Por favor, cambie las pilas.
2. "EEEEE": Sobrecarga. Por favor, elimine el punto rápidamente para proteger a la
báscula.
ITALIAN
Grazie per aver acquistato la nostra bilancia digitale. Manutenzione ordinaria e
trattamento adeguato deve rendere questa bilancia ha un servizio affidabile per molti
anni.
Manutenzione e cura giornaliera
1. Evitare di esporre in un ambiente molto caldo e freddo. Inoltre evitare qualsiasi tipo di
umidità. Sempre permettere che la tua bilancia si adatti alla temperatura ambiente prima
dell'uso.
2. Tenere la bilancia in un ambiente pulito e asciutto. Polvere, sporco, umidità, vibrazioni,
flusso d'aria e vicino ad altre apparecchiature elettroniche possono avere effetto negativo
sulla precisione e l'affidabilità della bilancia.
3. Maneggiare con cautela la bilancia.Applicare delicatamente tutti gli elementi da pesare
sulla parte superiore del vassoio. Anche se questa bilancia è stato progettato per essere
molto resistente, evitare trattamenti inadeguati in quanto ciò potrebbe danneggiare in
modo permanente le parti interne. Evitare di scuotere e far cadere a terra. Si tratta di uno

strumento preciso e deve essere maneggiato con molta cura.
Caratteristiche e funzioni
1. Capacità: 2000g/100g, Precisione: 0.1g/0.01g
2. Unità di misura: g, oz, ozt, dwt, ct, gn
3. Funzioni principali: ON/OFF, TARE, LIGHT, MODE, PCS
4. Schermo: display LCD con retroilluminazione blu
5. Automatic DI: 30 secondi di inattività.
6. Alimentazione: 2 batterie AAA
7. Temperatura di funzionamento: 10-30 ℃
Operazione
1. Posizionare la bilancia su una superficie piana e premere il tasto "ON/OFF" per
accendere la bilancia o spegnerlo.
2. Attendere che lo schermo LCD mostra zero, quindi premere il tasto "MODE" per
scegliere l'unità di pesatura.
3. Posizionare il documento da pesare sulla superficie e attendere che la lettura è stabile.
4. Retroilluminazione può essere attivato/disattivata premendo il tasto "LIGHT".
Funzione tara
1. Accendere la bilancia, come il metodo descritto sopra.
2. Posizionare il "PUNTO TARE" sulla superficie. Premere il tasto "TARE" e attendere che
il display LCD visualizza zero.
3. Bilancia può essere usato per la pesatura.Aggiungere il "net-weight-item".
Taratura
1. Posizionare la bilancia su una superficie piana e accenderla.
2. Premere e tenere premuto il tasto "MODE" finché sullo schermo appare "CAL", quindi
rilasciare il tasto.
3. Premere il tasto "MODE" e lo schermo mostrerà il peso richiesto di calibrazione.
4. Posizionare il peso sul centro della superficie. Lo schermo LCD visualizzerà "PASS" e
poi tornare alla normale modalità di pesatura. Togliere il peso e spegnere la bilancia.
Funzione di conteggio
1. Posizionare la bilancia su una superficie piana e accenderla.
2. Sampling: Preparare una quantità di campione (25, 50, 75 o 100 pezzi) della voce che
si desidera contare. Mettere gli elementi sulla superficie, premere e tenere premuto il
tasto "PCS" fino alla bilancia mostra "25", "50", "75" o "100". Premere il tasto "MODE" per
modificare le cifre di cui sopra per adeguare il volume degli elementi sulla superficie.
Premere il tasto "PCS" di nuovo e lo schermo visualizzerà "PCS" nell'angolo in alto a
destra. Il campionamento è finito.
3. Mettete le voci sulla superficie e lo schermo mostrerà la quantità di questi elementi.
Warning
1. "LO": bassa tensione. Si prega di sostituire le batterie.
2. "EEEEE": sovraccarico. Si prega di rimuovere rapidamente voce per proteggere la
bilancia.
DUTCH
Bedankt voor het kopen van onze digitale weger. Normaal onderhoud en een goede

behandeling stelt deze weger hebben betrouwbare service voor vele jaren.
Dagelijks Onderhoud en verzorging
1. Vermijd blootstelling van zeer warmte of koude omgeving. Vermijd ook elke vorm van
vocht. Laat uw weger naar normale kamertemperatuur acclimatiseren voor gebruik.
2. Houd de weger in een schone en droge omgeving. Stof, vuil, vocht, trillingen, lucht en in
de buurt van andere elektronische apparatuur kan hebben slechte invloed op de
nauwkeurigheid en betrouwbaarheid van de weger.
3. Ga voorzichtig met de weger. Voorzichtig toe te passen alle items die moeten worden
gewogen op de lade top. Hoewel deze weger is ontworpen om vrij duurzaam, vermijd
ruwe behandeling, omdat dit permanent kan de inwendige onderdelen beschadigen.
Vermijd het schudden en laten vallen op de grond. Dit is een nauwkeurige apparaat moet
met grote zorg.
Specificaties en functies
1. Capaciteit: 2000g/100g, Nauwkeurigheid: 0.1g/0.01g
2. Eenheden: g, oz, ozt, dwt, ct, gn
3. Belangrijkste functies: ON/OFF, TARE, LIGHT, MODE, PCS
4. Scherm: LCD-scherm met blauwe achtergrondverlichting
5. Automatische UIT: 30 seconden geen bediening.
6. Voeding: 2 AAA-batterijen
7. Werken Temperatuur: 10-30 ℃
Werking
1. Plaats de weger op een vlakke ondergrond en druk op "ON/OFF" toets in te schakelen
de weger-of uitschakelen.
2. Wacht tot het LCD-scherm toont nul, en druk vervolgens op "MODE"-toets om de
weegeenheid te kiezen.
3. Plaats het item te wegen op het oppervlak en wacht totdat de meting stabiel is.
4. Backlight kan worden ingeschakeld/uit door op de "LIGHT"-toets.
Tarra functie
1. Zet de weger de hierboven beschreven werkwijze.
2. Plaats de "Tare item" op het oppervlak. Druk op de "TARE" toets en wacht tot in het
display nul.
3. Weger worden gebruikt voor het wegen. Voeg de "net-weight-item".
Ijking
1. Plaats de weger op een vlakke ondergrond en zet hem aan.
2. Houd de "MODE"-toets tot het scherm "CAL" verschijnt, laat dan de toets.
3. Druk nogmaals op de "MODE"-toets en het scherm zal de vereiste kalibratie gewicht te
laten zien.
4. Plaats het gewicht op het midden van het oppervlak. Het lcd-scherm wordt "PASS" en
dan terug naar de normale weegmodus. Verwijder het gewicht en zet de weger.
Telfunctie
1. Plaats de weger op een vlakke ondergrond en zet hem aan.
2. Sampling: Maak een hoeveelheid van het monster (25, 50, 75, 100 stuks) van het item
dat u wilt tellen. Plaats de items op het oppervlak, houdt u de "PCS" toets tot de weger
geeft "25", "50", "75", "100". Druk op de "MODE"-toets om de bovenstaande cijfers te

veranderen aan de hoeveelheid van de items op het oppervlak te passen. Druk nogmaals
op "PCS" toets en het scherm zal "PCS" in de rechter bovenhoek. Sampling is voltooid.
3. Plaats de items op het oppervlak en het scherm zal de hoeveelheid van deze items
weer te geven.
Waarschuwing
1. "LO": lage spanning. Vervang de batterijen.
2. "EEEEE": overbelasten. Neem snel te verwijderen item om de weger te beschermen.
Table of contents
Languages:
Other BLscale Scale manuals
