Blue Coat SG9000-5 Installation and operation manual

BETADRA
Blue Coat®
9000 Series
Maintenance & Upgrade Guide
Document Number: 231-03038 Rev G.2
9000_MG.book Page 1 Friday, July 17, 2015 11:07 AM

Disclaimer
THIS DOCUMENT IS PROVIDED “AS IS” WITHOUT ANY EXPRESS OR IMPLIED WARRANTY OF ANY KIND, INCLUDING WARRANTIES OF MERCHANT-
ABILITY, NONINFRINGEMENT OF INTELLECTUAL PROPERTY, OR FITNESS FOR ANY PARTICULAR PURPOSE. IN NO EVENT SHALL BLUE COAT OR ITS
SUPPLIERS BE LIABLE FOR ANY DAMAGES WHATSOEVER (INCLUDING, WITHOUT LIMITATION, DAMAGES FOR LOSS OF PROFITS, BUSINESS INTER-
RUPTION,ORLOSSOFINFORMATION)ARISING OUTOF THEUSE OFORINABILITYTOUSE THISDOCUMENT,OR THEPRODUCTSDESCRIBEDHEREIN,
EVEN IF BLUE COAT HAS BEEN ADVISED OF THE POSSIBILITY OF SUCH DAMAGES. BECAUSE SOME JURISDICTIONS PROHIBIT THE EXCLUSION OR
LIMITATION OF LIABILITY FOR CONSEQUENTIAL OR INCIDENTAL DAMAGES, THE ABOVE LIMITATION MAY NOT APPLY TO YOU. Blue Coat and its
suppliers further do not warrant the accuracy or completeness of the information, text, graphics, links or other items contained within this
document, or assume liability for any incidental, indirect, special or consequential damages in connection with the furnishing, performance,
or use of this document. Blue Coat may make changes to this document,or to the products described herein, at any time without notice. Blue
Coat makes no commitment to update this document.
Copyrights / Trademarks / Patents
© 2015 Blue Coat Systems, Inc. All rights reserved. BLUE COAT, PROXYSG, PACKETSHAPER,
CACHEFLOW, INTELLIGENCECENTER, CACHEOS, CACHEPULSE, CROSSBEAM, K9, DRTR, MACH5,
PACKETWISE, POLICYCENTER, PROXYAV, PROXYCLIENT, SGOS, WEBPULSE, SOLERA NETWORKS,
DEEPSEE, DS APPLIANCE, SEE EVERYTHING. KNOW EVERYTHING., SECURITY EMPOWERS
BUSINESS, BLUETOUCH, the Blue Coat shield, K9, and Solera Networks logos and other Blue Coat logos
are registered trademarks or trademarks of Blue Coat Systems, Inc. or its affiliates in the U.S. and certain
other countries. This list may not be complete, and the absence of a trademark from this list does not mean it
is not a trademark of Blue Coat or that Blue Coat has stopped using the trademark. All other trademarks
mentioned in this document owned by third parties are the property of their respective owners. This
document is for informational purposes only.
BLUE COAT MAKES NO WARRANTIES, EXPRESS, IMPLIED, OR STATUTORY, AS TO THE
INFORMATION IN THIS DOCUMENT. BLUE COAT PRODUCTS, TECHNICAL SERVICES, AND ANY
OTHER TECHNICAL DATA REFERENCED IN THIS DOCUMENT ARE SUBJECT TO U.S. EXPORT
CONTROL AND SANCTIONS LAWS, REGULATIONS AND REQUIREMENTS, AND MAY BE SUBJECT
TO EXPORT OR IMPORT REGULATIONS IN OTHER COUNTRIES. YOU AGREE TO COMPLY STRICTLY
WITH THESE LAWS, REGULATIONS AND REQUIREMENTS, AND ACKNOWLEDGE THAT YOU HAVE
THE RESPONSIBILITY TO OBTAIN ANY LICENSES, PERMITS OR OTHER APPROVALS THAT MAY BE
REQUIRED IN ORDER TO EXPORT, RE-EXPORT, TRANSFER IN COUNTRY OR IMPORT AFTER
DELIVERY TO YOU.
Americas: Rest of the World:
Blue Coat Systems, Inc. Blue Coat Systems International SARL
420 N. Mary Ave. 3a Route des Arsenaux
Sunnyvale, CA 94085 1700 Fribourg, Switzerland
Revision History
April, 2009 231-03038 Rev A.0
October, 2009 231-03038 Rev B.0
August, 2010 231-03038 Rev C.0
February, 2011 231-03038 Rev D.0
August, 2011 231-03038 Rev E.0, E.1
December, 2011 231-03038 Rev E.2
March, 2012 231-03038 Rev E.3
November, 2014 231-03038 Rev F.0
February, 2015 231-03038 Rev G.0
9000_MG.book Page 2 Friday, July 17, 2015 11:07 AM

9000 Series Maintenance & Upgrade Guide 3
May, 2015 231-03038 Rev G.1
July, 2015 231-03038 Rev G.2
9000_MG.book Page 3 Friday, July 17, 2015 11:07 AM

4 9000 Series Maintenance & Upgrade Guide
9000_MG.book Page 4 Friday, July 17, 2015 11:07 AM

9000 Series Maintenance & Upgrade Guide 5
Table of Contents
About This Guide............................................................................................................................................. 7
ProxySG 9000 Appliance Listing ................................................................................................................ 8
Upgrade Kit Listing ......................................................................................................................................... 9
Upgrade Kit Installation Tasks............................................................................................................13
9000 Series System Diagrams ............................................................................................................23
Front Bezel ..................................................................................................25
Pre-Installation Checklist .....................................................................................................................25
Fan Assembly ..............................................................................................27
Pre-Installation Checklist .....................................................................................................................27
Verifying Fan Installation.....................................................................................................................30
Hard Disk.....................................................................................................31
Pre-Installation Checklist .....................................................................................................................31
ProxySG 9000 Upgrade Kit.........................................................................................................................32
Identifying a Faulty Hard Disk............................................................................................................33
Removing a Hard Disk...........................................................................................................................33
Installing a Hard Disk.............................................................................................................................35
Verifying Hard Disk Installation .........................................................................................................35
Memory .......................................................................................................37
Pre-Installation Checklist .....................................................................................................................37
Upgrade Kit Information......................................................................................................................38
Replacing the Memory Modules.......................................................................................................39
Verifying Memory Installation............................................................................................................41
Troubleshooting Memory Installation Issues...............................................................................41
Option Card.................................................................................................43
Pre-Installation Checklist .....................................................................................................................43
Option Card Information .....................................................................................................................44
Option Card Installation.......................................................................................................................45
Verifying Option Card Installation....................................................................................................49
9000_MG.book Page 5 Friday, July 17, 2015 11:07 AM

6 9000 Series Maintenance & Upgrade Guide
AC Power Supply.........................................................................................51
Pre-Installation Checklist .....................................................................................................................51
Verifying Power Supply Installation.................................................................................................53
DC Power Supply ........................................................................................55
Pre-Installation Checklist. ....................................................................................................................55
DC Power Supply Installation and Replacement Tasks ............................................................56
Checking for a Faulty Power Supply................................................................................................57
Removing a Power Supply Unit.........................................................................................................57
Installing the DC Power Rating Label..............................................................................................58
Installing the DC Power Supply Unit ...............................................................................................58
Verifying Power Supply Installation.................................................................................................60
Processor (CPU)...........................................................................................61
Pre-Installation Checklist .....................................................................................................................61
CPU Upgrade Information...................................................................................................................62
Installing a Processor (CPU) ................................................................................................................63
Replacing an Existing Processor (CPU) ...........................................................................................67
Verifying CPU Installation....................................................................................................................73
BIOS Battery................................................................................................75
Pre-Installation Checklist .....................................................................................................................75
Replacing the BIOS Battery .................................................................................................................76
Finalize the BIOS Battery Installation ..............................................................................................80
Appendix A: Safety Notices .......................................................................81
General Safety Information.................................................................................................................81
Server Safety Information...........................................................................................................................82
English: Server Safety Information ...................................................................................................82
Deutsch: Sicherheitshinweise für den Server...............................................................................87
Français: Consignes de sécurité sur le serveur.............................................................................91
Español: Información de seguridad del servidor ........................................................................95
Chinese: Server Safety Information..................................................................................................99
Additional Warnings and Compliance Statements................................................................. 103
Recycling Your Appliance........................................................................................................................109
9000_MG.book Page 6 Friday, July 17, 2015 11:07 AM
9000 Series Maintenance & Upgrade Guide 7
About This Guide
TheBlueCoat9000SeriesMaintenance&UpgradeGuidedescribeshowtoinstallfield‐
serviceablecomponentsandupgradekitsina9000Seriesappliance.
Important: Review the “General Safety Information” on page 81 before servicing your
appliance.
Online Documentation
Todownloadthelatestversionofthisguideandotherhardwaredocuments,visit:
https://bto.bluecoat.com/documentation/pubs/hardware
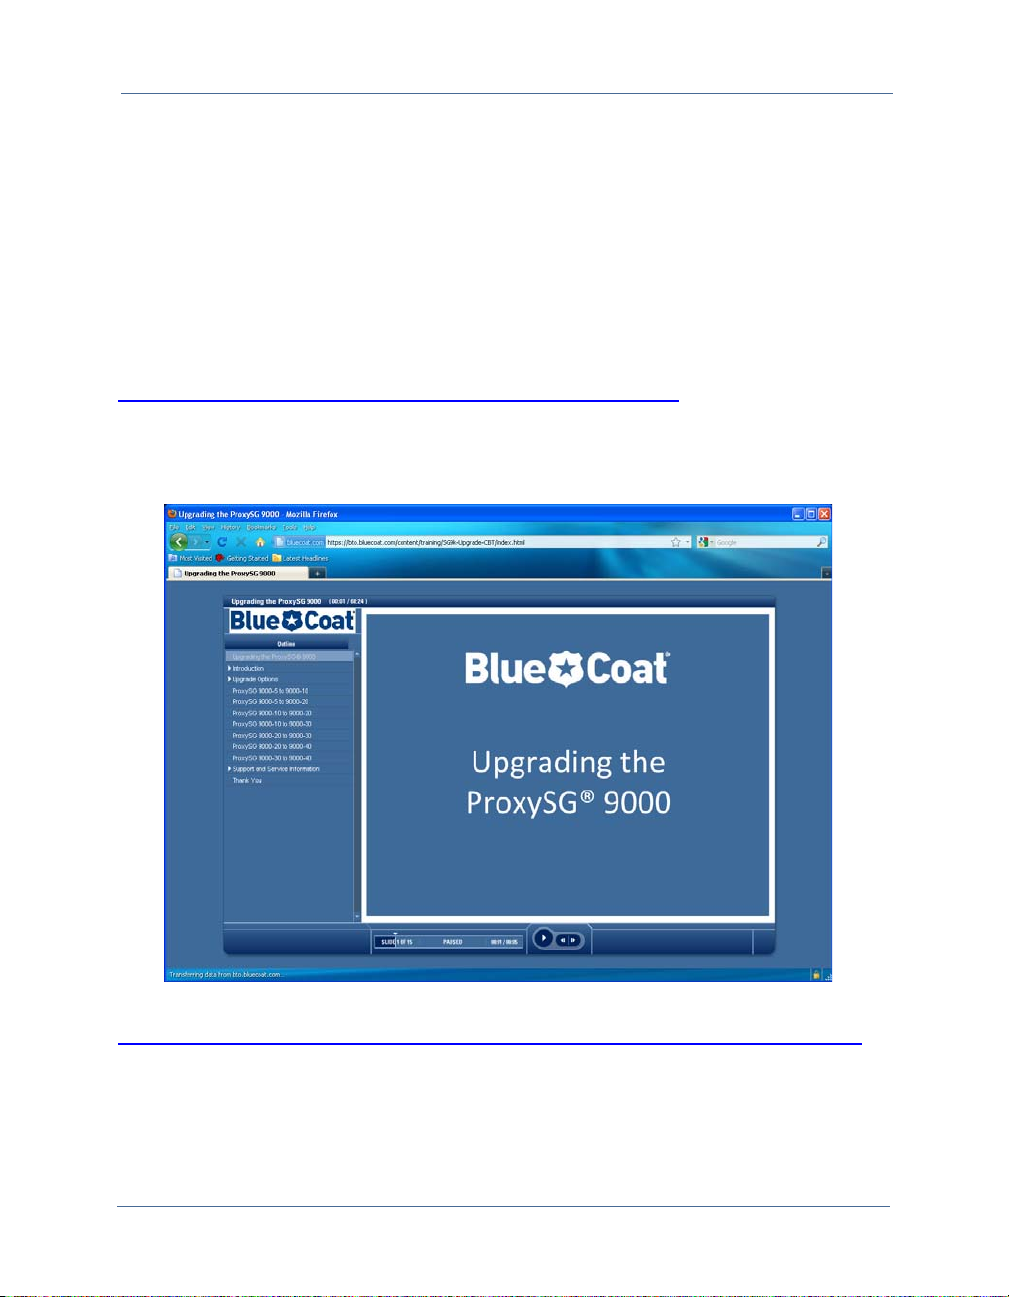
Online Upgrade Kit Tutorial
BlueCoatoffersafreeCBT(Computer‐Basedtraining)videoforSG9000upgradekit
customers.Thevideocoversallaspectsoftheupgradekitinstallation.
TowatchtheProxySG9000UpgradekitCBT(Computer‐BasedTraining)video,visit:
https://bto.bluecoat.com/content/training/SG9k-Upgrade-CBT/index.html
9000_MG.book Page 7 Friday, July 17, 2015 11:07 AM

8 9000 Series Maintenance & Upgrade Guide
ProxySG 9000 Appliance Listing
ThetablebelowshowsthecurrentProxySG9000seriesappliancesanditsbasic
hardwareconfigurations.Upgradekitscontaintherequisitecomponentstoconverta
modeloftheSG9000tohigherspecificationmodel.
Specificationsandconfigurationsaresubjecttochangewithoutnotice.
Forcurrentandcompletespecifications,see:
https://www.bluecoat.com/products/proxysg-secure-web-gateway(FullProxy
Edition,alsoknownasProxyEdition)or
http://www.bluecoat.com/products/mach5(AccelerationEdition,alsoknownas
MACH5).
Specification SG9000-5 SG9000-10 SG9000-20 SG9000-20B
System disk
drives
RAM
Active CPU Cores
SSL Offload Card
Compression
Acceleration Card
4x 500GB
(7200 RPM Near-
Line SAS)
4 GB
2
Standard
Not Supported
8x 500GB
(7200 RPM Near-
Line SAS)
8 GB
2
Standard
Not Supported
10x 500GB
(7200 RPM Near-
Line SAS)
16 GB
4
Standard
Not Supported
8x 1TB
(7200 RPM Near-
Line SAS)
24GB
4
Standard
Not Supported
Specification SG9000-30 SG9000-40
System disk
drives
RAM
Active CPU Cores
SSL Offload Card
Compression
Acceleration Card
10x 1TB
(7200 RPM Near-
Line SAS)
40 GB
2 x 4
Standard
Not Supported
15x 1TB
(7200 RPM Near-
Line SAS)
64 GB
2 x 6
Standard
Included
9000_MG.book Page 8 Friday, July 17, 2015 11:07 AM

9000 Series Maintenance & Upgrade Guide 9
Upgrade Kit Listing
Upgradekitsmaycontainadditionalharddisks,newDIMMset(memory),processor
upgrade,andnewlicensekeys.Thetablebelowliststheavailableupgradekitsandtheir
contents.Verifythatyourupgradekitmatchesthekitcontentslistandselectthelinkto
theupgradeprocedureintheright‐mostcolumntoproceed.
Part Description Kit Contents Link to Upgrade
●UPG-KIT-SG9000-5 to -
10 -M5.
●UPG-KIT-SG9000-5 to -
10 -PR.
Upgradesthe SG9000-5tothe
SG9000-10 model. This hard-
ware upgrade package is
available in both MACH5 (M5)
and Proxy Edition (PR) config-
urations.
(4) 2GB DDR2-667 modules
(4) 500 GB, SAS HDDs w/carriers
(1) ESD Wrist strap
(1) Information flyer
See, “Upgrading from
the SG9000-5 to a
SG9000-10” on page 13.
●UPG-KIT-SG9000-5 to -
20 -M5.
●UPG-KIT-SG9000-5 to -
20 -PR.
Upgradesthe SG9000-5tothe
SG9000-20 model. This hard-
ware upgrade package is
available in both MACH5 (M5)
and Proxy Edition (PR) config-
urations.
(8) 2GB DDR2-667 modules
(6) 500 GB, SAS HDDs w/carriers
(1) ESD Wrist strap
(1) Information flyer
See, “Upgrading from
the SG9000-5 to a
SG9000-20” on page 14.
●UPG-KIT-SG9000-5 to -
20B -M5.
●UPG-KIT-SG9000-5 to -
20B -PR.
Upgradesthe SG9000-5tothe
SG9000-20B model. This
hardware upgrade package is
available in both MACH5 (M5)
and Proxy Edition (PR) config-
urations.
(4) 2GB DDR2-667 modules
(4) 4GB DDR2-667 modules
(8) 1TB, SAS HDDs w/carriers
(1) ESD Wrist strap
(1) Information flyer
See, “Upgrading from
the SG9000-5 to a
SG9000-20B” on page
15.
●UPG-KIT-SG9000-5 to -
30 -M5.
●UPG-KIT-SG9000-5 to -
30 -PR.
Upgradesthe SG9000-5tothe
SG9000-30 model. This hard-
ware upgrade package is
available in both MACH5 (M5)
and Proxy Edition (PR) config-
urations.
(2) Quad core Opteron CPUs
(2) Replacement heatsinks
(12) 2GB DDR2-667 modules
(4) 4GB DDR2-667 modules
(10) 1 TB, SAS HDDs w/carriers
(1) ESD Wrist strap
(1) Information flyer
See, “Upgrading from
the SG9000-5 / -10 / -20
to a SG9000-30” on
page 18.
9000_MG.book Page 9 Friday, July 17, 2015 11:07 AM

10 9000 Series Maintenance & Upgrade Guide
●UPG-KIT-SG9000-5 to -
40-M5.
●UPG-KIT-SG9000-5 to -
40 -PR.
Upgradesthe SG9000-5tothe
SG9000-40 model. This hard-
ware upgrade package is
available in both MACH5 (M5)
and Proxy Edition (PR) config-
urations.
(2) 6 core Opteron CPUs
(2) Replacement heatsinks
(16) 4GB DDR2-667 modules
(15) 1 TB, SAS HDDs w/carriers
(1) Compression acceleration
card
(1) ESD Wrist strap
(1) Information flyer
See, “Upgrading from
the SG9000-5 / -10 / -20
to a SG9000-40” on
page 19.
●UPG-KIT-SG9000-10 to
-20 -M5.
●UPG-KIT-SG9000-10 to
-20 -PR.
Upgrades the SG9000-10 to
the SG9000-20 model. This
hardware upgrade package is
available in both MACH5 (M5)
and Proxy Edition (PR) config-
urations.
(8) 2GB DDR2-667 modules
(2) 500 GB, SAS HDDs w/carriers
(1) ESD Wrist strap
(1) Information flyer
See, “Upgrading from
the SG9000-10 to a
SG9000-20” on page 16.
●UPG-KIT-SG9000-10 to
-20B -M5.
●UPG-KIT-SG9000-10 to
-20B -PR.
Upgrades the SG9000-10 to
the SG9000-20B model. This
hardware upgrade package is
available in both MACH5 (M5)
and Proxy Edition (PR) config-
urations.
(4) 2GB DDR2-667 modules
(4) 4GB DDR2-667 modules
(8) 1TB, SAS HDDs w/carriers
(1) ESD Wrist strap
(1) Information flyer
See, “Upgrading from
the SG9000-10 to a
SG9000-20B” on page
17.
●UPG-KIT-SG9000-10 to
-30 -M5.
●UPG-KIT-SG9000-10 to
-30 -PR.
Upgrades the SG9000-10 to
the SG9000-30 model. This
hardware upgrade package is
available in both MACH5 (M5)
and Proxy Edition (PR) config-
urations.
(2) Quad core Opteron CPUs
(2) Replacement heatsinks
(12) 2GB DDR2-667 modules
(4) 4GB DDR2-667 modules
(10) 1 TB, SAS HDDs w/carriers
(1) ESD Wrist strap
(1) Information flyer
See, “Upgrading from
the SG9000-5 / -10 / -20
to a SG9000-30” on
page 18.
●UPG-KIT-SG9000-10 to
-40-M5.
●UPG-KIT-SG9000-10 to
-40 -PR.
Upgrades the SG9000-10 to
the SG9000-40 model. This
hardware upgrade package is
available in both MACH5 (M5)
and Proxy Edition (PR) config-
urations.
(2) 6 core Opteron CPUs
(2) Replacement heatsinks
(16) 4GB DDR2-667 modules
(15) 1 TB, SAS HDDs w/carriers
(1) Compression acceleration
card
(1) ESD Wrist strap
(1) Information flyer
See, “Upgrading from
the SG9000-5 / -10 / -20
to a SG9000-40” on
page 19.
Part Description Kit Contents Link to Upgrade
9000_MG.book Page 10 Friday, July 17, 2015 11:07 AM

9000 Series Maintenance & Upgrade Guide 11
●UPG-KIT-SG9000-20 to
-30 -M5.
●UPG-KIT-SG9000-20 to
-30 -PR.
Upgrades the SG9000-20 to
the SG9000-30 model. This
hardware upgrade package is
available in both MACH5 (M5)
and Proxy Edition (PR) config-
urations.
(2) Quad core Opteron CPUs
(2) Replacement heatsinks
(12) 2GB DDR2-667 modules
(4) 4GB DDR2-667 modules
(10) 1 TB, SAS HDDs w/carriers
(1) ESD Wrist strap
(1) Information flyer
See, “Upgrading from
the SG9000-5 / -10 / -20
to a SG9000-30” on
page 18.
●UPG-KIT-SG9000-20 to
-40 -M5.
●UPG-KIT-SG9000-20 to
-40 -PR.
Upgrades the SG9000-20 to
the SG9000-40 model. This
hardware upgrade package is
available in both MACH5 (M5)
and Proxy Edition (PR) config-
urations.
(2) 6 core Opteron CPUs
(2) Replacement heatsinks
(16) 4GB DDR2-667 modules
(15) 1 TB, SAS HDDs w/carriers
(1) Compression acceleration
card
(1) ESD Wrist strap
(1) Information flyer
See, “Upgrading from
the SG9000-5 / -10 / -20
to a SG9000-40” on
page 19.
●UPG-KIT-SG9000-20B
to -30 -M5.
●UPG-KIT-SG9000-20B
to -30 -PR.
Upgrades the SG9000-20B to
the SG9000-30 model. This
hardware upgrade package is
available in both MACH5 (M5)
and Proxy Edition (PR) config-
urations.
(2) 6 core Opteron CPUs
(2) Replacement heatsinks
(12) 2GB DDR2-667 modules
(4) 4GB DDR2-667 modules
(2) 1 TB, SAS HDDs w/carriers
(1) ESD Wrist strap
(1) Information flyer
See, “Upgrading from
the SG9000-20B to a
SG9000-30” on page 20.
●UPG-KIT-SG9000-20B
to -40 -M5.
●UPG-KIT-SG9000-20B
to -40 -PR.
Upgrades the SG9000-20B to
the SG9000-40 model. This
hardware upgrade package is
available in both MACH5 (M5)
and Proxy Edition (PR) config-
urations.
(2) 6 core Opteron CPUs
(2) Replacement heatsinks
(16) 4GB DDR2-667 modules
(7) 1 TB, SAS HDDs w/carriers
(1) Compression acceleration
card
(1) ESD Wrist strap
(1) Information flyer
See, “Upgrading from
the SG9000-20B to a
SG9000-40” on page 21.
Part Description Kit Contents Link to Upgrade
9000_MG.book Page 11 Friday, July 17, 2015 11:07 AM

12 9000 Series Maintenance & Upgrade Guide
●UPG-KIT-SG9000-30 to
-40 -M5.
●UPG-KIT-SG9000-30 to
-40 -PR.
Upgrades the SG9000-30 to
the SG9000-40 model. This
hardware upgrade package is
available in both MACH5 (M5)
and Proxy Edition (PR) config-
urations.
(2) 6 core Opteron CPUs
(2) Replacement heatsinks
(16) 4GB DDR2-667 modules
(5) 1 TB, SAS HDDs w/carriers
(1) Compression acceleration
card
(1) ESD Wrist strap
(1) Information flyer
See, “Upgrading from
the SG9000-30 to a
SG9000-40” on page 22.
Part Description Kit Contents Link to Upgrade
9000_MG.book Page 12 Friday, July 17, 2015 11:07 AM

9000 Series Maintenance & Upgrade Guide 13
Upgrade Kit Installation Tasks
ToinstallanupgradekitfortheProxySG9000Seriesappliance,followthenumbered
taskslistedinthetablebelowforyourupgradekit.Pleasenote,anexperiencednetwork
appliancetechnicianmustperformthesetaskstoreducetheriskofdamagetoyour
appliance.
Note: Please review “General Safety Information” on page 81 before servicing or
upgrading your appliance.
Upgrading from the SG9000-5 to a SG9000-10
FollowthelistedstepstoupgradetheSG9000‐5toaSG9000‐10.
Upgrade Steps Description
1 Power down the appliance. See the ProxySG 9000 Series Quick Start Guide for additional information.
2 Install additional HDDs.
See, “Hard Disk” on page 31.
3 Replace existing memory modules.
See, “Memory” on page 37.
4 Power on the appliance. See the ProxySG 9000 Series Quick Start Guide for additional information.
5 Install new license key.
See ‘Chapter 3: Licensing’ of the SGOS Administration Guide for additional instructions.
6 Restart the appliance.
See ‘Chapter 73: Maintaining the ProxySG’ of the SGOS Administration Guide for additional instructions.
9000_MG.book Page 13 Friday, July 17, 2015 11:07 AM

14 9000 Series Maintenance & Upgrade Guide
Upgrading from the SG9000-5 to a SG9000-20
FollowthelistedstepstoupgradetheSG9000‐5toaSG9000‐20.
Upgrade Steps Description
1 Power down the appliance. See the ProxySG 9000 Series Quick Start Guide for additional information.
2 Install additional HDDs.
See, “Hard Disk” on page 31.
3 Replace existing memory modules.
See, “Memory” on page 37.
4 Power on the appliance. See the ProxySG 9000 Series Quick Start Guide for additional information.
5 Install new license key.
See ‘Chapter 3: Licensing’ of the SGOS Administration Guide for additional instructions.
6 Restart the appliance.
See‘Chapter73:Maintainingthe ProxySG’oftheSGOS Administration Guide foradditionalinstructions.
9000_MG.book Page 14 Friday, July 17, 2015 11:07 AM

9000 Series Maintenance & Upgrade Guide 15
Upgrading from the SG9000-5 to a SG9000-20B
FollowthelistedstepstoupgradetheSG9000‐5toaSG9000‐20B.
Upgrade Steps Description
1 Power down the appliance. See the ProxySG 9000 Series Quick Start Guide for additional information.
2 Replace all existing HDDs.
See, “Hard Disk” on page 31.
3 Replace existing memory modules.
See, “Memory” on page 37.
4 Power on the appliance. See the ProxySG 9000 Series Quick Start Guide for additional information.
5 Install new license key.
See ‘Chapter 3: Licensing’ of the SGOS Administration Guide for additional instructions.
6 Restart the appliance.
See‘Chapter73:Maintainingthe ProxySG’oftheSGOS Administration Guide foradditionalinstructions.
9000_MG.book Page 15 Friday, July 17, 2015 11:07 AM

16 9000 Series Maintenance & Upgrade Guide
Upgrading from the SG9000-10 to a SG9000-20
FollowthelistedstepstoupgradetheSG9000‐10toaSG9000‐20.
Upgrade Steps Description
1 Power down the appliance. See the ProxySG 9000 Series Quick Start Guide for additional information.
2 Add additional HDDs.
See, “Hard Disk” on page 31.
3 Replace existing memory modules.
See, “Memory” on page 37.
4 Power on the appliance. See the ProxySG 9000 Series Quick Start Guide for additional information.
5 Install new license key.
See ‘Chapter 3: Licensing’ of the SGOS Administration Guide for additional instructions.
6 Restart the appliance.
See‘Chapter73:Maintainingthe ProxySG’oftheSGOS Administration Guide foradditionalinstructions.
9000_MG.book Page 16 Friday, July 17, 2015 11:07 AM

9000 Series Maintenance & Upgrade Guide 17
Upgrading from the SG9000-10 to a SG9000-20B
FollowthelistedstepstoupgradetheSG9000‐10toaSG9000‐20B.
Upgrade Steps Description
1 Power down the appliance. See the ProxySG 9000 Series Quick Start Guide for additional information.
2 Replace all existing HDDs.
See, “Hard Disk” on page 31.
3 Replace existing memory modules.
See, “Memory” on page 37.
4 Power on the appliance. See the ProxySG 9000 Series Quick Start Guide for additional information.
5 Install new license key.
See ‘Chapter 3: Licensing’ of the SGOS Administration Guide for additional instructions.
6 Restart the appliance.
See‘Chapter73:Maintainingthe ProxySG’oftheSGOS Administration Guide foradditionalinstructions.
9000_MG.book Page 17 Friday, July 17, 2015 11:07 AM

18 9000 Series Maintenance & Upgrade Guide
Upgrading from the SG9000-5 / -10 / -20 to a SG9000-30
FollowthelistedstepstoupgradetheSG9000‐5/‐10/‐20toaSG9000‐30.
Upgrade Steps Description
1 Check current appliance for upgrade eligibility. To check for eligibility, see:
http://bluecoat.force.com/knowledgebase/articles/Solution/FAQ1385
2 Upgrade to a qualified SGOS 6.2.x or later release. For the minimum supported release, see:
http://bluecoat.force.com/knowledgebase/articles/Solution/1153
See the SGOS 6.2.x Upgrade/Downgrade Guide for additional instructions.
3 Archive the configuration and keyring that are running on the appliance and record your network
configuration settings.
See ‘Chapter 5: Backing Up the Configuration’ of the SGOS Administration Guide for additional
instructions.
4 Power down the appliance. See the ProxySG 9000 Series Quick Start Guide for additional information.
5 Replace all existing HDDs.
See, “Hard Disk” on page 31.
6 Replace existing memory modules.
See, “Memory” on page 37.
7 Replace the existing CPU and heatsink unit and add a second CPU and heatsink unit.
See, “Processor (CPU)” on page 61.
8 Power on the appliance. See the ProxySG 9000 Series Quick Start Guide for additional information.
9 Restore the archived keyring and configuration onto the upgraded appliance.
See ‘Chapter 5: Backing Up the Configuration’ of the SGOS Administration Guide for detailed
information on this procedure.
10 Install new license key.
See ‘Chapter 3: Licensing’ of the SGOS Administration Guide for additional instructions.
11 Restart the appliance.
See ‘Chapter 73: Maintaining the ProxySG’ of the SGOS Administration Guide for additional instructions.
9000_MG.book Page 18 Friday, July 17, 2015 11:07 AM

9000 Series Maintenance & Upgrade Guide 19
Upgrading from the SG9000-5 / -10 / -20 to a SG9000-40
FollowthelistedstepstoupgradetheSG9000‐5/‐10/‐20toaSG9000‐40.
Upgrade Steps Description
1 Check current appliance for upgrade eligibility. To check for eligibility, see:
http://bluecoat.force.com/knowledgebase/articles/Solution/FAQ1385
2 Upgrade to a qualified SGOS 6.2.x or later release. For the minimum supported release, see:
http://bluecoat.force.com/knowledgebase/articles/Solution/1153
See the SGOS 6.2.x Upgrade/Downgrade Guide for additional instructions.
3 Archive the configuration and keyring that are running on the appliance and record your network
configuration settings.
See ‘Chapter 5: Backing Up the Configuration’ of the SGOS Administration Guide for additional
instructions.
4 Power down the appliance. See the ProxySG 9000 Series Quick Start Guide for additional information.
5 Replace all existing HDDs.
See, “Hard Disk” on page 31.
6 Replace existing memory modules.
See, “Memory” on page 37.
7 Replace the existing CPU and heatsink unit and add a second CPU and heatsink unit.
See, “Processor (CPU)” on page 61.
8 Install the compression acceleration card into expansion slot three (3).
See, “Option Card” on page 43.
9 Power on the appliance. See the ProxySG 9000 Series Quick Start Guide for additional information.
10 Restore the archived keyring and configuration onto the upgraded appliance.
See ‘Chapter 5: Backing Up the Configuration’ of the SGOS Administration Guide for detailed
information on this procedure.
11 Install new license key.
See ‘Chapter 3: Licensing’ of the SGOS Administration Guide for additional instructions.
12 Restart the appliance.
See‘Chapter73:Maintainingthe ProxySG’oftheSGOS Administration Guide foradditionalinstructions.
9000_MG.book Page 19 Friday, July 17, 2015 11:07 AM

20 9000 Series Maintenance & Upgrade Guide
Upgrading from the SG9000-20B to a SG9000-30
FollowthelistedstepstoupgradetheSG9000‐20BtoaSG9000‐30.
Upgrade Steps Description
1 Check current appliance for upgrade eligibility. To check for eligibility, see:
http://bluecoat.force.com/knowledgebase/articles/Solution/FAQ1385
2 Upgrade to a qualified SGOS 6.2.x or later release. For the minimum supported release, see:
http://bluecoat.force.com/knowledgebase/articles/Solution/1153
See the SGOS 6.2.x Upgrade/Downgrade Guide for additional instructions.
3 Archive the configuration and keyring that are running on the appliance and record your network
configuration settings.
See ‘Chapter 5: Backing Up the Configuration’ of the SGOS Administration Guide for additional
instructions.
4 Power down the appliance. See the ProxySG 9000 Series Quick Start Guide for additional information.
5 Add additional HDDs.
See, “Hard Disk” on page 31.
6 Replace existing memory modules.
See, “Memory” on page 37.
7 Replace the existing CPU and heatsink unit and add a second CPU and heatsink unit.
See, “Processor (CPU)” on page 61.
8 Power on the appliance. See the ProxySG 9000 Series Quick Start Guide for additional information.
9 Restore the archived keyring and configuration onto the upgraded appliance.
See ‘Chapter 5: Backing Up the Configuration’ of the SGOS Administration Guide for detailed
information on this procedure.
10 Install new license key.
See ‘Chapter 3: Licensing’ of the SGOS Administration Guide for additional instructions.
11 Restart the appliance.
See ‘Chapter73:Maintaining theProxySG’of the SGOS Administration Guide foradditionalinstructions.
9000_MG.book Page 20 Friday, July 17, 2015 11:07 AM
This manual suits for next models
6
Table of contents
Other Blue Coat Network Hardware manuals


Popular Network Hardware manuals by other brands


Wicrypt
Wicrypt Spider instruction manual

QNAP
QNAP TVS-472XT user guide

Patton
Patton SmartNode Branch eXchange Series user manual

Net Optics
Net Optics Link Aggregator Tap 10/100 In-Line to GigaBit with SFP Monitor... installation guide

Logicube
Logicube Falcon-NEO Application note

Verizon
Verizon Wireless Home Phone Connect user guide


