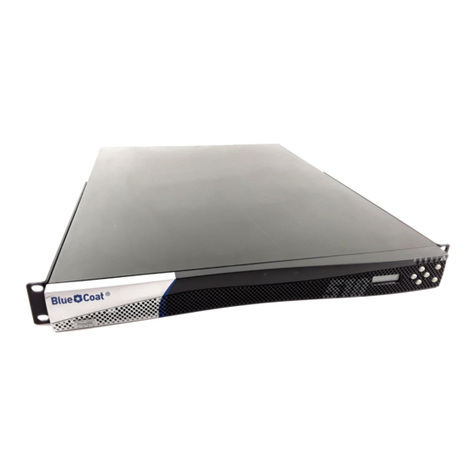
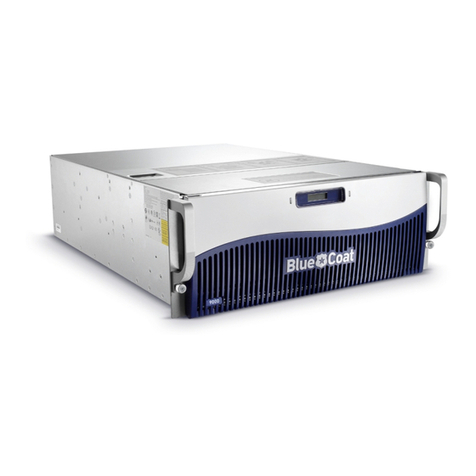
Blue Coat ProxySG 9000 Series Installation and operating manual

Tamper Evident Panel and Label Installation
For Compliance Model Number 9000
ProxySG 9000 Series
FIPS Compliance Guide:

Disclaimer
THIS DOCUMENT IS PROVIDED “AS IS” WITHOUT ANY EXPRESS OR IMPLIED WARRANTY OF ANY KIND, INCLUDING WARRANTIES OF MERCHANTABIL-
ITY, NONINFRINGEMENT OF INTELLECTUAL PROPERTY, OR FITNESS FOR ANY PARTICULAR PURPOSE. IN NO EVENT SHALL BLUE COAT OR ITS SUPPLIERS
BE LIABLE FOR ANY DAMAGES WHATSOEVER (INCLUDING, WITHOUT LIMITATION, DAMAGES FOR LOSS OF PROFITS, BUSINESS INTERRUPTION, OR
LOSS OF INFORMATION) ARISING OUT OF THE USE OF OR INABILITY TO USE THIS DOCUMENT, OR THE PRODUCTS DESCRIBED HEREIN, EVEN IF BLUE
COAT HAS BEEN ADVISED OF THE POSSIBILITY OF SUCH DAMAGES. BECAUSE SOME JURISDICTIONS PROHIBIT THE EXCLUSION OR LIMITATION OF LIA-
BILITY FOR CONSEQUENTIAL OR INCIDENTAL DAMAGES, THE ABOVE LIMITATION MAY NOT APPLY TO YOU. Blue Coat and its suppliers further do not
warrant the accuracy or completeness of the information, text, graphics, links or other items contained within this document, or assume liability
for any incidental, indirect, special or consequential damages in connection with the furnishing, performance, or use of this document. Blue Coat
may make changes to this document, or to the products described herein, at any time without notice. Blue Coat makes no commitment to update
this document.
Copyright/Trademarks/Patents
Copyright© 1999-2012 Blue Coat Systems, Inc. All rights reserved worldwide. No part of this document may be
reproduced by any means nor modified, decompiled, disassembled, published or distributed, in whole or in part, or
translated to any electronic medium or other means without the written consent of Blue Coat Systems, Inc. All right,
title and interest in and to the Software and documentation are and shall remain the exclusive property of Blue Coat
Systems, Inc. and its licensors. ProxyAV™, ProxyOne™, CacheOS™, SGOS™, SG™, Spyware Interceptor™,
Scope™, ProxyRA Connector™, ProxyRA Manager™, Remote Access™ and MACH5™ are trademarks of Blue
Coat Systems, Inc. and CacheFlow®, Blue Coat®, Accelerating The Internet®, ProxySG®, WinProxy®,
PacketShaper®, PacketShaper Xpress®, PolicyCenter®, PacketWise®, AccessNow®, Ositis®, Powering Internet
Management®, The Ultimate Internet Sharing Solution®, Cerberian®, Permeo®, Permeo Technologies, Inc.®, and
the Cerberian and Permeo logos are registered trademarks of Blue Coat Systems, Inc. All other trademarks
contained in this document and in the Software are the property of their respective owners.
BLUE COAT SYSTEMS, INC. AND BLUE COAT SYSTEMS INTERNATIONAL SARL (COLLECTIVELY “BLUE
COAT”) DISCLAIM ALL WARRANTIES, CONDITIONS OR OTHER TERMS, EXPRESS OR IMPLIED, STATUTORY
OR OTHERWISE, ON SOFTWARE AND DOCUMENTATION FURNISHED HEREUNDER INCLUDING WITHOUT
LIMITATION THE WARRANTIES OF DESIGN, MERCHANTABILITY OR FITNESS FOR A PARTICULAR
PURPOSE AND NONINFRINGEMENT. IN NO EVENT SHALL BLUE COAT, ITS SUPPLIERS OR ITS LICENSORS
BE LIABLE FOR ANY DAMAGES, WHETHER ARISING IN TORT, CONTRACT OR ANY OTHER LEGAL THEORY
EVEN IF BLUE COAT SYSTEMS, INC. HAS BEEN ADVISED OF THE POSSIBILITY OF SUCH DAMAGES.
Americas: Rest of the World:
Blue Coat Systems, Inc. Blue Coat Systems International SARL
420 N. Mary Ave. 3a Route des Arsenaux
Sunnyvale, CA 94085 1700 Fribourg, Switzerland
http://www.bluecoat.com
Revision History
Dec. 2009 Rev A.0
Sep. 2010 Rev A.1
Dec. 2011 Rev B.0

SG9000 Tamper Evident Panel and Label Installation
3
About This Document
This document describes how to install louvered shutters and apply serialized labels
over various apertures and joints. These shutters and labels secure and tamper-proof
the Blue Coat® SG9000 series appliances. Applying these materials is one of the tasks
involved to make your network environment Federal Information Processing
Standards (FIPS) compliant.
Kit Contents
This kit contains the following materials:
Name Part
(4) Long Labels
Note: Two (2) long labels are required to secure the appliance.
Additional labels are included for reapplication purposes.
(14) Short Labels
Note: Seven(7) short labels are required to secure the appliance.
Additional labels are included for reapplication purposes.
(1) Large Louvered
Shutter
(1) Small Louvered
Shutter
(6) Flat-Head
Screws

SG9000 Tamper Evident Panel and Label Installation
4
Additional Materials Required for Applying Tamper Evident Labels
Ensure that you have the following materials before installing the FIPS kit:
❐Alcohol swabs - For cleaning surfaces before label application.
❐#2 Phillips head screwdriver.
Blue Coat does not provide the following optional materials, but they are highly
recommended for label installation:
❐(Optional) Skin Moisturizer - Applying a skin moisturizer to the tips of the fingers
that come in contact with the label adhesive minimizes activation of the labels.
❐(Optional) Rubber Finger Tips - Wearing rubber finger tips can help ease label-
backing removal.
❐(Optional) Cotton Rounds - For removing grime and contaminants from a surface.
Optional Steps
The supplied labels are serialized. Manually recording label serial numbers as you
apply labels to Blue Coat appliances is optional. If you are asked to perform this task,
Blue Coat recommends creating a matrix that associates Blue Coat appliances with a
physical location, then record each serial number as you add labels.
Label Precautions and Application Tips
Adhere to the following when applying the tamper evident labels:
❐The minimum temperature of the environment must be 35-degrees Farenheit. After
application, the labels acceptable temperature in the operation environment is -50-
degrees to 200-degrees Farenheit.
❐Do not touch the adhesive side of the label. This disrupts the integrity of the
adhesive. If a label is removed from a surface, the label is destroyed and leaves
tamper-evident text as evidence. If you accidently touch the adhesive side, discard
that label and apply another one.
❐Tips to avoid label applications:
•Apply skin moisturizer on your fingers before handling.
•Use a rubber finger tip to partially remove the label from its backing.
Note: For more detailed label information presented by the vendor, see
www.novavisioninc.com/pages/
prd_security_labels_non_residue_red.html

SG9000 Tamper Evident Panel and Label Installation
5
Label Replacement
If you incorrectly apply a label onto the appliance or need to replace an existing label,
you must thoroughly clean the label surface to remove all traces of the adhesive before
attempting to reapply a label. If the adhesive is not completely removed, the new label
will not correctly adhere to the surface.
To clean the adhesive residue and other contaminants after a label is removed:
Step 1: Remove traces of the silicone adhesive evidence by throughly cleaning the
surface using an alcohol swab.
Step 2: Remove any remaining surface contaminants using a cotton round.
Step 3: Repeat if necessary.
Before You Begin
If the Blue Coat appliance is already rack-mounted and operating, Blue Coat
recommends powering it down, removing the system from the rack, and creating a
workplace with ample room to maneuver around the unit.

SG9000 Tamper Evident Panel and Label Installation
6
Procedure: Installing the Louvered Shutters
The FIPS compliance louvered shutters are designed to prevent unauthorized access to
key system components by shielding the rear ventilation outlets. The kit includes one
large shutter, which covers the primary ventilation outlet and a smaller shutter, which
covers the secondary outlet. Both shutters are installed using the included flat-head
screws.
The image below shows the louvered shutters and security labels installed on a
SG9000:
To install the louvered shutters on an SG9000 series appliance:
Step 1: Align the large louvered shutter mounting points against the screw locations
shown below and secure with three flat-head screws.
Step 1
Flat-Head Screw
x3

SG9000 Tamper Evident Panel and Label Installation
7
Step 2: Align the small louvered shutters against the mounting points shown below
and secure with two flat-head screws.
Step 2
Flat-Head Screw
x2

SG9000 Tamper Evident Panel and Label Installation
8
Procedure: Applying the High-Security Labels
The FIPS compliant labels are applied over key areas of the chassis to provide tamper-
evident security. If the labels are removed after being affixed to a surface, the image
self-destructs and leaves tamper-evident text on the label. The image below illustrates
the tamper-evident features of the label:
To secure the SG9000 series appliance using the high-security labels:
Step 1: Use alcohol swabs to clean the label location surface ; this ensures complete
adhesion. Verify that all surfaces are dry before applying the labels.
Step 2: Apply one long label over each power supply unit, as illustrated below. When
applying the labels, make sure there is enough material on both ends to
properly secure the power supply.!
Unique Serial Number
Destroyed
Imprinted Image
Step 2
x2
Long Label

SG9000 Tamper Evident Panel and Label Installation
9
Step 3: Apply one short label across the large louvered shutter and over the chassis. Be
sure that the label covers both parts in equal amounts.
Step 3
Short Label

SG9000 Tamper Evident Panel and Label Installation
10
Step 4: Apply one short label across and over the small louvered shutter mounting
tab.Make sure it covers the entire mounting tab and extends over the right edge
of the appliance.
Step 5: Apply one short label across the center of the small louvered shutter. Make sure
it covers both the small louvered shutter and extends over the right edge of the
appliance.
Step 6: Apply one short label vertically over the large louvered shutter and over the top
edge of the appliance. Make sure the label contacts all edges of the surfaces
without any gaps.
Step 4-5
Short Label
Step 4
Step 5
x2
Step 6
Short Label x1

SG9000 Tamper Evident Panel and Label Installation
11
Step 7: Apply one short label across the edge of the middle panel as to secure the panel to
the chassis. The label should be placed approximately three-quarters of an inch
beyond the release tab.
Step 8: Rack mount the appliance. Refer to the SG9000 Quick Start Guide for instructions
and safety information on rack-mounting the appliance.
Step 9: Reinstall the power cables.
Step 10: Reinstall the network cables.
Step 11: Power-on the system.
Step 7
Short Label x1

SG9000 Tamper Evident Panel and Label Installation
12
Step 12: Close the bezel.
Step 13: Apply two short labels across the chassis and bezel to prevent unauthorized
access to the front panel and hard disk carriers. Each label should be placed on the
opposite ends of the appliance, as shown below.
Note: The chassis-bezel labels are destroyed each time the bezel is opened. Be
sure to re-secure the bezel after servicing the appliance!
x2
Step 13
Short Label

SG9000 Tamper Evident Panel and Label Installation
13

www.bluecoat.com
231-03063 REV B.0
Table of contents
Other Blue Coat Network Hardware manuals
Popular Network Hardware manuals by other brands
HARTING
HARTING HAIIC MICA Hardware development guide
Microsemi
Microsemi SyncSystem 4380A Operation and maintenance manual
Ericsson
Ericsson EDACS Station GETC1e 19D901868G4 Configuration manual
Leadshine Technology
Leadshine Technology ME742 user manual
NetPing
NetPing IO v2 user guide
Huawei
Huawei Telecom Power TP48120A-HD15A1 user manual
Aruba
Aruba AP25 installation guide
ICP DAS USA
ICP DAS USA I-2533CS-FD user manual
ACTi
ACTi ENR-1100 System administration manual
Billion
Billion BiPAC 2073 R2 quick start guide
HMS Networks
HMS Networks Anybus Terminator T1 installation manual
Patton electronics
Patton electronics ACC-S02 Specification sheet
