BLUE OAK Saylor User manual

Before
You Begin
You already know this, but it’s best to read ALL the
instructions before assembly. Failure to do so may result in
faulty assembly and potential injury (no one wants that
kind of stain on their party hosting record).
Assemble your Blue Oak™outdoor furniture on a soft,
non-abrasive surface such as a carpet or cardboard to
avoid damaging the item. Seek assistance to assemble
bulky or heavy items (there’s no “i” in “team”).
After final alignment, make sure all the bolts are securely
tightened with hex caps pressed in place.
If you have issues, challenges or annoyances with
this product, give us a call at 1-888-444-0367.
We’re available from 8am-5pm (EST)
Monday-Thursday and 8am-4pm (EST) on Friday.
Saylor
Dining Table
Saylor
Dining Table
ASSEMBLY INSTRUCTIONS
REV 0517
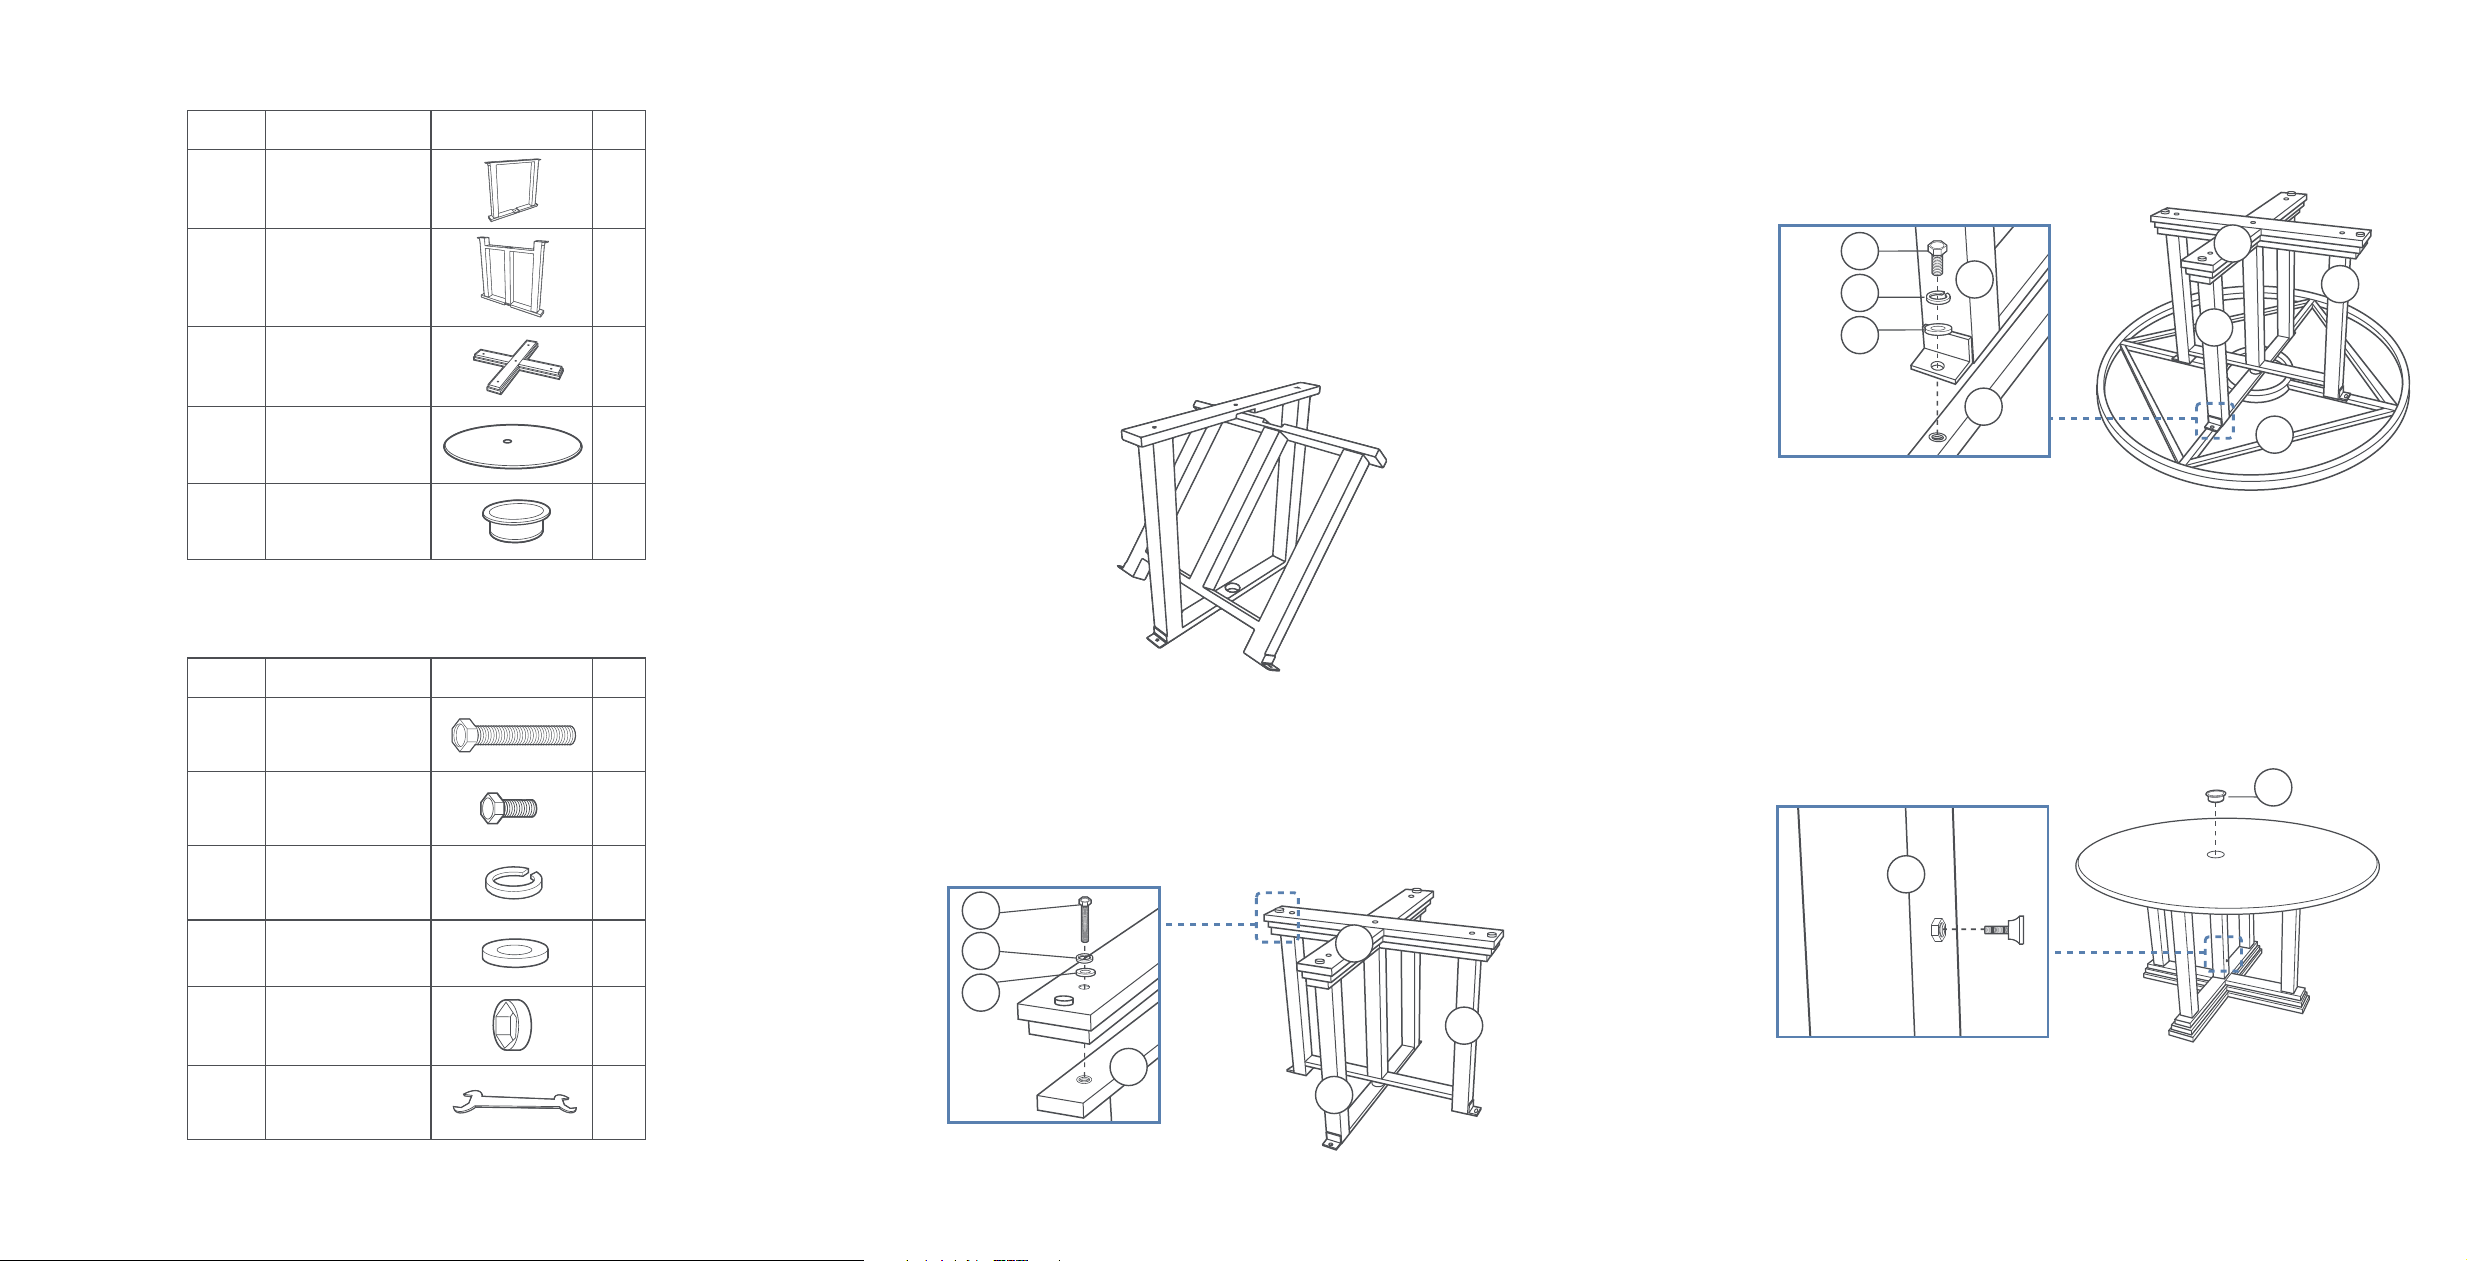
Step 1
See Figure 1. Place table leg (B) across and into table leg (A).
Step 2
See Figure 2. Put the table base (C) above the legs (A and B)
and match up the holes in the table base (C) with those in
the legs (A and B). Use the wrench (FF) to attach the table
legs (A and B) to the table base (C) with 5 M8x70 bolts (AA),
M8 washers (DD) and lock washers (CC).
Step 3
See Figure 3. Use the wrench (FF) to attach the assembled
table base to the table top (D) with 4 M8x20 bolts (BB), M8
washers (DD) and lock washers (CC).
Step 5
See Figure 4. Use the umbrella screw to tighten the umbrella
if necessary. If the table is used without an umbrella, use the
umbrella cap (E) to cover the umbrella hole.
Step 4
Fully tighten all bolts and apply the bolt head caps (EE) on
to each bolt.
Assembly Instructions
Take a deep breath and keep a clear spot nearby
where you can place the small pieces.
Note: There are two sizes of hex bolts. Make sure you’re using the type
specified in each step. Do not fully tighten the bolts until you’ve completed
the assembly and checked to see if the alignment is correct.
Parts
Part NameItem
B
A
Part Picture Qty
1
1
Table Leg
Table Leg
C 1Table Base
D 1Table Top
Hardware Kit
Part Name Part Picture Qty
Bolt
M8x20 4
Lock Washer
Bolt Head Cap
Wrench
M8 Washer
1
9
9
9
Item
BB
Bolt
M8x70 5AA
DD
EE
FF
CC
Your Table Is Complete!
Life is a play and you’ve just created center stage.
AA
A
DD
B
C
A
CC
Figure 2
E 1Umbrella Cap
Figure 3
C
B
A
D
D
A
BB
CC
DD
Figure 4
B
E
Figure 1
Other BLUE OAK Indoor Furnishing manuals


Popular Indoor Furnishing manuals by other brands

Notável Móveis
Notável Móveis NT 5170 Assembly instructions

TIMBER ART DESIGN
TIMBER ART DESIGN SR 930062 Assembly instructions

Amart Furniture
Amart Furniture 67368 Assembly instruction

Office Star Products
Office Star Products S2721 operating instructions

PHI VILLA
PHI VILLA THD7-305-006 Use and care guide

Burrow
Burrow CHORUS Assembly instructions


