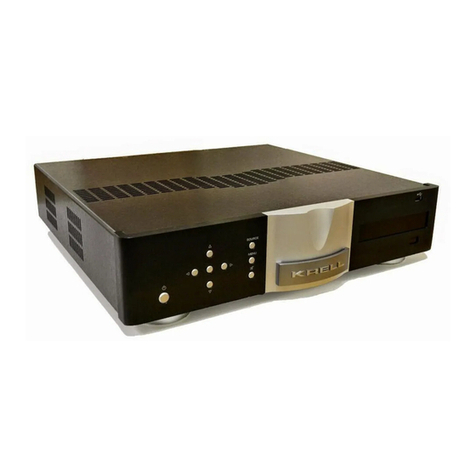
BLUENOTE Phono 2 User manual


Bluenote®
Phono 2
I.A.V.®
ITALIAN PRESTIGE MM & MC REFEREBCE PHONO STAGE
Owner’s Manual

MANUFACTURED IN ITALY
TEL.+39.0571.675005 FAX.+39.0571.675013
PHONO 2 Italian Prestige phono stage
Table Of Contents
-Congratulations & Introduction 3
-Box Content 4
-Installation & Positioning 4
-Operating the Phono 1 4
-Volume Control 5
-Specifications 6
-Warranty, Customer Service & Warnings 7
-Troubleshooting 8
-F.A.Q. & Adjustment 9

VERY IMPORTANT:Please read the following instructions carefully before installing your
Bluenote® Phono Stage
PHONO 2 Italian Prestige phono stage
Congratulations
Thank you for having purchased a Bluenote® product.
Introduction
With Bluenote® products you enter a new dimension. Bluenote® is the new
way of listening to music. Bluenote® is a range of products of prestigious and
sophisticated Italian design featuring unique and innovative technical and
aesthetic characteristics. The materials used for the Bluenote® phono stages
are of the highest quality, and they are assembled and tested by hand, one by
one. No photos or technical descriptions can adequately convey the quality of
the Bluenote® phono stages.
The external chassis of the Bluenote® phono stages are made entirely from self shielding steel alloy to increase the
structural rigidity and avoid RFI EMI interferences. The front panel is made of polished black acrylic. The cables used for the
internal wiring are in high-quality OFC OCC Hyper Litz copper and are completely shielded with a steel sock inside.
In a word, the Bluenote® range sets a new standard of reference in the phono stages category.

Congratulations & Introduction 3
PHONO 2 Italian Pr estige phono stage
Contents of Packaging
-PHONO PREAMPLIFIER COMPLETE OF AC POWER CHORD
-INSTRUCTIONS AND WARRANTY CERTIFICATE.
Positioning of the PHONO 2 Phono Stage
The PHONO 2 Phono stage has been designed for use in Hi-Fi systems in sheltered locations. It ought therefore to be protected from any
eventual variations in temperature and humidity. Avoid using in the vicinity of radiators or other strong heat sources, electrical and electronic
motors, switched on mobile phones etc.
The location in proximity of other audio components is not theoretically critical, but you should nevertheless pay attention to this. If the
turntable should have to be moved after the Phono stage has been installed, certain readjustments may need to be made. In any case, take care
to lock the PHONO 2 Phono stage every time you need to move it, or to move the turntable on which it is installed.
Operating Conditions
Once it has been correctly mounted on your turntable, and once the supplied cable linking the connector located on the bottom of the Shaft and
the amplifier to the PHONO input set for the pre-installed cartridge has been connected, your PHONO 2 Phono stage is ready for use.
NOTE: Never disassemble any part of the product for any reason whatsoever. The PHONO 2 Phono stage could be irreparably
damaged and the guarantee would be invalidated.

Contents of Packaging -Positioning –Operating Conditions 4
PHONO 2 Italian Prestige phono stage
Volume Control
It is possible vary thePHONO 2 Gain from MM to MC. It is also possible vary the load impedance on this unit.
To do that, it is necessary to carefully unscrew and pull out (remember that the back panel is connected with soldered cables)
the back panel of Phono 1, after switching off the unit it is been disconnected the AC power chord from the wall plug.
Internally on the red schematic board of PHONO 2, underneath two black transformers, there is a small DIP SWITCH with 4
Micro-Switches.
The Micro-Switches 1 & 4 are able to vary the Gain of the unit: with the Micro-Switches towards the NUMBERS SIDE the
PHONO 2 operates in MM mode; with Micro-Switches towards the ON SIDE thePHONO 2 operates in MC mode.
The Micro-Switches 2 & 3 are able to vary the load impedance of the unit: with the Micro-Switches towards the NUMBERS
SIDE the PHONO 2 operates with a fix 47Kohm (right for all MM cartridges); with Micro-Switches towards the ON SIDE the
PHONO 2 operates with a 470ohm (default) or changing the resistors (optional) with the unit with a specific load as requested
by the user.

Volume Control 5
PHONO 2 Italian Prestige phono stage
TechnicalSpecifications
The following data describe the basic technical specifications of the I.A.V.® Phono 1Phono stage at the time of drafting this
manual. The specifications are subject to modification without notice. The product complies with the requirements laid down
in the EC regulations.
DIMENSIONIS: 130mm L x 110mm H x 240mm D
WEIGHT: Kg. 3,00
FREQUENCY RESPONSE: 1Hz -100KHz @ +/-3dB
THD (Total Harmonic Distortion): 0,1% @ 20Hz -20KHz
INPUT SENSIVITY: From 0,1 to 0,5 mV MC variable acceptance
From 0,6 to 3,0 mV MM variable acceptance
GAIN: >70dB MC on all RIAA diagram
>48dB MM on all RIAA diagram
RATIO SIGNAL TO NOISE: -88dB => P.
-81dB => L.

RATIO SIGNAL/NOISE -79dB => W. and -70dB => L.
Technical Specifications 6
PHONO 2 Italian Prestige phono stage
Warranty Certificate
The warranty certificate is enclosed separately and to be valid must be completed fill and returned to Bluenote factory or the official
distribution. In all countries where there is an official distribution network, the dealer must stamp the warranty certificate. In compliance with
the laws in force, the dealer may modify the official Bluenote warranty certificate wholly or partially without notice and without further
mention being made in this instruction manual.
Customer Service
All Bluenote® products are the result of meticulous technological research, and consequently their correct functioning is guaranteed. In spite
of this it is possible that problems may emerge which non-specialist users cannot resolve. In this case, contact your dealer who will advise you
on how to resolve the problem.
Do not return any object directly to the factory or to the national distributor or without being authorized to do so. In such cases both
Bluenote® and the distribution agents operating within your territory decline responsibility of any kind.
PS. The photos reproduced here refer to the PHONO 2 Phono Stage, but parts and descriptions may vary from the product on sale without
notice.

Warnings
1. Do not disassemble any part of the product.
2. Do not use any part of the product for other purposes.
3. For service and problems of any kind, contact qualified personnel.
4. Protect the product from rain and humidity and keep away from heat sources, electric and electronic motors etc.
Warranty Certificate –Customer Service –Warnings 7
PHONO 2 Italian Prestige phono stage
Troubleshooting
SYNPTOM DESCRIPTION CAUSE REMEDY
HEATING The Phono Stage warms
up too much •Phono Stages produced by
Bluenote normally warms up to
50° Celsius without creating any
problem
•
SPEAKER HUMMING
PROBLEMS The speakers hum when
the Phono Stage is
connected to the system
•The Phono Stage is very
SENSITIVE to house
environment positions and
more in general geographical
AREAS too.
•Be sure your area and personal
environment are compatible
with the Phono Stage.
•The Ground connector is not
plugged anywhere.
•The Ground connector is
plugged.
•Try to plug or to unplug the
ground connector always
finding the best solution in
your system. The Electrical
loops created by the ground
connection can not be
theoretical solved before
installation EVER.
•The Phono stage Input
Interconnect are not plugged. •Having an “open” input the
Phono Stage strongly hum.
Connect the Input
Interconnect to the Phono
Stage to eliminate such
matter.
•The listening volume is very •Any high gain phono stage

high. designed to achieve good
sonic performances hums a bit
when the volume of the
amplifier is increased. That is
normal and strongly
noticeable especially without
music and with MC gain unit
selection.
•The tone arm and cartridge are
not properly installed •Install them well. Eventually
a tone arm cable problem can
occur; please check other
ways out
•The cartridge gain is wrong. •Select the cartridge gain
following the manufacturer
instructions
•The interconnect input and/or
output cables are not shielded. •Be sure to always use shielded
cables for Phono Stage
connections.
SWITCHING ON/OFF
BUMP The Phono Stage bumps
any time is switched ON or
OFF
•It is important to notice that it
does not produce any risk even
if the bump is high
•
PHONO STAGE (THE)
DOES NOT WORK WHEN
THE PHONO STAGE IS
SWITCHED ON
•The AC Phono Stage plug is
disconnected from the AC wall
plug
•Connect it being sure that the
AC wall plug works
The Phono Stage just
does not work •The interconnect cables are not
properly connected to the
Phono Stage.
•Connect them properly
•The fuse is blown •Substitute the fuse with one of
the same value
••Be sure you selected the right
Input on the amplifier
•The electrical connection inside
the Phono Stage could be
damaged
•Contact your dealer for
assistance
Troubleshooting 8
PHONO 2 Italian Prestige phono stage
F.A.Q.
Adjustment
PHONO 2 Phono Stage
ACTION DESCRIPTION HOW TO ADJUST IT
MATCHING THE CARTRIDGE
IMPEDENCE •Your cartridge needs a proper
IMPEDANCE matching to
chose between 470ohm or
47Kohm.
•Once you disconnect the Phono Stage from the
AC plug Once you disconnect the Phono Stage
from the AC plug remove, taking extreme care,
the acrylic circular bottom. The signal cables are
soldered to the connectors of such bottom so
please doing that operation with great attention.
Inside the Phono stage is visible the RED PCB
where a DIPSWITCH with 4 switches is installed.

To have only move the following 2 micro
switches:
•470ohm (MC TYPICAL) impedance move the
2, 3 switches towards the “ON” labelled side.
•47Kohm (MM TYPICAL) impedance move the
2, 3 switches towards the “2 & 3” labelled side.
MATCHING THE CARTRIDGE GAIN •Your cartridge needs a proper
GAIN matchin g to chose
between MM or MC.
•Once you disconnect the Phono Stage from the
AC plug remove, taking extreme care, the acrylic
circular bottom. The signal cables are soldered to
the connectors of such bottom so please doing
that operation with great attention. Inside the
Phono stage is visible the RED PCB where a
DIPSWITCH with 4 switches is installed. To
have only move the following 2 micro switches:
•MC move the 1, 4 switches towards the “ON”
labelled side.
•MM move the 1, 4 switches towards the “1 & 4”
labelled side.
CLEANING THE PHONO STAGE •The Phono Stage is dirty and
needs to be cleaned •With EXTREME care use ONLY pure alcohol
and a very soft 100% cotton cloth to sweep dust
and stains out.
Any acid or not extremely soft cloth will irreversibly
damage the Phono Stage fine aesthetic.
Do not use any alcohol to clean the Phono Stage anodised
label, or printed parts. Only dry cloth is allowed
F.A.Q. & Adjustment 9
Table of contents
Other BLUENOTE Amplifier manuals
