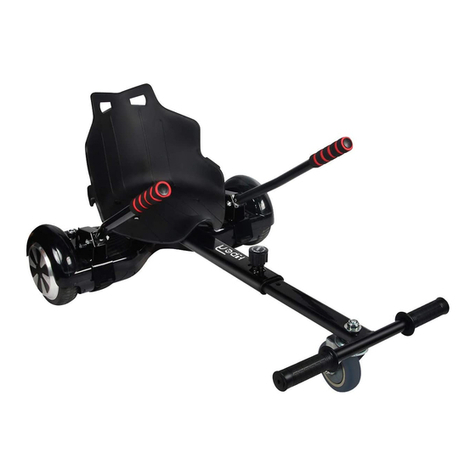
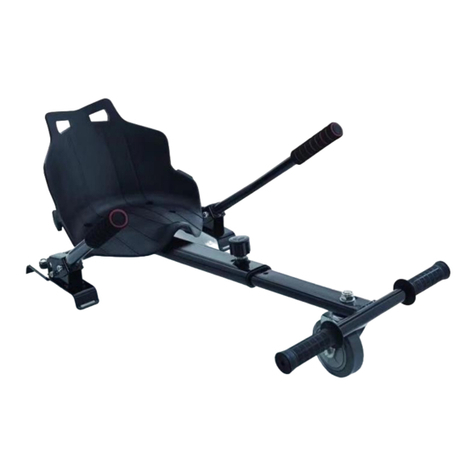
Bluewheel HOVOKART HK200 User manual

HK20
0
HOVOKART
DE
EN
ES
FR
IT
NL

2
Benutzerhandbuch
INHALTSVERZEICHNIS
1. LIEFERUMFANG .................................................................4
2. AUFBAUANLEITUNG ...........................................................5
3. STEUERUNG DES HOVOKARTS............................................6
4. SICHERHEITSHINWEISE ......................................................6
Stand: 11.01.2020
Recyclingkreislauf
Verpackungsmaterialien können wieder dem Rohstoffkreislauf zugeführt werden.
Entsorgen Sie die Verpackung gemäß den aktuellen Bestimmungen. Informationen erhalten Sie bei den Rückgabe- und Sammelsystemen Ihrer Gemeinde.

Unsere Video Tutorials für dich!
Link zu den Videos:
https://service.innovamaxx.de/hk200_video
Uns gibt es auch auf Social Media!
Instagram-Seite Facebook-Seite
Hol dir die neuesten Produktinfos, Trainingsinhalte uvm. auf unserer:
Aufbau, Benutzung, Abbau.
1. QR-Code scannen
2. Videos anschauen
3. Schnell und sicher starten
https://www.instagram.com/bluewheel.de/https://www.facebook.com/bluewheelberlin/

4
1. LIEFERUMFANG
1 7
8
9
10
11
12
2
4
5
6
3
Sitz
Rahmen mit Rad und Fußauflage
Steuerhebel 2 Stück
Hauptrahmen mit Trittflächenbefestigungen
M8 Sicherungsmutter 4 Stück
M8*15 Schraube 4 Stück
Gurt 2 Stück
M10 Sicherungsmutter 4 Stück
Verschluss-Schraube
Imbus-Schlüssel
Maul-Schlüssel
M10*15 Schraube 4 Stück
iDAS HK200 HOVOKART-SET IST KOMPATIBEL MIT
ALLEN GÄNGIGEN 6,5 - 10 ZOLL HOVERBOARDS.
NICHT KOMPATIBEL MIT HX420 UND HX600.
Ausnahme bei HX510: Um das Board nach Benutzung ausschalten zu können, müssen
zuerst die Befestigungsgurte (#7) etwas gelockert werden.
Denn solange das Kart fest mit dem Board vergurtet ist, wird einerseits der An-/Ausschalter
vom Gurt teils verdeckt und andererseits aktiviert sich die automatische Ausschalt-Sperre
des HX510. Durch Lockern der Gurte haben Sie wieder vollen Zugriff auf den An-/Aus-
schalter und können Ihr Gerät wie gewohnt abschalten.
1
2
3
4
5
6
7
8
9
10
11 12

5
2. AUFBAUANLEITUNG
Schrauben Sie die beiden Steuerhebel an den Trittflächenbefestigungen auf beiden Seiten des Hauptrahmens an.
Hauptrahmen - Trittflächenbefestigung - Steuerhebel - Sicherungsmutter M10 (# 8) - M10*15 Schraube (# 12)
Befestigen Sie den Sitz am Hauptrahmen.
M8*15 Schraube (# 6) - M8 Sicherungsmutter (# 5)
Befestigen Sie den vorderen Rahmen am Hauptrahmen.
Verschlussschraube (# 9)
Platzieren Sie den Hovokart-Rahmen mittig auf dem
Hoverboard.
Lockern Sie die Muttern der hinteren Haltebügel und passen
Sie sie auf die Breite der Trittflächen an (danach festziehen).
Ziehen Sie die Gurte von der gegenüberliegenden Seite
durch die Ösen und befestigen Sie den Klettverschluss.
Das Hovokart ist nun einsatzbereit.

6
3. STEUERUNG DES HOVOKARTS
Drücken Sie beide Steuerhebel nach vorn um vorwärts zu
fahren.
Ziehen Sie beide Steuerhebel nach hinten um zu bremsen
oder rückwärts zu fahren.
Für eine Links-Drehung ziehen Sie den linken Steuerhebel
nach hinten und drücken den rechten nach vorn.
Für eine Rechts-Drehung drücken Sie den linken Steuerhebel
nach vorn und ziehen den linken nach hinten.
4. SICHERHEITSHINWEISE
!BITTE BEACHTEN SIE ZU IHRER EIGENEN
SICHERHEIT FOLGENDE HINWEISE
Zulassung
Hoverboards und Hovokarts sind nach StVZO nicht
für den öffentlichen Straßenverkehr zugelassen.
Dazu zählen neben der Straße auch Fußgänger- und
Radwege. Nutzen Sie dieses Gerät daher nur außer-
halb des Straßenverkehrs oder auf Privatgeländen.
Schutzkleidung
Tragen Sie angemessene und zugelassene Schutz-
kleidung bestehend aus Helm, Ellbogenschoner,
Knieschoner und Handgelenkschoner. Kinder und
ältere Menschen sollten nur unter Aufsicht erwach-
sener Personen fahren.
Abnutzung
Das Fahren mit dem Hovokart erweitert das Fahrer-
lebnis eines Hoverboards auf eine ursprünglich so
nicht vom Hersteller vorgesehene Art und Weise. Ab-
hängig von der eigenen Fahrweise kann es dadurch
zu einer schnelleren Entstehung von Abnutzungs-
und Gebrauchsspuren führen, als wenn man das
Board herkömmlich, also stehend, verwendet.
Versicherungsschutz
Verursachte Sach- oder Personenschäden mit die-
sem Gerät werden nicht von der privaten Haftpflicht-
versicherung übernommen. Für alle entstandenen
Schäden muss der Fahrer selbst aufkommen.

7
Usermanual
TABLE OF CONTENT
1. CONTENT OF DELIVERY......................................................9
2. INSTALLATION INSTRUCTIONS ............................................10
3. CONTROLLING THE HOVOCART...........................................11
4. SECURITY ADVICES............................................................11
Recycling loop
Packaging material can be conveyed back to the raw material cycle. Dispose of packaging material in accordance with legal provisions. Information can be
retrieved from the return or collections systems of your community.

8
Our video tutorials for you!
Link to the videos:
https://service.innovamaxx.de/hk200_video
We are also on social media!
Instagram-page Facebook-page
Get the latest product information, training content and much more on our:
Assembly, use, disassembly.
1. Scan the QR code
2. Watch videos
3. Start fast and safely
https://www.instagram.com/bluewheel.de/https://www.facebook.com/bluewheelberlin/

9
1. CONTENT OF DELIVERY
1 7
8
9
10
11
12
2
4
5
6
3
Seat
Front frame
Control levers 2 pcs
Mainframe with footplate attachment
M8 locknut 4 pcs
M8*15 screw 4 pcs
Straps 2 pcs
M10 locknut 4 pcs
Fastener
Allen key
Hex wrench
M10*15 screws 4 pcs
iTHE HK200 HOVOCART SET IS COMPATIBLE WITH
ALL COMMON 6.5 - 10 INCH HOVERBOARDS.
NOT COMPATIBLE WITH HX420 AND HX600.
Exception with HX510: To be able to switch off the self balancing scooter after use, the fastening
straps (#7) must first be slightly loosened.
When the Go Kart is firmly strapped to the self balancing scooter, the on/off switch is partly
covered by the strap and the HX510‘s automatic switch-off lock is activated. By loosening the
straps you have full access to the on/off switch again and you can switch off your device as
usual.
1
2
3
4
5
6
7
8
9
10
11 12

10
2. INSTALLATION INSTRUCTIONS
Attach the two control levers to the footplate attachments on the sides of the main frame.
Main frame - Footplate Attachment- Control Levers - Locking nut M10 (# 8) - M10*15 screws (# 12)
Attach the seat to the main frame.
M8*15 Screw (# 6) - M8 Locknut (# 5)
Attach the front frame to the main frame.
Fastener (# 9)
Place the Hovocart frame on the center of the
Hoverboard.
Loosen the nuts of the rear retaining brackets and adjust
them to the width of the treads (then tighten).
Pull the straps from the opposite side through the eyelets and
secure the Velcro.
The Hovocart is now ready for ride.

11
3. CONTROLLING THE HOVOCART
Push both control levers to move forward. Pull both control levers to brake or move backward.
To turn left, pull the left control lever backwards and press the
right forward.
For a right turn, press the left control lever forward and pull
the left backward.
4. SECURITY ADVICES
!PLEASE NOTE THE FOLLOWING INSTRUCTIONS
FOR YOUR OWN SAFETY
Permission
Hoverboards and Hovocarts are not permitted for
public road traffic. It applies to all roads and also for
sidewalks and bike lanes. Use this device only off the
road or on private ground.
Insurance
Damage to property or personal injury caused by
this device are not covered by private liability in-
surance. The driver must pay for all damages incur-
red.
Protective clothing
Wear appropriate and approved protective clothing
consisting of helmet, elbow protector, knee protector
and wrist protector. Children and the elderly should
only drive under the supervision of adult persons.
Abrasion
The Hoverkart provides a driving experience of a
self-balancing scooter in a way not originally inten-
ded by the manufacturer. Depending on your riding
style, it can lead to a faster appearance of usage
than if you use the self-balancing scooter conventio-
nally, i.e. standing.

12
Manual de usuario
TABLA DE CONTENIDOS
1. CONTENIDO DE LA ENTREGA..............................................14
2. INSTRUCCIONES DE INSTALACIÓN.......................................15
3. CONTROL DE LA CARPA.....................................................16
4. CONSEJOS DE SEGURIDAD ................................................16
Reciclaje loop
El material de empaque puede trasladarse de nuevo al ciclo de materias primas. Deshágase del material de empaque de acuerdo a las normativas legales. Puede
encontrar información en los sistemas de recolección de su comunidad.

13
Nuestros tutoriales en video para usted!
Enlace a los videos:
https://service.innovamaxx.de/hk200_video
¡También estamos en redes sociales!
Instagram Facebook
Obtenga la última información sobre nuestros productos, entrenamientos y mucho
más aquí:
Montaje, Utilizar, Desmontaje.
1. Escanear el código QR
2. Ver vídeos
3. Comienza rápido y seguro
https://www.instagram.com/bluewheel.de/https://www.facebook.com/bluewheelberlin/

14
1. CONTENIDO DE LA ENTREGA
1 7
8
9
10
11
12
2
4
5
6
3
Asiento
Marco frontal
Palancas de control 2 piezas
Ordenador central y accesorios de la placa de pie
Tuerca M8 4 piezas
M8*15 tornillo 4 piezas
Velcro 2 piezas
Tuerca M10 4 piezas
Cierre
llave Allen
Llave hexagonal
M10*15 tornillo 4 piezas
iEL SET HOVOCART HK200 ES COMPATIBLE CON
TODAS LAS VARIANTES HOVERBOARDS DE 6.5 -
10 PULGADAS.
NO COMPATIBLE CON HX420 Y HX600.
Excepción para el HX510: para poder apagar el hoverboard después de usarlo, primero
deben aflojarse ligeramente las correas de sujeción (n. ° 7).
Mientras el kart esté firmemente sujeto al hoverboard no se podrá acceder al interruptor de
encendido / apagado ya que este estará parcialmente cubierto por las correas. Además, se
activa el bloqueo de apagado automático del HX510. Afloje las correas para acceder de for-
ma fácil al interruptor de encendido / apagado y apague su dispositivo como de costumbre.
1
2
3
4
5
6
7
8
9
10
11 12

15
2. INSTRUCCIONES DE INSTALACIÓN
Fije los dos palancas de control a los accesorios de la placa de pie a los lados del marco principal.
accesorios de la placa de pie - palancas de control - Tuerca de bloqueo M10 (# 8) - M10*15 tornillo (# 12)
Fije el asiento al bastidor principal.
Tornillo M8*15 (# 6) - Contratuerca M8 (# 5)
Sujete el marco frontal al marco principal.
Fijador (# 9)
Coloque el bastidor Hovocart en el centro de la
Hoverboard
Afloje las tuercas de los soportes de retención traseros y
ajústelos al ancho de las bandas de rodadura (luego apriete).
Tire de las correas del lado opuesto a través de los ojales y
asegure el Velcro.
El Hovocart está ahora listo para el paseo.

16
3. CONTROL DE LA CARPA
Empuje ambas palancas de control para avanzar. Tire de las dos palancas de control para frenar o retroceder.
Para girar a la izquierda, tire de la palanca de control izquier-
da hacia atrás y presione hacia derecha.
Para girar a la derecha, presione la palanca de control
izquierda hacia adelante y tire de la izquierda hacia atrás.
4. CONSEJOS DE SEGURIDAD
!TENGA EN CUENTA LAS SIGUIENTES
INSTRUCCIONES PARA SU PROPIA SEGURIDAD
Permiso
No se permiten los tableros giratorios y las car-
rocerías para el tráfico público. Se aplica a todos
los caminos y también para aceras y carriles bici.
Utilice este dispositivo sólo fuera de la carretera o en
terreno privado.
Seguro
Los daños materiales o personales causados por
este dispositivo no están cubiertos por un seguro de
responsabilidad civil. El conductor debe pagar por
todos los daños sufridos.
Ropa protectora
Wear appropriate and Use ropa protectora apropi-
ada y aprobada que conste de casco, protector de
codo, protector de rodilla y protector de muñeca.
Los niños y los ancianos sólo deben conducir bajo
la supervisión de personas adultas.
Desgaste
El Hoverkart proporciona una experiencia de con-
ducción de un patín eléctrico no prevista original-
mente por el fabricante. Dependiendo de su estilo
de conducción pueden aparecer marcas de uso
más rápido que si utiliza el patín eléctrico de forma
convencional, es decir, de pie.

17
Manuel utilisateur
TABLE DES MATIÈRES
1. CONTENU DE LA LIVRAISON ...............................................19
2. INSTRUCTIONS D‘INSTALLATION .........................................20
3. CONTRÔLE DE LA CHARRETE .............................................21
4. CONSEILS DE SÉCURITÉ.....................................................21
Chaîne du recyclage
Les matériaux d‘emballage peuvent être transportés vers le cycle des matières premières. La disposition des matériaux d‘emballage, conformément aux
dispositions légales. Les informations peuvent être récupérées à partir des systèmes de retour ou de collections.

18
Nos tutoriels vidéo pour vous!
Lien vers les vidéos:
https://service.innovamaxx.de/hk200_video
Vous pouvez aussi nous trouver sur les réseaux sociaux!
la page Instagram la page Facebook
Retrouve les dernières informations sur les produits, le contenu des entraînements et
bien plus encore sur notre:
Montage, utilisation, démontage.
1. Scannez le code QR
2. Regarder les vidéos
3. Démarrez rapidement et en toute sécurité
https://www.instagram.com/bluewheel.de/https://www.facebook.com/bluewheelberlin/

19
1. CONTENU DE LA LIVRAISON
1 7
8
9
10
11
12
2
4
5
6
3
Siège
Cadre avant
Leviers de commande
Unité centrale avec attaches
Ecrou de blocage M8 4 pièces
Vis M8*15 4 pièces
Velcro 2 pièces
Contre-écrou M10 4 pièces
Attache
Clé Allen
Clé hexagonale
Vis M10*15 4 pièces
iLE HK200 HOVOCART EST COMPATIBLE AVEC
TOUS LES HOVERBOARDS DE TAILLE CONVEN-
TIONNELLE (6,5 À 10 POUCES).
IL N‘EST PAS COMPATIBLE AVEC HX420 ET HX600.
Exception du HX510: Pour pouvoir éteindre le Scooter électrique après utilisation, il faut
tout d’abord desserrer légèrement les sangles de fixation (#7).
Tant que la carte est attachée avec le Scooter électrique, l‘interrupteur marche/arrêt est
partiellement recouvert par la sangle. D‘autre part, le verrouillage automatique de l‘arrêt du
HX510 est activé.
En desserrant les sangles, vous aurez de nouveau accès à l’interrupteur marche/arrêt et
vous pouvez éteindre votre appareil comme d’habitude.
1
2
3
4
5
6
7
8
9
10
11 12

20
2. INSTRUCTIONS D‘INSTALLATION
Fixez les deux leviers de commande aux attaches de pied sur les côtés du cadre principal.
Cadre principal - Attaches de pied - Leviers de commande - Écrou M10 (# 8) - Vis M10*15 (# 12)
Fixez le siège au cadre principal.
Vis M8*15 (# 6) - Contre-écrou M8 (# 5)
Fixez le cadre avant au cadre principal.
Attache (# 9)
Placez le cadre Hovocart au centre de la
Hoverboard.
Desserrer les écrous des supports de fixation arrière et les
ajuster à la largeur des bandes de roulement (puis serrer).
Tirez les sangles du côté opposé à travers les oeillets et fixez
le Velcro.
Le Hovocart est maintenant prêt pour la promenade.
Table of contents
Languages:
Other Bluewheel Hoverboard manuals
