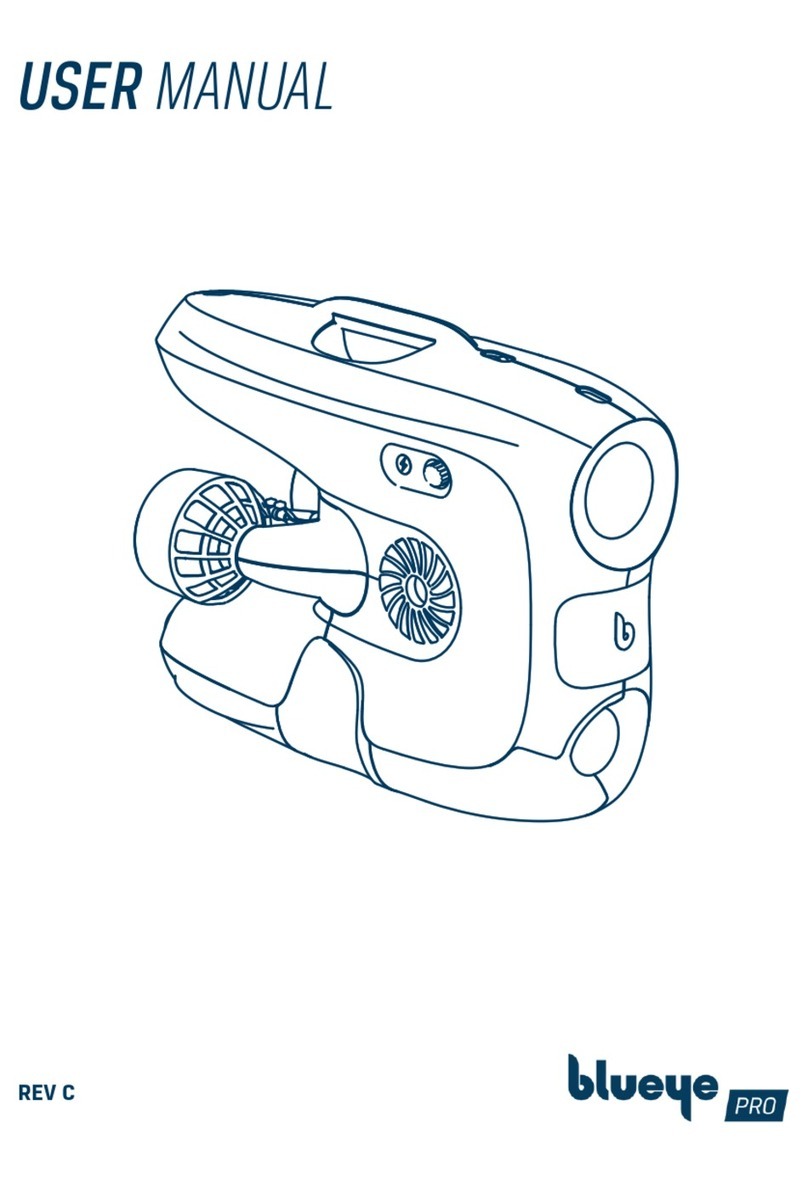
BluEye Pioneer Guide

START GUIDE
Quick start guide
PIONEER
REV G
REV I

2 3
DroneIn the box
Blueye Pioneer underwater drone
Transport box
75 m tether
Blueye Surface unit
Tether bag
Controller
Blueye Charger
Power supply
Charging cable for drone
USB charger
Charging cable for surface unit
Drybag for controller
Drybag for charger and power supply
Universal mount
Power-on/off
magnet
Moviemask
Removable battery
(installed in drone)
Hex keys and torx keys
Silicone grease
Spare o-rings
Pin spanner
Spare propellers
The drone is safe to submerge in water to a depth of 150 m.
Handle
Vertical thruster
Slot for universal mount
Charging port
Camera
Lateral thruster
LED lights and power on/off sensor
Forward thruster
Battery lid
Battery lid screw
Salt water ballast weight (remove
when diving in fresh water)

4 5
Surface Unit
The surface unit can withstand water spray
from any direction (IP64) when the rubber
connector lid is properly attached. The sur-
face unit CANNOT be submerged in water.
> 1,5 m/s
150 m
The surface unit is turned on.
The surface unit is turned on and
connected to the drone.
Battery level is low. Push the button
with the battery symbol to check the
battery level.
Battery is fully charged. Push the but-
ton with the battery symbol to check
the battery level.
Antenna
Rubber connector lid
Connection status indicator
Battery check button
Battery level indicator
Tether connector
Securing strap
Reset button
USB accessory port
Charging port (Micro USB)
Power button

6 7
Charger
The charger is NOT splash proof. it needs to
be kept away from water and dust.
> 1,5 m/s
150 m
To charge the drone with the battery charger cable, set the charger selector
switch to the drone symbol.
DC input
Drone charging output
Charging status
Indicates if drone or battery is
selected for charging
Select to charge drone or batttery
Battery charging connector
To charge the battery by connecting it directly to the charger, set the charger
selector switch to the battery symbol.
The battery is charging. The battery is fully charged.

8 9
Remote controller
iOS
Android
Left Stick Right Stick
> 1,5 m/s
150 m
> 1,5 m/s
150 m
Down
Up Forwards
Backwards
Sideways Left Turn Left
Sideways Right Turn Right
> 1,5 m/s
150 m
> 1,5 m/s
150 m
> 1,5 m/s
150 m
> 1,5 m/s
150 m
> 1,5 m/s
150 m
> 1,5 m/s
150 m
Use the left and right lower triggers (L2 and R2) to gradually decrease or boost
the thrust power. Decreasing the thrust is recommended in situations were
higher precision is needed, for example stable video shoots or tricky naviga-
tion. Boosting of the thrust can be helpful when diving in higher currents or if
faster motion is needed.
The remote controller is NOT splash proof. It
needs to be kept away from water and dust.
> 1,5 m/s
150 m
Menu
Boost thruster power
Light ON/OFF
Lock heading ON/OFF
Lock depth ON/OFF
Capture Video ON/OFF
Right stick
Pairing button
Menu
Boost thruster power
Light ON/OFF
Lock heading ON/OFF
Lock depth ON/OFF
Capture Video ON/OFF
Right stick
L1L2 R1 R2
LTLB RB RT
Settings
Decrease thruster power
Left stick
Adjust lights
Adjust manual camera
exposure (when enabled
in settings)
Power button
Settings
Decrease thruster power
Left stick
Adjust lights
Adjust manual camera
exposure (when enabled
in settings)
MODE button

10 11
Dive down to 150 m. The drone can handle rain
and snowy weather.
Avoid diving close
to precious corals.
In areas with lots of electromagnetic interference you may experience lag or ar-
tefacts in the video stream. Electromagnetic interference may be caused by large
steel or concrete structures or areas with lots of other WiFi activity. To resolve this
you can try to move closer to the surface unit or move to another location.
Beware
BewareBeware of wifi limitations
Ok to dive
Evaluating conditions and safety
Avoid diving in
unknown water with
very poor visibility.
Dive in open water.
Beware of struc-
tures and rocks
where the tether
may get stuck.
Beware in areas
with kelp and
seaweed as the
tether may get
stuck.
> 1,5 m/s
150 m
> 1,5 m/s
150 m
> 1,5 m/s
150 m
> 1,5 m/s
150 m
> 1,5 m/s
150 m
> 1,5 m/s
150 m
> 1,5 m/s
150 m
> 1,5 m/s
150 m
Do your first few dives in line of sight in calm waters to get accustomed to the
controls and the behaviour of the vehicle.
> 1,5 m/s
150 m
> 1,5 m/s
150 m
> 1,5 m/s
150 m
> 1,5 m/s
150 m
> 1,5 m/s
150 m
NEVER drop the
surface unit into
water.
DO NOT spin thrusters
in air, they rely on
water as lubricant for
the bearings.
DO NOT touch spin-
ning propellers.
DO NOT turn on
the lights in air to
prevent overheat-
ing the LEDs.
> 1,5 m/s
150 m
> 1,5 m/s
150 m
> 1,5 m/s
150 m
> 1,5 m/s
150 m
SAFETY
DO NOT DIVE
During thunder
storms.
Currents greater
than 1,5 m/s.
Keep tether away from
propellers.
> 1,5 m/s
150 m
> 1,5 m/s
150 m
> 1,5 m/s
150 m
> 1,5 m/s
150 m
> 1,5 m/s
150 m
Close to humans.
> 1,5 m/s
150 m
Beware
> 1,5 m/s
150 m
Children should only operate
under the supervision of adults

12 13
Preparing for launch
80% 20%
Make sure the batteries on the drone,
surface unit, controller and mobile de-
vice are at least 80% charged before
you go diving.
When the battery in the drone reach-
es 20% when diving, go back to shore.
To avoid tangle on the tether, do not
pack it all at once. First unroll all the
tether. Make sure that there are no
knots.
Once unrolled, take the loose end and
put it into the tether bag and pull it out
through the hole in the mesh pocket.
Then pack it 1 m at a time into the
tether bag.

14 15
Sea water and fresh water have different density, and ballast weights are
provided to compensate for the difference.
Configurations:
Fresh water: no ballast weights
Brackish water: 1 ballast weight
Salt water: 2 ballast weights
Variations in salinity may occur. Always check that the drone floats before
diving. If not, remove a plate.
Connect the surface unit tether
connector end to the surface unit and
place the surface unit in the mesh
pocket.
Attach the bag with the roll top buckle
to something stationary to avoid that
the bag gets dragged into the sea.
It could be the boat, dock railing or
a tree.

16 17
Turn on & connect
Download the Blueye App. Search for
“Blueye” in the App Store or Google
Play. To avoid interruptions during the
dive, put the mobile device in Airplane
mode before diving. Make sure that
Wi-Fi and Bluetooth are still on.
Turn on the surface unit by pressing
the power-on button. The power button
will light up and the surface unit will
initialize and the battery status LEDs
will sweep from side to side. Once the
initialization is completed the battery
status LEDs will show the current
battery charge.
Turn on the drone by putting the “ON”
side of the magnet attached to the
tether bag against the LED light win-
dow until a melody is played and lights
start blinking.
To connect the drone to a mobile
device, go to Wi-Fi settings, connect to
“Blueye_XXXXXX” (Default password
is: 1234567890).
Turn on the controller in pairing
mode
iOS: Turn on the controller by press
and hold the on button until the lights
start blinking. Press and hold the
Bluetooth button until the lights starts
blinking at a faster rate.
Android: Turn on the controller and
put it in pairing mode by pressing the
Mode button and the A button at the
same time. Verify that the first light
blinks at a fast rate.
Connect the controller
To connect the controller to a mobile
device, go to Bluetooth settings and
select the controller. The name of
the iOS controller is Speedy Gaming
Controller and on Android the name is
PXN-9613.
If the controller is not foud or you are
unable to connect, re-start the con-
troller and turn Bluetooth off and on.

18 19
Calibrating the drone compass
2. Hold the drone vertically and turn
around 360°. Flip the drone upside
down and turn back around 360°.
3. Hold the drone lying on its side
and turn around 360°. Flip the
drone so that it is lying on its other
side and turn back around 360°.
It is recommended to calibrate the compass in any of the following situations:
• Before first dive after receiving your drone
• Diving at a new location after traveling with your drone
• When the Blueye app warns you that the compass needs calibration
1. Tap the “Compass Calibration”
button under “Drone Settings” in
the app, then follow the on-screen
instructions.
4. Hold the drone with the camera
pointing up and turn around
360°. Flip the drone so that the
camera is pointing down and
turn back around 360°.
5. Place the drone securely on a
horizontal surface and tap “Finish
calibration” in the app. Leave the
drone for a while for the drone to
finish the calibration.
Do not calibrate you compass where there is a
chance of strong magnetic interference, such as
magnetite, large steel structures or steel reinforce-
ments underground.
> 1,5 m/s
150 m
Compass Calibration

20 21
App
Diving with remote controller
L1 (LB) 3D-view of drone
heading relative to you R1 (RB) Menu
Function buttonsDepth
Heading
Light ON/OFF
Y-button on controller
Capture video ON/OFF
X-button on controller
Lock depth ON/OFF
A-button on controller
Lock heading ON/OFF
B-button on controller
It is recommended to
immediately turn on both lock
depth and lock heading for
easier manoeuvrability.
Change screenview by
tapping or swiping
Diving without remote controller
3,6 m
35◦
45◦R1
90◦135◦
360◦
315◦
L1
35◦
3,6 m
45◦R1
90◦135◦
360◦
315◦
L1
Pressing L1 brings up
information about:
• Dive time
• Remaining battery
• Remaining storage
Pressing R1 (RB) brings up
menu for viewing:
• Control instructions
• Light settings
• Camera settings
• Calibration
• Diagnostics
Touch controls
Forward / Backward
Turn Left / Right
Touch controls
Up / Down
Move sideways

22 23
Diving
DO NOT throw the
drone into the water.
It is not recommend-
ed to lower the drone
by the tether as this
will shorten the life-
time of the tether.
Lower the drone
slowly into the water
by hand. A boat hook
can also be used
from heights.
> 1,5 m/s
150 m
> 1,5 m/s
150 m
> 1,5 m/s
150 m
Ending a dive
Before picking the drone up from the
water, make sure that both lock
depth and lock heading are turned off.
If not, the thrusters will try to
compensate for movements also
when the drone is out of the water.
Pick up the drone from the water.
3,6 m
35◦
End dive
100% --00:00:00
45◦
BatteryDive time Free storage
R1
90◦135◦
360◦
315◦
L1
To transfer videos and images to a mobile device directly after the
dive, press the L1 on the controller and tap “End dive”. The connection
screen will appear in the app. Tap “Download video files” to choose
which files to download to the mobile device.

24 25
When finished with the dive, make
sure that both the drone and the
surface unit are turned off. The drone
is turned off by putting the “OFF” side
of the magnet attached to the tether
bag against the LED light window.
When the drone is turned off all indi-
cator lights in the LED light window
will be off.
Also check and remove any foreign
objects in the thrusters, for example
sea weed.
ON/OFF magnet
After each dive in salt water
To avoid unnecessary wear on the drone and tether, after each dive in salt
water, the drone and tether must be rinsed with fresh water.
The drone can either be submerged in fresh water or rinsed with a garden
hose. Running the thrusters submerged in fresh water after each dive will keep
them in shape longer.
The tether can be rinsed inside the tether bag, just remember to remove the
Surface Unit away from the bag.

26 27
Transferring videos and images
Transferring video and images from the drone can either be done in the app or
on a PC.
To transfer videos and images to a mobile device, turn on the drone and
surface unit, connect the mobile device to the surface unit Wi-Fi, start the app,
and choose “Transfer video files”.
To transfer videos and images to a PC go to this address: https://www.blueye.
no/Software/FileTransfer
Download and install the Blueye File Transfer Desktop App on the computer.
Turn on the drone and the surface unit and connect the computer to the
surface unit Wi-Fi.
Open the Blueye File Transfer Desktop App and choose which files to download
to the computer.
Turn off the drone when files have been transferred.
24
Transferring videos and images
To transfer videos and images to a mobile device, turn on the drone
and surface unit, connect the mobile device to the surface unit Wi-Fi,
start the app, and choose “Transfer video files”.
Transferring video and images from the drone can either be done in the
app or on a PC.
To transfer videos and images to a PC go to this address: https://www.
blueye.no/Software/FileTransfer
Download and install the Blueye File Transfer Desktop App on the
computer.
Turn on the drone and the surface unit and connect the computer to
the surface unit Wi-Fi.
Open the Blueye File Transfer Desktop App and choose which files to
download to the computer.
Turn off the drone when files have been transferred.
Charging the batteries
Before charging the drone make sure that the drone
is turned off. Connect the power supply to the
charger and connect the power supply to the wall
socket. Make sure that the charging selector switch
on the bottom is set to drone charging. See page 7.
Place the drone on a robust and stable surface
laying on the left side to remove any risk of the
drone falling over.
Unscrew the charging connector cap on the drone
and connect the charger to the charging port on
the drone with the included charging cable.
Open the connector lid on the Surface Unit and
connect an output of the external USB charger to
the charging port (micro USB) on the Surface Unit.
Make sure the USB output rating is minimum 2.1A.
Connect the other USB outputs on the external
USB charger to charge a mobile device and the
controller.
To disconnect the power supply from the mains,
pull the plug from the wall socket outlet. Make sure
that the wall socket outlet is easily accessible.
Do not turn the drone on while charging, it
may damage the drone and/or charger. When
finished charging remember to put the charging
connector cap back on.
> 1,5 m/s
150 m

28 29
Charging the battery outside of drone
1. Open lid
Warning: We recommend charging the battery
inside the drone as much as possible to limit
wear of the o-rings on the aluminium lid.
> 1,5 m/s
150 m
2. Unscrew the aluminium lid with
the pin spanner to open it.
3. Pull out the battery.
4. Make sure that the charging selec-
tor switch on the bottom is set to
battery charging.
5. Remove the blue cover on charger.
Connect the power supply to
a wall socket and connect the
battery direcly to the back of the
charger.
6. Inspect o-ring for damages. Put a
small amount of silicone grease on
the o-ring before closing the lid.
7. Insert the battery. Make sure that
the arrow on the battery is point-
ing upwards.
8. Make sure that the battery is
pushed all the way in. There are
two guiding pins at the bottom of
the battery canister that will align
the battery with the connector.
Fold down the handle.
9. Close the aluminium lid with the
pin spanner. Make sure to not
tighten the lid too much, but there
shouldn’t either be a large gap
between the aluminium lid and
the aluminium tube. Be careful to
not damage the threads of the lid
when closing.
UP
10. Close the battery lid by sliding it
along the battery tube. The battery
lid cannot be pushed all the way
in. Tightening the thumb screw will
move the lid into place.

30 31
Specifications
Drone specifications
Drone
Ingress protection IPX8
Dimensions 485 x 257 x 354 mm (LxWxH)
Weight in air 8.6 kg (with salt water ballast)
Construction ABS enclosures, Aluminium pressure
enclosures, Polycarbonate (PC)
windows
Buoyancy material HCP 30 Polymer Foam
Maximum rated depth 150 m
Forward speed at normal use 1.5 m/s (3 knots)
Thrusters 4 x 350 W
Run time at normal use Approx. 2 hours
Operating temperature -5 to +35 °C
Camera
Sensor CMOS, 1/3 inch
Max image size 1920 x 1080 pixels
Shutter speed 1/30 s – 1/8000 s
Picture max resolution 2M (1920 x 1080)
Picture type JPEG
Video resolution FHD: 1920 x 1080 25/30 Fps, HD: 1280
x 720 25/30 Fps
Video type MP4
Video storage bit-rate 2 to 16 MBit/s
SD card 64 GB
LED lights
Luminous flux 3300 Lumen
Colour temperature 5000 K
Colour rendering index (CRI) 70
Adjustable dimming Yes
Smart Battery Pack
Nominal Voltage 14.8 V
Nominal Capacity 6500 mAh
Nominal Energy 96.2 Wh
Operating temperature -5 to +35 °C
Charging temperature 5 to 30 °C
Sensors
IMU 3 axis gyro & accelerometer &
magnetometer
Depth sensor Resolution: 0.2 mbar
Depth sensor operating range 0 to 30 bar
Temperature sensor +/-1 °C
Tether
Length 75 m
Breaking strength 100 kg
Number of cables 1 twisted pair (copper)
Size 26 AWG
Controller
Compatibility iOS or Android

32 33
Surface Unit specifications
Surface Unit
Ingress protection IP64
Dimensions 38 x 149 x 158 mm (LxWxH)
Operating frequency 2.4 GHz / 5.8 GHz
Max Wi-Fi distance 30 m
Battery 19.48 Wh
Operating temperature -5 to +35 °C
Transmitter power 125 mW
Operating voltage 5 - 8.4 V
Output, USB A 5 V, 400 mA
Input, Micro USB 5 V, 2.1 A
Antenna Dual-band 3dBi RP-SMA Male
Charger specifications
Charger
Dimensions 56 x 107 x 64 mm (LxWxH)
Operating temperature 5 to 30 °C
Operating rel. humidity 20% to 80%
Input 19.5 V, 4 A
Output 16.8 V, 2.5 A
Power supply
Input 100 - 240 V, 3A, 50 - 60 Hz
Output 19.5 V, 11.8 A
Operating temperature 0 to 40 °C
Operating rel. humidity 20% to 80%
Manufacturer FSP GROUP
Model FSP230-AJAN3
Manufacturer markings
Marking plate for the drone can be found on the outside of the tube containing the
battery. See section “Charging the battery outside of drone” for instructions on how to
gain access to the battery tube.
The following warnings apply to both the Blueye Surface Unit and the Blueye Smart
Battery.
Important: Blueye Surface Unit battery is only accessible to Blueye service personnel
and cannot be accessed by any means by the user or operator. Only the Blueye Smart
Battery can be accessed by the user or operator.
• CAUTION: RISK OF EXPLOSION IF (Drone) BATTERY IS REPLACED WITH AN INCORRECT
TYPE. DISPOSE OF USED BATTERIES ACCORDING TO THE INSTRUCTIONS.
• Do not dispose batteries in household waste. Obey local waste disposal regulations.
Do not subject the battery to mechanical shock.
• Observe the plus (+) and minus (-) marks on the battery and equipment and ensure
correct use.
• Always purchase the battery and charger from Blueye Robotics.
• Keep the battery clean and dry.
• Wipe the battery terminals with a clean dry cloth if they become dirty.
• The battery needs to be charged before use. Always use the correct charger and
refer to the Start Guide for proper charging instructions.
• Do not leave the battery in prolonged charge when not in use.
• After extended periods of storage, it may be necessary to charge and discharge the
battery several times to obtain maximum performance.
• Retain the original product literature for future reference.
• Use the battery only for the application for which it was intended.
Battery warnings

34 35
• When possible, remove the battery from the equipment when not in use.
• Only charge the drone battery with the supplied charger. A charger that is suitable
for one type of battery pack may create a risk of fire when used with another battery
pack.
• When battery pack is not in use, keep it away from other metal objects, like paper
clips, coins, keys, nails, screws or other small metal objects that can make a con-
nection from one terminal to another. A short-circuit of the battery terminals can lead
to burns, fire and serious injury.
• Under abusive condition, liquid may be ejected from the battery; avoid contact.
• If contact accidentally occurs, flush with water. If liquid contacts eyes, additionally
seek medical help. Liquid ejected from battery may cause irritation or burns.
• Do not use a battery pack or appliance that is damaged or modified. Damaged or
modified batteries may exhibit unpredictable behavior resulting in fire, explosion or
risk of injury.
• Do not expose a battery pack or appliance to fire or excessive temperature. Exposure
to fire or temperature above 130 °C (266 °F) may cause explosion.
• Follow all charging instructions and do not charge the battery pack outside of the
temperature range specified in this instruction. Charging improperly or at tempera-
tures outside the specified range may damage the battery and increase the risk of
fire.
• Do not open, modify or attempt to repair the battery pack.
• Do not charge the battery pack in a damp or wet environment
• Do not cover the charger or the battery pack with cloth or anything else. The charger
and battery pack heats up during charge and lack of ventilation may result in fire or
serious injury.
• Do not use the battery pack for appliances that it is not intended for.
• Keep battery packs and chargers away from children if not thoroughly supervised.
• Failure to comply with these warnings can lead to explosion, fire, leakage and/or
serious injury.
Recycling information
This product should not be disposed of in the general household waste.
Instead, in order to prevent possible harm to the environment or human
health from uncontrolled waste disposal, please dispose of this product
separately in accordance with your local laws and regulations. Please
check with your Local Authority or retailer for recycling advice.
Symbol overview
Standby
Drone
Standby
Drone. Lights up when the
surface unit is turned on
and it is connected to the
drone.
Surface unit
Charging symbol
Drone symbol
Battery symbol
Charger
Charging. Shows where to
connect the charging cable.
Battery charging symbol
Battery fully charged symbol
Battery checking.
Charging. Shows where to
connect the charging cable.

FOR MORE TIPS,
TUTORIALS AND VIDEOS VISIT
WWW.BLUEYEROBOTICS.COM
Other manuals for Pioneer
1
Table of contents
Other BluEye Drone manuals
