BluEye PRO User manual
USER MANUAL
REV C
2
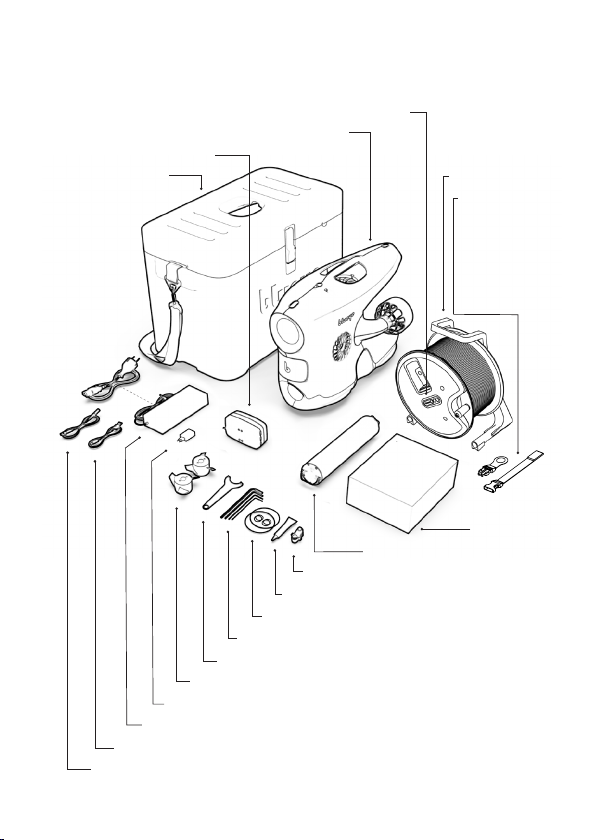
In the package
Blueye Pro underwater drone
Transport Case Reel w/tether
Power magnet
Blueye Surface unit (installed in reel)
Controller
Blueye Charger
Power supply
Charging cable for drone
USB charger
Charging cable for surface unit / controller
Universal mount
Battery (installed in drone)
Hex keys and torx keys
Silicone grease
Spare o-rings
Pin spanner
Spare propellers

3
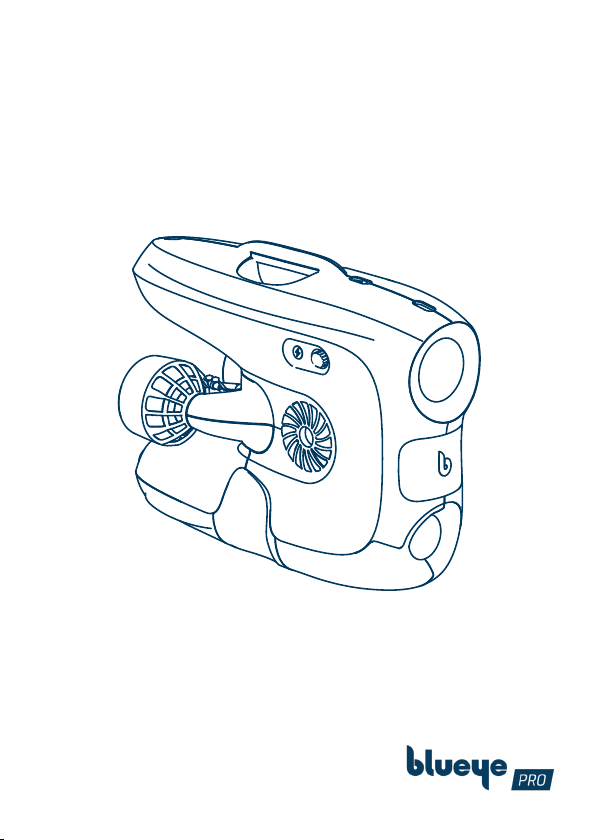
Drone
The drone is safe to submerge in water to a depth of 305 m / 1000 ft.
Handle
Vertical thruster
Slot for universal mount
Charging port
Camera
Lateral thruster
LED lights and power on/off sensor
Forward thruster
Battery lid
Battery lid screw
Tether shackle
Salt water ballast weight (remove
when diving in fresh water)
Universal mount
4
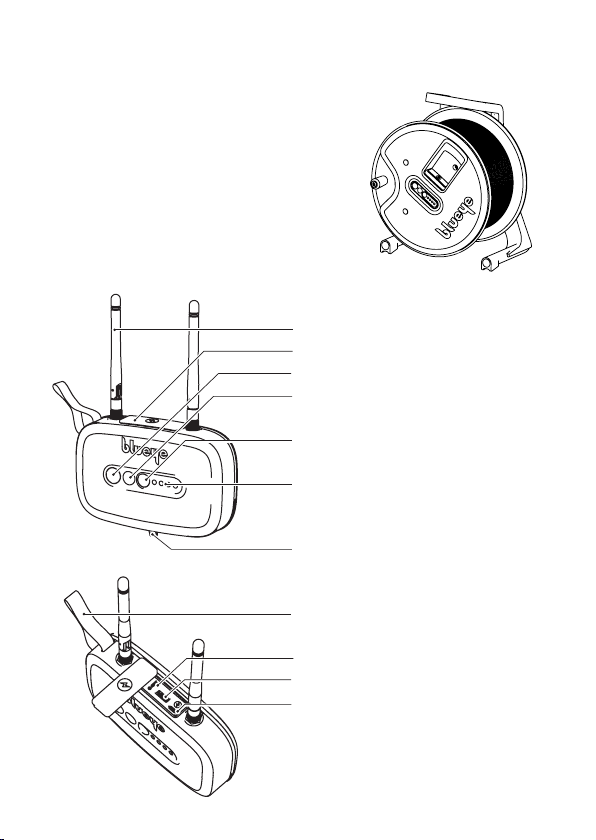
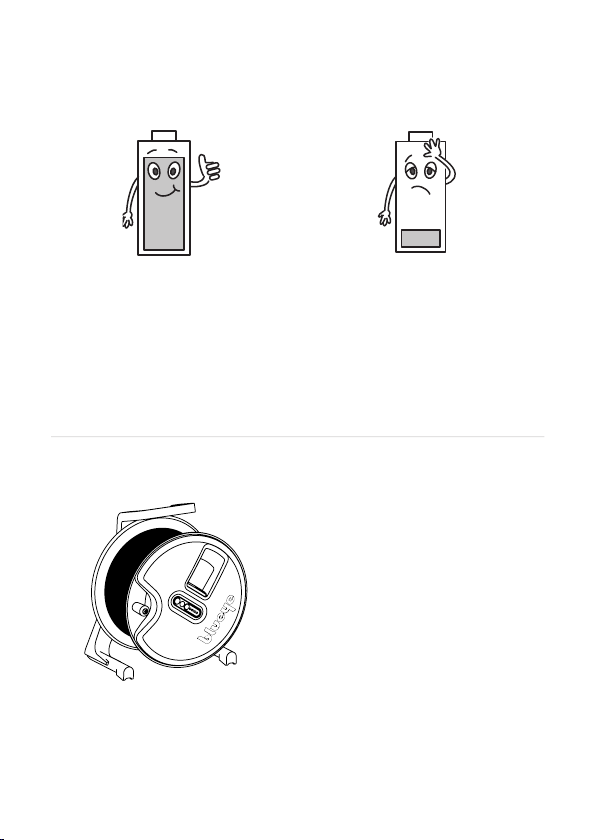
Surface Unit
Antenna
The Blueye Surface Unit(S.U.) is installed
inside the tether reel. All S.U. buttons and
cable ports are accessible through openings
in the front cover on the reel. If you need
to separate the S.U. from the reel, use the
included tools to unscrew the reel cover.
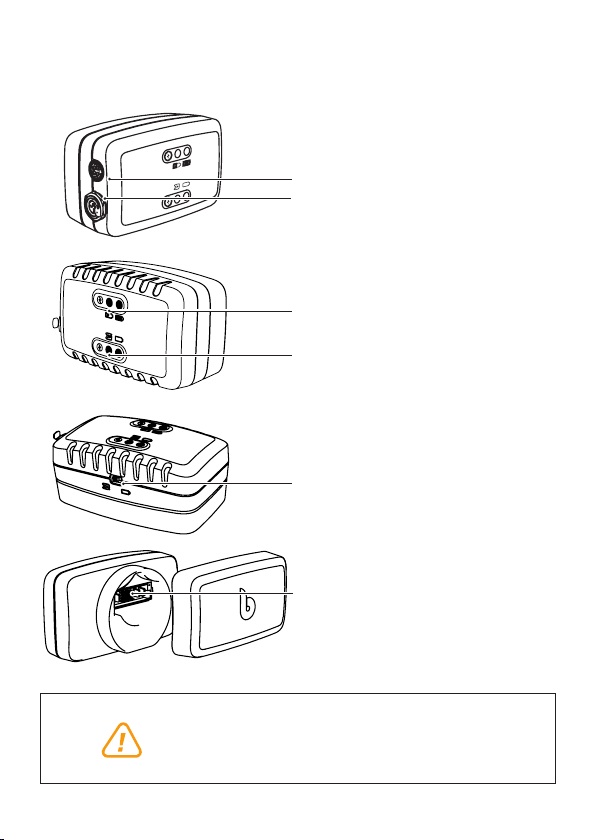
Rubber connector lid
Connection status indicator
Battery check button
Battery level indicator
Tether connector
Securing strap
Reset button
USB accessory port
Charging port (Micro USB)
Power button

5
The surface unit can withstand water spray from
any direction (IP64) when the rubber connector lid
is properly attached. The surface unit CANNOT be
submerged in water.
The operator shall maintain a minimum distance of
20 cm to the surface unit.
> 1,5 m/s
150 m
> 1,5 m/s
150 m
The surface unit is turned on.
The surface unit is turned on and
connected to the drone.
Battery level is low. Push the button
with the battery symbol to check the
battery level.
Battery is fully charged. Push the but-
ton with the battery symbol to check
the battery level.
6
Charger
The charger is NOT splash proof. it needs to be
kept away from water and dust.
> 1,5 m/s
150 m
DC input
Drone charging output
Charging status
Indicates whether the battery is
selected for charging inside or
outside the drone
Select to charge via drone or battery
Battery charging connector

7
To charge the battery inside the drone with the charger cable, set the charger
selector switch to the drone symbol.
To charge the battery outside the drone by connecting it directly to the
charger, set the charger selector switch to the battery symbol.
The battery is charging. The battery is fully charged.
8
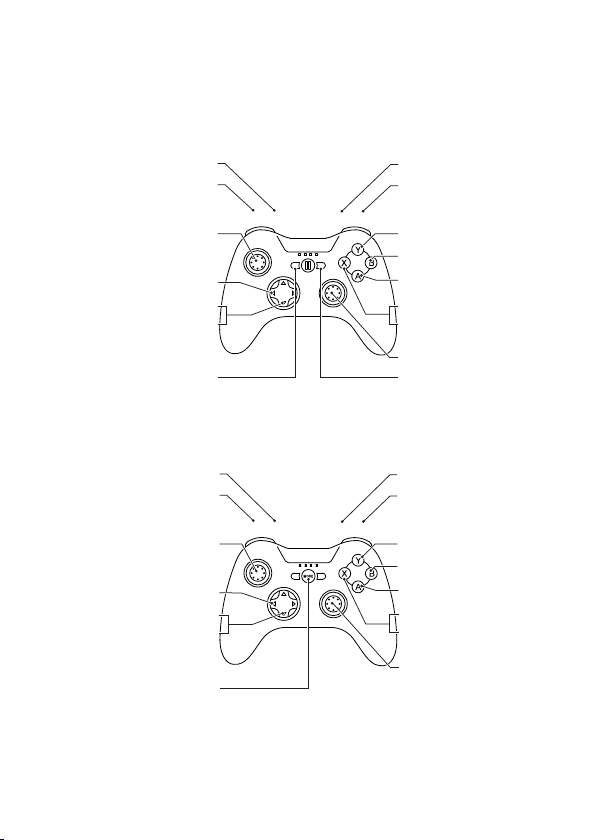
Remote controller
Some of the buttons have multiple functions: Press and hold down the
left or right Modifier (L1 or R1) (LT or RB) to enable the (*)-actions.
iOS
L1L2 R1 R2
Modifier*
Boost thruster power
Light ON/OFF
Lock heading ON/OFF
Lock depth ON/OFF
Capture video ON/OFF
*Capture still picture
Pairing button
Modifier*
Decrease thruster power
Left stick
Adjust lights
*Adjust camera exposure
Tilt function
Power button
Right stick
(Hold down Modifier to enable)
Pro
*Adjust camera exposure
(Hold down Modifier to enable)
Tilt function
Android Pro
Modifier*
Boost thruster power
Light ON/OFF
Lock heading ON/OFF
Lock depth ON/OFF
Capture video ON/OFF
*Capture still picture
Modifier*
Decrease thruster power
Left stick
Adjust lights
MODE button
Right stick
*Adjust camera exposure
Tilt function
(Hold down Modifier to enable)
(Hold down Modifier to enable)
LTLB RB RT
iOS
Android
9
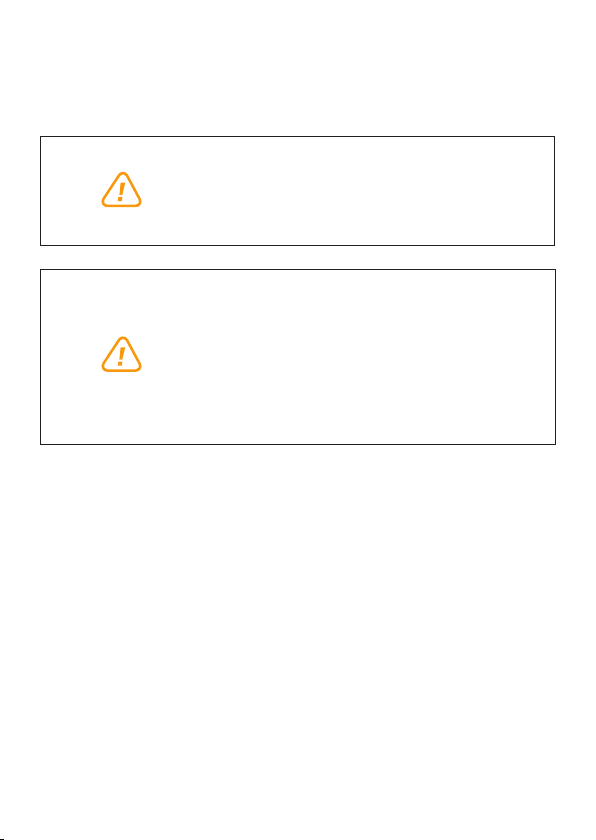
Changes in the controller layout can occur.
Diagrams and information regarding changes in control
mapping will be provided in the Blueye App Settings
and the Blueye Help Center (support.blueye.no). Also
make sure you are updated with the latest app.
The remote controller is NOT splash proof. It needs
to be kept away from water and dust.
> 1,5 m/s
150 m
> 1,5 m/s
150 m
10
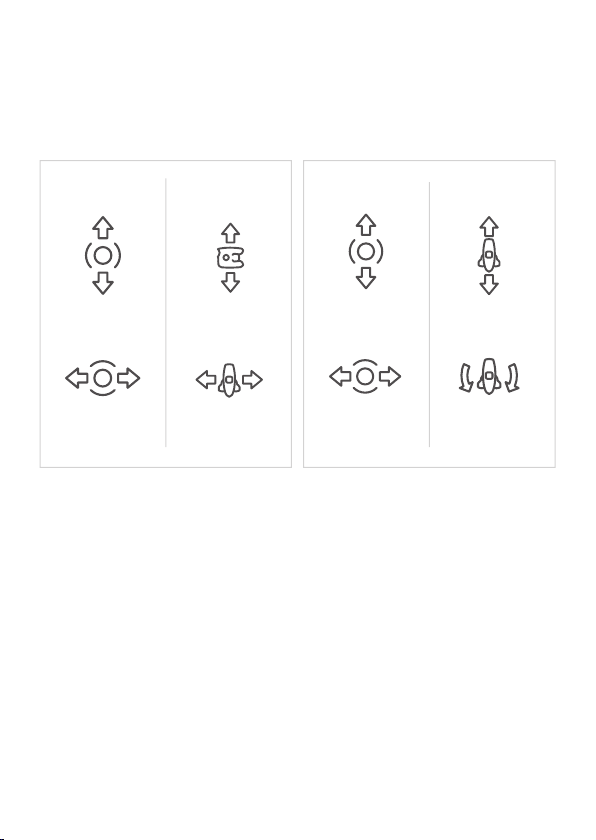
Left stick
Up/down and sideways
Right stick
Forward/backwards and turning
> 1,5 m/s
150 m
> 1,5 m/s
150 m
Down
Up Forwards
Backwards
Sideways Left Turn Left
Sideways Right Turn Right
> 1,5 m/s
150 m
> 1,5 m/s
150 m
> 1,5 m/s
150 m
> 1,5 m/s
150 m
> 1,5 m/s
150 m
> 1,5 m/s
150 m
The left and right sticks controls the movements of the drone under water.
Press and hold the left and right lower triggers (L2 and R2) (LB and RT) to
gradually decrease or boost the thrust power.
Decreasing the thrust is recommended in situations were higher precision
is needed, for example stable video shoots or tricky navigation. Boosting of
the thrust can be helpful when diving in higher currents or if faster motion
is needed. Note that boosting will drain the battery faster.
11
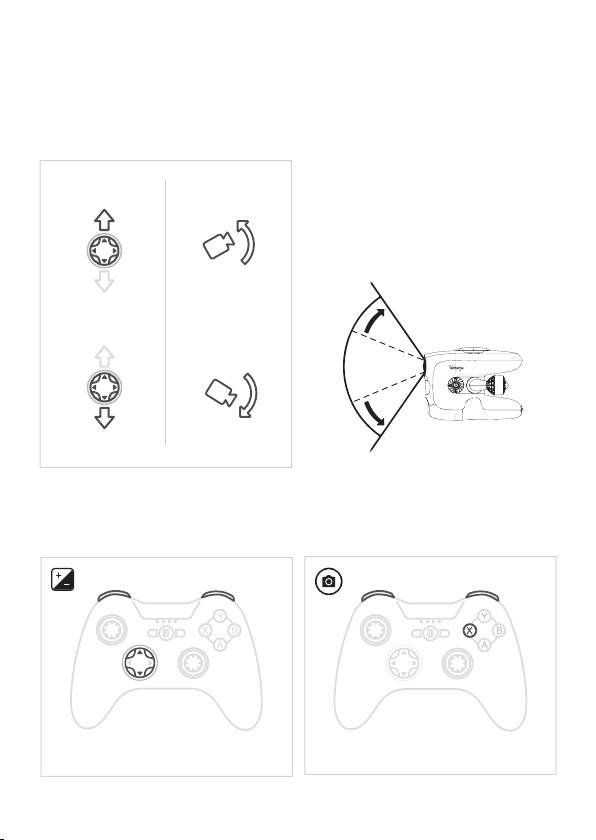
Capture still pictureAdjust camera exposure
Directional pad (D-pad)
Tilting the camera
Modifiers
Up
Down
Hold one Modifier + Press X-buttonHold one Modifier + Up/down D-pad
Use the D-pad buttons to tilt the drone
camera upwards and downwards.
Tilting the camera will allow you to
increase the vertical field of view.

12
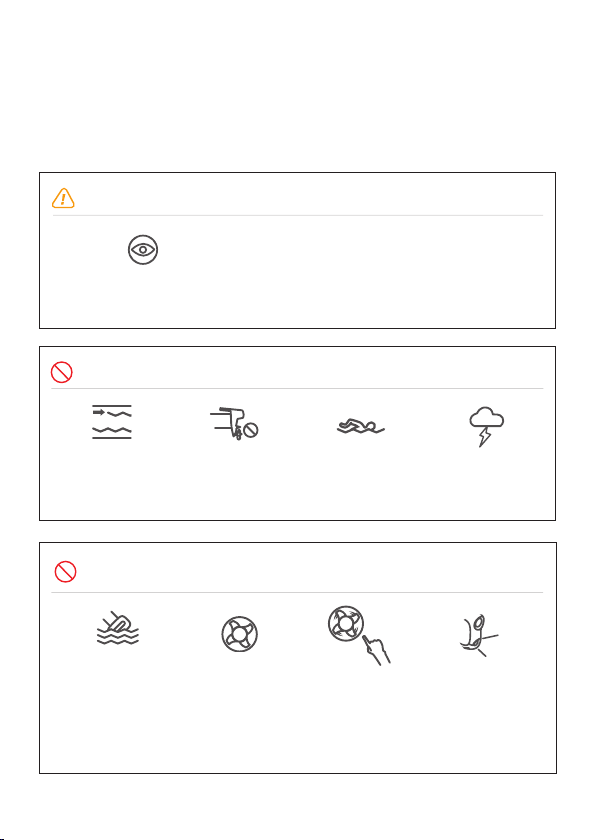
Dive down to 305 m. The drone can handle rain
and snowy weather.
Avoid diving close
to precious corals.
In areas with lots of electromagnetic interference you may experience lag or ar-
tefacts in the video stream. Electromagnetic interference may be caused by large
steel or concrete structures or areas with lots of other Wi-Fi activity. To resolve
this you can try to move closer to the surface unit or move to another location.
Beware
Beware of Wi-Fi limitations
Ok to dive
Evaluating conditions and safety
Avoid diving in
unknown water with
very poor visibility.
Dive in open water.
Beware of struc-
tures and rocks
where the tether
may get stuck.
Beware in areas
with kelp and
seaweed as the
tether may get
stuck.
> 1,5 m/s
150 m
> 1,5 m/s
150 m
> 1,5 m/s
150 m
> 1,5 m/s
150 m
> 1,5 m/s
150 m
> 1,5 m/s
150 m
> 1,5 m/s
150 m
Do your first few dives in line of sight in calm waters to get accustomed to the
controls and the behaviour of the vehicle.
> 1,5 m/s
150 m
> 1,5 m/s
150 m
> 1,5 m/s
150 m
> 1,5 m/s
150 m
> 1,5 m/s
150 m
305 m
13
Beware
> 1,5 m/s
150 m
NEVER drop the
surface unit into
water.
DO NOT spin thrusters
in air, they rely on
water as lubricant for
the bearings.
DO NOT touch spin-
ning propellers.
DO NOT turn on
the lights in air to
prevent the LEDs
from overheating.
> 1,5 m/s
150 m
> 1,5 m/s
150 m
> 1,5 m/s
150 m
SAFETY
DO NOT DIVE
During thunder
storms.
Currents greater
than 1,5 m/s.
Keep tether away from
propellers.
> 1,5 m/s
150 m
> 1,5 m/s
150 m
> 1,5 m/s
150 m
> 1,5 m/s
150 m
> 1,5 m/s
150 m
Keep a safe distance
of 20 m from people.
> 1,5 m/s
150 m
Children should only operate
under the supervision of adults.
14
Preparing for launch
80% 20%
Make sure the batteries on the
drone, surface unit, controller and
mobile device are at least 80%
charged before you go diving.
When the battery in the drone
reaches 20% when diving, go back
to shore.
Make sure to place the tether reel
in a steady and secure position, to
avoid that the reel and surface unit
gets dragged into the sea.
It’s recomended to tie/secure the
reel to something stationary, like the
boat, dock railing or a tree.

15
Sea water and fresh water have different density, and ballast weights are
provided to compensate for the difference.
Configurations:
Fresh water: no ballast weights
Brackish water: 1 ballast weight
Salt water: 2 ballast weights
Variations in salinity may occur. Always check that the drone floats before
diving. If not, remove a plate.
Ballast weights

16
Turn on & connect
Download the Blueye App. Search for
“Blueye” in the App Store or Google
Play. To avoid interruptions during the
dive, put the mobile device in Airplane
mode before diving. Make sure that
Wi-Fi and Bluetooth are still on.
Turn on the surface unit by pressing
the power-on button. The power button
will light up and the surface unit will
initialize. The battery status LEDs will
sweep from side to side. Once the
initialization is completed the battery
status LEDs will show the current
battery charge.
Turn on the drone by putting the “ON”
side of the magnet against the LED
light window until a melody is played
and lights start blinking. The magnet is
attached to the reel.
Connect the drone to a mobile
device: go to Wi-Fi settings, connect
to “Blueye_XXXXXX” . The default
password is: 1234567890.
17
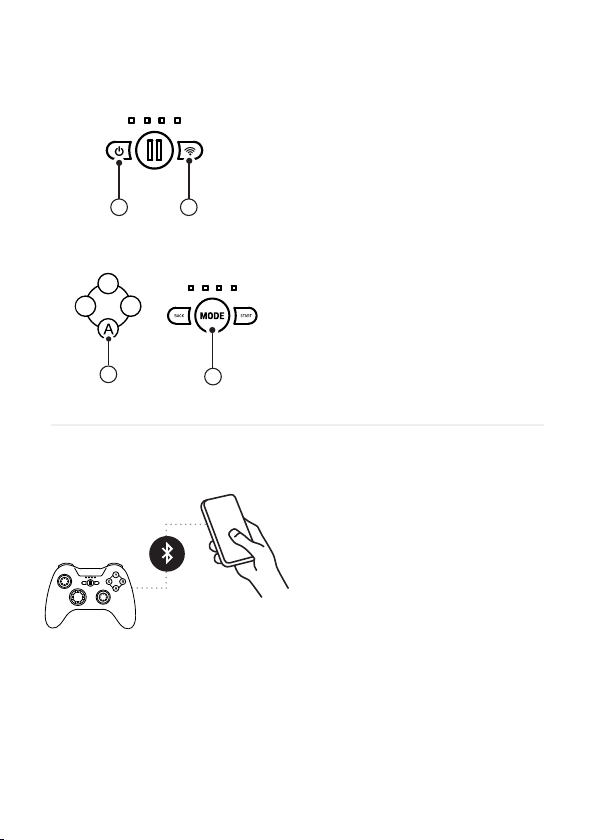
Turn the controller in pairing mode
iOS: Press and hold the power button
(1) until all LEDs start blinking red,
then hold the Bluetooth button (2) for
about 5 seconds until the LEDs start
blinking at a faster rate.
Android: Press A button (1) and then
the MODE button (2) at the same time
until a blue LED starts blinking at a
fast rate.
Connect the controller
To connect the controller to a mobile
device, go to Bluetooth settings and
select the controller. The name of
the iOS controller is Speedy Gaming
Controller and on Android the
name is PXN-9613. (May appear as
«00:11:22:33:FF:EE» first time).
If the controller is not found or you
are unable to connect, re-start the
controller and turn Bluetooth off/on.
L1L2 R1 R2
21
LTLB RB RT
LTLB RB RT
1 2
18
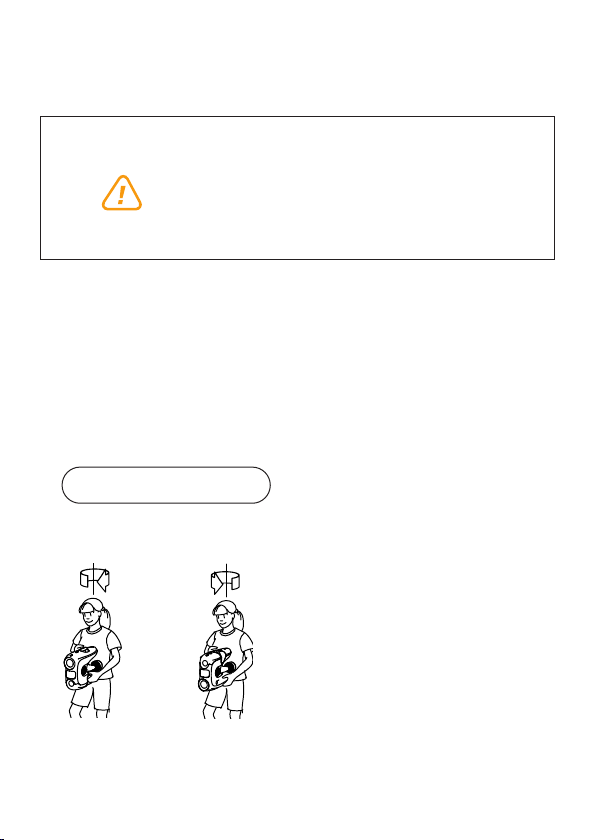
Calibrating the drone compass
2. Hold the drone vertically and turn
around 360°. Flip the drone upside
down and turn back around 360°.
It is recommended to calibrate the compass in the following situations:
• Before the first dive after receiving your drone
• Diving at a new location after traveling with your drone
• When the Blueye app warns you that the compass needs calibration
1. Tap the “Compass Calibration”
button under “Drone Settings” in
the app, then follow the on-screen
instructions.
Do not calibrate you compass where there is a
chance of strong magnetic interference, such
as magnetite, large steel structures or steel
reinforcements underground.
> 1,5 m/s
150 m
Compass Calibration

19
3. Hold the drone lying on its side
and turn around 360°. Flip the
drone so that it is lying on its other
side and turn back around 360°.
4. Hold the drone with the camera
pointing up and turn around
360°. Flip the drone so that the
camera is pointing down and
turn back around 360°.
5. Place the drone securely on a
horizontal surface and tap “Finish
calibration” in the app. Wait for
the drone to finish the calibration
process.
20
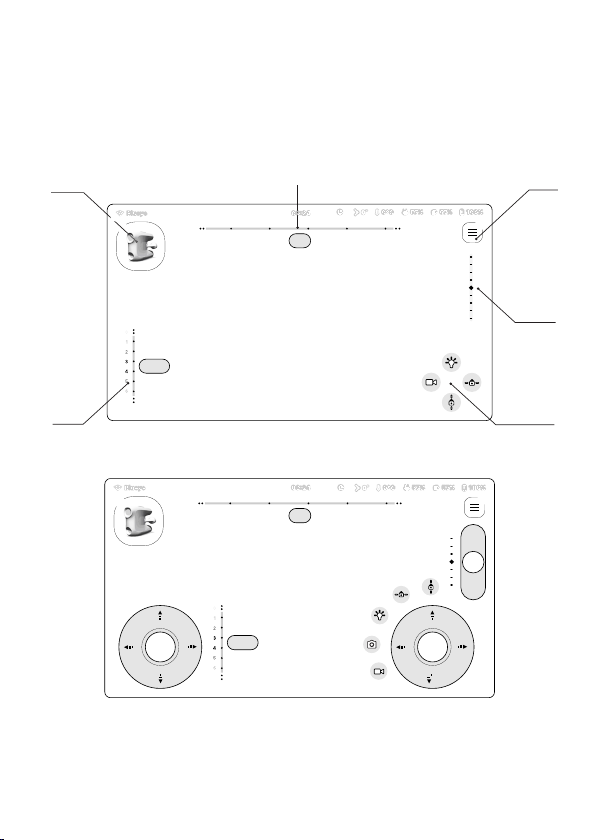
App
App layout
3D-view of drone
(Heading relative to you) Menu
Function buttons
Tilt
Depth
Heading
Tap the screen to open the touch interface controller.
35°
3,6 m
45° R1
90° 135°360°315°
L1
3,6 m
35°
45° R1
90° 135°360°315°
L1
Table of contents
Other BluEye Drone manuals


