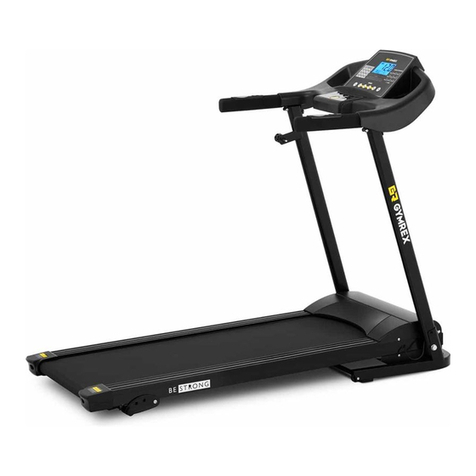
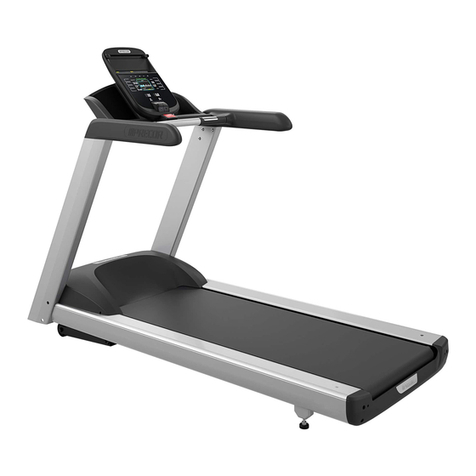
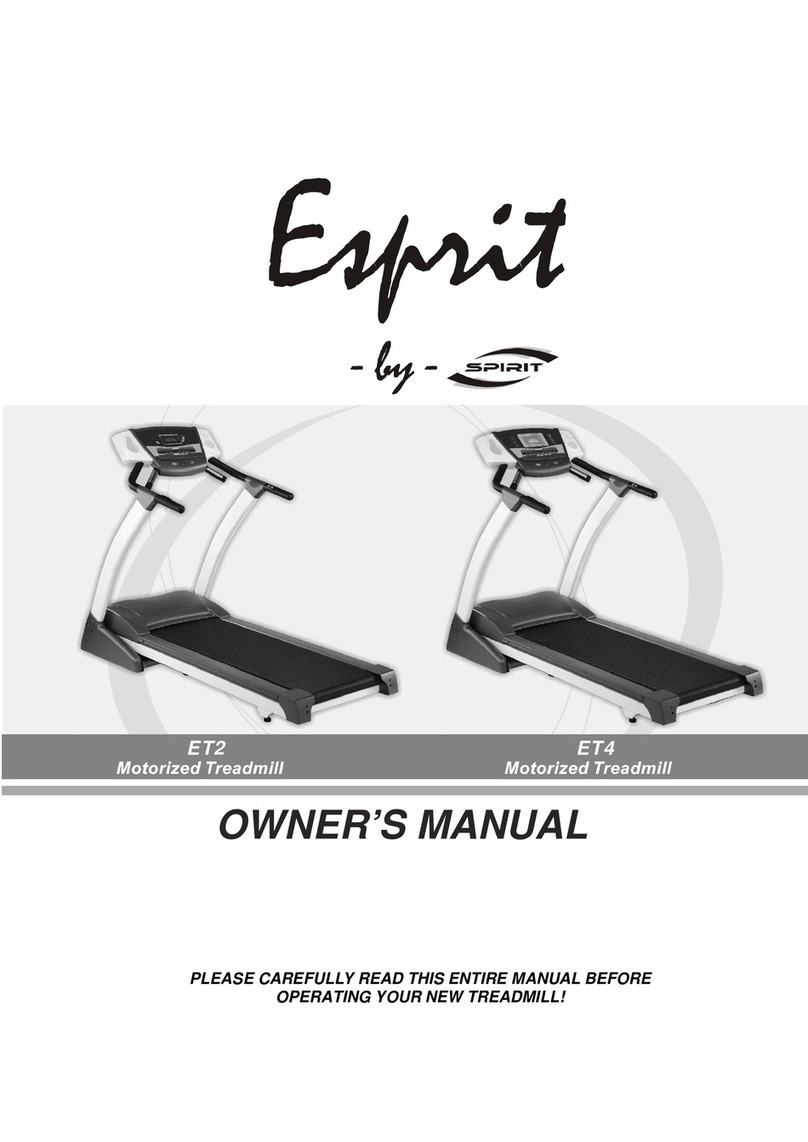
BluMill HSM-T09D5 User manual

MANUAL
GEBRUIKSAANWIJZING
MODE D’EMPLOI
ANLEITUNG

2 3
SAFETY INSTRUCTIONS
You should consult a physician before beginning any exercise program this
is especially important if you are pregnant, sick injured or have a pre-existing
medical condition.
If whilst using the treadmill you feel dizzy, faint, short of breath or any pain
STOP using the treadmill immediately and consult a physician.
When using electrical products, you should follow normal safety procedures,
especially if there are children or pets around.
• Place the treadmill at on the ground away from water and heat.
• Avoid placing the treadmill on thick carpet - it should be placed on a at
clean surface allowing air to circulate around it freely to avoid ove-heating
the motor.
• To fold and unfold the treadmill, refer to the Folding Instructions section
below.
• To turn on the treadmill, connect the power cord to the wall and turn on the
red On/Off switch at the back of the treadmill and avoid sharing the power
outlet with other electrical products.
• Grounding electrical equipment is important and reduces the risk of
electrical shock. The electrical cord and plug provided with the treadmill are
grounded therefore a grounded power outlet must be used to avoid injury.
• Always check the running belt alignment each time you use the treadmill
-the running belt will move to one side with use - to align the running belt
correctly and tighten it when it becomes sticky under foot and loose, refer to
the Belt Alignment section in page10 . It’s important you do this correctly to
avoid injury.
• To start the treadmill, place the safety key on the yellow circle on the Control
Pad and attach the clip to your clothing. Note, the treadmill will not start
unless you place the safety key on the yellow circle.
• START the treadmill at the lowest speed and hold onto the handrests. Note,
there should be a 3 second countdown before the running belt begins to
move.
• In the event the treadmill malfunctions, PULL the safety key from the Control
Pad – the treadmill will stop immediately, turn OFF the red power switch at
the back of the treadmill, disconnect the power, and contact the customer
care team for further instructions.
• Regular maintenance will prolong the life of your treadmill and prevent injury
– refer to the Troubleshooting section in page12.
• Always use proper lifting techniques and/or assistance when lifting or
moving the treadmill to avoid injury.
• Never leave the treadmill unattended or plugged in especially if there are
young children around.
• Always turn the treadmill OFF at the wall and remove the plug when it’s not
in use – this applies when you are cleaning or moving the treadmill.
• The treadmill is not suitable for children under 14 years of age or for people
with physical conditions unless supervised by an adult.
• The treadmill is designed for home use only and should only be used indoors
in a clean dry area.
EN EN
Please ensure you read the User Manual and Safety
Instructions carefully prior to operating this treadmill.

4 5
EN EN
TREADMILL Android:
Download your favorite application from the Google PlayStore.
iPad/iPhone:
Download your favorite application from the AppStore.
Check if your mobile device conrms the requirements for the application.The require-
ments of each application are shown in the Google PlayStore or AppStore.
GEBRUIK:
1. Turn on the Bluetooth function of your mobile device.
2. Open the application on your device.
3. Click on in the main menu on the button,,Indoor “ to searth for available devices.
4. Choose the show device from the list to pair it.
Once the device is paired you can start using the application in diffrerent categories:
Quick Run
Map Mode
Target Mode
Please understand that we are not able to offer you a complete opera-
tion guide of application inside this manual, as the app will be updated
from time. This process can make changes to the operation or the
design of the application.
Please refer to the instructions inside the specic app download store or contact us.
12
4
5
6
7
8
9
10
11
12
13
14
45
3
1. Control Pad
2. iPad Holder
3. Control Pad Sensor Wires
4. Handrests
5. Motor Cover
6. Running Belt Safety Rails
7. Rear Cover
8. Manual Incline (three levels
9. Running Belt
10. Transport wheels
11. Safety Lock
12. Upper Frame
13. Safety Lock (Expandable)
14. Hand Pulse
15. Emergency Safety Key
This product is not intended to be used by persons including children with redu-
ced physical abilities unless supervised.
If the power cord is damaged, it must be replaced by the manufacturer, agent or
a qualied person in order to avoid injury or damage.

6 7
EN EN
TECHNICAL SPECS
PRODUCT FEATURES
• Model: HSM-T09D5
• User Manual
• Handrests with padded foam
• Hand Pulse
• Running surface 100*34CM
• Speed range: 1-10KM/H
• 12 pre-set programs / 1 manual
• 4 Speed Quick Start Keys
• Fitshow APP
• iPad Holder
• 2 Water Bottle Holders
• Safety Key (emergency stop)
• Manual Incline(3 levels)
• Transport wheels
• Easy to Use Control Pad displaying
Speed, Time, Distance, Calories, Pulse
and Pre-set Programs
Product Dimensions
(Unfolded)
126 x 60 x 120cm Motor Power 735W
Product Dimensions
(Folded)
120 x 60 x 68cm Rated Voltage/
Frequency
220-240V 50 /
60Hz
Max User Weight 110kg Machine Weight 24kg
CE Certied
LCD Display Speed, Time, Distance, Calories,Pulse
WHAT’S IN THE BOX
Remove the treadmill and other components from the packaging – save the packaging
until you have fully assembled and tested the treadmill. Note, returns must be returned in
the original packaging for safety reasons.
If any of the components are missing, damaged in transit or simply don’t work, please
contact the Customer Care team immediately for further instructions. Note, do not try to
resolve any issues yourself as this could lead to further damage or injury.
TOOL KIT
• Allen Key x 1
• Lubricant x 1
• Safety Key (emergency stop) x 1
• Decorative Handrest Cover x 2
• Safety Locks (to fold and unfold) x 2
• Control Pad Locks x 2
ASSEMBLY INSTRUCTIONS
5 easy steps to assemble your treadmill then you’re ready to workout.
Treadmill Frame Handrests, Control Pad
and iPad Holder
Tool Kit
Step 1Step 2Step 3Step 4Step 5
Place the Treadmill
frame on the ground,
pull the spring cotter to
open the frame upright.
Screw the safety lock in
place to keep the frame
upright and secure.
Screw off bolts/washers on two stand co-
lumns ,x the handrests and Control Pad onto
the stand columns, using the bolts/washers
to x and place the decorative covers over
the bolts.
Connect the Control Pad signal cable (A) to
the signal cable on the frame (B).
Screw off the small silver bolt on the back-
side of control panel. Mounting the control
panel Align the control panel and iPad Holder
with two black screws, screwing in place
tightly by hand. WARNING - Internal wire, do
not rotate the control panel!
borgpen

8 9
EN EN
FOLDING INSTRUCTIONS OPERATING INSTRUCTIONS
Safety key
To start the treadmill, the Safety Key must be attached to the Control Pad (yellow circle)
and your clothing. Note, the treadmill will not start unless you do this.
You can STOP the treadmill at any time by pulling the Safety Key off the Control Pad – the
treadmill will STOP immediately.
Starting the treadmill
Turn the power on at the wall and turn the red power switch on at the back of the
treadmill and place the Safety Key on the Control Pad.
Now press the START key - the Control Pad will beep and the LCD display will light up –
the treadmill is now in Standby Mode.
Now select the Manual Mode or a Pre-set Program by referring to the instructions below.
Selecting the PRE-SET programs
There are 12 pre-set programs for you to choose - refer to table below and the Charts on
the Control Pad to determine the degree of diculty for each program.
1. To select a pre-set program, keep pressing the PROG key to switch between
programs.
1. Now change the TIME by using the Speed + and Speed - keys then press the START
key to start the treadmill and a 3 second countdown will begin(Time range 5-99
minutes).
TO FOLDTO UNFOLD
After using, unscrew the safety lock on the bottom frame and place it in the safety lock
holder, fold the treadmill and pull the spring cotter out from the upper frame and release
to lock the treadmill in an upright position.
Release the spring cotter and lower the bottom frame to the ground. Screw the safety
lock to the bottom frame to lock the upper frame in an upright position.

10 11
EN EN
Note, a 3 second countdown will begin each time the program is ready to change speeds.
During speed changes, hold onto the handlebars to ensure you won’t fall off from the
running belt and pull the Safety Key to stop the treadmill if you feel unstable or fall.
Note, the speeds for the pre-set programs are xed and cannot be changed.
The speed changes every time interval as per the table below (the time interval depends
on the time you set)
RUNNING BOARD/BELT MAINTENANCE
RUNNING BOARD/BELT MAINTENANCE
The treadmill running belt has been pre-lubricated prior to leaving the factory.
With use the running belt will move to the left or right and become loose. In order to
protect your investment and prolong the life of your treadmill it’s important to know how
to lubricate, tighten and align the running belt correctly.
For this reason, refer to the instructions below.
RUNNING BOARD/BELT LUBRICATION
Lubricating under the running belt will ensure superior performance and extend its life
expectancy. After the rst 25 hours of use (or 2-3 months) apply some lubricant, and
repeat for every following 50 hours of use (or 5-8 months).
How to check running belt for proper lubrication
Lift one side of the running belt and feel the top surface of the running deck. If the surface
is slick to the touch, then no further lubrication is required. If the surface is dry to the
touch, apply some lubricant.
How to apply lubricant
Lift one side of running belt.
Pour some lubricant under the centre of the running belt on the top surface of the
running deck. Run on the treadmill at a slow speed for 3 to 5 minutes to evenly distribute
lubricant.
NOTE: DO NOT over lubricate running deck. Any excess lubricant that comes out should
be wiped off.
Manual Mode
To select the Manual Mode, press the MODE key.
Use the Speed + and Speed – keys to change the default TIME or DISTANCE.
Now press the START key and a 3 second countdown will begin.
To change the speed, use the Quick Start Speed keys or the Speed + and Speed - keys.
Stopping the treadmill
To stop the treadmill at any time, simply press the STOP key or remove the Safety Key
from the Control Pad.
Turning off the treadmill
When you are nished, press the STOP key, turn the red power switch OFF at the back of
the treadmill, turn the power OFF at the wall, and remove the plug from the wall.
Refer to the Maintenance section for more information on how to maintain your treadmill.
Program Speed (km/h) per segment
P1 23345345534544423353
P2 2445646664564442254 2
P3 2446647774774442453 2
P4 3 5567757788595566443
P5 2445677567885446554 2
P6 24345487578364425432
P7 2333453453453336653 3
P8 23367746744467444232
P9 24477478489944456332
P10 2 4 567546886654424433
P11 3 4 595955599555998763
P12 2 5 8
10
7 7
10 10
7 7
10 10
6699554 3
Lubricant 1 PC

12 13
EN EN
RUNNING BELT ALIGNMENT
We strongly recommend you check the alignment of the running belt when you take it out
of the box to ensure it has moved during transit and before or after each workout to avoid
injury. Adjust the left and right sides at the same time to keep the running belt tight and
centered.
ADJUST A LOOSE RUNNING BELT
With use, the running belt will become loose. A simple way to check if the running belt is
loose it is will bunch up in the middle of the belt. If you are running on the belt and it feels
unstable (wobbly) or your feet are sticking to the belt, STOP the treadmill immediately and
tighten the belt to avoid injury.
1. Place the treadmill on a at level surface.
2. To adjust the tightness of the belt, STOP the treadmill.
3. Use the Allen key provided and turn the end cap screw a ¼ turn clockwise - see
illustration C.
4. START the treadmill on a medium speed - check the belt is centered, if not keep
turning the screw a ¼ turn clockwise at a time until the belt is centered.
AC
B
MAINTENANCE
Regular maintenance will prolong the life of your treadmill and prevent injury. We strongly
recommend that you do the following on a regular basis -
1. Remove the power cord from the wall after use, especially if children are around.
2. It’s especially important to keep the running belt, safety side rails and the oor under
the belt clean and free of dust and dirt to avoid increased wear and tear and possible
damage to the treadmill.
3. Clean the treadmill after use with a dry cloth to clean the Control Pad and areas
around the Power Switch - use a soft cloth and cleanser to remove stubborn stains
and dirt off the Running Belt.
4. Check the running belt alignment each time before you use the treadmill (it will move
with use) - refer to the Adjusting the Running Belt section above.
5. Keep the running belt lubricated - refer to the Running Belt Maintenance section.
6. Keep the treadmill in a safe dry place away from heat and water.

14 15
VEILIGHEIDSINSTRUCTIES
Raadpleeg een arts voordat u begint met een trainingsprogramma. Dit geldt
met name voor zwangere vrouwen, zieken en personen met een zwakke
gezondheid.
Als u tijdens het gebruik van de loopband last krijgt van duizeligheid,
kortademigheid of pijn, moet u onmiddellijk STOPPEN met het gebruik van het
apparaat en een arts raadplegen.
Houd u bij het gebruik van elektrische apparaten altijd aan de gebruikelijke
veiligheidsvoorschriften, vooral met betrekking tot kinderen en huisdieren.
• Zet de loopband op een vlakke ondergrond, uit de buurt van water en
warmtebronnen.
• Zet de loopband niet op te dikke vloerbedekking. Het apparaat moet op een
gladde ondergrond staan, zodat er een goede luchtcirculatie mogelijk is en
de motor niet oververhit kan raken.
• Raadpleeg het gedeelte In- en uitklappen hieronder voor instructies voor het
in- en uitklappen van de loopband.
• Zet de loopband aan door de stekker in het stopcontact te stekken en op
de rode aan-uitschakelaar aan de achterzijde te drukken. Sluit geen andere
elektrische apparaten aan op hetzelfde stopcontact.
• Gebruik een geaard stopcontact om het risico van een elektrische schok te
voorkomen.
• Controleer altijd de uitlijning van de loopband voordat u het apparaat
gebruikt, want de band kan opzijschuiven bij gebruik. Raadpleeg het gedeelte
Band afstellen op pagina 10 voor informatie over het uitlijnen en op spanning
brengen van de band als die te los zit. Zorg dat u dit op de juiste manier doet,
om letsel te voorkomen.
Lees de gebruiksaanwijzing en veiligheidsinstructies
zorgvuldig door voordat u de loopband gebruikt.
NL
TROUBLESHOOTING
We raden u ten zeerste aan de uitlijning van de band te controleren wanneer u het
apparaat uit de verpakking haalt, omdat de band mogelijk is verschoven tijdens het
transport. Controleer de uitlijning ook voor of na elk gebruik.
Stel de band altijd zowel links als rechts af om deze goed strak en in het midden te
houden.
REF PROBLEM SOLUTION
1THERE IS NO
DISPLAY ON THE
CONTROL PAD.
Check the power outlet and the switch at the back of the
treadmill are turned ON.
Check the Control Pad sensor wires are connected to
the frame (A) and (B) - refer to the Assembly instructions
above. Place the Safety Key magnet on the yellow circle
on the Control Pad and attach the safety cord to your
clothing. Press the START key on the Control Pad - the
running belt should move after 3 seconds.
If there is no change, try a different power outlet.
Note, the Control Pad will automatically turn off when
not in use. Failing this, call Customer Care.
2THERE IS NO
DISPLAY ON THE
CONTROL PAD.
Check the voltage - it could be too low. Try a different
power outlet. Check the Safety Key is attached to the
Control Pad.
If there is no change, call Customer Care.
3THE RUNNING BELT
IS LOOSE.
Refer to the Running Belt Maintenance section above.
Refer to the how to video on the Salus Sports website.
If there is no change, call Customer Care.
4THE RUNNING BELT
HAS MOVED TO THE
RIGHT OR LEFT.
Refer to the Running Belt Maintenance section above.
Refer to the how to video on the Salus Sports website.
If there is no change, call Customer Care.
5THE ANTI-STATIC
AGENT HAS WORN
OFF
Lubricate the treadmill after approximately 80 hours
of use or try the test of rubbing your hand between the
board and the belt to see if it is dry.
Refer to the Running Belt Maintenance section above.
Refer to the how to video on the Salus Sports website.
If there is no change, call Customer Care.

16 17
• Start de loopband door de magneet van het noodstopkoord in de gele cirkel
op het bedieningspaneel te plaatsen en de clip aan uw kleren te bevestigen.
Let op: De loopband start niet totdat u de magneet op de cirkel plaatst.
• START de loopband op de laagste snelheid en houd de handgrepen vast. Let
op: Er wordt gedurende 3 seconden afgeteld voordat de loopband begint te
bewegen.
• Als de loopband niet goed werkt, trekt u het noodstopkoord van het
bedieningspaneel om de loopband onmiddellijk te laten stoppen. Zet het
apparaat uit met de aan-uitschakelaar aan de achterzijde, haal de stekker uit
het stopcontact en neem contact op met de klantenservice.
• Regelmatig onderhoud is noodzakelijk voor het verlengen van de levensduur
van de loopband en het voorkomen van letsel. Raadpleeg het gedeelte
Problemen / storingen oplossen op pagina 12.
• Zorg dat u de loopband altijd op de juiste manier tilt. Vraag indien nodig
iemand om hulp bij het tillen of verplaatsen van de loopband, om letsel te
voorkomen.
• Laat de loopband niet onbeheerd achter met de stekker in het stopcontact,
met name wanneer er jonge kinderen in de buurt zijn.
• Zet de loopband altijd UIT met de aan-uitschakelaar en haal de stekker uit
het stopcontact wanneer u het apparaat niet gebruikt. Doe dit ook wanneer u
de loopband schoonmaakt of verplaatst.
• De loopband is niet bedoeld om zonder toezicht te worden gebruikt door
kinderen jonger dan 14 jaar en personen met een lichamelijke beperking.
• De loopband is alleen bedoeld voor gebruik thuis en op een schone, droge
LOOPBAND
12
4
5
6
7
8
9
10
11
12
13
14
45
3
1. Bedieningspaneel
2. iPad-houder
3. Sensorkabels bedieningspaneel
4. Handgrepen
5. Motorbehuizing
6. Zijkanten loopband
7. Achterzijde
8. Verstelbare helling (drie standen)
9. Loopband
10. Wieltjes
11. Vergrendeling
12. Bovenkant frame
13. Borgpen (uittrekbaar)
14. Hartslagmeter hand
15. Noodstop
Dit product mag niet zonder toezicht worden gebruikt door kinderen of personen
met een lichamelijke beperking.
Wanneer het stroomsnoer beschadigd is, moet het worden vervangen door de
fabrikant of een erkend onderhoudsbedrijf om letsel en schade te voorkomen.
NL NL

18 19
Android:
Download de app bij Google Play.
iPad/iPhone:
Download de app uit de App Store.
Controleer of uw mobiele apparaat voldoet aan de vereisten voor de app. Deze worden
vermeld bij Google Play en in de App Store.
GEBRUIK:
1. Schakel Bluetooth in op het mobiele apparaat.
2. Open de app.
3. Zoek in het hoofdmenu naar beschikbare apparaten.
4. Selecteer het apparaat in de lijst om te koppelen.
Nadat het apparaat is gekoppeld, kunt u de app op verschillende manieren gebruiken:
Quick Run
Map-modus
Target-modus
Helaas kunnen we de werking van de app hier niet uitgebreid beschrij-
ven, aangezien die regelmatig wordt aangepast. Deze aanpassingen
kunnen ertoe leiden dat de app anders werkt of er anders uitziet.
Raadpleeg de instructies in Google Play of de App Store of neem contact met ons op.
TECHNISCHE GEGEVENS
KENMERKEN
• Model: HSM-T09D5
• Gebruikershandleiding
• Handgrepen bekleed met foam
• Hartslagmeter hand
• Loopoppervlak: 100 x 34cm
• Snelheidsbereik: 1-10 km/u
• 12 programma’s / 1 handmatige
modus
• 4 quickstart-knoppen met
verschillende snelheden
• Fitshow-app
• iPad-houder
• 2 eshouders
• Noodstopkoord
• Verstelbare helling (drie standen)
• Wieltjes
• Gebruiksvriendelijk display met
weergave van snelheid, tijd,
afstand, calorieën, hartslag en
voorgedenieerde programma’s.
Afmetingen
(uitgeklapt)
126 x 60 x 120cm Motorvermogen 735W
Afmetingen
(ingeklapt)
120 x 60 x 68cm Nominale spanning
/ frequentie
220-240V 50 /
60Hz
Maximaal gebrui-
kersgewicht
110kg Gewicht van
apparaat
24kg
CE-gecerticeerd
Lcd-display Snelheid, tijd, afstand, calorieën, hartslag
DE INHOUD VAN DE DOOS
Haal alle onderdelen van de loopband uit de verpakking en bewaar de verpakking totdat u
de loopband hebt gemonteerd en getest. Let op: De loopband kan alleen worden geretour-
neerd in de oorspronkelijke verpakking.
Als er onderdelen ontbreken, zijn beschadigd of niet werken, neem dan meteen contact op
met de klantenservice voor instructies. Let op: Probeer het apparaat niet zelf te repareren
om verdere schade en letsel te vermijden.
Frame Handgrepen,
bedieningspaneel en
iPad-houder
Accessoires
NL NL

20 21
ACCESSOIRES
• 1 x inbussleutel
• 1 x smeermiddel
• 1 x noodstopkoord
• 2 x afdekkapjes
• 2 x vergrendelingen (voor in- en uitklappen)
• 2 x vergrendelingen bedieningspaneel
MONTAGE
U monteert de loopband in vijf eenvoudige stappen.
Stap 1Stap 2Stap 3Stap 4Stap 5
Leg het frame op de
grond en trek aan de
borgpen om het frame
uit te klappen.
Draai de vergrendeling
vast om het frame ste-
vig rechtop te houden.
Schroef de bouten en ringen los van de twee
verticale delen, bevestig de handgrepen,
schroef de bouten met ringen weer vast en
plaats de kapjes over de bouten.
Sluit de signaalkabel van het bedie-
ningspaneel (A) aan op de kabel op het frame
(B).
Draai het schroefje aan de achterzijde van het
bedieningspaneel los. Bevestig het bedie-
ningspaneel en de iPad-houder met de twee
zwarte schroeven. WAARSCHUWING! Draai
het bedieningspaneel niet om schade aan de
interne bedrading te voorkomen!
borgpen
IN- EN UITKLAPPEN
INKLAPPENUITKLAPPEN
Draai na gebruik van de loopband de vergrendeling aan de onderkant van het frame los
en bewaar die in de houder. Klap de loopband in en gebruik de borgpen om het apparaat
rechtop vast te zetten.
Trek de borgpen naar buiten en laat het frame voorzichtig op de grond zakken. Draai de
vergrendeling vast aan de onderkant van het frame om het apparaat vast te zetten.
NL NL

22 23
GEBRUIKSAANWIJZING
Noodstopkoord
Start de loopband door de magneet van het noodstopkoord in de gele cirkel op het
bedieningspaneel te plaatsen en de clip aan uw kleren te bevestigen. Let op: De loopband
start niet totdat u de magneet in de cirkel plaatst. U kunt de loopband op elk moment
STOPPEN door het noodstopkoord van het bedieningspaneel te trekken.
De loopband starten
Steek de stekker in het stopcontact en zet de loopband aan met de rode schakelaar aan
de achterzijde. Plaats de magneet van het noodstopkoord op het bedieningspaneel.
Druk op de knop START. Het bedieningspaneel piept en het lcd-display gaat aan. De
loopband staat nu in stand-by.
Zie de instructies hieronder voor het selecteren van het handmatige programma of een
van de voorgedenieerde programma’s.
Een programma selecteren
U kunt kiezen uit 12 voorgedenieerde programma’s. In de onderstaande tabel en op het
display van het bedieningspaneel ziet u de moeilijkheidsgraad van elk programma.
1. Druk herhaaldelijk op de knop PROG om een van de programma’s te selecteren.
2. Stel de tijd in met de knoppen SPEED+ en SPEED- en druk vervolgens op START om
de loopband te starten na 3 seconden aftellen. U kunt een tijd instellen tussen 5 en
99 minuten.
Let op: Bij elke snelheidsverandering in het programma wordt 3 seconden afgeteld.
Houd bij een snelheidsverandering de handgrepen vast om te voorkomen dat u valt. Trek
het noodstopkoord van de loopband als u niet stevig staat of dreigt te vallen.
Let op: U kunt de snelheden van de voorgedenieerde programma’s niet aanpassen.
De snelheidsveranderingen staan aangegeven in de onderstaande tabel. De intervallen
zijn afhankelijk van de door u ingestelde tijd.
Handmatige stand
Druk op de knop MODE om de handmatige stand te selecteren.
Druk op de knoppen SPEED+ en SPEED- om de tijd of afstand aan te passen.
Druk op START; het apparaat telt 3 seconden af.
Als u de snelheid wilt wijzigen, drukt u op een van de Quickstart-knoppen of SPEED + en
SPEED-.
De loopband stoppen
U kunt de loopband op elk moment stoppen door op STOP te drukken of het
noodstopkoord van het bedieningspaneel te trekken.
De loopband uitzetten
Wanneer u klaar bent, drukt u op de knop STOP, zet u het apparaat uit met de rode aan-
uitschakelaar aan de achterzijde en haalt u de stekker uit het stopcontact.
Raadpleeg het gedeelte Onderhoud voor informatie over het onderhouden van de
loopband.
Programma Snelheid (km/u) per segment
P1 23345345534544423353
P2 2445646664564442254 2
P3 2446647774774442453 2
P4 3 5567757788595566443
P5 2445677567885446554 2
P6 24345487578364425432
P7 2333453453453336653 3
P8 23367746744467444232
P9 24477478489944456332
P10 2 4 567546886654424433
P11 3 4 595955599555998763
P12 2 5 8
10
7 7
10 10
7 7
10 10
6699554 3
NL NL

24 25
ONDERHOUD VAN LOOPVLAK EN BAND
De loopband van het apparaat is in de fabriek gesmeerd.
De band kan naar links of rechts verschuiven of losser komen te zitten door uw gebruik
van de loopband. Om de levensduur van uw loopband te verlengen, is het belangrijk om te
weten hoe u de band op de juiste manier smeert, spant en uitlijnt.
Raadpleeg de instructies hieronder.
SMEREN VAN LOOPVLAK EN BAND
Een goede smering onder de band zorgt voor de beste prestaties en een lange levensduur.
Breng na de eerste 25 uur gebruik (of 2-3 maanden) wat smeermiddel aan en herhaal dit
na elke 50 uur gebruik (of 5-8 maanden).
De smering van de band controleren
Til een kant van de band omhoog en voel aan de bovenkant van het loopvlak. Als het
oppervlak glad aanvoelt, hoeft u niet te smeren. Als het oppervlak droog aanvoelt, brengt
u een beetje smeermiddel aan.
Smeermiddel aanbrengen
Til een kant van de band omhoog. Druppel wat smeermiddel op het loopvlak, onder
het midden van de band. Loop ca. 5 minuten op lage snelheid op de loopband om het
smeermiddel gelijkmatig te verdelen.
LET OP: Gebruik niet TE VEEL smeermiddel. Veeg overtollig smeermiddel weg met een
droge doek.
smeermiddel
BAND AFSTELLEN
We raden u ten zeerste aan de uitlijning van de band te controleren wanneer u het
apparaat uit de verpakking haalt, omdat de band mogelijk is verschoven tijdens het
transport. Controleer de uitlijning ook voor of na elk gebruik.
Stel de band altijd zowel links als rechts af om deze goed strak en in het midden te
houden.
LOSSE BAND AFSTELLEN
De band gaat losser zitten naarmate u het apparaat gebruikt. De band zit te los als u ziet
dat deze in het midden opbolt. Als u op de band loopt en deze niet stabiel aanvoelt of
aan uw voeten blijft plakken, moet u de loopband onmiddellijk STOPPEN en de band op
spanning brengen om letsel te voorkomen.
1. Zet de loopband op een vlakke ondergrond.
2. STOP de loopband voordat u de band gaat spannen.
3. Draai de schroef aan het uiteinde van het frame een kwartslag naar rechts met de
inbussleutel, zie afbeelding C.
4. START de loopband op gemiddelde snelheid en controleer of de band in het midden
zit. Als dat niet het geval is, draait u de schroef nogmaals een kwartslag. Herhaal
totdat de band goed gecentreerd is.
AC
B
NL NL

26 27
PROBLEMEN OPLOSSEN
We raden u ten zeerste aan de uitlijning van de band te controleren wanneer u het
apparaat uit de verpakking haalt, omdat de band mogelijk is verschoven tijdens het
transport. Controleer de uitlijning ook voor of na elk gebruik.
Stel de band altijd zowel links als rechts af om deze goed strak en in het midden te
houden.
ONDERHOUD
Regelmatig onderhoud is noodzakelijk voor het verlengen van de levensduur van de
loopband en het voorkomen van letsel. We raden u ten zeerste aan om het volgende te
doen:
1. Haal de stekker uit het stopcontact na gebruik, met name als er zich kinderen in de
buurt bevinden.
2. Houd de loopband, de zijkanten en de vloer onder het apparaat schoon en vrij
van stof en vuil, om overmatige slijtage en mogelijke schade aan de loopband te
voorkomen.
3. Maak het bedieningspaneel en het gebied rond de aan-uitschakelaar na gebruik
schoon met een droge doek. Hardnekkige vlekken en vuil op de band kunt u
verwijderen met een zachte doek en schoonmaakmiddel.
4. Controleer de uitlijning van de band voor elk gebruik van het apparaat. Raadpleeg het
gedeelte Band afstellen hierboven.
5. Zorg dat de band goed gesmeerd is. Raadpleeg het gedeelte Onderhoud van loopvlak
en band hierboven.
6. Zet de loopband op een veilige en droge plaats, uit de buurt van water en
warmtebronnen.
NR. PROBLEEM OPLOSSING
1ER WORDT NIETS
WEERGEGEVEN OP
HET DISPLAY.
Controleer of de stekker in het stopcontact zit en het
apparaat is ingeschakeld met de aan-uitschakelaar aan
de achterzijde. Controleer of de kabel van het bedie-
ningspaneel is aangesloten op de kabel van het frame,
raadpleeg de montage-instructies. Plaats de magneet
van het noodstopkoord in de gele cirkel op het bedie-
ningspaneel en bevestig de clip aan uw kleren. Druk op
de knop START op het bedieningspaneel. De band begint
na 3 seconden te draaien. Als het probleem hiermee niet
is opgelost, probeert u een ander stopcontact. Houd er
rekening mee dat het bedieningspaneel automatisch
uitschakelt wanneer u het apparaat niet gebruikt. Bel de
klantenservice als u het probleem niet kunt oplossen.
2HET BEDIE-
NINGSPANEEL IS
AAN, MAAR DE MO-
TOR DRAAIT NIET.
Controleer of de elektrische spanning niet te laag is.
Probeer een ander stopcontact. Controleer of de magneet
van het noodstopkoord zich op het bedieningspaneel
bevindt. Bel de klantenservice als u het probleem niet kunt
oplossen.
3 DE BAND ZIT LOS. Raadpleeg het gedeelte Onderhoud van loopvlak en band
hierboven.
4DE BAND IS NAAR
RECHTS OF LINKS
VERSCHOVEN.
Raadpleeg het gedeelte Onderhoud van loopvlak en band
hierboven.
5 DE BAND IS NIET
MEER ANTISTA-
TISCH.
Smeer de loopband na ca. 80 uur gebruik. Voel tussen het
loopvlak en de band of de oppervlakken niet te droog zijn.
Raadpleeg het gedeelte Onderhoud van loopvlak en band
hierboven.
NL NL
Denk aan het milieu!
Houd u aan de plaatselijke richtlijnen voor afvalinzame-
ling. Lever oude elektrische apparatuur in bij de daarvoor
bestemde inzamelingslocatie.

28 29
CONSIGNES DE SÉCURITÉ
Il est recommandé de consulter un médecin avant de pratiquer un programme
d’exercices physiques. Ceci est particulièrement important si vous êtes
enceinte, malade, blessé(e) ou atteint(e) d’une affection préexistante.
Si pendant l’utilisation du tapis de course, vous éprouvez des vertiges, des
étourdissements, un soue court ou des douleurs ARRÊTEZ immédiatement
votre entraînement et consultez un médecin.
L’utilisation d’un appareil électrique implique une connaissance des
procédures normales de sécurité, notamment en présence d’enfants ou
d’animaux.
• Installez le tapis de course sur un sol plat, à l’abri de l’humidité ou de la
chaleur.
• Évitez d’installer le tapis de course sur une moquette ou un tapis épais pour
permettre la circulation de l’air et éviter une surchauffe du moteur. Préférez
une surface lisse.
• Pour plier et déplier le tapis de course, suivrez les instructions du chapitre
Pliage et dépliage ci-après.
• Pour allumer le tapis de course, branchez l’appareil et appuyez sur
l’interrupteur marche / arrêt à l’arrière de l’appareil. Évitez de brancher
d’autres dispositifs électriques sur la même prise.
• Le tapis de course étant équipé d’une che avec mise à la terre, il doit être
branché sur une prise adéquate pour éviter tout risque de blessures.
• Vériez toujours l’alignement de la bande de course avant d’utiliser l’appareil.
Celle-ci se déplacera légèrement vers le côté au l de l’utilisation. Pour
aligner et xer solidement la bande de course lorsque celle-ci devient
collante ou trop lâche, consultez le chapitre Aligner la bande de course
ci-après. Il est important d’entretenir la bande de course correctement pour
éviter les blessures.
Veuillez lire ce mode d’emploi et les consignes de sécurité
avant d’utiliser ce tapis de course.
• Pour mettre en route le tapis de course, connectez la clé de sécurité
magnétique au cercle jaune de la console et attachez le clip à votre
vêtement. Remarque: Le tapis de course peut uniquement démarrer si la clé
de sécurité est connectée au cercle jaune.
• DÉMARREZ le tapis de course à la vitesse minimum et tenez-vous aux
appuie-mains. Remarque: Le tapis de course se met en mouvement après 3
secondes.
• En cas de dysfonctionnement du tapis de course, TIREZ sur la clé de
sécurité pour la déconnecter de la console. Le tapis de course s’arrêtera
immédiatement. Éteignez l’appareil en appuyant sur l’interrupteur marche
/ arrêt à l’arrière de l’appareil. Débranchez-le et contactez le Service clients
pour connaître les instructions à suivre.
• Un entretien régulier augmente la durée de vie de votre tapis de course et
réduit les risques de blessures. Consultez le chapitre Dysfonctionnements
en page 12.
• Lorsque vous soulevez ou déplacez le tapis de course, utilisez des
techniques adéquates de levage ou demandez de l’aide pour éviter de vous
blesser.
• Ne laissez jamais le tapis de course branché et/ou sans surveillance en
présence d’enfants.
• Lorsque vous n’utilisez pas le tapis de course, ou pour le déplacer ou
le nettoyer, éteignez-le en appuyant sur l’interrupteur marche / arrêt et
débranchez l’appareil.
• Le tapis de course n’est pas adapté aux enfants de moins de 14 ans ni aux
personnes aux aptitudes physiques réduites, sauf sous la surveillance d’un
adulte.
• Le tapis de course est conçu pour être utilisé exclusivement à l’intérieur,
dans un endroit propre et sec.
FR FR

30 31
DESCRIPTION
12
4
5
6
7
8
9
10
11
12
13
14
45
3
1. Console
2. Support pour iPad
3. Fils des capteurs de la console
4. Appuie-mains
5. Capot du moteur
6. Rails latéraux de sécurité
7. Bouchons
8. Inclinaison manuelle (3 niveaux)
9. Bande de course
10. Roues de transport
11. Bouton de serrage
12. Montants
13. Goupille à ressort
14. Capteurs de pouls
15. Clé de sécurité
Cet appareil n’est pas conçu pour être utilisé par des enfants ou des personnes
aux aptitudes physiques réduites, sauf sous la surveillance d’un adulte.
Si le cordon d’alimentation est endommagé, il doit être remplacé par le fabri-
cant, son agent de service ou une personne qualiée, pour éviter tout danger.
Android:
Téléchargez votre application favorite sur Google Play.
iPad / iPhone:
Téléchargez votre application favorite sur App Store.
Vériez si votre téléphone a les conditions requises pour l’installation de l’application. Les
conditions pour chaque application sont achées sur Google Play ou App Store..
INSTRUCTIONS D’UTILISATION:
1. Activez la fonction Bluetooth de votre téléphone.
2. Ouvrez l’application sur votre téléphone.
3. Dans le menu principal, cherchez les appareils Bluetooth disponibles.
4. Sélectionnez l’appareil correspondant sur la liste de votre téléphone.
5. Une fois la connexion établie, vous pouvez utiliser l’application de diverses façons:
Une fois la connexion établie, vous pouvez utiliser l’application de diverses façons:
«Quick Run»
Mode «Map»
Mode «Target»
L’application sera mise à jour régulièrement, c’est pourquoi nous ne
pouvons vous fournir un manuel complet de l’application. Les mises à
jour peuvent modier le mode de fonctionnement de l’application.
En cas de besoin, consultez les instructions sur Google Play ou App Store ou contac-
tez-nous.
FR FR

32 33
SPÉCIFICATIONS TECHNIQUES
CARACTÉRISTIQUES DU PRODUIT
• Modèle: HSM-T09D5
• Mode d’emploi
• Appuie-mains revêtement mousse
• Capteurs de pouls
• Surface de course: 100 x 34cm
• Vitesse: 1 à 10km/h
• 12 programmes préenregistrés / 1
mode manuel
• 4 touches vitesses préprogrammées
• Application Fitshow
• Support pour iPad
• 2 supports pour bouteilles d’eau
• Clé de sécurité (arrêt d’urgence)
• Inclinaison manuelle (3 niveaux)
• Roues de transport
• Console intuitive avec écran achant
vitesse, temps, distance, calories,
fréquence cardiaque et programmes
préenregistrés
Dimensions du
produit (déplié)
126 x 60 x 120cm Puissance du
moteur
735W
Dimensions du
produit (plié)
120 x 60 x 68cm Tension nominale /
Fréquence
220-240V 50 /
60Hz
Charge maximum 110kg Poids du produit 24kg
Certié CE
Écran LCD Vitesse, temps, distance, calories, fréquence cardiaque
CONTENU DU CARTON
Retirez le tapis de course et les accessoires du carton. Conservez l’emballage jusqu’au
moment où vous avez entièrement assemblé et testé le tapis de course. Remarque: Pour
des raisons de sécurité, les produits à retourner doivent être envoyés dans leur emballage
d’origine. Si une pièce manque, a été endommagée pendant le transport ou ne fonctionne
pas, contactez immédiatement le Service clients pour recevoir les instructions adéquates.
Remarque: N’essayez pas de résoudre vous-même un éventuel problème sous peine
d’aggraver le problème ou de vous blesser.
Châssis du tapis de
course
Appuie-mains, console
et support pour iPad
Kit d’accessoires
KIT D’ACCESSOIRES
• 1x clé Allen
• 1x lubriant
• 1x clé de sécurité (arrêt d’urgence)
• 2x couvercles cache-vis pour appuie-mains
• 2x boutons de serrage (pliage et dépliage)
• 2x boutons de serrage du console
ASSEMBLAGE
Assemblez votre tapis de course en 5 étapes et commencez l’entraînement.
Étape 1Étape 2Étape 3Étape 4Étape 5
Placez le tapis de course
sur le sol et tirez sur la
goupille à ressort pour le
déplier.
Vissez le bouton de ser-
rage pour sécuriser la
structure à la verticale.
Dévissez les boulons / rondelles sur les deux
montants verticaux. Vissez les appuie-mains
et la console sur les montants puis placez les
couvercles cache-vis.
Connectez le l (A) de la console au l (B) du
châssis.
Dévissez le petit boulon chromé au dos de la
console.
Montez et alignez la console puis vissez le
support pour iPad à la main avec deux vis
noires. AVERTISSEMENT – Branchements
internes, ne faites pas pivoter la console!
goupille à ressort
FR FR

34 35
PLIAGE ET DÉPLIAGE
PLIAGEDÉPLIAGE
Après utilisation, dévissez le bouton de serrage situé au bas du châssis et placez-le sur
son support. Pliez l’appareil, tirez sur la goupille à ressort et relâchez pour verrouiller
l’appareil en position pliée.
Tirez sur la goupille à ressort et dépliez l’appareil. Vissez le bouton de serrage sur le bas
du châssis pour verrouiller l’appareil en position dépliée.
INSTRUCTIONS D’UTILISATION
Clé de sécurité
Pour démarrer le tapis de course, la clé de sécurité magnétique doit être connectée à la
console (cercle jaune) et attachée à votre vêtement. Remarque: L’appareil ne peut pas
fonctionner sans avoir connecté la clé magnétique.
Vous pouvez ARRÊTER l’appareil à tout moment en tirant sur la clé de sécurité pour la
déconnecter. L’appareil s’arrête alors immédiatement.
Allumer le tapis de course
Branchez l’appareil et appuyez sur l’interrupteur rouge situé à l’arrière du tapis de course.
Connectez ensuite la clé de sécurité à la console.
Appuyez sur la touche START de la console. Après un bip, l’écran LCD s’allume. Le tapis
de course est en Mode Veille.
Sélectionnez le mode manuel ou un programme préenregistré. Pour cela, consultez les
instructions ci-après.
Sélectionner un programme préenregistré
Vous avez le choix entre 12 programmes préenregistrés. Veuillez consulter le tableau
ci-dessous et ses informations sur la console pour déterminer le niveau de diculté de
chaque programme.
1. Pour sélectionner un programme préenregistré, maintenir la touche PROG appuyée
pour naviguer entre les diverses options.
2. Maintenant adaptez la durée du programme (TIME) avec les touches SPEED + et -
pour ajouter ou soustraire des minutes (durée de 5 à 99 minutes). Appuyez ensuite
sur START pour démarrer. Le tapis se met en route au bout de 3 secondes.
FR FR

36 37
Remarque: Un compte à rebours de 3 secondes commence à chaque fois que le
programma est prêt à changer de vitesse.
Pendant les changements de vitesse, tenez-vous aux appuie-mains pour ne pas tomber.
Si vous vous sentez trop instable ou en cas de chute, tirez sur la clé de sécurité pour
arrêter le tapis de course.
Remarque: La vitesse des programmes préenregistrés est xe et ne peut pas être
modiée.
La vitesse change à chaque intervalle de temps comme indiqué sur le tableau (l’intervalle
dépend de la durée que vous avez choisie).
Mode manuel
Pour sélectionner le mode manuel, appuyez sur la touche MODE.
Utilisez les touches SPEED + et - pour modier la durée (TIME) ou la DISTANCE.
Appuyez ensuite sur START et un compte à rebours de 3 secondes se déclenche.
Pour modier la vitesse utilisez les touches de vitesses préprogrammées ou SPEED + et -.
Arrêter le tapis de course
Pour arrêter le tapis de course, appuyez simplement sur la touche STOP ou déconnectez
la clé de sécurité de la console.
Programme Vitesse (km/h) par intervalle
P1 23345345534544423353
P2 2445646664564442254 2
P3 2446647774774442453 2
P4 3 5567757788595566443
P5 2445677567885446554 2
P6 24345487578364425432
P7 2333453453453336653 3
P8 23367746744467444232
P9 24477478489944456332
P10 2 4 567546886654424433
P11 3 4 595955599555998763
P12 2 5 8
10
7 7
10 10
7 7
10 10
6699554 3
Éteindre le tapis de course
La bande de course a été lubriée avant sa sortie d’usine.
Au l de son utilisation, la bande de course se détendra et se déplacera vers la gauche
ou la droite. Pour prolonger la durée de vie de votre appareil, il est important de savoir
comment lubrier, tendre et aligner la bande de course.
Pour cela, consultez les instructions suivantes.
LUBRIFIER LA BANDE DE COURSE
Lubrier l’appareil sous la bande de course rend le tapis de course plus performant et
prolonge sa durée d’utilisation. Appliquez un peu de lubriant après 25 heures d’utilisation
(ou 2 à 3 mois). Répétez ensuite l’opération toutes les 50 heures (5 à 8 mois).
Vérier la bande de course pour une bonne lubrication
Soulevez un côté de la bande de course et touchez la surface de la planche de course. Si
la surface est lisse, la lubrication n’est pas nécessaire. Si la surface est sèche, appliquez
un peu de lubriant.
Comment appliquer le lubriant
Soulevez un côté de la bande de course.
Versez un peu de lubriant sous le centre de la bande et sur la surface de la planche de
course.
Pour répartir uniformément le lubriant, courez 3 à 5 minutes sur le tapis de course à
vitesse réduite.
REMARQUE: Ne lubriez PAS TROP la planche de course. Essuyez les éventuels excès de
lubriant.
lubriant
FR FR

38 39
ALIGNER LA BANDE DE COURSE
Nous recommandons vivement de contrôler l’alignement de la bande de course à la
réception de l’appareil mais aussi avant et après chaque utilisation.
Ajustez les deux côtés en même temps pour garder la bande alignée et centrée.
RETENDRE LA BANDE DE COURSE
Il est normal qu’au l de son utilisation, la bande de course se détende. Lorsque des
gonements se forment au milieu de la bande de course, celle-ci est trop détendue. Si
le tapis est instable (bancal) lorsque vous courez ou si sa surface est collante ARRÊTEZ
immédiatement l’appareil et retendez la bande de course pour éviter le risque de
blessures.
1. Installez l’appareil sur un sol plat.
2. Pour ajuster la tension de la bande, ARRÊTEZ le tapis de course.
3. Utilisez la clé Allen fournie et tournez la vis située à l’arrière d’un quart de tour dans le
sens des aiguilles d’une montre – voir illustration C.
4. DÉMARREZ l’appareil à vitesse moyenne et vériez si la bande de course est centrée.
Si ce n’est pas la cas, tournez la vis d’un quart de tour supplémentaire. Répétez
l’opération si nécessaire.
AC
B
ENTRETIEN GÉNÉRAL
Un entretien régulier augmente la durée de vie de votre tapis de course et réduit les
risques de blessures. Nous recommandons vivement d’effectuer les opérations suivantes
de façon régulière.
1. Débranchez l’appareil après utilisation, surtout si des enfants sont présents.
2. Pour réduire l’usure et les risques d’endommager votre appareil, il est extrêmement
important de nettoyer et dépoussiérer la bande de course, les rails latéraux et la
surface sous l’appareil.
3. Après chaque utilisation, nettoyez la console et les zones autour de l’interrupteur
marche / arrêt avec un chiffon sec. Utilisez un chiffon doux et un produit nettoyant
pour nettoyer les taches tenaces sur la bande de course.
4. Vériez l’alignement de la bande de course avant chaque utilisation (elle se décalera
au l de son utilisation). Consultez le chapitre précédent Retendre la bande de
course.
5. Veillez à maintenir la bande de course lubriée. Consultez le chapitre Entretien de la
bande de course.
6. Conservez l’appareil dans un lieu sûr, à l’abri de la chaleur et de l’humidité.
Contribuez à la protection de l’environnement!
Respectez les dispositions légales en vigueur: remettez
tout équipement électrique dans un centre de recyclage
approprié.
FR FR
Table of contents
Languages:
