bmcm AP8a User manual

AP8a
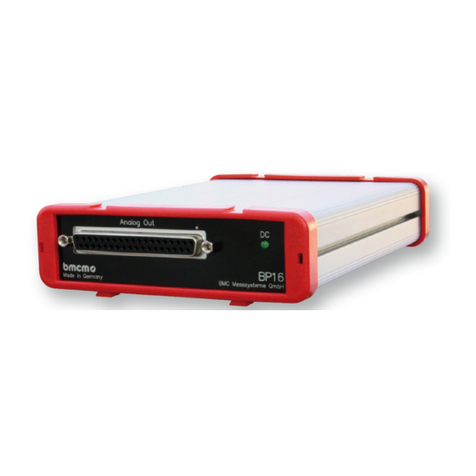
Backplane for 5B modules
For measuring amplifers and
sensors. Get connected.
Carrier board in 5B technology: Up to eight
measuring amplifiers, converters, output
modules, or any other function modules can be
plugged into the analog backplane AP8a. The
variety of available 5B modules provides for the
solution of the most specific measuring tasks -
individual and simple.
5B technology. Industrial standard.
The pin assignment of the backplane
integrated in the AP8a corresponds to the 5B
module standard of Analog Devices and Burr
Brown. An additional 0EX pin has been
introduced for sensors requiring unipolar
supply.
Clearly safe.
Most of the 5B modules feature galvanic
isolation of the channels from each other and
from the data acquisition and control system.
This perfectly protects the whole system
against high potentials and interferences.
Well supplied.
The AP8a is operated with 5V or 9-40V
optionally. The supply voltage is connected via
screw-clamp terminals.
Signal connection.
Clamp. Plug in. Ready.
Sensors or other voltage signals can
comfortably be connected via 7-pin spring
terminal blocks (ZU7ST), which are plugged in
the relevant input connectors of the AP8a.
Connection to the DAQ system.
The amplifier outputs are available at a 16-pin
plug connector. They are connected to the
input lines of a data acquisition system.
Combining the AP8a with a measuring card or
DAQ system from bmcm makes a powerful
measurement system.
DIN rail mounting.
The AP8a comes with a DIN rail carrier with
bracket to be easily mounted on a standard
DIN rail as commonly used in electrical
installation.
The small option.
You have the choice.
For all needing less channels: The analog
backplane is also available as a 2-channel
version AP2.
Functional diagram

AP8a
Seite 2
1Installation
Attach the DIN rail bracket to the AP8a and click it to the DIN rail. Provide for power supply by
applying a 2-pin cable to the power unit. Now the analog output of the AP8a is connected with the
DAQ system, the AP8a is equipped with 5B-compatible modules, and the signals cables are attached
to the terminal blocks (available under: ZU7ST), which are plugged into the input connectors of the
AP8a then.
Always turn off the power before changing the modules! Check for correct poling of the power
supply!
2Connections and pin assignments
The available connections and different components of the AP8a board are shown in the following
figure of the board (view on top of the board (fitted with components), analog output connector top
right).
Figure 1
2.1 Power supply +5V or 9-40V
The power supply is applied to the 2-pin screw terminal of the AP8a (see
Figure 1).
The range of the supply voltage is selected at the 3-pin jumper on the
AP8a. If placed across the pad in the middle and the square pad, the
backplane must be supplied with +5V. If placed across the pad in the
middle and the round pad, a voltage in the range of +9..40V (default
setting ex works) can be used.
The power supply is provided with a reversible semi-conductor fuse (multifuse), which is turned off
when overloaded. To make the fuse work effectively again, get rid of the overload first before
disconnecting the AP8a from the power supply.

AP8a
Seite 3
2.2 Ground-to-ground resistance
Ideally, the output ground is not electrically connected with the power supply ground. If, however, a
connection to ground is necessary (e.g. to use the output switch in the 5B module), the 2-pin jumper
(see Figure 1) must be closed. In case of electrically connected systems (e.g. PC), this jumper
represents a high-resistance bridge (1k) and may generate a hum loop.
2.3 Analog OUT connector
The amplifier outputs are available at the 16-pin pin connector (see Figure
1). They are connected to the analog inputs of the data acquisition
system.
The output cable can be laid with the same signal ground and shield in
case of short distances (long distances may lead to cross talk).
2.4 Input terminals
The measuring signals are connected to pins HI and LO of the input terminals (see Figure 1).
Depending on the 5B module used, the +EX and -EX pins provide the relevant supply for the sensors.
Pins +SE and -SE are sensor lines and are connected according to the relevant application (e.g. for 6-
wire technology in strain gage measurement). the shield of the analog input cables can be applied to
ground or 0EX depending on the application (always connect at one end of the cable only).
Comfortable connection to the input terminals is possible by using 7-pin spring terminal blocks
available in a package of 8 (order number: ZU7ST).
Run the signal ground separately if possible. Always lay input cables separately.
2.5 Module pin assignment
The pin assignment on the right shows the top view of the module
backplane (see Figure 1). It corresponds to the 5B modules of
Analog Devices®, BURR BROWN®etc.
However, an additional 0EX pin has been introduced particularly
suitable for ungrounded shielding. This is a specific assignment of
bmcm. The 0EX pin is not connected in modules of other
manufacturers.
The AP8a also supports the use of output modules.
2.6 Current measurement modules
If a current measurement module requires an external shunt, it can be inserted in front of the relevant
5B module.
2.7 Thermocouple connection
Using a thermocouple requires a cold junction compensation. The relevant element is plugged
underneath the module slot (see Figure 1). This allows the installation of a cold junction compensation
directly at the terminal connection of the thermocouple matching the 5B modules.
Analog Out 1
Analog Out 2
Analog Out 3
Analog Out 4
Analog Out 5
Analog Out 6
Analog Out 7
Analog Out 8
Masse/ground

AP8a
Seite 4
3Connection examples for using the AP8a with 5B amplifiers
The most different 5B amplifiers can be used with the AP8a. Please see the relevant data sheets of the
5B modules for further connection examples.
3.1 MA-U: Voltage measurement (DC and AC decoupled)
The input is differential (balanced).
Close jumpers J5 and J7 of the MA-U for AC decoupling to suppress
DC components of the signal. AC decoupling can only be used in the
0.5V and 1V measuring range.
3.2 MA-UNI: Strain gage measurement with DC
Strain gages are resistors operated in bridge circuits. The EX voltage is
2.5V DC. The input amplifier is operated in differential mode. If
necessary, the sensor lines compensate for line losses.
In the case of bridge extensions, precise supplementary resistors must
be used (0.1%; TC15). If using 100bridges, it is only possible to
supply with +2.5V, dividing the measuring range in half.
The Jumpers J12, J13 of the MA-UNI must only be closed in 6-wire
applications. For some applications, it is better to connect the screen to
earth and not to the internal ground (0EX).
4Important notes for using the AP8a
•The AP8a is only suitable for extra-low voltages –please observe the relevant regulations!
•An electrically isolated power unit (with CE) must be used for power supply.
•All accessible pins are electrostatic sensitive devices. Provide an earthed conductive work place when
installing.
•Only use non-solvent detergents for cleaning. The product is designed to be maintenance-free.
•If using the direct switches, the relevant LO input is connected with the succeeding DAQ system and therefore
may be connected to ground. Open inputs should be closed.
•The board must not be used for safety-relevant tasks. With the use of the product, the customer becomes
manufacturer by law and is therefore fully responsible for the proper installation and use of the product. In the
case of improper use and/or unauthorized interference, our warranty ceases and any warranty claim is
excluded.
Do not dispose of the product in the domestic waste or at any waste collection places. It has to be either duly
disposed according to the WEEE directive or can be returned to bmcm at your own expense.
5Technical data (typical at 20°C, after 5min., 9-40V supply)
•Electrical data
Power supply:
9..40V (max. 1A DC, default setting ex works) or +5V DC ±5% (max. 1.5A DC)
Max. current to be drawn for the modules:
max. 1A (total of current of all individual modules)
Electrical isolation:
depending on the module in use; in case of direct switching no electrical isolation!
Max. permissible potentials:
60V DC acc. to VDE, max. 1kV ESD on open lines
•General data
Temperature ranges // Relative humidity:
operating temp. 0..70 C, storage temp. -25..70 C // 0-90% (not condensing)
CE standards:
EN61000-6-1, EN61000-6-3, EN61010-1; for decl. of conformity (PDF) visit www.bmcm.de
ElektroG // ear registration:
RoHS and WEEE compliant // WEEE Reg.-No. DE75472248
Dimensions (L x W x H):
backplane: 18cm x 10cm x 2cm; with DIN rail carrier and bracket: 18.3cm x 10.5cm x 4.3cm
Available accessories (optional):
7-pin pluggable spring clamp terminals ZU7ST (package of 8), power supply ZU-PW40W,
waterproof housing ZU-PBOX-PG, ZU-PBOX-LAN
Warranty:
2 years from date of purchase at bmcm, claims for damages resulting from improper use excluded
Manufacturer: BMC Messsysteme GmbH. Subject to change due to technical improvements. Errors and printing errors excepted. Rev. 4.102/05/2020
Other bmcm Computer Hardware manuals
Popular Computer Hardware manuals by other brands

Texas Instruments
Texas Instruments OMAP36 Series Technical reference manual

NETGEAR
NETGEAR WAG511 - 802.11a/b/g Dual Band Wireless PC... Specifications

Asus
Asus MPRFMODULE1 manual

VersaLogic
VersaLogic SPX-5 Reference manual

ICP DAS USA
ICP DAS USA I-87K Series user manual

RF-Star
RF-Star RF-BM-ND06 instruction manual