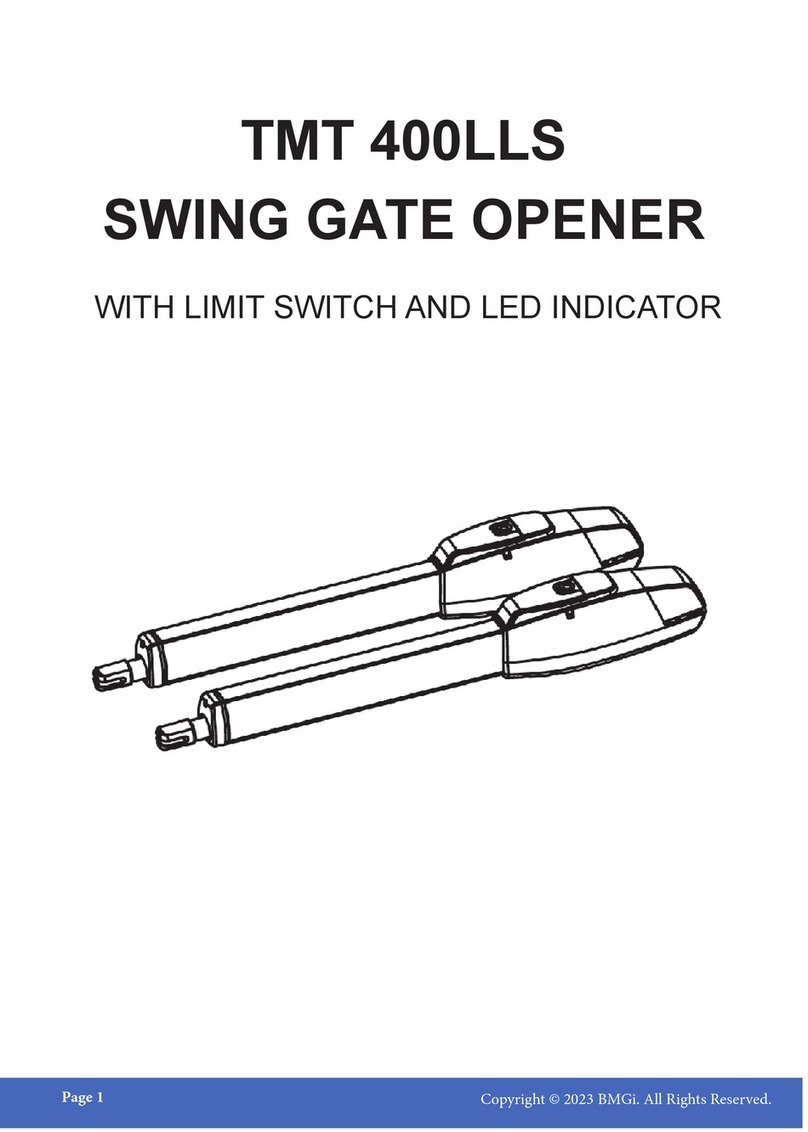
BMGi E8-400 User manual

Installation Manual
E8 - 400
E8 - 500
E8 - 600
Solar or Electric Systems

WARNING
Important Safety Information
Gate equipment has hazards associated with its use and therefore by installing this product the
installer and user accept full responsibility for following and noting the installation and safety
instructions. Failure to follow installation and safety instructions can result in hazards developing
due to improper assembly.
READ ALL INSTRUCTIONS CAREFULLY AND COMPLETELY before attempting to install and
use this automatic gate operator. This gate operator produces a high level of force. Stay clear of
the unit while it is operating and exercise caution at all times.
All safety instructions should be read and completely understood by installer and the owner prior
to the installation of the E8 auto gate system. This product is designed and manufactured for the
use indicated in the manual.
Remember that all automatic gates are intended for vehicular gates only. A separate gate or en-
trance must be installed for pedestrian use. Any other use, not expressly indicated may damage
the product or be a source of danger.
Swing Gate Motor - Model E8
E8 swing gate motor is suitable for light - medium weight gates. Do not use it on large sized gates
which exceed the maximum recommended gate weight and length. Wrong selection of motor will
result in an unreliable operation.
Please Read This First!
Thank you for purchasing the E8 “do-it-yourself” automatic gate opener! When correctly installed
and properly used, your E8 Gate Opener will give you many years of reliable service.
The E8 Opener is designed for installation on a pull-to-open or push-to-open gate.
The E8 Gate Opener can be used on aluminum, chain link, farm tube, and wrought iron gates.
Use on solid surface gates is NOT recommended. Solid surface gates have a high resistance to
the wind. If the wind is strong enough, the operator will obstruct and stop.
The E8 Gate Opener accommodates extra transmitters, digital keypads, solar panels, push but-
tons, automatic gate locks, and other access control products.
The E8 Gate Opener features an obstruction sensor. This feature makes the gate stop and
reverse open when it comes in contact with an obstruction. This sensitivity is pre set on the main
control board and cannot be adjusted.
The E8 Gate Opener has an adjustable auto-close feature. After the gate reaches the fully open
position, it can be set to remain open up to 120 seconds before automatically closing. Pressing
the transmitter button at any time after the gate opens fully will cause it to close immediately. OFF
is the factory setting; meaning the gate will stay open until you press the transmitter (or keypad,
etc.) again.

Table of Contents
Important Safety Information .................................................................... 2 - 6
Manually Opening and Closing Gate ............................................................ 4
Technical Speciations .................................................................................. 7
Kit Inclusions ............................................................................................. 7- 8
Optional Extras ............................................................................................. 9
Example Setup of Single Swing Gate ..........................................................10
Example Setup of Double Swing Gates ...................................................... 11
Before You Begin (Power Options & Solar Panel) ...................................... 12
Proper Gate Installation .............................................................................. 13
Installation Pointers & Cardboard Template ................................................ 14
Installatioin of Gate Opener ........................................................................ 15
Installing the Gate Stop .............................................................................. 16
Pull-to-Open Setup .............................................................................. 17 - 19
Push-to-Open Setup ............................................................................ 20 - 23
Transformer Wiring Installation ............................................................ 24 - 25
Solar Wiring Installation ....................................................................... 26 - 27
Control Board - D1 ...................................................................................... 28
Setting up the System - Single Gate............................................................ 29
Setting up the System - Double Gates ........................................................ 30
Remote Controls & Receiver ....................................................................... 31
Other Considerations .................................................................................. 32
External Light Connection ........................................................................... 33
Trouble Shooting ......................................................................................... 34
Other Accessories
• Long Range Receiver ........................................................................... 35
• Photocells/Eyebeams -Wired ................................................................ 36
• Keypad - Wired ..................................................................................... 37
• Keypad - Wireless ................................................................................. 38
• Gate Lock - Double Setup...................................................................... 39
• Gate Lock - Single Setup ...................................................................... 40
Other Information ......................................................................................... 41
Installer & Owner Notes .............................................................................. 42

Important Safety Information
Because automatic gate operators produce high levels of force, consumers need to know the
potential hazards associated with improperly designed, installed, and maintained automated gate
opener systems. Keep in mind that the gate opener is just one component of the total gate op-
erating system. Each component must work in unison to provide the end user with convenience,
security, and safety.
This manual contains various safety precautions and warnings for the installer end user. Because
there are many possible applications of the gate operator, the safety precautions and warnings
contained in this manual cannot be completely exhaustive in nature. It does, however, provide an
overview of the safe design, installation, and use of this product.
CAREFULLY READ AND FOLLOW ALL SAFETY PRECAUTIONS, WARNINGS AND INSTALLA-
TION INSTRUCTIONS TO ENSURE THE SAFE SYSTEM DESIGN, INSTALLATION AND USE
OF THIS PRODUCT.
Because the E8 automatic gate opener is only part of the total gate operating system, it is the re-
sponsibility of the installer and end user to ensure that the total system is safe for its intended use.
CAUTION
The gate will move freely and uncontrolled when the gate operator is removed from the gate.
ONLY disconnect the operator when the power source has been disabled (ie. battery or transform-
er( is off and the gate is NOT moving.
Manually Opening and Closing Gate
Disconnecting the Opener
1. Place release key into the release bolt and
unscrew fully
2. Pull actuator arm off gate bracket
3. Now the gate will swing freely
The gate can be opened and closed manually
when the actuator is disconnected.
If leaving the actuator arm off the gate please
disconnect power to avoid damaging the motor
or cable.
DO NOT have the release bolt done up tight
as this will make for a difcult release of the
actuator arm. May also cause jamming and or
binding.
Release Key
Release Bolt
Actuator Arm
Gate
Bracket

Important Safety Information
For the Installer and End User
To reduce the risk of injury or death:
1. READ AND FOLLOW ALL INSTRUCTIONS.
2. Never let children operate or play with gate controls. Keep the remote control away from
children.
3. Always keep people and objects away from the gate. NO ONE SHOULD CROSS THE PATH
OF THE MOVING GATE.
4. Test the gate operator monthly.
5. Use the manual/emergency release only when the gate is not moving.
6. KEEP GATES PROPERLY MAINTAINED.
7. The entrance is for vehicles only. Pedestrians must use separate entrance.
8. The gate must be installed in a location that provides adequate clearance between it and ad-
jacent structures when opening and closing to reduce the risk of entrapment. Swinging gates
must not open into public access areas.
Owner should observe the following:
1. Do not cross the gate while it is operating.
2. Keep children away from the gate and the remote controls.
3. Test the system frequently and monitor the high and low speed of the system.
4. Practice the use of the emergency release key. This is crucial in the event that the system
does not work.
5. Place the WARNING signs prominently on the gate to warn pedestrian of the automatic gate
operation on your premises. It is your responsibility to post the warning signs on both sides
of the gate.
Installer should observe the following:
1. Make sure the gate weight and length does not exceed the maximum specications.
2. The gate design must be suitable for the installation of the auto gate system.
3. Ensure that the gate is installed on at, level ground and can move freely in both directions
along the entire swing of the gate. A properly balanced swinging type gate should NOT
swing open or swing close when no pushing or pulling force is exerted onto it.
4. Control panel box must be installed in the area where it is not easily damaged.
5. Do not change with parts or components not supplied by manufacturer.
6. Make sure all wiring is correct and in accordance with electrical bylaws and in good condition
before supplying the mains power to the control panel.
7. Remove all power when doing any maintenance including solar.
8. Ensure the control panel box is free from water leakage and insects to avoid short circuiting
of the control panel. Silicon off any holes.
9. Never supply mains power directly to the DC motor
10. Transformer MUST be connected to mains power via RCD (residual current device).
11. Do not install the operating system if in doubt.
WARNING

Important Safety Information
For the Installer and End User
1. Attach the warning sign (included) to the gate to alert the public of automatic gate operation.
2. The gate is automatic and could move at any time, posing serious risk of entrapment. No one
should be in contact with the gate when it is moving or stationary.
3. Do not attempt to drive into the gate area while the gate is moving; wait until the gate comes
to a complete stop.
4. Do not attempt to “race the gate” while the gate is closing. This is extremely dangerous.
5. Do not allow children or pets near your gate. Never let children operate or play with gate
controls. Keep the remote control away from children and unauthorized users; store controls
where children and unauthorized users do not have access to them.
6. KEEP GATE SYSTEMS MAINTAINED. Always disconnect any power source from the opera-
tor before performing any maintenance.
7. To operate this equipment safely, YOU must know how to disconnect the operator for manual
gate operation.
8. Disconnect the operator ONLY when all power sources are DISCONNECTED and the gate is
NOT moving.
9. Make arrangements with local re and law enforcement for emergency access.
10. Distribute and discuss copies of the IMPORTANT SAFETY INFORMATION section of this
manual with all persons authorized to use your gate.
11. IMPORTANT: Save these safety instructions. Make sure everyone who is using or will be
around the gate and gate operator are aware of the dangers associated with automated gate
systems. In the event you sell the property with the gate operator or sell the gate operator,
provide a copy of these safety instructions to the new owner.
After Installation

Technical Specications
Supply voltage: 16vac Transformer or Solar
Backup Battery: 12Vdc Lead acid maintenance free
Operating Voltage: DC 16-18V for normal speed
DC 6-10V for cushioning speed
Driving Method: Screw driven type
Max. Output Power: 80W per driver
Gear Box: Three-stage spur gear reducer
Operating Cycle: 13-19 seconds Per 90° (on AC power only)
Max. Piston Stroke: 400mm/500mm
Max Piston Speed: 3cm/sec
Max. Weight of Gate: 250kgs dependant on gate length
Max. Length of Gate: 2.5m per leaf (400mm)
4.0m per leaf (500mm)
Safety Clutch: Electronic current sensing, high amp cutoff
Electronic Controller: Micro-processor based
Remote Controller: 2 channel 330MHz
Kit Includes
Standard Packaging of the swing gate opener kit includes: Single = 1 leaf Double = 2 leaf
Actuator Arm: 1 x for single or 2 x for double
Cardboard Template: 1 only
Primary Post Bracket: 1 x for single or 2 x for double
Secondary Post Bracket: 1 x for single or 2 x for double
Gate Bracket: 1 x for single or 2 x for double
Rubber Gate Stop: 1 only
Release Keys: 2 only
Primary Bracket Bolts: Not supplied (Single x 4 or Double x 8)
Secondary Bracket Bolts: 2 x for single or 4 x for double
Gate Bracket Bolts: 2 x for single or 4 x for double
Rear Mounting Bolts: 1 x for single or 2 x for double
Release Bolts: 1 x for single or 2 x for double
Small Bracket set (3): 1 only
Control Box: 1 only
Main Control Board
(Model D1): 1 only
Receiver: 1 only
Remotes/fobs: 3 only
Entry/Exit Button: 1 only
12v Battery: 1 only
Regulator: 1 only (if Solar)
45Watt Solar Panel: 1 only (if Solar) with 10mtrs cable + mounting bracket
Transformer 16VAC: 1 only (if Electric)
Conduit: 1 small piece only
Cable: 6m for double (across driveway for second actuator)
Junction box: 1 for double kit only
PLEASE NOTE: POST BRACKET BOLTS AND CONTROL BOX MOUNTING BOLTS ARE NOT
SUPPLIED

Control Box
Actuator Arm with cardboard template
Caution Sign
Main Control board
Receiver
Remotes Push Button Rubber Stop
12v Battery Regulator
(if Solar)
20watt Solar Panel
(if Solar)
Transformer
(if Electric)
Bracket Set
(3)
Release Key Gate Bracket Primary
Bracket
Secondary
Bracket
Gate Bracket
Bolts
Release Bolt Mounting Bolt P & S Bracket
Bolts
STANDARD KIT INCLUSIONS

OPTIONAL EXTRAS
Round Gate
Bracket Round Post
Brackets
Long Range Upgrade Adjustable Hinge
Extra Secondary
Bracket
Wireless Keypad Wired Keypad
Wireless Eyebeams Wired Eyebeams Keyed Push Button
40watt Upgrade

Single Swing Setup Example
Installations vary slightly on different types of gates

Double Swing Setup Example
Installations vary slightly on different types of gates

Before You Begin
POWER OPTIONS
1. Determine Charging Option for Battery: Transformer OR Solar
NEVER USE TRANSFORMER AND SOLAR PANEL(S) AT THE SAME TIME.
It will damage the control board.
IMPORTANT
• Transformer is suitable for outdoor use. Use 2.5m x 2 core cable
• The gate opener is designed and intended for use with a 12 Volt automo-
tive or marine type battery.
SOLAR PANEL
The solar panel should face full NORTH with a minimum of 6 hours of DIRECT
sun exposure to be effective (ltered sunlight not acceptable). The solar regu-
lator supplied is not weatherproof and must be located in the main control box
to protect it.
The performance of your gate opener is dependent on your geographical
location, weather conditions and seasonal lighting availability. On cloudy days
and during winter, your solar panel will not receive as much direct sunlight,
resulting in reduced output and may reduce operating time.
Accessories connected to your system will draw additional power from the
battery.
For maximum charge see below for your area and recommended tilt:
Brisbane 38°
Sydney 45°
Melbourne 50°
Tasmania 56°
Adelaide 48°
Darwin 14°
Perth 43°
0° being at and 90° vertical
Important: just one hand print of shade on your solar panel can reduce your
solar panels output by up to 80%.

IMPORTANT: Check For Proper Gate Installation
• The gate must be plumb, level, and swing freely on its hinges.
• The gate must move throughout its arc without binding or dragging on the ground.
• A properly leveled gate will not have the tendency to self-open or self-close and remain sta-
tionery. A self-opening or closing gate suggests that the gate is not leveled. This will cause
accelerated wear to your automatic gate system.
• Wheels must NOT be attached to the gate.
• Post must be secured in the ground with concrete (minimizes twist/ex when the operator is
activated).
• Make sure there is a stable area for mounting the gate bracket.
• We recommend you position the operator near the center-line of the gate to keep the gate
from twisting and exing, and to avoid back-splash from rain.
• Double gates - rubber gate stop supplied will need to be bolted down to the middle of the
driveway for the gates to close up onto
• Single gate - gate will either close up onto the opposite post or you can install the rubber
gate stop on the post for the gate to strike
• You can install another gate stopper at the full open position or you may choose to let the
gate swing till it is stopped by the internal built in stop mechanism when the arm is fully
retracted (pull to open position) or fully extended (push to open position).
• Installing a gate stop at the full open position will allow for a rm/solid push and prevent the
gate from swaying or moving in moderately windy conditions.
A - Level
B - Plumb
C - Free Swinging
D - Secured Posts in Concrete
E - Good Working Hinges

Installation Pointers
The proper position of the Primary and Secondary Brackets (post bracket) and gate bracket is
crucial to the efciency and leverage of the gate opener. Attention needs to be paid to both its
correct height and its position on the post in respect to the relationship between your gate hinge
pivot point and the motor pivot point on the bracket. Once you have determined the general de-
sired height of the actuator arm, position the bracket and take note of the dimensions.
Its best to locate the gate opener arms in approximately the middle between the top and bottom of
the gate. This will prevent the gate from twisting or exing and provide a more even pull and push
over the entire gate.
Pull-to-Open and Push-to-Open (Terminology)
• For pull-to-open gate - Arm is fully retracted when the gate is fully opened (gate pulls into the
property)
• For push-to-open gate - Arm is fully extended when the gate is fully opened (gate pushes out
towards the road)
Mounting of the Control Box
Select a at and sturdy surface for the mounting of the control box.
Care must be taken to ensure that the mounting screws and holes on the control panel are
properly sealed to prevent water seepage and insects into the control box (silicon around screws).
Water damage or insect damage to the control board will void your warranty.
The mounting point guides located in your control box serves only as reference and a guide for
your installation. We recommend that the mounting points be lower then the D1 control board, so
that in the unlikely event that water seeps in, it will not ow onto the control board.
Cardboard Actuator Template
The cardboard template is a guide for the actuator arm in Full-Open and Full-Close positions. The
template is simply 2 x card board strips with a screw joining the 2 together. The screw is acting as
your pivot point where the actuator arm will attach to the secondary bracket.
This is an easy way to determine the best position to drill your bracket mounting points for your
post and gate brackets and take the guess work out of installation.
Clamping your brackets rst is always recommended.
You may need to change the bracket or design a new one that best suits your application.
Each arm guide has a mark measured from the screw.
The screw represents the position of the secondary post bracket pivot.
The outer line marked on the guide represents the position of the gate bracket pivot.
Short template – Arm fully retracted
Long template – Arm fully extended
Short Template
LongTemplate

Installation of Gate Opener
Primary and Secondary Post Brackets
The position of the Primary and Secondary post brackets are crucial to the
success of your installation and attention needs to be paid to both correct
height and position on the post in respect to the relationship between your
hinge pivot point and the motor pivot point on the bracket. Once you have
determined the general desired height of the actuator arm, position the bracket
and take note of the dimensions.
In a standard installation the basic aim is to get the “J” and “K” dimensions to
be as close as possible to equal, but “J” can be greater allowing for a more
positive push of the gate against gate stop.
Hint: The dimension of BOTH J and K for a standard installation is approxi-
mately
For 300mm Arm
J ~ 150 mm - 170mm
K ~ 150 mm - 170mm
For 400mm Arm
J ~ 200 mm
K ~ 200 mm
For 500mm Arm
J ~ 250 mm
K ~ 250 mm
This dimension is a good initial position to place the cardboard template.
Please note the above measurements are for a guide only.

Installing the Gate Stop
Double Gates
Installing the rubber gate stop is required
to ensure proper alignment of the two
gates and for them to have a solid push
onto the stopper in the full-cosed position.
Single Gates
The gate should either stop onto a post
in the closed position, or you can use
the rubber gate stop and place it onto
the post allowing the gate to have a solid
push in the closed position. If using the
rubber stop, make sure you place it on the
same level as the actuator arm to avoid
bending and twisting of the gate.
Rubber gate stop
GATE TABS FOR DOUBLE GATES
Rubber gate
Stop on post
Actuator arm on
same level
Full-Close Position
Each gate must stop on a rm and well secured Gate Stop in the closed
position. Failure to do so may result in misalignment and accelerated wear to
the system and the gate hinges.
Full-Open Position
In the full-open position, the gates can either be hard stopped by a peg / stop-
per, or be stopped by the internal built-in mechanism at the end of the retract-
ed arm (Pull-to-Open gate) or fully extended arm (Push-to-Open gate).

Pull-to-Open Setup
Actuator on the inside of the property with the gate pulling in to open
Step1.
Position the template on the ground
approximately where the arm is to be
installed with the short length in the fully
open position and the long length at the
fully closed position.
Hint: The pivot point of template for a
standard gate should be approximately
(200mm x 200mm for 400mm arm) and
(250mm x 250mm for 500mm arm) from
the gate hinge in both the J and K direc-
tion. Please note the above measure-
ments are for a guide only.
Long
Template
IDENTIFYING APPROXIMATE
LOCATION FOR THE GATE
POST BRACKET USING THE
CARDBOARD TEMPLATE Short
Template
Step 2.
Short Template. OPEN gate fully to 90 degrees and put a sticker on the
gate to mark the approximate location to mount the Gate Bracket.
Step 3.
CLOSE the gate to the gate stop.
• Compare the long template mark
with the mark on the gate that was
done on Step #2.
• Check that the gate mark is at least
10mm LESS than the mark on the
template. This is to ensure that the
gate will have a solid push onto the
gate stopper in the closed position.
LONG Template. Gate fully CLOSED En-
sure that the mark on the gate is less than
the mark on the long template

Pull-to-Open Setup
Actuator on the inside of the property with the gate pulling in to open
Step 4.
Ensure that there is sufcient angle (more than 5 degrees) non parallel between the
template and the gate.
It is important that in both the full open and full close positions,
the arms must not be parallel to the gate. A parallel arm will
not result in a turning movement to the gate causing potential
damage to both gate and actuator arm.
Installing Primary and Secondary post brackets
Assemble the primary and secondary brackets by placing the secondary wall bracket
between the middle gap of the primary wall bracket. Do not tighten the nylon nut yet.
Primary Wall Bracket
Secondary Wall Bracket (straight section
facing away from the gate)
Rear actuator pins should NEVER bind
onto the secondary bracket
Round Post Bracket Installation
Optional extra if ordered with the kit
Standard round post brackets
Suits all post sizes (bracket pair)
Place Secondary bracket between
the 2 round post brackets
Large round post bracket
Suits 150mm post only
Attach Primary and
Secondary bracket to
round post bracket

Pull-to-Open Setup
Actuator on the inside of the property with the gate pulling in to open
• Check your J & K measurements.
• Pivot point should be worked out from template now
• Open the gate to 90 degrees
• Attach the retracted arm on the secondary bracket.
• Swing the arm on the secondary bracket towards the gate.
• At the position in which the arm contacts the gate, this
marks the position of the gate bracket. Temporarily hold the
gate bracket with a clamp.
• Attach the arm to the gate bracket.
• Now extend the arm to close the gate and hit the stop. Do
this by taking red and blue cable from the actuator arm and
placing them onto the battery terminals red to positive blue
to negative to extend arm.
• The arm should be at least 10mm from full extension when
the gate completely closes against the stop. This is to en-
sure that when in operation, the arm will give a solid push
to the gate onto the stop.
• If the gate does not fully close, even when the arm is
fully extended, re-adjust the Primary and or Secondary
brackets.
• A smaller [K] is necessary if gate does not fully close
• A bigger [J] will allow for a more positive push of the gate
towards the gate stop
• Once the nal position of the Primary and Secondary
brackets have been determined, secure the brackets to the
post.
• If double gates, repeat the same procedure for the second
gate.
NOTE: Actuator Arm MUST be level with the gate
Round Gate Bracket Installation
Optional extra if ordered with the kit to suit farm gates
Standard Gate
Bracket
Round Gate
Bracket
Round gate bracket setup examples

Push-to-Open Setup
Actuator on the inside of the property with the gate pushing outwards
You may require the longer secondary bracket for this
setup (see optional extras page 9)
Step1.
Position the template on the ground approximately
where the pivot point of the arm is to be installed with
the long length in the fully open position and the short
length at the fully closed position.
Step 2.
OPEN the gate to 90 degrees and place a length of
white tape to the gate roughly where the gate bracket
maybe positioned. Close the gate to the gate stop
and compare the short template mark against the
mark on the white tape of the gate that was done in
the open position. Check that the gate mark is about
10mm LESS than the mark on the cardboard tem-
plate. This is to ensure the gate will have a solid push
onto the gate stopper in the closed position.
Short Template
Identifying approx. location
for the gate post bracket piv-
ot point using the cardborad
template
Step 3.
CLOSE the gate to the gate stop.
• Compare the short template mark with
the mark on the gate that was done on
Step #2.
• Check that the gate mark is at least
10mm LESS than the mark on the tem-
plate. This is to ensure that the gate will
have a solid push onto the gate stopper
in the closed position.
LONG Template. Gate Fully OPENED to 90
degrees
Put a sticker to mark the approximate location
to mount the Gate Bracket.
Short Template. Gate in Fully CLOSED Position.
Ensure that the Mark on the Gate is Less than the
mark on the short template.
Long Template
This manual suits for next models
2
Table of contents
Other BMGi Gate Opener manuals
Popular Gate Opener manuals by other brands
Nice
Nice 4024 Instructions and warnings for installation and use
MFZ Ovitor
MFZ Ovitor MDF Series operating instructions
Novoferm
Novoferm iso20-4 ZF Original assembly and operating instructions
MyQ
MyQ CHAMBERLAIN CHAA250EVC installation manual

SEA
SEA Libra Mini Tank manual

FAAC
FAAC Estate Swing instructions
