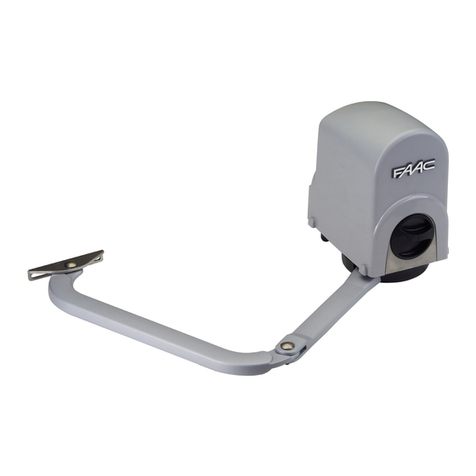
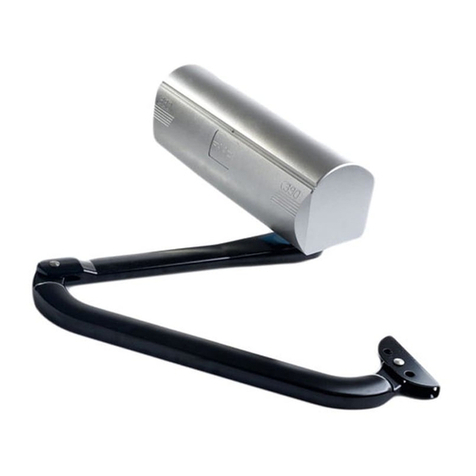
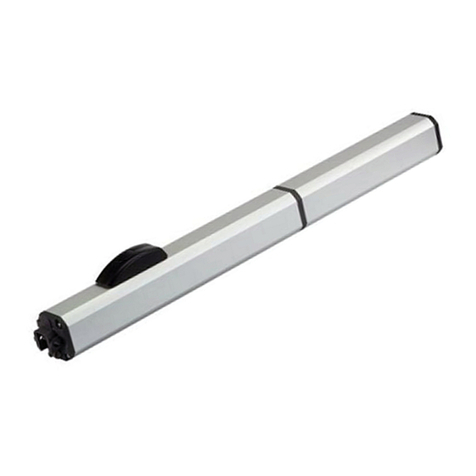
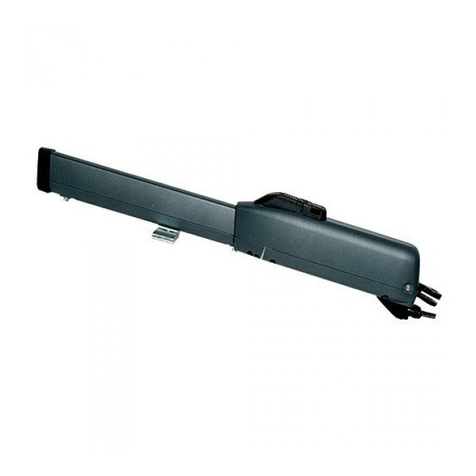
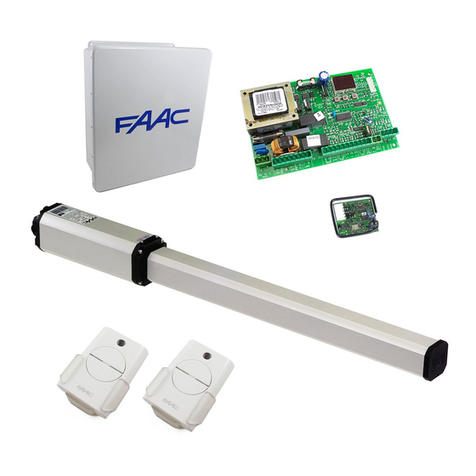
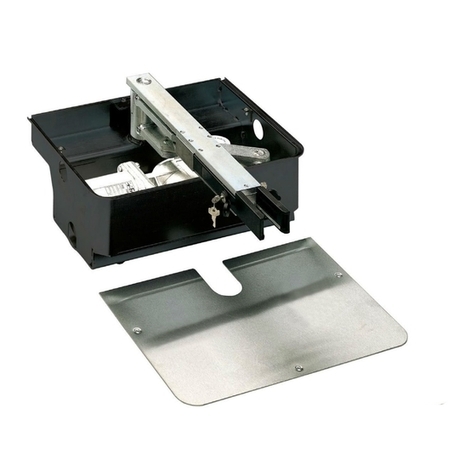
FAAC Estate Swing User manual

Instruction Manual for the
Manufactured by
E-SL 1800 Series

CE DECLARATION OF CONFORMITY OF MACHINES
(Directive 89/392/EEC, Annex II, Part B)
Manufacturer: FAAC S.p.A.
Address: Via Benini, 1 – 40069 Zola Predosa Bologna – Italy
Declares that: 740 A.K.A. Estate Slide 1800 (USA) mod operator
• Is built to be integrated into a machine or to be assembled with other machinery to create a machine under the provisions
of Directive 89/392/EEC, and subsequent amendments 91/368/EEC, 93/44/EEC.
• Conforms to the essential safety requirements of the following EEC directives:
o 73/23/EEC and subsequent amendment 93/68/EEC, 89/336/EEC and subsequent amendment 92/31/EEC and
93/68/EEC.
o And also declares the it is prohibited to put into service the machinery until the machine in which it will be
integrated or of which it will become a component has been identified and declared as conforming to the
conditions of Directive 89/392/EEC and subsequent amendments assimilated under national laws under DPR
#459 of July 24, 1996.
Bologna, January 1, 2002
Managing Director
A. Bassi
Warnings for the installer
General safety obligations
1. Attention! To ensure the safety of people, it is important that you read all the following instructions. Incorrect installation or incorrect
use of the product could cause serious harm to people.
2. Carefully read the instructions before beginning to install the product.
3. Store these instructions for future reference.
4. This product was designed and built strictly for the use indicated in the documentation. Any other use, not expressly indicated here,
could compromise the good condition/operation of the product and/or be a source of danger.
5. FAAC declines all liability caused by improper use or use other than that for which automated system was intended.
6. Do not install the equipment in an explosive atmosphere; the presence of inflammable gas or fumes is a serious danger to safety.
7. The mechanical parts must conform to the provisions of Standards EN 12604 and EN 12605.
For non-EU countries, to obtain an adequate level of safety, the standards mentioned above must be observed, in addition to national
legal regulations.
8. FAAC is not responsible for failure to observe Good Technique in the construction of the closing elements to be motorized, of for any
deformation that may occur during use.
9. The installation must conform to Standards EN 12453 and EN 12445.
The safety level of the automated system must be C+D.
10. Before attempting any job on the system, cut out electrical power and disconnect the batteries.
11. The main power supply of the automated system must be fitted with an all-pole switch with contact opening distance of 3 mm or
greater. Use of a 6A thermal breaker will all-pole circuit break is recommended.
12. Make sure that a differential switch with threshold of 0.03 A is fitted upstream of the system.
13. Make sure that the earthing system is perfectly constructed, and connect metal parts of the means of the closure to it.
14. The automated system is supplied with an intrinsic anti-crushing safety device consisting of a torque control. Nevertheless, its tripping
threshold must be checked as specified in the Standards indicated at point 10.
15. The safety devices (EN 12978 standard) protect any danger areas against mechanical movement risks, such as crushing, dragging, and
shearing.
16. Use of at least one indicator-light (e.g. FAACLIGHT 12VDC) is recommended for every system, as well as a warning sign adequately
secured to the frame structure, in addition to the devices mentioned at point “15”.
17. FAAC declines all liability as concerns safety and efficient operation of the automated system, is system components not produced by
FAAC are used.
18. For maintenance, strictly use original parts by FAAC.
19. Do not in any way modify the components of the automated system.
20. The installer shall supply all information concerning manual operation of the system in case of an emergency, and shall hand over to
the user the warnings handbook supplied with the product.
21. Do not allow children or adults to stay near the product while it is operating.
22. Keep remote controls or other pulse generators away from children, to prevent the automated system from being activated involuntar-
ily.
23. Transit through the leaves is allowed only when the gate is fully open.
24. The user must not attempt any kind of repair or direct action whatever and contact qualified personnel only.
25. Do not short-circuit the poles of the batteries and do not try to recharge the batteries with power supply units other than Master or Slave
cards.
26. Do not throw exhausted batteries into containers for other waste but dispose them in the appropriate containers to enable them to be
recycled.
27. Anything not expressly specified in these instructions is not permitted.
Abassi

Estate Slide Summery of Functions
The Estate Slide is only to be used for vehicular Slide gates in a Class I
setting.
Class I: A vehicular gate opener (or system) intended for use in a home of
one-to-four single family dwelling, or a garage or parking area associated
therewith.
The FAAC Estate Slide automated system was designed and built for controlling
vehicle access. Do not use for any other purpose.
The EstateSlide automated system automates residential Slide-leaf gates with
leaves of up to 25’ in length.
It consists of a locking electro-mechanical linear operator, powered by a 24V AC
transformer, coupled with control board that switches the voltage to DC to power
the motor. The MASTER card can be programmed and is used to set the follow-
ing: function logics, work times (by self-learning) and pause times, leaf speed, and
the sensitivity of the anti-crushing device.
The locking system will automatically lock when the motor is not operating. A re-
lease system enables the gate to be moved by hand in case of a system failure.
Keep this manual safely stored after
installation.
Serial Number__________________________
Date of Pur hase_______________________
Pla e of Pur hase______________________
Have this information on hand while handling all
service and warranty issues.
This manual and its contents are produced by Web Direct Brands, Inc. and is based on the instructions
written by FAAC,

The table of contents are listed to assist you locating a desired section. We do
however strongly suggest studying every page of the instruction manual before
attempting installation.
PAGE(S):
• Specifications of the Estate Slide and Components 1.1
• System Overview & Preliminary Checks 2.1
• Tools Needed for Installation 3.1
• Manual Operation 4.1
• Installation of Base, Operator and Limits 5.1-.5
• Temporary Safety Jumpers & Power 6.1-6.3
• Programming 7.1-7.3
• Control Board Overview 8.1-8.3
• Connecting Accessories 9.1
• Warranty / Troubleshooting Notice 10
Table of Contents
Marks pages with opener or usage warnings. Although we have marked these as very important warn-
ings, please read the entire manual. Every step is important to the correct installation of your gate
opener.

MODEL Estate Swing
Power Supply 115V AC/ 24V DC
Absorbed Power (W) 3
Absorbed Current (W) 70
Accessory Max Load 500 mA
Torque (Nm) 13.5
Gate speed 3/4’ per second
Operating ambient temperature -4 to 131 Deg F
Operator weight (lbs) 19
Protection class IP 44
Gate leaf max length (ft.) Up to 25
Gate leaf max weight (lbs.) Up to 900
Operator overall dimensions LxHxD(in.) See below
Type of Limit Switch Magnetic
Specifications
1.1

Standard System
Overview and Safety
Zones
The system display to the right is a
recommended standard system.
Other approved accessories can be
installed. Photo sensors and a flash-
ing light indicating gate movement
is recommended for safety purposes.
IMPORTA T
Preliminary Checks:
To ensure safety and an efficiently operating automated system, make sure the following condi-
tions are observed.
• The gate and post must be suitable for being automated. Check that the structure is suffi-
ciently strong and rigid, and its dimensions and weights conform to those
indicated in section 1. In particular, wheel diameter must be in relation to the weight of the
gate to be automated. Dimensions and weight must match those indicated in the technical
specifications.
• Make sure the leaves move smoothly without any irregular friction during entire travel.
• The soil must permit sufficient stability for the expansion plugs securing the foundation
plate.
• Check if the upper guide and travel limit mechanical stops are installed.
We advise you to have any metalwork carried out before the automated system is installed.
2.1
1 Estate Swing Operator
2Photocells (not included)
3Key operated pushbutton
4Flashing lamp
5Radio receiver (optional)
Notes: 1) Do not extend operator connection cables
2) When laying electrical cables, use
appropriate rigid and/or flexible tube
3) Do not run any wires in the same conduit as
110 AC power that may be in the area. This
will cause unwanted interference

Tools eeded
• Power Drill
• Crescent Wrench
• Metal Drill Bits
• Hacksaw
• Flat Head Screwdriver
• Phillips Head Screwdriver
• Tape Measure
• Level
• Wire Strippers
• C-clamps
Other items that may be needed prior to commencing installation.
• Cement, boards for a slab frame, and a trowel.
• Low voltage wire will be required to run power to your operator. From 0’-300’
16 gauge 2 conductor stranded direct burial wire will be needed. From 301’-600’
14 gauge 2 conductor stranded direct burial wire will be needed.
• If the gate is more than 600’ from an a/c power supply then an electrician will be
required to move a supply closer.
• Depending on the current base, you may need cement to form a level mounting
pad.
• A voltage meter may be necessary to run diagnostic checks.
• A digital camera will come in handy with technicians if any support is needed.
3.1

4.1
Manual Operation
1. Open the protective key cover by turning the counter clock-wise.
2. Turn the provided key in the lock.
3. Rotate the dial clockwise.

Installation of Mounting Hardware
5.1
Set the Foundation Plate
1. Find the distance the foundation plate must be from your gate. The foundation plate must be
located as shown in example A (right closing) or example B (left closing) to ensure the rack
and pinion mesh correctly. The arrow on the plate MUST face the gate.
A
B

2. Secure the provided bolts to the foundation plate as seen in the diagram below. There should be a nut
above and below the plate.
2. Observing the dimensions from step 1, Create a concrete slab around the bolts. Create a slab with the
dimensions found below. Before pouring the cement set up conduit through the slab to run wires to the op-
erator through. The conduit should line up with the hole in the foundation plate.
3. While the concrete is still workable but hard enough to hold the position of the plate, sit the founda-
tion plate on top of the wet cement. It should be inserted to the bottom of the foundation plate.
Important: check levelness of plate and measurements from gate right away before the concrete sets
and the foundation plate is fixed to the pad.
Concrete Slab Tips: Creating a wood rectangle with no top is a good way to form a slab. After the
cement dries the wood can be knocked away. The slab must be secured to the ground below. Hav-
ing rebar pass into the slab works well. 5.2
Note: If you have a cross
bar you are trying to mount
the rack on, the center line
of the screws that support
the rack are 2” from the
bottom of the operator. So
create your slab to be tall
enough to position the bot-
tom of the operator in the
correct position. The height
of the operator is however
adjustable vertically by an
inch after the slab is set by
adjusting bolts.

1. Position the operator over the foundation plate and
slide the treaded part of the bolts thought the oblong
holes on the outside of the base of the opener.
If the height of the operator from the slab ever has to be
adjusted, the nuts just above the plate can be moved up
the threading and the operator can rest on the nuts (as
seen in the illustration to the right).
2. Feed any wires up through the opener while installing
the opener to the base.
1. Manually take the leaf to its close position.
2. Lay the first piece of rack at the appropriate level
and mark the hole position on the gate. Make a hole
and use nuts, bolts and washers to make a connec-
tion to the gate (not provided).
The holes in the rack are made oblong for adjust-
ment after the holes are drilled. No special bolts are
required for mounting, simply tightening the bolts
will hold the rack secure.
5.3
Securing the Operator
Rack Installation

5.4
3. Move the gate manually, checking if the rack is resting on the pinion. Repeat at each hole.
4. Bring another rack element near the previous one, using a piece of rack (as shown below) to
synchronize the teeth of the two elements.
5. Move the gate manually and carry out the securing operations as far as the first element, pro-
ceeding until the gate is fully covered.
Notes on rack installation
• Make sure that during the gate travel, all the rack elements mesh correctly with the pinion.
• Do not, on any account, weld the rack elements either to the spacers or to each other.
• When you have finished installing the rack, adjust the distance between the pinion teeth and
the rack groove. Check if the distance is .06” (below) along the entire travel using the rack
slots.
• Manually check if the gate habitually reaches the travel limit mechanical stops and make sure
that there is no friction during gate travel.
• Do not use grease or other lubricants between rack and pinion.

5.5
The ESTATE SLIDE operator is supplied with a Two magnets that trigger limits built into the
motor that need to be secured to the top of the rack. This triggers gate movement to stop in the
open and closed position.
1. Move the gate to the closed position.
2. Attach the one of the magnets as seen in the picture so it is triggering the limit.
3. Repeat for open position.
The correct positioning of the closed plate can be checked later after powering up the unit. The
FCC limit light (above M2 terminal block) will go off when the closed limit is tripped/ The open
limit can be confirmed by the FCA limit light going off.
If the incorrect light is turning off the wires in FCC and FCA on the M2 terminal block must be
switched.
Travel Limit Magnet Installation

6.1
For Your Convenience
The white terminal strips on the control board are easily removed for wiring.
Simply pull straight out on the terminal strip to remove it from the board. It will
slide right off. Slide it back on when you are finished with your wiring
connections.


6.2
Power
1. The Estate Swing E-SL 1800 comes with 1) 24V transformer. The transformer supplied has 2 screw
terminals to connect to. You may locate the transformer up to 144’ away from the control board
using 2 conductor stranded direct burial wire as specified below.
CAVowtehtotniremrofsnartehtmorfseriwowtehttresnI.2
terminals on the control board (CN1). The wires are not polarized, there is no positive or negative.
Do not splice the power cable wire.
Never run 110VAC power directly to the Estate Swing. This will destroy the Estate Swing
control board.
Never connect the power wire with the transformer plugged in. Contact between the two
lead wires, even for a second, will destroy the transformer.
Transformers are only warranted if the internal fuse is not blown. If the fuse is blown an
outside factor (shorting, surge, water, etc) has caused the transformer not to function.
3. Plug the transformer into a 110 V AC outlet.
4. The transformer is not weather proof and must be kept in a covered area. Plug covers are available
from your dealer, contact 1-800-640-GATE for a dealer in your area.
5. Two 12V DC batteries may be run in series as backup to the 24V transformer power. Running two
12V batteries in series creates a 24V system, you cannot run them in parallel (see diagram)
6. The power light located below the +24V and –24V output terminals will be on if the power is con-
nected properly. If the light is off then power through the transformer is not functioning properly
and either the unit has no power or is on battery backup. The light stays off during battery backup.
• 0-36 Feet - Use 16 Gauge
• 37-57 Feet - Use 14 Gauge
• 58-91 Feet - Use 12 Gauge
• 92-144 Feet - Use 10 Gauge

6.3
Temporary Safety Jumpers
For the highest level of safety, the Estate Swing systems are set up with Normally Closed safety
terminals. This means that in order for the gate opener to move these terminals must be closed
either through a safety device (recommended) or with jumpers. Temporary safety jumpers are
provided in the control box hardware bag for jumping these terminals to common (COM) during
the set-up process.
It is recommended not to use any accessories until setup and programming are complete.
NOTE: If not using safety devices the temporary safety jumper must remain in. In order for
the gate operator to move, all three safety terminal lights (STOP, FSW CL, FSW OP) must
be lit.
NOTE: The lights will not come on until the power is applied ot the board in the next step,
but the connections should be made prier to that.

7.1
Programming Operating Parameters
Complete this step prior to programming the gate movements. This will
dictate how your gate will react during programming.
If you do not use a backup battery and lose power or if you must
disconnect all power during programming to reset your control board,
you MUST start at this step before programming movements or
operating your gate, all parameters return to default.
Entering programming mode
1. Make the necessary power connections and check the LED lights to be sure the appropriate
lights are lit.
2. The display should show
3. Press and hold down P2 until the display shows parameter A with the
corresponding number that is currently default or previously pro-
grammed.
4. Press P1 to change the number variable of the parameter, USE THE
CHART ON THE NEXT PAGE AS A GUIDE.
5. To move to the next parameter, Press P2.
6. When 60 seconds have elapsed without any button being pressed the control unit automati-
cally exits the programming mode. To exit manually, Press P2 to scroll through all the pa-
rameters until the display shows
NOTE: there are 3 buttons on the casing but only two make contact
with P1 or P2, the other is there for a different model opener and should
be ignored.

7.2
After programming your last parameter you may now move on to
programming your gate movement. Press P2 one more time to exit
this mode. Gate movement instructions begin on the next page.
Operating Parameters Chart
A1, A2, A3, A4
Force: 1 = Obstructs easily, 4 = Obstructs less sensitive
Obstruction is when gate meets resistance motor stops and reverses directions
C0, C1
0 = Auto reclose off, 1 = Auto reclose on
Time delay set during run time learning process
D0, D1
0 = open/close/open, 1 = open/stop/close/stop
Sequencing when remote or OPEN A is triggered
E0, E1
0 = Condo function off, 1 = Condo function on
Condo function ignores signal from OPEN A or remote during an open cycle
G0, G1
0 = Flashing lamp, 1 = Steady on lamp (2 minute)
For 24V lamp terminal output
H1, H2, H3, H4
1 = 10%, 2 = 20%, 3 = 30%, 4 = 40%
Percentage of run time in slow down
I0, I1
0 = Slow down speed quarter speed, 1= slow down speed half speed
L0, L1
0 = encoder only, 1 = limits and encoder
Encoder is a device that records number of motor turns from closed to open
Recommended to use 1 setting
N0, N1
0 = pre-flashing off, 1 = pre-flashing on
For 24V lamp terminal, pre-flashing is a delay that allows lamp to flash
before closing as a warning of closing about to occur
O0, O1
0 = photocell close off, 1 = photocell close on
When open and in auto-reclose count down, photo cell wired in closing safety
if triggered and released makes gate close immediately
P0, P1
0 = auto-reclose override off, 1 = auto-reclose override on
Auto-close override is a trigger from OPEN A or remote causes auto-reclose
to be skipped and gate to close immediately
R0, R1
0 = Final brake off, 1 = Final brake on
If on there is a slight braking to decrease remaining momentum
before stopping

7.3
Programming Gate Movements
In this stage, your control board will memorize run time so it may judge where to begin slowing down for the
soft stop feature. Also if the auto-close feature is activated it will learn the user specified pause time.
1. Release the operator gears using the manual release process. Once released, manually move the gate
half way between the open and close position (this does not need to be exact).
2. Relock the operator gears at the half way point through its cycle. Verify your operator control
board is showing on the LED display.
3. Press and hold down P2 until the LED display shows the A parameter and the relevant number ap-
pear in the LED display.
4. Give an OPEN A command. This can be done with any opening device (keypad, push button, etc…)
wired into OPEN A and COM or by using the transmitter. You can also briefly (one second or less)
jump OPEN A and COM with a wire. This will begin your gate in the CLOSING DIRECTION
and the LED display will read “Pr”.
5.
When the closing limit switch is reached, the motor pauses for approximately 2 seconds, and then re-
starts with a total opening maneuver to the opening stop limit switch.
6. When the full open stop or limit switch is reached the gate will stop.
7. Wait for the amount of time you would like your gate to pause for during normal operation before
automatically re-closing and then signal your opener using an OPEN A contact or transmitter signal to
close the gate. The gate will then return to closed and programming will be complete.
(Even if your auto close is off you must still set a pause time, the pause time will not
be used in normal gate operation.)
IMPORTANT: If the gate begin to open rather than close, the gate must be stopped with a
reset pulse. You can either:
Touch the TWO pins of the JMP “RESET” using a screwdriver OR
Disconnect all power (transformer and backup battery)
Then switch the wires leading into APM1 and CHM1. Also switch the wires between FCC and
FCA.
Other manuals for Estate Swing
1
This manual suits for next models
1
Table of contents
Other FAAC Gate Opener manuals

FAAC
FAAC Estate Slide E-SL 1200 Series User manual

FAAC
FAAC FSL700 User manual

FAAC
FAAC Estate Swing e-sU 2200 series User manual

FAAC
FAAC J275/600 F User manual

FAAC
FAAC 750 Standard User manual

FAAC
FAAC E391 User manual

FAAC
FAAC 741 User manual

FAAC
FAAC 740-24V User manual

FAAC
FAAC Estate Swing Heavy Duty Series User manual

FAAC
FAAC Estate Slide E-SL 1200 Series User manual