Press the
Clear
button briefly. The maximum limit is displayed (
FL:HI
).
Press the buttons to set the maximum limit.
Press the Mode/Return button to exit and save the changes.
NOTE: If no button is pressed for 60 seconds, the thermostat will
save the changes and return to normal display.
5.2 Other Configurations
This procedure allows you to choose the following configurations:
Press and hold the Pgm button for 3 seconds. The current tem-
perature unit is displayed (unit).
Press the to toggle between °C and °F.
Press the Pgm button briefly. The current time format is dis-
played (Hr).
Press the to toggle between 24H and 12H.
Press the Pgm button briefly. The current Early Start setting is
displayed (ES).
Press the to toggle between OFF and On.
Press the Mode/Return button to exit and save the changes.
NOTE: Early Start can be used in Automatic mode only. When this function is
set to On, the thermostat calculates the optimal time to start heating in order
to obtain the desired temperature by the set time. The thermostat re-assesses
the start time daily based on the previous day’s results.
Press the Hour button to set the hour.
Set the Min button to set the minutes.
Set the Day button to set the day.
Press Mode/Return to exit and save the changes.
Daylight Savings (DLS) Time
When the DLS function is set to US, the thermostat switches to Day-
light Savings Time on the second Sunday of March and to normal
time on the first Sunday of November.
When the DLS function is set to Eu, the thermostat switches to Day-
light Savings Time on the last Sunday of March and to normal time
on the last Sunday of October.
NOTE: The DLS function is OFF (default setting) when the clock
loses its setting.
Press the Day button (3 seconds) until DLS appears
on the screen.
Press the to toggle between US,Eu and OFF.
Press the Day button briefly. The year setting is dis-
played.
Press the to set the current year.
Press the Day button briefly. The month setting is dis-
played.
Press the to set the current month.
Press the Day button briefly. The date setting is dis-
played.
Press the to set the current date.
Press Mode/Return to exit and save the changes.
7.1 Setpoint Temperature
The thermostat normally displays the actual (measured) temperature.
To view the setpoint, press one of the buttons once. The setpoint
will appear for the next 5 seconds.
To change the setpoint, press one of the buttons until the desired
temperature is displayed. To scroll faster, press and hold the button.
Backlight
The screen is lit for 12 seconds when any button is pressed.
7.2 Preset Temperatures
The thermostat has 2 preset temperatures:
Comfort temperature
Economy temperature
To use a preset temperature, press the corresponding button. The
corresponding icon will be displayed.
The following table shows the intended use and the default value of
each of the preset temperatures.
To store a preset temperature:
Set the desired temperature using the buttons.
Press and hold the corresponding temperature preset button
until the corresponding icon is displayed.
The thermostat has 2 modes of operation: automatic mode and man-
ual mode.
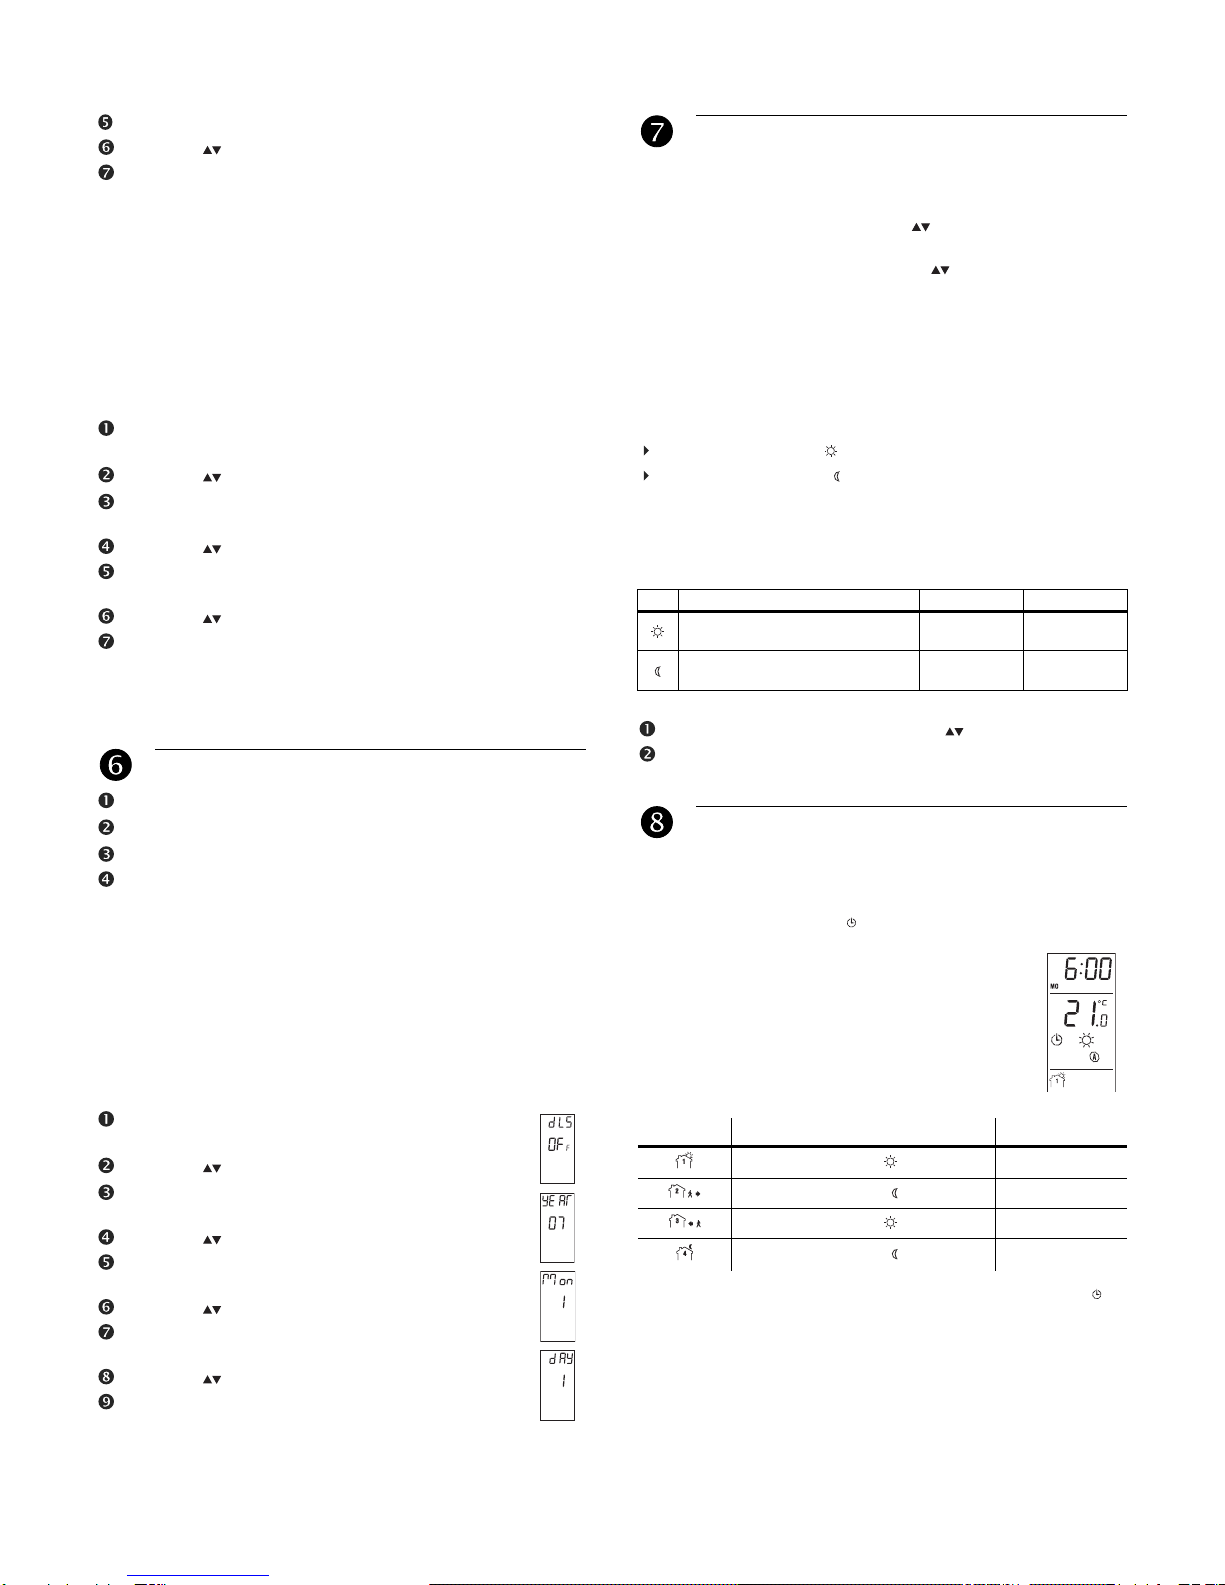
8.1 Automatic Mode
Use automatic mode if you want the thermostat to fol-
low the programmed schedule. The schedule has 4
time periods and uses the 2 preset temperatures. The
thermostat switches to Comfort temperature in periods
1 and 3 and to Economy temperature in periods 2 and
4. The following table shows the intended use of each
time period.
To use the automatic mode, press the Mode button to display on
the screen. The current period number will also appear.
sgnittestluafeDsretemaraP C°tamroferutarepmeT
H42tamrofemiT
Early Start setting (see the note below) On
Clock and Day Setting
6.
Temperature Adjustment
7.
Icon Intended use A/AF modes F mode
Comfort
(when at home) 21 °C (70 °F) 28 °C (82 °F)
Economy
(when asleep or away from home) 16.5 °C (62 °F) 20 °C (68 °F)
Modes of Operation
8.
Periods Temperature setting Typical use
Comfort Wake-up
Economy At work
Comfort At home
Economy Sleep