Bodylastics Curl Bar User manual


Your Bodylastics system is not a toy. It is a serious piece of exercise equipment. In fact, what you
have in your possession is the most powerful slingshot on the planet. Use it with caution and care!
When using the door anchor, be sure to place it on the hinge side of the door and lock your door!
When standing on the bands make sure to always wear athletic shoes, and position the bands
securely under the arches of your feet. Always check your components (bands etc.) for damage
prior to use. In the event that a component looks damaged, stop using it immediately and contact
While your Bodylastics bands have built-in snap reduction and safety tech, they are not snap proof!
They will not catch you in the event that a band does actually snap. Similar to free weights or ANY
other type of tness equipment, you must always exercise common sense and caution. Regardless
of the exercise performed, you must ALWAYS adjust your body weight in a manner to avoid losing
your balance, in the event that a band does snap.
Now Let’s get to work!
CAUTION

SCAN THE QR CODE OR GO TO
https://bodylastics.com/start
Get Started With Your Bodylastics
Scan the QR Code to go to the website and watch an unboxing video of the set that you have
purchased. Get to know your Bodylastics set inside and out and make sure there is nothing
missing. Watch the instruction and setup videos to learn how to use your Bodylastics Bands
and Components.

Curl Bar Assembly Instructions
Take the collapsed bar out of the travel bag
and lay both halves down on a at surface.
Hold a half in each hand and feed the
connector chain into the half that has the
hollow end.
1.
2. HOLLOW END
SOLID END NOTCHED OUT
SECTION
CONNECTOR
CHAIN

Curl Bar Assembly Instructions (cont.)
Now twist the plastic collar (clockwise or
counter clockwise, it depends on how you
are holding the bar) so the collar tightens
on the thread. Stop twisting when the
connection is secure and tight. DO NOT
OVER TIGHTEN THE COLLAR AS IT COULD
STRIP THE THREAD.
Push the solid end into the hollow end until
it stops. Then twist the two halves of the bar
until the notched out section from the solid
end aligns with the stopper of the hollow
end. Once you feel them align, you should be
able to move the solid end deeper into the
hollow end until it stops.
3.
4. PLASTIC
THREAD
PUSH BAR
TOGETHER
TWIST
COLLAR
TO TIGHTEN
PLASTIC
COLLAR

Door Anchor Position Diagram
Top of the door -
Chest height -
Waist height -
Knee height -
Bottom of the door -
Close the anchor in the door so
the anchor loop is on the side of
the door facing you.
Refer to this diagram for the door anchor position found in the exercise descriptions.
CAUTION: The distance from the bottom of your door to the oor cannot be taller than 20mm.
If gap is taller than 20mm, place door anchor on the bottom of the hinge side of the door.

Door Anchor Setup
Locate the hinge side
of the door. The hinge
side is the the vertical
side of the door that
the door hinges are
attached to.
Push the loop of the
anchor between the
door opening and the
door frame.
Thread your band(s)
through the loop of
the door anchor.
Open the loop of the
door anchor.
1. 3.
2. 4.

Ankle Strap Setup
Place the strap
around your ankle
with the soft
cushioned side
against your ankle.
Thread the rough side
of velcro through the
rectangular ring.
Check to make sure
that the strap is
securely attached.
Pull the end of the
strap back and
stick the rough side
securely to the soft
side.
1. 3.
2. 4.

Ankle Strap Setup Anywhere Anchor Setup
Wrap the
Anywhere
Anchor around a
stationary object.
Pull the strap tight.
Pull one loop
through the other
loop.
Thread a band
through the padded
loop to double over
your band, or clip a
band directly onto
the D-Ring to use
a single length of
elastic.
1. 3.
2. 4.

Attaching The Clip Bands
or or
Increasing Resistance:
Attaching The Bands:
Decreasing Resistance:
To attach your Clip Resistance
Bands to the handles and ankle
straps simply clip them on to the
metal rings.
To increase resistance,
simply substitute the
elastic for a thicker
one (thicker = more
tension), or “Stack” the
resistance by clipping
on (combining)
multiple bands.
To decrease
resistance, simply
change out the
elastic for a
thinner one (less
tension), or remove
additional bands
which are attached.

Decreasing Resistance:
Maintaining Your Bands
Do not pull your bands side to side
like a pulley. If you are pulling side
to side wrap one end of the band
back through the loop.
Never clip your band
to an anchor loop.
Do not stretch the bands
more than 3-4 times their
resting length.
Do not wrap your bands
around stationary objects.
Never thread your band through
the ring of an ankle strap.
Do not store your bands
in direct sunlight or extreme
hot or cold temperatures.

Lifetime Warranty
Replacements in the First 90 days:
US, CA, UK or EU shipping addresses: FREE of charge
All other countries: Market price for shipping
Replacements After 90 days:
US, UK or EU shipping addresses: $£€5.95 per item
CA: CAD 8.95 per item
All other countries: Market price for shipping
* Free Replacement Not Applicable For Products Used In Commercial Settings
Here’s how it works:
To place a warranty order go to https://bodylastics.com/warranty

Curl Bar Exercises
The next 54 pages contain 27 exercises you can perform with your
Bodylastics Bar.
Important: Please make sure you have reviewed all the safety precautions at the
beginning of this manual. Also make sure that you carefully inspect all equipment for any
signs of damage prior to performing any exercise. Do not use any equipment that
arrange a replacement in accordance with the warranty.
27 Curl Bar
Exercises

Chest Press
MUSCLE GROUP
CHEST

Area Targeted: Middle Chest
Set up:
Anchor Position: #1 - Top of the door.
Bands: Thread the band(s) through the anchor and attach each end of the band(s) to an
outer ring of the bar.
Body Positioning: Stand close to the door with your back to the anchor. Position your head
and shoulders in between the bar and the anchor. Grip the bar at chest height with hands
shoulder-width apart and palms facing forward. Position your elbows tight to your body.
Your palms should be facing down. Keep your back straight, head straight, and chest up.
Movement:
Push the bar down and forward until your arms are almost fully straight and are at stomach
height. Return to the starting position (controlling the resistance). Repeat.
Points To Remember:
1. Grip the bar lightly to ensure that the majority of the stress is placed on the chest muscles.
2. Do not bring your elbows past your shoulders as you move them back to the starting
position.
Chest Press

Standing Chest Fly
MUSCLE GROUP
CHEST

Area Targeted: Middle Chest
Set up:
Anchor Position: #2 - Chest height.
Bands: Thread the band(s) through the anchor and attach each end of the band(s) to an
outer ring of the bar.
Body Positioning: Grip the center collar of the bar with one hand (palm facing forward) and
stand 3 to 4 feet away from the door with your active side facing the door. Position your arm
so that it is pointing straight towards the door anchor and has a slight bend. Keep your back
straight, head straight, chest up, and feet shoulder-width apart.
Movement:
Pull the bar across your body until it is right in front of your chest.
Points To Remember:
1. Keep your arm frozen with a slight bend in your elbow throughout the movement.
2. Keep your shoulders square, do not rotate your upper body as your pull the bar.
Standing Chest Fly

Biceps Curls
MUSCLE GROUP
BICEPS

Area Targeted: Biceps
Set up:
Anchor Position: Not required.
Bands: Attach each end of the band(s) to an outer ring of the bar.
Body Positioning: Stand on the band(s), hips-width apart. Now grip the bar with each hand
with palms facing up (choose the width that feels the most comfortable) and stand up
straight. Keep your back straight, head straight, chest up and stomach tight. Keep a slight
bend in your legs. Start with your arms straight down and elbows tight to your sides.
Movement:
Pull the bar up and bend your arms until it is at chest height. Return to the starting position
(controlling the resistance). Repeat.
Points To Remember:
1. Keep your elbows stationary at your sides, do not let them move forward and back during
the movement.
Biceps Curls

Reverse Biceps Curls
MUSCLE GROUP
BICEPS
This manual suits for next models
3
Table of contents
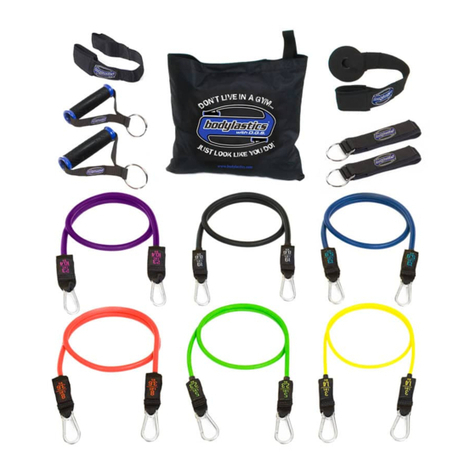
Other Bodylastics Fitness Equipment manuals
