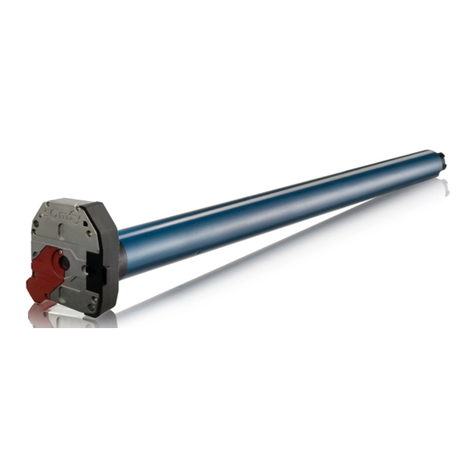
BOFU BRB23 User manual

PREMIER DECORATIVE ROLLER SHADES
HORIZONTAL FLAT SHEER SHADING
1. Position the blind:
Inside the recess: Decide the position of the blind so that it will be clear of any latches or fixtures.
Outside recess: Decide the position so that the overlaps on the both side of the recess are equal.
2. Fixing the brackets:
The brackets are designed for face or top fixing to
frame, wall or ceiling.
a. Having decided the positioning of the blind, preset it to
the desired position making sure it is centred and level.
b. Mark the location of each bracket with a pencil, make sure
they are on the same line.
c. Place each bracket on its location markings and mark
through the desired screw hole positions.
d. Use the screws provided to fix the brackets to wall.
3. Installing the blind.
Hold the cassette parallel with brackets, make sure the back
panel of cassette sits on the back hooks of the brackets
where it was attached to the wall. Push it forward until the
locking mechanism clicks.
Attention: After the locking mechanism clicks, if you see the
front hooks of the brackets stay firm into the top edge of
cassette, that is correct.
Warning
Please don't let the front hooks of cassette to lock into
the front top edge of the cassette first, as this will make
it impossible to install.
4. Operating the blind.
The beaded chain side control at the right-hand side or left-
hand side of blind is used to raise or lower the blind to the
desired height.

5. Installing the chain tensioner.
Shades with clutch controls come with a continuous chain
loop, which should always be screwed to the wall with the
included chain tensioner.
The chain tensioner should be installed to a flat surface, so
the bead chain is taut but not stretched. Be sure not to twist
or cross the chain.
On inside mount shades, the tensioner may be attached to
the windowsill or to the inside of the window frame. For
outside mount or wall mount shades, the bracket may be
mounted to the exterior of the window frame or the wall.
With a pencil, mark the desired location of the screw holes
for the tensioner and then drill pilot holes. Then install the
tensioner with the screws, making sure that the tensioner is
fully installed, so that the spring is pushed in and the chain
passes smoothly through the guide.
The chain tensioner forms an important safety function
by keeping chain loops away from small children. Never
operate this shade without a functioning and correctly
installed chain tensioner.
Please retain these instructions for the future reference.
Thank you for purchasing this product. Please read the
instructions and warning carefully before installation to
ensure safe and satisfactory use of this product.

042.BRB237D01
Operation
Item
Item Operation Result Illustration
1Connect motor with battery
pack
2Within 60 seconds press
CONFIRM button on Motor jogs, the program
has been done
Technical data
Motor Load Torque: 0.7Nm/34rpm, 1.1Nm/28rpm
Battery Specification: Li-ion Batter, 2000mAH, 7.4V.
Notify:
●Motor antenna should be as straight as
possible in the position far away from metal objects. Directly contact
metal objects is prohibited; otherwise, the receivindistance will be influenced seriously.
●Please charge the battery when the motor alarm or work faltering
Program the
first
transmitter
with motor
BRB23/BRB23D Rechargeable Battery Motor Instruction
●Please skip the step and go to next If manufacturer has programmed a transmitter with motor
before delivery
transmitter
has
been
done
.
1Press UP button If motor goes up, please do
nothing, If motor goes down,
please do next step
2Press and hold LIMIT button
then press STOP button Release both buttons when
motor jogs
3Press UP button Motor goes up, the motor
rotation direction has been
revised
1Keep pressing LIMIT
button on any
programmed transmitter
Rleasethis button when
motor jogs
2Press DOWN button on
transmitter Motor runs down
3Press STOP button When
motor running close to the
end-point of bottom limit Motor stops
4Press either UP or DOWN
button
Motor runs step by step to
adjust bottom limit
accurately
Setup
bottom limit
Change
motor rotate
direction
The whole limit setting must be finished at one times
5Press CONFIRM button on
transmitter Motor jogs, down way
setting has been done.

Operation Item Operation Result Illustration
6Press UP button on
transmitter Motor runs up
7Press STOP button When
motor running close to the
end-point of upper limit Motor stops
8Press either UP or DOWN
button Motor runs step by step to
adjust lower limit accurately
9Press CONFIRM button on
transmitter Motor jogs, the setting has
completed.
1Press DOWN button Stop motor at the position
which you need
2Press and hold LIMIT
button then press UP
button
Release both buttons when
motor jogs, now the setting
has completed
3Press STOP button when
motor stop Motor will run to the setting
position and stops
Keep pressing
LIMIT
●Please skip the step and go to next if the subsidiary transmitter is not needed
Setup upper
limit
Set
intermediate
position
This step only can be done after setting motor limit
1
K
eep press
i
ng
LIMIT
button on the first
programmed transmitter A,
then press CONFIRM
button
Please release both buttons
once motor jogs
2Press CONFIRM button on
transmitter B
Motor jogs again, now
transmitter B has
programmed with motor
Delete all
other
transmitters 1Keep pressing LIMIT
button on transmitter A,
then press DOWN button
Please release both buttons
once motor jogs,now all
tramsitters have been
deleted except A
Delete itself
from motor 2Press CONFIRM button 3
times This transmitter has been
deleted from the motor
Charging
FAQ
Program
transmitter
using a
programed
transmitter
The motor works with Li-ion battery, please charging it when the motor alarms or work faltering. Please
charge the motor using professional charger CH-8.4V/1A
Charging time: Charger 4 hours or indicator change to green 1 hours, please take the charger away
when charging full.
If nothing works, please check:
●please charging the motor battery firstly
●If the motor runs to a direction continually, the user didn't setup limit successfully, please re-set limit.
This manual suits for next models
1
Popular Engine manuals by other brands

Mitsubishi
Mitsubishi S6R-Y2PTAW-1 Specification sheet
TecumsehPower
TecumsehPower OH318EA Operator's manual

Briggs & Stratton
Briggs & Stratton 106200 Repair manual
Metronic
Metronic Motor Horizon-Horizon installation guide

PowerTech
PowerTech 4045TF280 operating instructions

Briggs & Stratton
Briggs & Stratton 204400 Series Illustrated parts list
