Bolide BN-NVR User manual

BN-NVR / M4PoE
QUICK START GUIDE V1.1/2014-06-30
ISO 9001:2008 Certified Company
PoE Network Video Recorder
4Ch
BN-NVRM4POE Manual Bolide Technology Group, Inc
ii
Pre
ca
ut
io
ns
Preca
u
tion
s
Before using this device, study all of this document’s tips, advice, and rules. Follow
the rules strictly to ensure that your device operates at the best condition. If you
install this device in someplace public, provide the message, "You have entered the
area of electronic surveillance", in a noticeable area. Failure to properly use electrical
products may cause fire or severe injuries. To prevent accidents, read the information
below carefully.
S
ym
bo
ls
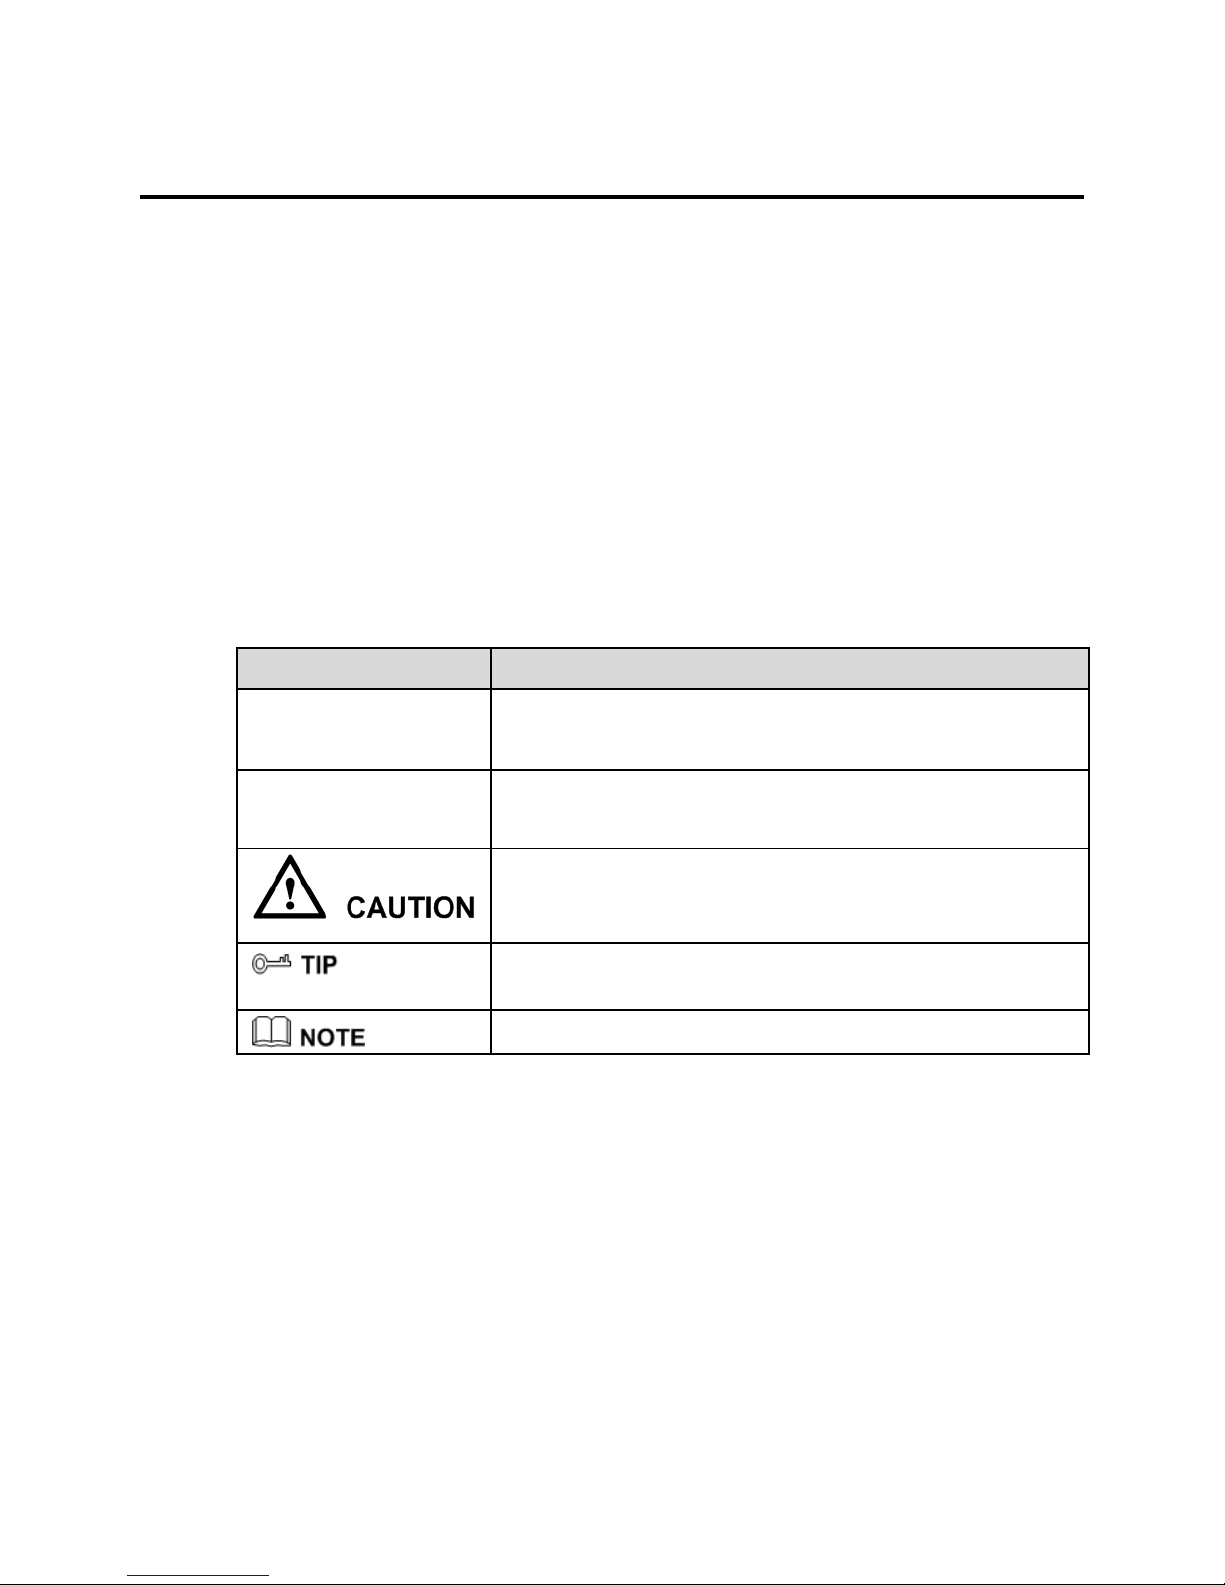
This document contains the following symbols. Their meanings are described
accordingly.
S
ymb
ol
Descr
ipt
io
n
Details fatal risks that, if not avoided, can cause severe
injuries or death.
Details moderate risks that, if not avoided, can cause
minor or moderate injuries.
Details risks that may affect the product. If these are
not avoided, it may lead to damage, data loss,
performance deterioration, or unpredictable results.
Provides information that, if taken to account, can save
time or resolve issues.
Provides additional information.
To prevent electric shocks, burns, or other injuries, keep the power plugs dry and
clean.
Observe the device’s installation requirements accurately during installation. The
manufacturer is not responsible for device damage caused by the user's failure to
follow these requirements.

BN-NVRM4POE Manual Bolide Technology Group, Inc
iii
Conform to local electrical safety standards and use power adapters that are
marked with the LPS standard when installing and using this device. Otherwise,
this device may be damaged.
Use the accessories delivered with this device. The voltage must meet input
voltage requirements for this device.
If this device is installed in places with unsteady voltage, ground this device to
discharge high energy levels (such as electrical surges) in order to prevent the
power supply from burning out.
When in use, ensure that no liquids flow into the device. Immediately power off the
device and disconnect all cables if water, or any other liquid, unexpectedly flows into
the device.
Do not focus strong light (such as light bulbs or sunlight) on this device.
Otherwise, the service life of the image sensor may be shortened.
If this device is installed in places where lightning frequently occurs, ground the
device to discharge high energy levels, such as lightning strikes, in order to
prevent device damage.
Avoid heavy loads, intensive shakes, and soaking to prevent damages during
transportation and storage. The warranty does not cover any damage that is caused
during secondary packaging and transportation after the original packaging is
taken apart.
Protect this device from dropping or significant impact. Keep the device away from
magnetic field interference. Do not install the device in places with shaking
surfaces or frequent rattling.
Clean the device with a soft and dry cloth. For stubborn stains, dip the cloth into
a neutral cleanser, and then gently wipe the stain away with the cloth before you
dry the device.
Do not jam or block the ventilation opening. Follow the installation instructions
provided in this document when installing the device.
Keep the device away from heat sources such as radiators, electric heaters, open
flame, and other heating equipment.
Keep the device away from places that are moist, dusty, extremely hot,
extremely cold, or contain strong electric currents.
If the device is installed outdoors, take measures to repel insects and moisture
to avoid circuit board corrosion that can affect monitoring.
Unplug the power plug if the device has been idle for a long time.
Before unpacking, check to see if the fragile sticker is damaged. If the fragile
sticker is damaged, contact the customer service or sales personnel. The
manufacturer shall not be held responsible for any artificial damage to the fragile
sticker.

BN-NVRM4POE Manual Bolide Technology Group, Inc
iv
Special
An
no
u
nce
me
nt
After strict inspection, all complete products sold by the manufacturer are delivered
along with nameplates, operation instructions, and accessories. The manufacturer
shall not be held responsible for counterfeit products.
This manual will be regularly updated alongside product enhancements and software
upgrades. Updated information may be added to new versions of this manual without prior
notice. It is up to the user to ensure that their product stays up to date.

v
Cont
e
n
ts
Precautions
....................................................................................................................
i
1 Specifications............................................................................................................ 1
2 NVR
Ne
t
wo
r
k
i
ng
.....................................................................................................
3
3 Hard Disk
..................................................................................................................
4
3.1 Precautions ..................................................................................................................... 4
3.2 Hard Disk Recommendation .......................................................................................... 4
3.3 Video Storage Duration .................................................................................................. 4
3.4 Hard Disk Installation .................................................................................................... 5
4 Operation Instruction.............................................................................................. 8
4.1 Front panel ..................................................................................................................... 8
4.2 Rear panel....................................................................................................................... 9
4.3 Startup ............................................................................................................................ 9
4.4 Shutdown ..................................................................................................................... 10
5 Quick Setup
............................................................................................................
12
6 Web
Access..............................................................................................................
16
7 FAQ
..........................................................................................................................
18
A Hazardous Substance Declaration
.....................................................................
19

BN-NVRM4POE Manual Bolide Technology Group, Inc
1
1
Sp
ecifi
ca
ti
o
ns
System Specifications
CPU
Industrial-grade embedded CPU
Operating
system
Embedded Linux operating system
Hard disk
interface
One hard disk interface, which supports SATA2.0 and a capacity of up
to 4 TB
Network
interface
One 10 Mbps/100 Mbps adaptive Ethernet interface
Four PoE 10 Mbps/100 Mbps Ethernet interfaces, compliant with the
IEEE802.3af standard
Audio interface
One input interface
One output interface
Video interface
One HDMI output interface
One VGA output interface
Support for 1920
×
1080, 1280
×
720, and 1024
×
768 output resolution
USB interface
Two front-facing USB2.0 interfaces
Alarm interface
One alarm input
One alarm output
Factory reset
button
One
Performance Specifications
Network video
input
Four video inputs
Total bit rate
18 Mbps
Video
resolution
1080p/720p/D1
Synchronous
playback
Up to four 1080p video inputs
Local preview
Four video inputs, support for real-time preview on a 1/4 screen and
rotating video windows
Video backup
Backup to a USB flash drive, removable hard disk, or network disk

BN-NVRM4POE Manual Bolide Technology Group, Inc
2
Others
Operating
temperature
0℃–45℃
Operating
humidity
≤ 90% (non-condensing)
Power supply
DC 48 V/1.35 A power adapter
Power
consumption of
the mainboard
≤ 6 W (excluding the hard disk)
PoE power
consumption
≤ 40 W
Shelf size
260 mm
×
175 mm
×50
mm (length
×
width
×
height)
Package size
382 mm
×
304 mm
×
121 mm (length
×
width
×
height)
Net weight
≤ 700 g (excluding the hard disk)
Installation
Desktop or wall-mounted
Recording times listed above are estimations. They are not perfectly exact. Each individual
product’s limit will differ slightly.

BN-NVRM4POE Manual Bolide Technology Group, Inc
3
2 NVR
Ne
twor
ki
ng
The network video recorder (NVR) has five network interfaces: one 100 Mbps network
interface, and four PoE network interfaces. The four PoE network interfaces can be
connected to devices within a distance of less than 100 meters.
Connections must be made via standard cables.
POE Network Interfaces
After IP cameras are connected to the PoE network interfaces, the NVR automatically
adds the IP cameras and enables 24/7 recording.
100 Mbps Network Interface
The 100 Mbps network interface can be connected to other network devices. Figure 2-1
shows the network topology of the NVR.
Figure 2-1 Network topology of the NVR

BN-NVRM4POE Manual Bolide Technology Group, Inc
4
3 Hard
Disk
3.1
Preca
u
tion
s
Formatting will clear all video data on the hard disk. Use this function only when
necessary.
Be sure to uninstall the hard disk before removing it from the NVR during runtime.
Otherwise, the hard disk may be damaged, or data may be lost.
The NVR must be connected to a stable power supply during runtime. Otherwise,
the hard disk may be damaged, or data may be lost.
The maximum capacity of a single hard disk cannot exceed 4 TB.
3.2
Hard
Disk R
e
com
me
nd
a
tion
Seagate and Western Digital hard disks, which are highly stable and inexpensive,
are recommended.
3.3 Video Storage
D
u
ra
tion
Table 3-1 Video storage duration
Maximum Hard Disk
Capacity
Maximum Bit Rate
Video Storage Duration
1
×4
TB
18 Mbps
21 days
Formulas for calculating the video storage duration:
Step 1 Use the following formula to calculate the storage capacity q (unit: Mbyte) required
to record a single video per hour:
q = d/8
×
3600/1024
d indicates the bit rate (unit: Kbit/s)
Step 2 Use the following formula to calculate the video storage duration t (unit: day)

BN-NVRM4POE Manual Bolide Technology Group, Inc
5
w indicates the capacity (unit: Mbyte) of a single hard disk.
n indicates the number of disks.
h indicates the recording duration per day.
c indicates the number of video inputs of the NVR.
Table 3-2 shows examples of video storage duration (h is 24 hours).
Table 3-2 Examples of video storage duration
Hard
Dis
k
C
a
pa
c
ity
Bit
Ra
t
e
Video
Cou
n
t
Video
S
t
orag
e
Du
r
a
t
io
n
1
×
4TB
D1, 1.5Mbps
4
64 days
1
×
4TB
720p, 3Mbps
4
32 days
1
×
4TB
1080p, 4.5Mbps
4
21 days
The data listed in the preceding table is only a mathematical reference. The recording time
estimate for the device is dependent on the user’s use and hard disk space.

BN-NVRM4POE Manual Bolide Technology Group, Inc
6
3.4
Hard
Disk I
n
s
ta
ll
a
ti
on
Take the following steps to install a hard disk:
Step 1 Unscrew the two fixing screws on the hard disk cover and remove the hard disk cover,
as shown in Figure 3-1.
Figure 3-1 Unscrewing the hard disk cover
Step 2 Use the four screws included in the accessory kit to fix the hard disk to the hard disk
cover, as shown in Figure 3-2.
Figure 3-2 Fixing the hard disk to the hard disk cover
Step 3 Insert the hard disk cover equipped with the hard disk into the hard disk cartridge and
connect the hard disk lines to the hard disk, as shown in Figure 3-3.

BN-NVRM4POE Manual Bolide Technology Group, Inc
7
Figure 3-3 Inserting the hard disk into the hard disk cartridge
Step 4 Install the hard disk cover and screw the two fixing screws back into the hard disk
cover, as shown in Figure 3-4.
Figure 3-4 Restoring the hard disk cover
----End

BN-NVRM4POE Manual Bolide Technology Group, Inc
8
4 Operation
In
str
uct
i
on
4.1 Front
panel
Figure 4-1 shows the front panel of the NVR and the interfaces on it. Table 4-1 shows
the description of the front panel.
Figure 4-1 Front panel
Table 4-1 Elements of the front panel
N
O.
El
emen
t
Descr
ipt
io
n
1
PWR
Power indicator
When the NVR is operating, the PWR indicator
will be on.
When the NVR has been shut down, the PWR
indicator will be off.
2
HDD
Hard disk status indicator
The HDD indicator flashes when data is read
from or written to the hard disk.
3
Network LAN LED
Non-PoE network status indicator
This indicator flashes when data is transmitted.
4/5/6/7
PoE indicator
PoE network status indicator
This indicator flashes when data is transmitted.
8
KB/MOUSE
Supports connection to a USB mouse and
keyboard.
9
BACKUP
Supports connection to a USB flash drive or

BN-NVRM4POE Manual Bolide Technology Group, Inc
9
N
O.
El
emen
t
Descr
ipt
io
n
USB removable hard disk.
4.2 Rear
p
a
nel
Figure 4-2 shows the rear panel of the NVR and the interfaces on it. Table 4-2 shows
the description of the rear panel.
Figure 4-2 Rear panel
Table 4-2 Elements of the real panel
N
O.
N
am
e
Descr
ipt
io
n
1
Alarm input
One alarm input (Boolean value)
2
Alarm output
One alarm output (Boolean value)
3
LAN
RJ45 10 Mbps/100 Mbps adaptive Ethernet
interface
4
HDMI
Video output interface
5
VGA
6
LINE OUT
Audio output
7
RESET
Factory reset button
8
MIC IN
MIC input
9
PoE network interface
Four PoE network interfaces
10
DC power interface
Connected to an external power adapter
4.3
S
ta
rt
up
Before starting the NVR, ensure that the NVR is connected to a stable power
supply and power adapter.

BN-NVRM4POE Manual Bolide Technology Group, Inc
10
Once the NVR is connected to a stable power supply, it will start automatically after an
initial activation.
Before starting the NVR, ensure that the NVR is properly connected to a power
supply, and that a monitor is connected to the HDMI or VGA interface of the NVR.
When the NVR is started, the power indicator will light up. The NVR will then initiate
a self-test, and will display the test results on the screen. The startup process takes
about 2 minutes.
When all the hardware has been inspected, the self-test will stay on-screen. You can
click continue or shutdown in the lower right corner of the screen. If you click
continue, the NVR enters the login screen.
The hard disk of the NVR must be provided by the user. Hard disk detection is performed
during startup. If the detection fails, possible causes include:
The hard disk is new and unformatted. In this case, format the hard disk based on chapter
5’s “Quick Setup”
The hard disk is formatted, but the file system is inconsistent with the one supported by
the NVR.
The hard disk is damaged.
4.4
S
hu
td
ow
n
Do not disconnect the power supply when the system prompts "Shutting down".
The NVR may fail to operate normally when a power supply abnormality occurs.
Damage to the NVR is possible in extreme situations. To avoid this, the user is
advised to use a regulated power supply.
To shut down the NVR, click in the upper right corner of the main screen. The
shutdown screen is displayed, as shown in Figure 4-3.

BN-NVRM4POE Manual Bolide Technology Group, Inc
11
Figure 4-3 Shutdown interface
Enter the correct password and click Shutdown. When authentication is successful, a
confirmation prompt will display. Click Yes.
----End

BN-NVRM4POE Manual Bolide Technology Group, Inc
BN-NVRM4POE Manual Bolide Technology Group, Inc
13
If the manual mode is selected, click to synchronize the times of the IP
cameras. If the auto mode is selected, the NVR synchronizes the times of the IP
cameras automatically.
2. Authentication accounts of managed cameras
Only successfully authenticated cameras can be used normally. Before adding a camera,
add its authentication account and password the list.
To log in to an IP camera, you need to enter the correct authentication account. Only
successfully authenticated IP cameras can be managed.
The system provides the default account admin and default password admin. You
can click to add an IP camera authentication account.
To delete an IP camera authentication account, select the account and click .
3. NVR network configuration
The default IP address of the NVR is: 192.168.0.121.
You can enable automatic IP address acquisition and set the IP address, subnet
mask, default gateway, and DNS address of the NVR. The network connection
status and speed are displayed in real time. For details about the parameters, see
section 8.1.5 "Network" of the Network Video Recorder (NVR) User Guide. Figure
5-2 shows the network topology of the NVR.
Figure 5-2 Network topology of the NVR

BN-NVRM4POE Manual Bolide Technology Group, Inc
14
4. Hard disk management
Formatting will clear all video data on the hard disk. Use this function only when
necessary.
Be sure to uninstall the hard disk before removing it from the NVR during runtime;
otherwise, the hard disk may be damaged or data may be lost.
The NVR must be connected to a stable power supply during runtime; otherwise,
the hard disk may be damaged or data may be lost.
You can manage the hard disk of the NVR as follows:
Format the hard disk. Click Format. In the displayed dialog box, click Yes.
Install or uninstall the hard disk. Before removing a hard disk from the NVR, shut
down the NVR first and then uninstall the hard disk.
Check the status of the hard disk (normal, abnormal, unformatted, and unavailable).
Check the used space and total space of the hard disk.
5. Camera deletion
To remove managed cameras, click in the camera list, select the cameras to
be removed, and click Delete Camera.
6. IP camera setup
You can view the status of an IP camera and set the name, IP address, recording policy,
stream parameter, and motion detection parameter of the IP camera.
Viewing the status of an IP camera
The camera status may be Online, Offline, and Incorrect account. For an online IP
camera, click to view live video.
Changing the name of an IP camera
Enter a name in the Name column.
Setting a recording policy
Click the recording policy to be modified. The Recording Policy Configuration
dialog box is displayed. For how to set a recording policy, see section 8.1.7
"Recording" of the Network Video Recorder (NVR) User Guide.
Setting a stream
Click the stream to be modified. The Stream dialog box is displayed, as shown in
Figure 5-3.

BN-NVRM4POE Manual Bolide Technology Group, Inc
15
Figure 5-3 Stream dialog box
Set stream parameters, select On for Apply to All Devices, and click Apply. The
parameter settings are applied to all IP cameras that have the same resolution as the
configured resolution.
Setting a motion detection alarm
Click the motion detection information to be modified. The Motion Alarm dialog
box is displayed. Set the arming time and detection zone when the motion detection
alarm function is enabled.
----End
Table of contents
Popular Recording Equipment manuals by other brands

turck
turck TBEN-L 4RFID-8DXP Series Instructions for use

Siemens
Siemens SIMATIC HMI Mobile Panel 277 RO operating instructions

Roland
Roland MT-200 Owner's manual set

Advanced Bionics
Advanced Bionics Auria troubleshooting guide

Flock Audio
Flock Audio Patch XT user manual

Zoom
Zoom R8 Interface Interface manual


