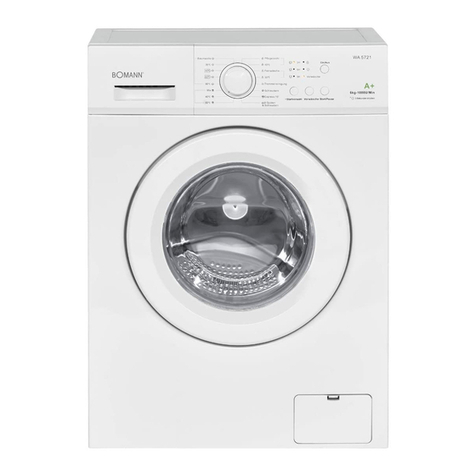
BOMANN WA 5724 User manual

HOUSEHOLD
HOUSEHOLDHOUSEHOLD
HOUSEHOLD-
--
-
WASHING MACHINE
WASHING MACHINEWASHING MACHINE
WASHING MACHINE
WA 5724
WA 5724WA 5724
WA 5724
Instruction Manual
Instruction ManualInstruction Manual
Instruction Manual

2
Contents
ContentsContents
Contents
Introduction..............................................................................................Page 3
General Notes……………………………………………….………….…….Page 3
Special safety Information for this Unit……………………………………..Page 4
Unpacking the Appliance………………...………………….………..…..…Page 6
Overview of the Appliance……………….…………………….……..……..Page 7
Installation…………….……...…………...………………………...………...Page 7
Startup / Operation………....……...………………………..…..…….……Page 13
Start the Washing cycle………………………...…………….……………Page 21
Tips for Energy saving……………...….………………………....………..Page 27
Cleaning and Maintenance.....…………………………...……..……..…..Page 27
Repairs……………….……………………………………………………....Page 31
Troubleshooting……………………..………………………………......….Page 31
Technical Data……………...……………………………..……..…………Page 33
Disposal….………………………..……….……………………..……..…..Page 35

3
Introduction
IntroductionIntroduction
Introduction
Thank you for choosing our product. We hope you will enjoy using the appl
ance.
Symbols in these Instr
Symbols in these InstrSymbols in these Instr
Symbols in these Instructions for Use
uctions for Useuctions for Use
uctions for Use
Important information for your safety is specially marked. It is essential to
comply with these instructions in order to avoid accidents and prevent da
age to the machine:
WARNING:
WARNING:WARNING:
WARNING:
This warns you of dangers to your health and indicates
possible injury risks.
CAUTION:
CAUTION:CAUTION:
CAUTION:
This refers to possible hazards to the machine or other objects.
NOTE
NOTENOTE
NOTE:
::
: This highlights tips and information.
General Notes
General NotesGeneral Notes
General Notes
Read the operating instructions carefully before putting the appliance into
operation and ke
ep the instructions including the warranty and the receipt. If
you give this device to other people, please also pass on the operating i
structions.
•
The appliance is designed exclusively for private use and for the envi
aged purpose. This appliance is not fit for commercial use.
•
The appliance is only to be used as described in the user manual. Do not
use the appliance for any other purpose. Any other use is not intended
and can result in damages or personal injuries.
•Do not use it outdoors. Keep it away fr
om sources of heat, direct sunlight
and humidity. Do not use the appliance with wet hands.
Thank you for choosing our product. We hope you will enjoy using the appl
i-
Important information for your safety is specially marked. It is essential to
comply with these instructions in order to avoid accidents and prevent da
m-
possible injury risks.
This refers to possible hazards to the machine or other objects.
Read the operating instructions carefully before putting the appliance into
ep the instructions including the warranty and the receipt. If
you give this device to other people, please also pass on the operating i
n-
The appliance is designed exclusively for private use and for the envi
s-
The appliance is only to be used as described in the user manual. Do not
use the appliance for any other purpose. Any other use is not intended
om sources of heat, direct sunlight

4
•Do not
notnot
not leave the device unattended. Do not
not not
not
leave the house during oper
tion.
•
When cleaning, for user maintenance work or with disruption, switch off
the appliance and always pull out the plug from the socket
(pull the plug i
self, not the lead).
•
The device and the mains lead have to be checked regularly for signs of
damage. If damage is found the device must not be used.
•For safety reasons, alterations or modificatio
ns of the device are prohibi
ed.
•
In order to ensure your children’s safety, please keep all packaging (pla
tic bags, boxes, polystyrene etc.) out of their reach.
WARNING:
WARNING:WARNING:
WARNING:
Do not allow small children to play with the foil. There is a
danger of su
danger of sudanger of su
danger of su
focatio
focatiofocatio
focation!
n!n!
n!
Special safety Information for this U
Special safety Information for this USpecial safety Information for this U
Special safety Information for this U
WAR
WARWAR
WARNING
NINGNING
NING:
: :
:
Hot surface! Danger of burns!
Hot surface! Danger of burns!Hot surface! Danger of burns!
Hot surface! Danger of burns!
During operation the temperature of the bull’s-
eye may be
very hot.
•
Before using the transportation locking screws must be
removed, otherwise it may cause serious damag
•
The dry weight of laundry must not exceed 7 kg.
•
Do not use any flammable/explosive cleaning agents
such as benzene in the device.
leave the house during oper
a-
When cleaning, for user maintenance work or with disruption, switch off
(pull the plug i
t-
The device and the mains lead have to be checked regularly for signs of
ns of the device are prohibi
t-
In order to ensure your children’s safety, please keep all packaging (pla
s-
danger of su
danger of sudanger of su
danger of su
f-
f-f-
f-
Special safety Information for this U
Special safety Information for this USpecial safety Information for this U
Special safety Information for this U
nit
nitnit
nit
Hot surface! Danger of burns!
Hot surface! Danger of burns!Hot surface! Danger of burns!
Hot surface! Danger of burns!
eye may be
Before using the transportation locking screws must be
removed, otherwise it may cause serious damag
es.
The dry weight of laundry must not exceed 7 kg.
Do not use any flammable/explosive cleaning agents

5
•In the bottom of the washing machines are located ven-
tilation openings. These may not be clogged/blocked
e.g. by carpet. Pay attention to free circulation of air.
•If the device is used in the bathroom, unplug the power
cord after using as the proximity of water presents a
danger. This even applies when the unit is turned off.
•This appliance can be used by children
children children
children aged from 8
years and above and persons with reduced physical,
sensory or mental capabilities or lack of experience and
knowledge if they have been given supervision or in-
struction concerning use of the
use of theuse of the
use of the appliance
applianceappliance
appliance in a safe way
and understand the hazards involved.
•Chi
ChiChi
Children
ldrenldren
ldren shall not play with the appliance.
•Cleaning and user maintenance
user maintenanceuser maintenance
user maintenance shall not be made by
children
childrenchildren
children unless they are older 8 years and supervised.
•The unit must be connected with a new set of hoses to
the water supply; old hose sets should not be reused.
•The maximum permissible inlet water pressure is
1 MPa.
•The lowest permissible water inlet pressure is
0.05 MPa.

6
•
The device must be cleaned regularly. Follow the i
structions in the chapter "Cleaning and Maintenance".
•Do not try to repair the appliance on
your own.
contact an authorized technician. To avoid the exp
sure to danger, always have faulty cable be replaced
only by the manufacturer, by our customer service or by
qualified person and with a cable of the same type.
not use the device if the device or plug is
damaged
Unpacking the
Unpacking theUnpacking the
Unpacking the
Appliance
ApplianceAppliance
Appliance
1. Remove the appliance from its packaging.
2.
Remove all packaging material, such as foils, filler, cable holder and car
board packaging.
3.
To prevent hazards, check the appliance for any transport damage.
4. In
case of damage, do not put the device into operation. Contact your
distributor.
NOTE
NOTENOTE
NOTE:
::
:
Production residue or dust may have collected on the appliance. We reco
mend cleaning the appliance according to chapter “Cleaning
and Maint
nance”.
The device must be cleaned regularly. Follow the i
n-
structions in the chapter "Cleaning and Maintenance".
your own.
Always
contact an authorized technician. To avoid the exp
o-
sure to danger, always have faulty cable be replaced
only by the manufacturer, by our customer service or by
qualified person and with a cable of the same type.
Do
damaged
.
Remove all packaging material, such as foils, filler, cable holder and car
d-
To prevent hazards, check the appliance for any transport damage.
case of damage, do not put the device into operation. Contact your
Production residue or dust may have collected on the appliance. We reco
m-
and Maint
e-

7
Overview of
Overview of Overview of
Overview of the appliance
the appliancethe appliance
the appliance
NOTE
NOTENOTE
NOTE:
::
:
The drawing can deviate from the original device.
Delivery scope
Delivery scopeDelivery scope
Delivery scope
1 x Water inlet hose 4 x
Transportation locking screw caps
1 x Hose holder
Installation
InstallationInstallation
Installation
WARNING:
WARNING:WARNING:
WARNING:
•
The installation of pipes and electrical supplies may only be performed by
qualified personnel.
•
The unit must not be connected to the mains during installing. Otherwise
there is d
dd
danger to life
anger to lifeanger to life
anger to life or electric shock hazard
electric shock hazardelectric shock hazard
electric shock hazard!
1
Detergent drawer
2 Program
selector knob
3
Temperature selector knob
4
Control panel
5
Door handle
6 Filter pump
7
Adjustable feet
Transportation locking screw caps
The installation of pipes and electrical supplies may only be performed by
The unit must not be connected to the mains during installing. Otherwise
Detergent drawer
selector knob
Temperature selector knob
Control panel
Door handle
Adjustable feet

8
Removal of transportation locking screws
Removal of transportation locking screwsRemoval of transportation locking screws
Removal of transportation locking screws
CAUTION
CAUTIONCAUTION
CAUTION:
::
:
Before using the transportation locking
screws must be removed from the device
backside. Otherwise it may cause serious
damages.
•Loosen all locking screws with a spanner and remove them.
•Plug the holes with the supplied transportation
locking screw caps.
CAUTION
CAUTIONCAUTION
CAUTION:
::
:
Keep the transportation locking screws properly for future use / transport.
Whenever the device will be transported, the locking screws must be refitted.
Conditions for the installation location
Conditions for the installation location Conditions for the installation location
Conditions for the installation location
•Good ventilation around the unit is required so that the heat can be de-
rived correctly. The distance between the machine and wall must be
approx. 10 cm.
•The device must be installed in a clean place.
•A concrete floor is the most suitable installation surface for a washing
machine, being far less prone to vibration during the spin cycle than
wooden floorboards or a carpeted surface.

9
•Only place the device on a steady and safe surface in order to reduce
vibration and noise to a minimum.
•If the ground is evidently uneven (the maximum allowed tilt angle is 2°), it
must be balanced; otherwise the unit is wrong, vibrates or moves. If the
floor is uneven, adjust the adjustable feet (see “Feet adjustment”).
•Install the device for the wall socket to be freely accessible.
•Power cord and water hoses must not be squashed.
•Avoid the installation:
Avoid the installation:Avoid the installation:
Avoid the installation:
- near heaters, next to a stove, direct sunlight or any other heat
sources;
- at locations with high humidity (e.g. outdoors), as metal parts would
be susceptible to corrosion under such circumstances;
- in rooms where the temperature could drop below freezing. Do not
expose the device any weather.
- near volatile or flammable materials (e.g. gas, fuel, alcohol, paint,
etc.).
Feet
Feet Feet
Feet a
aa
adjustment (level adjustment)
djustment (level adjustment)djustment (level adjustment)
djustment (level adjustment)
Take care to a firm and horizontal position of the device. If the device moves,
adjusts the feet. Loosen the locknuts with a spanner.
Adjust the feet
Adjust the feetAdjust the feet
Adjust the feet: turn to the right to let down the unit, turn to the left to lift up the
unit. Tighten the lock nut with the wrench when the device is oriented. The

10
feet must have solid ground contact. Check with a spirit level
if
leveled well horizontally.
If the appliance is not in balance, the feet must be
adjusted again.
CA
CACA
CAUTION:
UTION:UTION:
UTION:
•The locknuts
must be tightened after adjustment. Any looseness can
cause vibration and noise.
•
The feet must never be removed. Do not restrict the floor clearance
through deep pile carpets, strips of wood or similar. This might cause heat
build-up wh
ich would interfere with the operation of the appliance.
Water Connection
Water ConnectionWater Connection
Water Connection
Install the w
Install the wInstall the w
Install the water
ater ater
ater inlet hose (c
inlet hose (cinlet hose (c
inlet hose (cold
old old
old w
ww
water)
ater)ater)
ater)
Use the new included inlet hose to connect the machine at the water supply
(cold water). Old hose-sets
should not be reused. Installation s
with local water authority and building regulation requirements.
•The water inlet pressure must be between 0.05 MPa
and
pressure is lower, contact an authorized specialist.
•
Connect the water supply hose to the tap with a 3/4
thread and tighten it firmly to the right.
•
Connect the other end of the inlet hose to the inlet valve
on the back of the device and tighten it firmly to the right
too.
NOTE
NOTENOTE
NOTE:
::
:
If a leak develops remove the inlet hose and reconnect. Connect to a stan
ard water tap.
if
the unit is
If the appliance is not in balance, the feet must be
must be tightened after adjustment. Any looseness can
The feet must never be removed. Do not restrict the floor clearance
through deep pile carpets, strips of wood or similar. This might cause heat
ich would interfere with the operation of the appliance.
Use the new included inlet hose to connect the machine at the water supply
should not be reused. Installation s
hould comply
and
1 MPa. If the
Connect the water supply hose to the tap with a 3/4
"-
Connect the other end of the inlet hose to the inlet valve
on the back of the device and tighten it firmly to the right
If a leak develops remove the inlet hose and reconnect. Connect to a stan
d-

11
Install the water drain hose
Install the water drain hoseInstall the water drain hose
Install the water drain hose
The drain hose can be hanged over the edge of a wash-bowl or a sink. With
the direct connection to the water outlet, you must make sure that the drain
hose is securely attached and cannot slip out.
•The end of the drain hose must be connected directly to the water outlet
(drain) in the wall or at a sink.
•The drain hose must be connected at a height of min. 60 cm and max.
90 cm.
The drain hose can be connected in different ways:
1. Hang the drain hose into a sink or into the drain.
2. Connect the hose to the drainpipe of the sink.
3. Connect the hose directly to the drainpipe.
•If the outlet spigot has not been used before, remove any blanking plug
that may be in place. Put the drain hose onto the spigot and secure with a
clip if required.
Ensure a loop is formed in the drain hose to
prevent waste from the sink entering in the de-
vice.
•The waster can be drained up and down; the drain hose shall be installed
at a height of min. 60 cm and max. 90 cm about the ground. The hose end
shall not be immersed in water. Use the supplied hose holder for flexible
hoses to get a proper angle and secure it well to avoid a change in posi-
tion.

12
CAUTION
CAUTIONCAUTION
CAUTION:
::
:
Do not pinch the drain hose and do not place heavy objects on it: an uncon-
trolled water flow can cause the machine to stop working.
If you need a drain hose extension, make sure to use a similar drain hose, but
it must be no longer than 4 meters; otherwise the washing effect could be
reduced.
Electrical connection
Electrical connectionElectrical connection
Electrical connection
WAR
WARWAR
WARNING:
NING:NING:
NING:
For your personal safety:
•Do not use an extension cord or an adapter plug with this appliance.
•Do not, under any circumstances, cut or remove the earth connection from
the power cord.
•Ensure that your mains power corresponds with the specifications of the
appliance. The specifications are printed on the rating label.
•Connect the mains cable to a properly installed and earthed wall outlet.
•Use the required 10 amp fuse, a time delay fuse or circuit breaker recom-
mended and provide a separate power protection for this device.
•Let replace the mains socket by an authorized specialist if this is not suita-
ble for the device power plug.
•The connection should be easily accessible in order to can pull the plug
from the socket in an emergency.

13
Grounding i
Grounding iGrounding i
Grounding instructi
nstructinstructi
nstructions
onsons
ons
This appliance must be earthed. In the event of a malfunction or breakdown,
earthing will reduce the risk of electric shock by providing a path of least re-
sistance for the electric current. This appliance is equipped with a cord having
an equipment-earthing conductor and an earthing plug. The plug must be
plugged into an appropriate outlet that is installed and earthed in accordance
with all local standards and requirements.
WARNING:
WARNING:WARNING:
WARNING:
•Improper connection of the equipment earthing conductor can result in the
risk of an electric shock.
•Check with a qualified electrician if you are in doubt whether the appliance
is properly earthed.
•Do not modify the plug provided with the appliance. If the plug does not fit
properly to the outlet, please have a qualified electrician to install a proper
outlet.
Startup / Operation
Startup / OperationStartup / Operation
Startup / Operation
Prior to f
Prior to fPrior to f
Prior to first use
irst useirst use
irst use
•Make sure the power voltage at your place is same to the rating label at
the device.
•Remove the accessories and any material from the drum.
•Clean the drum. Consider the instructions in the chapter “Cleaning and
Maintenance”.
•Before using for the first time let run one washing cycle without laundry:
- Connect the power and turn on the tap.
- Fill a little detergent into the drawer and close it (see “Detergent
drawer”).

14
- Turn the device on by turning the program selector knob to the de-
sired program. Then select the appropriate wash temperature. We
recommend choosing the program cotton at 60°C for the first wash
without clothing.
- Press the START/PAUSE-button in order to start the washing cycle.
Preparation of Clothes
Preparation of ClothesPreparation of Clothes
Preparation of Clothes
•Check the pockets of the clothes to be washed, empty the rigid items such
as decorations and coins, otherwise washing machine may be damaged
or have abnormal troubles.
•Sort your laundry before placing it in the washing machine.
•Consider the symbols in the washing instructions on care label. Clothes
are differentiated in cotton, blended fabric, synthetics, silk, wool and syn-
thetic fibers.
•Separate in white and colored laundry. Wash all new clothing separately.
•Wash clothes of similar size together for better economy.
•Wash delicate clothes separately. New wool fabrics, curtains and silk must
be treated like delicates. Observe the washing instructions in all clothes.
•Remove hooks from curtains.
•Decorations on clothes can damage your washing machine. Turn buttons
and embroidery inside out.
•Close zippers, buttons and hooks. Tie bands and ribbons together.
•We recommend placing for instance bras inside a pillowcase to prevent
damage.
•Delicate textiles such as laced curtains, straightjackets, small articles (tight
socks, handkerchiefs, ties etc.) shall be put into string bag for washing.
•Washing large and heavy parts such as bath towels, jeans, lined jackets
and the like can cause the drum to run unbalanced. We recommend add-
ing one or two smaller parts; this especially helps with the spinning cycle.

15
•The clothes which easily get fuzzed shall be washed separately; otherwise
the other articles can be stained with dust and thrum etc. Preferably, black
clothes and cotton clothes shall be washed separately because they can
easily get stained with the thrums of other colors when being washed to-
gether.
•Clean away dusts, stains and pet hairs from the clothes.
•For spot removing heavy soiling the laundry can be treated with a special
pre-wash spray. Follow the application instructions of the manufacturer.
Please pay attention with regard to detergents
Please pay attention with regard to detergentsPlease pay attention with regard to detergents
Please pay attention with regard to detergents
WAR
WARWAR
WARNING
NINGNING
NING:
::
:
Keep detergents and additives in safe and dry places out of touch by kids!
•Use only ‘slightly foaming’ detergent for washing machines according to
type of fabric (cotton, synthetics, lined or woolen products), color, washing
temperature and degree of soiling. Otherwise foaming can cause overflow-
ing.
•Bleach is alkaline and can damage your clothing, preferably does not use
bleach.
•Detergents often leave residue in the clothes, which can cause bad odor if
not rinsed properly.
•Detergent cannot easily get dissolved completely if there is too much
detergent or water temperature is rather low. It can remain in clothes,
pipes and washing machines to pollute the clothes.
•Washing shall follow the weight of clothes, dirty degrees, local water hard-
ness as well as the recommendations from the detergent manufacturers.
Please consult the water company if you are not clear of water hardness.

16
Detergent dra
Detergent draDetergent dra
Detergent drawer
werwer
wer
CAUTION
CAUTIONCAUTION
CAUTION:
::
:
•The dispenser is suitable for the use of washing powder in pre- and main-
wash cycle!
•To avoid overflowing dissolve your washing powder in a bit of water in
case it is clotted.
•Follow the manufacturer’s dosage information.
•Open the detergent drawer.
•Add the detergent into the pre-wash com-
partment marked I.
I.I.
I.
•Add adequate detergent into main wash
compartment marked II
IIII
II (
It is recommended
to use low foaming powder).
•Add the fabric softener without exceeding the MAX-marking into the
compartment marked .
•Close the detergent drawer.
Clothing, which are not suitable for the washing machine:
Clothing, which are not suitable for the washing machine:Clothing, which are not suitable for the washing machine:
Clothing, which are not suitable for the washing machine:
CAUTION:
CAUTION:CAUTION:
CAUTION:
Do not wash clothes soaked in petrol, thinners, alcohol or solvents.
•Ties, waistcoats, outerwear, etc. can shrink.
•Colored clothes can discolor.
•Pleated clothes, embossed or synthetic fibers can also shrink. Cotton and
wool, silk and fur can shrink and crease;
•Ornamented evening attire and traditional clothing easily discolors.
•Do not wash clothes without washing instructions.

17
•Do not wash water-
proof materials (ski suits, outside napkin pads, cu
tains):
As for the fiber products that water cannot get soaked easily into
such as water-
proof cushions, and clothes, it is better not to wash. Othe
wise there will be water bursting out or abnormal v
ibration to cause danger
while rinsing and draining so that the clothes also may be damaged.
Fill in the l
Fill in the lFill in the l
Fill in the laundry
aundryaundry
aundry
•Unravel the clothes before putting them into the machine.
•
Each loading should correspond to the rated capacity of the machine.
Do not overload the machine.
•
Different strengths / sizes / types of laundry can affect the actual loading
capacity of the machine. It is advisable to load the machine with only the
amount of clothes that normal circulation is possible during washing.
•Make sure that no la
undries are caught between the door and the seal.
NOTE
NOTENOTE
NOTE:
::
:
The device is fitted with a balance control system,
which balances the laundry
during the spin cycle
. To protect the machine, it will cut in if the laundry is not
evenly distributed in the drum. T
he laundry is redistributed by reverse rotation
of the drum. This may happen several times before the unbalance disappears
and normal spinning can resume.
Control panel
Control panelControl panel
Control panel
proof materials (ski suits, outside napkin pads, cu
r-
As for the fiber products that water cannot get soaked easily into
proof cushions, and clothes, it is better not to wash. Othe
r-
ibration to cause danger
while rinsing and draining so that the clothes also may be damaged.
Each loading should correspond to the rated capacity of the machine.
Different strengths / sizes / types of laundry can affect the actual loading
capacity of the machine. It is advisable to load the machine with only the
amount of clothes that normal circulation is possible during washing.
undries are caught between the door and the seal.
which balances the laundry
. To protect the machine, it will cut in if the laundry is not
he laundry is redistributed by reverse rotation
of the drum. This may happen several times before the unbalance disappears

18
1.
1.1.
1. Program
ProgramProgram
Program
selector knob
selector knobselector knob
selector knob
The knob is u
sed to select a desired program and to turn the
It can be rotated in clockwise and counterclockwise for a fast and easy s
lection of program. Details of programs you see in the “T
able of washing
cycles”.
NOTE
NOTENOTE
NOTE:
::
:
At the end of a wash cycle the program selector
knob must be turned to
the position Off-position .
WAR
WARWAR
WARNING
NINGNING
NING:
::
:
For your safety, please do not turn the knob to the Off-
position
clothes while the machine is running. Because the temperature of water
may be high and it may scald you. The door lock will open automatically at
the end of a wash cycle while the temperature of the drum is cool down.
2.
2. 2.
2. Temperature
Temperature Temperature
Temperature selector
selector selector
selector knob
knobknob
knob
Rotate this switch and select a required washing
temperature:
- 60 - 70 - 80 - 90°C.
If no temperature is selected the washing temperature is
cold.
3.
3.3.
3. Spin regulation (
Spin regulation (Spin regulation (
Spin regulation (SCHLEUDERDREHZAHL)
SCHLEUDERDREHZAHL)SCHLEUDERDREHZAHL)
SCHLEUDERDREHZAHL)
Press the button repeatedly to select the desired spin speed for the spin
cycle. The display shows
the section. In the section 000 spin stop no spin
occurs. Please consider that
the section of spin speed is not
each program.
4.
4.4.
4. Additional options:
Additional options:Additional options:
Additional options:
NOTE
NOTENOTE
NOTE:
::
:
The options are not available in each washing program.
sed to select a desired program and to turn the
machine off.
It can be rotated in clockwise and counterclockwise for a fast and easy s
e-
able of washing
knob must be turned to
position
and get
clothes while the machine is running. Because the temperature of water
may be high and it may scald you. The door lock will open automatically at
the end of a wash cycle while the temperature of the drum is cool down.
temperature:
30 - 40 - 50
cold.
Press the button repeatedly to select the desired spin speed for the spin
the section. In the section 000 spin stop no spin
the section of spin speed is not
available for

19
E
EE
Extra
xtraxtra
xtra
r
rr
rinse
inse inse
inse (SPÜLEN+)
(SPÜLEN+)(SPÜLEN+)
(SPÜLEN+)
With this function you can select an additional rinse cycle to the previously
set main wash program. The LED indicator lamp
shows you the selected
setting:
LED lights
extra rinse is selected
LED flashes
rinse stop is selected
LED off
no option is selected
Rinse
RinseRinse
Rinse-
--
-stop (SPÜLSTOPP)
stop (SPÜLSTOPP)stop (SPÜLSTOPP)
stop (SPÜLSTOPP)
No drain or spin in this function after the last wash cycle.
The laundry r
mains in the water. Thus the wrinkling
is reduced when the laundry is not
taken immediately after the program ends. While pressing
the
START/PAUSE-button the drain and spin cycle started.
Note
NoteNote
Note
creases completely, it is need to iron your clothes.
5.
5.5.
5. Additio
AdditioAdditio
Additional options
nal optionsnal options
nal options:
: :
: pre
prepre
pre-
--
-wasch (
wasch (wasch (
wasch (VORWÄSCHE
VORWÄSCHEVORWÄSCHE
VORWÄSCHE)
))
)
and soak
and soakand soak
and soak
(
((
(
EINWEICHEN
EINWEICHENEINWEICHEN
EINWEICHEN
NOTE
NOTENOTE
NOTE:
::
:
The options are not available in each washing program.
Press the button to select a function. The LED indicator l
amp
the selected option:
LED lights pre-
wash is selected
LED flashes
soak is selected
LED off
no option is selected
Pre
PrePre
Pre-
--
-wash
washwash
wash
The pre-
wash function is used to make a low temperature washing for
large dirty particles before the main wash cycle to remove stains.
With this function you can select an additional rinse cycle to the previously
shows you the selected
extra rinse is selected
rinse stop is selected
no option is selected
The laundry r
e-
is reduced when the laundry is not
the
Note
NoteNote
Note
:
::
: To remove
EINWEICHEN
EINWEICHENEINWEICHEN
EINWEICHEN
)
amp
shows you
wash is selected
soak is selected
no option is selected
wash function is used to make a low temperature washing for
large dirty particles before the main wash cycle to remove stains.

20
Soak
SoakSoak
Soak
The soak function is used to soak strongly dirt clothes before main wash
cycle.
6.
6.6.
6. START/PAUSE
START/PAUSESTART/PAUSE
START/PAUSE
Press this button to start or pause the wash cycle. When the program will
be paused or the device is in standby-mode the LED indicator lamp is
blinking. The LED indicator lamp lights continuously when the device is in
operation.
7.
7.7.
7. Start delay
Start delayStart delay
Start delay
(
((
(S
SS
STARTVERZÖGERUNG
TARTVERZÖGERUNGTARTVERZÖGERUNG
TARTVERZÖGERUNG)
))
)
a
aa
and
nd nd
nd child safety
child safety child safety
child safety lock (
lock (lock (
lock (KINDER
KINDERKINDER
KINDER-
--
-
SICHERUNG
SICHERUNGSICHERUNG
SICHERUNG)
))
)
This button allows you, after choosing the wash program to delay the start
time and activate the child lock.
Start delay
Start delayStart delay
Start delay
By pressing this button repeatedly you can delay program start by 1 – 24h.
Confirm the selected delay time by pressing the START/PAUSE-button.
The display shows the remaining time until the start of the washing pro-
gram.
Child safety lock
Child safety lockChild safety lock
Child safety lock
In order to do not interrupt the washing process due to incorrect operation
of playing children, you can active the child safety lock. Hold the button
pressed before or during operation for a few seconds. The indicator lamp
flashes. With activated child safety lock the indicator lamp flickers with
each invalid button press. To deactivate the child safety lock, hold the but-
ton for a few seconds until the indicator lamp (door lock) lights.
Table of contents
Other BOMANN Washer manuals

BOMANN
BOMANN WA 5711 User manual

BOMANN
BOMANN WAA 936 E manual

BOMANN
BOMANN WA 9310.1 User manual

BOMANN
BOMANN WA 5612 User manual

BOMANN
BOMANN WA 5715 User manual

BOMANN
BOMANN WA 7170.1 User manual

BOMANN
BOMANN WA 5729 User manual

BOMANN
BOMANN MWA 9481 CB User manual

BOMANN
BOMANN WA-921 manual

BOMANN
BOMANN WA 9312.1 User manual

BOMANN
BOMANN WA 7184 User manual

BOMANN
BOMANN WA 7194 User manual

BOMANN
BOMANN WA 7182 User manual

BOMANN
BOMANN WTK 5020 Guide

BOMANN
BOMANN WA 7193 User manual

BOMANN
BOMANN WA 7191 User manual

BOMANN
BOMANN WA 7160 TL User manual
BOMANN
BOMANN WA 7192 User manual

BOMANN
BOMANN WA 5716 User manual

BOMANN
BOMANN WA 7174 User manual