Bond GRAND BLOOMINGTON FOUNTAIN User manual

11
GRAND BLOOMINGTON FOUNTAIN
ITEM # Y95871
Serial Number Purchase Date
Questions, problems, missing parts?
Before returning to your retailer, call our customer service department at 1-866-771-
BOND (2663) 8 a.m. – 4:30 p.m. PST, Monday – Friday.
ATTACH YOUR RECEIPT HERE

2
SAFETY INFORMATION
WARNING
Please read and understand this entire manual before attempting to assemble, operate or install the
product.
• Save these warnings and instructions for reference. Read all instructions before use.
• Failure to follow warnings and instructions may result in injury or property damage.
• Excessive weight or pressure on any of the fountain sections may cause it to fall. Keep pets,
children, or anyone from sitting, leaning, or climbing on any of the fountain components.
• While fountain is designed to operate as splash free as possible, some water splashing out of
the fountain is inevitable. Place the fountain in a location where any splashing will not cause
damage.
• The National Electric Code requires that a ground fault circuit interrupter (GFCI) be used in the
branch circuit supplying fountain pump and other pond equipment. Seek your electrical supplies
dealer for this device.
• Always keep the fountain working with sufficient water and clean of debris and dirt to ensure proper
functioning of the pump.
• If necessary, clean the fountain with a soft cloth and change the water frequently. Due to water
evaporation, you may see a buildup of white residue on the fountain surface from mineral content in
the water supply. To prevent such buildup, regularly clean the fountain with soap and water. Do not
use any abrasive, which may damage the applied finish.
• Use of water clarifier or algaecide of any kind will damage the paint in the fountain and will not be
covered under the manufacturer’s warranty.
• This fountain is intended for outdoor use only.
• See the pump instructions for pump safety, maintenance, and warranty information.
• The pump on your fountain has no user-serviceable parts. Only an authorized service
representative should service the pump.
•
California Prop. 65 Warning: This product can expose you to the chemicals including Lead
and Lead Compounds, which are know to the state of California to cause cancer and birth
defects or other reproductive harm. For more information go to www.P65Warnings.ca.gov.

CAUTION
3
SAFETY INFORMATION
1. Install the fountain pump correctly before operating it.
2. DO NOT allow the pump to run dry.
3. For fountains with multiple sections or attached decorations: If any of the fountain’s attached
sections with electrical lights or components fall into the water located in fountain base, unplug the
fountain and turn off circuit breaker before trying to put the fountain pieces back in place.
4. If any leakage occurs around the pump housing, turn off the circuit breaker immediately and have
the pump serviced by a registered technician.
5. Do not operate the fountain if the pump has been dropped or has a damaged power cord or plug.
6. If the plug or your wall receptacle gets wet due to water dripping down the power cord or for any
other reason, do not remove the plug from the wall outlet until the circuit breaker is turned off.
7. Always unplug the fountain pump and any other independent electrical accessories (e.g. lights)
from the outlet when not in use and before cleaning or replacing parts.
8. Disconnect the power cord from the outlet by holding the plug, not by pulling on the power cord.
9. Do not expose the pump to direct sunlight or to low temperatures for any period of time.
10. Keep the power cord away from high temperatures or heat sources.
11. This fountain pump is not intended for commercial use.
NOTE: Allow the pump power cord to hang at a lower level than
the wall outlet to form a “drip loop”. This will help prevent water
from dripping down the power cord and getting into the wall outlet.

4
PACKAGE CONTENTS
A
E
B
D
C
Top fountain
Fountain base
Pump
Water flow rate control valve assembly
Reservoir lid
ITEM DESCRIPTION QUANTITY
A 1
B1
C 1
D1
E1
Glass bead
F1 bag
F

5
PREPARATION
Before beginning assembly of product, make sure all parts are present. Compare parts with package
contents list. If any part is missing or damaged, do not attempt to assemble the product.
Estimated Assembly Time: 10 minutes
HARDWARE CONTENTS
AA BB CC DD EE
Silicone plug
M8xL30Screw
Washer
Plastic cap
Spanner
ITEM DESCRIPTION QUANTITY
AA 2
BB4
CC 4
DD4
EE1
Tools required for assembly (included): Spanner

6
ASSEMBLY INSTRUCTIONS
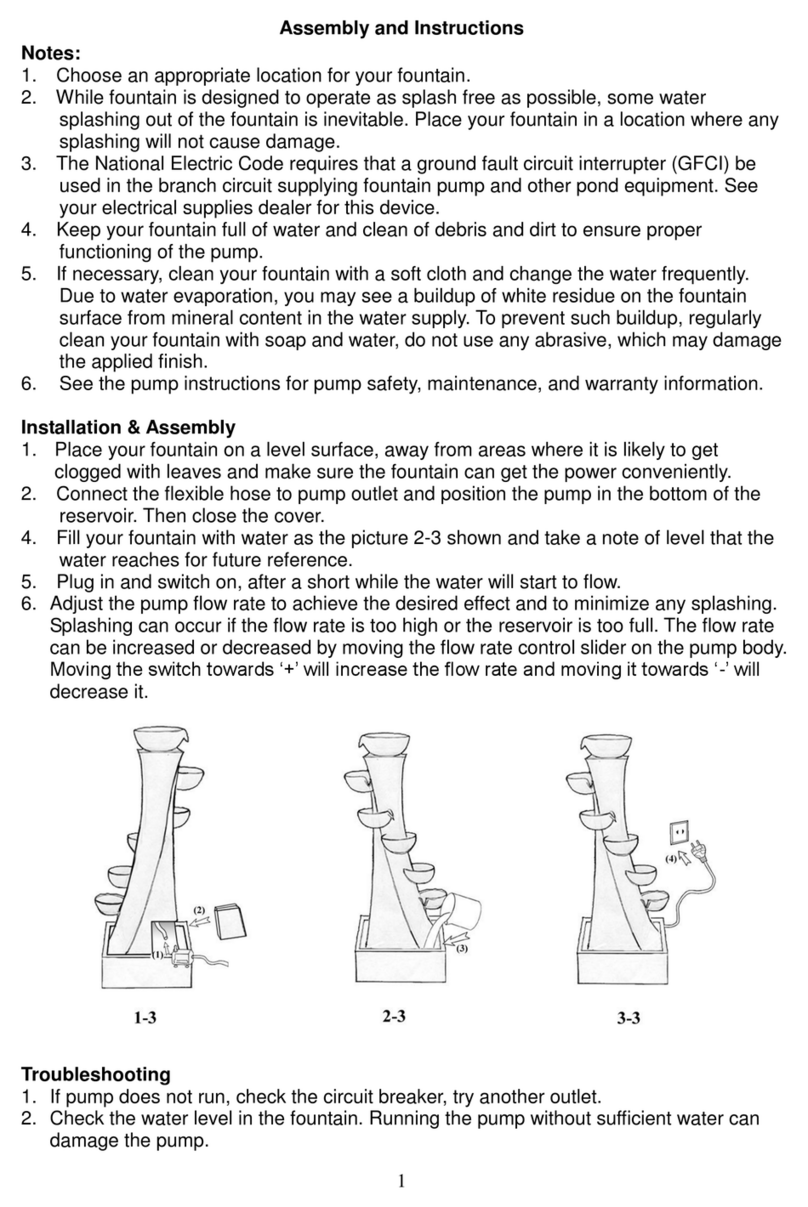
1. Remove all packaging from all parts.
Connect the two long flexible hoses on the water
flow rate control valve assembly (C) to the inlets
on the bottom side of the top fountain (A).
3. Block the drain hole at the bottom of the fountain
base (B) with the silicone plug (AA).
2. Connect the short hose on the water flow rate
control valve assembly (C) to the outlet of the pump
(E).
NOTE: Just need one silicone plug for assembly,
another one is a spare part.
CA
E
C
AA B

7
ASSEMBLY INSTRUCTIONS
4. Insert and pull out the power cord plug of the
pump through the hole on the side wall of the
fountain base (B).
5. Place the pump (E) into the fountain base (B)
and attach the top fountain (A) to the fountain
base using 4 M8xL30screws (BB) and 4 washers
(CC), tighten with spanner (EE). Then buckle the
6. Pour clean water into fountain base through
the operation hole on the bottom plate of top
fountain (A), make sure the water pump is fully
submerged to prevent pump damage. View the
water level through the operation hole, make
sure the the water level is between the Max fill
line and Min fill line on the wall inside the fountain
base (B).
NOTE: Make sure the operation hole on the top
4 plastic caps (DD).
fountain align with the drain hole at the bottom
of the fountain base.
B
BB
CC
DD

8
ASSEMBLY INSTRUCTIONS
7. Cover the operation hole on the bottom plate of
the top fountain (A) with the reservoir lid (D).
8. 3OXJSXPScordplug LQWRRXWOHW of power supply
7KHZDWHUÀRZUDWHFDQEHLQFUHDVHGRUGHFUHDVHGE
\PRYLQJWKHÀRZrate controller on the water pump
to the +/- signs. If the flow is not same for the two
outlets, adjust the knobs on the water flow rate control
valve assembly (C).
CAUTION:
Be careful not to spill water onto the plug of the pump.
DO NOT allow the pump to run dry!
Adjust the feet under the fountain base (B) to make
it level. Pour glass bead (F) into the fountain base
evenly.
9.
Flow rate
adjusting
knob
D
F
C

9
OPERATING INSTRUCTIONS
While fountain is designed to operate as splash free as possible, some water splashing out of the
fountain is inevitable. Place the fountain in a location where any splashing will not cause damage.
Always keep the fountain working with sufficient water and clean of debris and dirt to ensure proper
functioning of the pump.
Adjust the flow rate to achieve the desired effect and to minimize any splashing. Splashing can occur
if the flow rate is too high or the reservoir is too full. The flow rate can be increased or decreased by
moving the flow rate control switch towards the ‘+/max’ or ‘-/min’ positions.
Note:
1. Drain the water if you don’t plan to use the fountain for a long time to prevent mosquito breeding
and water odor.
2. Be sure to drain all water during winter months or cold seasons to prevent reservoir from cracking
or breaking.
Operating Fountain
ALWAYS MAKE SURE THE PUMP IS FULLY SUBMERGED UNDER THE WATERLINE PRIOR TO
TURNING PUMP ON.
1. Check that there is enough water in the reservoir.
2. Plug in pump cord into outlet and switch on, pump will start to work.
3. The water flow rate can be increased or decreased by moving the flow rate controller on the water
pump to the +/- signs.
4. Turn off power outlet switch, the pump will stop working.
5. Unplug fountain from outlet if not in use for a long period of time.
3. The method of draining water: Unplug the power cord for pump from power supply, remove the
reservoir lid (D) from the bottom plate of top fountain (A), then remove the silicone plug (AA) at the
bottom of the fountain base (B) through the operation hole.
WARNING: Please check and
ensure the power cord is not dam-
aged before using this appliance.
Minimum Water Level
Flow control valve
(+)Maximum
(-)Minimum

10
CARE AND MAINTENANCE
• If necessary, clean the fountain with a soft cloth and change the water frequently. Due to water
evaporation, you may see a buildup of white residue on the fountain surface from mineral content in
the water supply. To prevent such buildup, regularly clean the fountain with soap and water. Do not
use any abrasive, which may damage the applied finish.
• Use of water clarifier or algaecide of any kind will damage the paint on the fountain and will not be
covered under the manufacturer’s warranty.
• Check regularly that the water reservoir has sufficient water to cover the pump at all times. It will be
necessary to check more frequently in warm or windy weather.
• Disconnect the power and empty the reservoir if the fountain will not be used for an extended time.
• If installed outdoors and in a freeze-prone area of the country, ensure all water is removed and
the unit is completely dry before temperatures drop too low. This product is NOT to be operated
below 41°F or freeze damage may occur.
• Store your product indoors during the winter months. Avoiding extreme cold temperatures
will prevent from exposure damage.
• Keep this manual for future reference.
Model# Description Volt. Power
YH-LV250C water
pump 120 V
Frequency Flow Height Flow Volume
60 Hz 780L/hour
NOTE: The pump data in this manual is from
lab tests. The actual pump may be different
due to the method of production or technical
improvements. This data can be used as a
reference when purchasing a similar pump.
Outlet
Suction cap
Pump housing
Rotor Gland
Filter
18W
190cm
Water level controller

11
TROUBLESHOOTING
WARRANTY
• 1 Year warranty against manufacturer’s defect in materials & workmanship. The manufacturer
warranty will be voided by, and manufacturer disclaims any responsibility for, the following actions:
• Modification of the unit and/or components.
• Use of any component part not manufactured or approved by manufacturer.
• Use and installation other than as instructed in this manual.
Please contact the manufacturer for replacement parts.
If the pump does not run
If hose is blocked.
Check the circuit breaker or try another outlet.
Check the setting of the flow control on the pump and adjust the flow.
Check the pump discharge and intake for dirt and debris.
Check and reconnect the cord and try again.
Check the water level in the fountain. Running the pump without suffi-
cient water can damaged the pump.
The pump might be “air locked.” Plug and unplug the pump several
times to release the air inside the pump.
Problem Solution
CUSTOMER SERVICE
If you have any questions or concerns, please contact Bond Manufacturing Co., Inc. at the below
resources:
Toll Free Phone 1-866-771-BOND (2663) | Monday - Friday, 8am - 4:30pm PST
Email customer[email protected]
Online www.bondmfg.com
Help available in English and Spanish.

12

Numéro de série Date d’achat
JOIGNEZ VOTRE REÇU ICI
30 (HNP), du lundi au dimanche.
détaillant, appelez notre service à la clientèle au 1 866 771-(BOND)2663, entre 8 h et 16 h
Des questions, des problèmes, des pièces manquantes?
Avant de retourner l’article au
13
Guide d’utilisation
FONTAINE GRAND BLOOMINGTON
No de produit: Y95871

14
CONSIGNES DE SÉCURITÉ
Assurez-vous de lire et de comprendre l’intégralité du présent manuel avant de tenter d’assembler,
d’installer ou d’utiliser l’article.
autorisé devrait effectuer l’entretien de la pompe.
• La pompe de la fontaine ne contient aucune pièce réparable par l’utilisateur. Seul un représentant
et la garantie qui s’y rattachent.
• Consultez les instructions de la pompe pour connaître les renseignements sur la sécurité, l’entretien
• Cette fontaine est conçue pour une utilisation à l’extérieur seulement.
l’intérieur de la fontaine et n’est pas couverte par la garantie du fabricant.
• L’utilisation de clarificateur d’eau ou d’algicide de tout genre peut endommager la peinture à
pourraient endommager le fini.
nettoyez régulièrement la fontaine à l’aide de savon et d’eau. N’utilisez pas de produits abrasifs qui
en eau, peuvent s’accumuler sur la surface de la fontaine. Pour éviter une telle accumulation,
de l’évaporation de l’eau, des résidus blancs, provenant du contenu minéral de l’approvisionnement
• Au besoin, nettoyez la fontaine à l’aide d’un linge doux et changez l’eau fréquemment. En raison
pour assurer le bon fonctionnement de la pompe.
• Faites toujours fonctionner la fontaine avec suffisamment d’eau et retirez la saleté et les débris
renseignements sur l’appareil.
Communiquez avec votre fournisseur d’appareils électriques pour obtenir davantage de
de dérivation qui alimente la pompe de la fontaine et les autres composants du bassin.
• Selon le code national de l’électricité, vous devez utiliser un disjoncteur différentiel dans le circuit
dommages.
complètement évitées. Placez la fontaine dans un endroit où l’eau ne risque pas de causer des
• Bien que la fontaine soit conçue de façon à minimiser les éclaboussures, celles-ci ne peuvent être
appui ou de grimper sur les composants de la fontaine.
de la renverser. Empêchez les animaux, les enfants ou toute personne de s’asseoir, de prendre
• Un poids ou une pression excessifs appliqués sur n’importe quelle section de la fontaine risquent
dommages matériels.
• Le non-respect de ces avertissements et de ces instructions peut entraîner des blessures ou des
les instructions avant d’utiliser l’article.
• Conservez ces avertissements et ces instructions pour vous y référer ultérieurement. Lisez toutes
AVERTISSEMENT
amples renseignements
visitez
www.P65Warnings.ca.gov.
cancers, des anomalies congénitales etd’autres troubles de l’appareil reproducteur.
Pour de plus
compris le plomb et les
composés de plomb, connus par l’état de Californie
pour provoquer des
Avertissement California Prop.
65
:
Ce produit peut
vous exposer aux produits chimiques, y
•

ATTENTION
15
CONSIGNES DE SÉCURITÉ
1. Installez correctement la pompe avant de mettre la fontaine en marche.
2. NE FAITES PAS fonctionner la pompe sans eau.
3. Pour les fontaines comportant plusieurs sections ou des décorations : si une section de la fontaine
comportant des lumières ou des composants électriques tombe dans l’eau au pied de la fontaine,
débranchez la fontaine et coupez l’alimentation du disjoncteur avant d’essayer de remettre les
sections en place.
4. En cas de fuite autour du boîtier de la pompe, coupez immédiatement l’alimentation du disjoncteur
et faites faire l’entretien de la pompe par un technicien autorisé.
5. Ne faites pas fonctionner la fontaine si la pompe est tombée par terre ou si le cordon
d’alimentation ou la fiche sont endommagés.
6. Si la fiche ou la prise murale est mouillée parce que de l’eau s’écoule le long du cordon
d’alimentation ou pour toute autre raison, ne retirez pas la fiche de la prise murale avant que
l’alimentation du disjoncteur n’ait été coupée.
7. Débranchez toujours la pompe de la fontaine et tous les autres accessoires électriques
indépendants (par exemple, les lumières) de la prise lorsque vous ne les utilisez pas et avant de
les nettoyer ou de remplacer des pièces.
8. Débranchez l’article en tirant sur la fiche et non sur le cordon d’alimentation.
9. Ne laissez pas la pompe en plein soleil ni à des températures basses pendant une période
prolongée.
10. N’exposez pas le cordon d’alimentation à de hautes températures et tenez-le loin des sources de
chaleur.
11. Cette pompe de fontaine n’est pas conçue pour un usage commercial.
REMARQUE : Assurez-vous que le cordon d’alimentation de la
pompe tombe sous la prise murale de façon à former une
« boucle d’égouttement ». Cela empêchera l’eau de couler le
long du cordon jusqu’à la prise murale.
BOUCLE
D’ÉGOUTTEMENT
DISJONCTEUR
DIFFÉRENTIEL

16
CONTENU DE L’EMBALLAGE
PIÈCE DESCRIPTION QUANTITÉ
A
B
C
D
E
Partie supérieure de la fontaine
Base de la fontaine
Ensemble vanne de régulation de débit d’eau
Couvercle du réservoir
1
1
1
1
1
A
E
B
D
C
F
FBille de verre 1 sac
Pompe

17
PRÉPARATION
Avant de commencer l’assemblage de l’article, assurez-vous d’avoir toutes les pièces. Comparez les
pièces avec la liste du contenu de l’emballage. S’il y a des pièces manquantes ou endommagées, ne
tentez pas d’assembler l’article.
Temps d’assemblage approximatif: 10 minutes
PIÈCE DESCRIPTION QUANTITÉ
AA
BB
CC
2
4
4
QUINCAILLERIE INCLUSE
AA BB CC DD EE
Outils nécessaires pour l’assemblage (inclus): Clé.
DD
EE Clé
4
1
Bouchon en silicone
Vis M8xL30
Rondelle
Capuchon en plastique

18
INSTRUCTIONS POUR L’ASSEMBLAGE
CA
E
C
AA B
supérieure (A).
aux entrées sur le côté inférieur de la fontaine
l’ensemble vanne de régulation de débit d’eau (C)
pièces. Connectez les deux tuyaux flexibles longs à
1. Retirez les matériaux d’emballage de toutes les
pompe (E).
régulation de débit d’eau (C) à la sortie de la
2. Connectez le tuyau court à l’ensemble vanne de
pièce de rechange.
pour l’assemblage, le second est fourni comme
REMARQUE: Un seul bouchon en silicone suffit
(AA).
base de la fontaine (B) avec le bouchon en silicone
3.
Bouchez l’orifice de vidange sur le fond de la

19
INSTRUCTIONS POUR L’ASSEMBLAGE
B
BB
CC
DD
Attachez ensuite les 4 capuchons en plastique (DD).
rondelles (CC). Serrez le tout avec une clé (EE).
fontaine à l’aide de 4 vis M8xL30 (BB) et de 4
et fixez la fontaine supérieure (A) à la base de la
Insérez et tirez la fiche du cordon d’alimentation4.
de la pompe à travers le trou sur la paroi latérale de
la base de la fontaine (B).
Placez la pompe (E) sur la base de la fontaine (B)5.
vidange aménagé sur le fond de la fontaine.
de la fontaine supérieure est aligné sur le trou de
REMARQUE:Assurez-vous que le trou d’intervention
de la fontaine (B).
remplissage minimum sur la paroi interne de la base
la ligne de remplissage maximal et la ligne de
Assurez-vous que le niveau de l’eau se trouve entre
le niveau de l’eau à travers le trou d’intervention.
immergée afin d’éviter de l’endommager. Inspectez
assurez-vous que la pompe à eau est complètement
inférieure de la fontaine supérieure (A) et
fontaine, à travers le trou d’intervention sur la plaque
6. Versez de l’eau propre dans la base de la

20
INSTRUCTIONS POUR L’ASSEMBLAGE
D
F
C
couvercle du réservoir (D).
inférieure de la fontaine supérieure (A) avec le
7. Couvrez le trou d’intervention sur la plaque
(C).
de l’ensemble vanne de régulation de débit d’eau
pasidentique aux deux sorties, ajustez les boutons
pompe à eau vers les signes + ou -. Si le débit n’est
débitd’eau en tournant le régulateur de débit de la
dans la prise secteur. L’utilisateur peut ajuster le
8. Branchez le cordon d’alimentation de la pompe
débit
réglage de
Bouton de
9. Ajustez les pieds sous la base de la fontaine (B)
pour la mettre à niveau. Versez uniformément les
billes de verre dans la base de la fontaine.
Table of contents
Languages:
Other Bond Lawn And Garden Equipment manuals
Popular Lawn And Garden Equipment manuals by other brands

Classen
Classen TR-20HE Operator's manual

OLT
OLT 8x12 Garden in a Box Assembly manual

Agria
Agria 8000 611 operating instructions

Home Accents Holiday
Home Accents Holiday 21RT3282125XY Assembly instructions

Wolf Garten
Wolf Garten Li-Ion Power 60 Original operating instructions

Steam Weeding
Steam Weeding Four Wheel Hoe instruction manual

Access Garden Products
Access Garden Products Eltham-D Assembly instructions

Land Pride
Land Pride Scarifer SF2566 Specifications

Gaspo
Gaspo Vertical Garden Assembly instructions

Ozito
Ozito PXCPPA-200 instruction manual

Quest Leisure Products
Quest Leisure Products C0091 manual

JARDIBRIC
JARDIBRIC PNR04 instructions