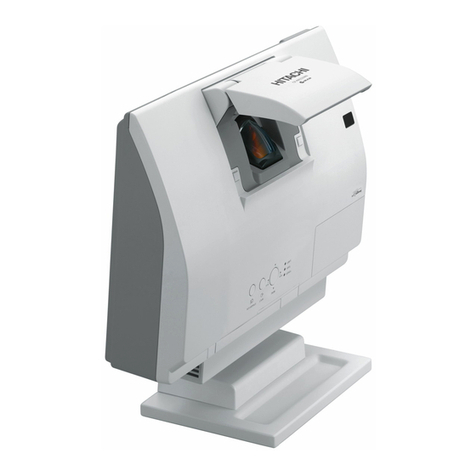
BOPIXEL OPR405 Series User manual

OPR405 Series DLP projector operating manual
Catalogue
一、Precautions for use .........................................................................................1
二、Module Hardware Features ........................................................................... 2
三、Port Description .............................................................................................3
3.1 PCB board port position description .................................................................3
3.1.2 Trigger input——J1 .......................................................................... 4
3.1.3 Trigger output——J2 ........................................................................ 4
3.1.4 JTAG BOUNDARY SCAN——J10 ................................................... 4
3.1.5 Power source 12V——J11.................................................................. 5
3.1.6 USB connector——J15 ....................................................................... 5
3.1.7 LED control signal——J16 ................................................................. 5
3.1.8 LED drive power——J35 .................................................................... 5
3.1.9 I2C connector——J36 ......................................................................... 6
3.1.10 Fan connector——J37 .......................................................................... 6
3.2 LED driver board port position description ................................................... 6
3.2.2 RED LED Port——J1 ......................................................................... 7
3.2.3 LED Control signal input——J2 ......................................................... 7
3.2.4 GREEN BLUE LED Port——J3 .........................................................7
3.2.5 Drive power input——J4 .....................................................................7
四、Operating Manual ................................................................................................8
4.1 Product Manual .................................................................................................8
4.2 Software and Documentation ............................................................................8
4.2.1 Software .................................................................................................. 8
4.2.2 Software Installation ............................................................................... 8
4.3 Image Input and Control ................................................................................... 9
4.3.1 Three 8bits combined into a 24bit image ..............................................10
4.3.2 Firmware for making two 24bit images ................................................13
4.3.3 Upload firmware ................................................................................... 15
4.3.4 Set display mode ................................................................................... 16
4.3.5 Save picture settings ............................................................................. 18
五、Guarantee ........................................................................................................... 20

1
一、Precautions for use
Please read the manual thoroughly before use, misoperation may
cause damage to the DLP projector.
1. The DLP projector contains optical components, and the PCB board leaks out, so
it cannot be dropped from a high place.
2. Do not use more than 120W power consumption. It may cause accidents such as
overheating and fusing of the connecting wire.
3. This DLP projector is a high-power module. All three lights are on and the
maximum current may reach more than 100W. The insufficient power supply
capacity of the power supply equipment may cause the module to restart.
4. This DLP projector contains high-precision optical components, which cannot be
disassembled without authorization.
5. The DLP projector is powered by a 12V power supply and can be powered by a
12V 4A or higher current adapter.
6. The DMD cable connector has a limited service life, so do not unplug the cable
without authorization.
7. It is strictly forbidden to unplug the DMD cable when the device is powered on,
as there is a high probability that the DMD will be damaged.
8. Please pay attention to anti-static measures before use. Static electricity will
cause damage to the main chip or DMD.
9. Before powering on, check whether there is overlap of the metal part of the IO
wire or foreign matter on the PCB board. The overlap of the bare IO wire or the
conductive foreign matter on the PCB board may cause a short circuit and cause
damage to the PCB board.
10. The power of the light source of this DLP projector is high.It is forbidden to
power on machine without connecting the radiator, the light source may burn out
within a few seconds.
11. The DLP projector is turned on when it is powered on. If it does not work
properly, please contact us.

2
二、Module Hardware Features
1. Module projection resolution:912x1140
2. Maximum frame rate:4225Hz(1 bit)120Hz(8bit)
3. Module uses 32MB external parallel flash
4. Streaming data input projection is not supported
5. Communication port:USB,I2C*
6. Trigger input/output voltage:3V and 5V(5V default)
Excellent optical performance
Small dimension, a large aperture, optional Blue /RGB light source, extremely
high MTF and sharp image edges
Uniformity>90%,Facilitate the use of grayscale coding pattern
Support I2C,USB extensions, convenient for secondary development
Provide a USB type C interface, which can be controlled using TI software
OPR405 series (DLP4500)
Type OPR405100 OPR405185 OPR405X35H
Working
distance mm
MIN TYP MAX MIN TYP MAX MIN TYP MAX
100 1000 2500 100 185 450 500 2000 8000
Screen size
(TYP)mm 1014*634 140*79 1667*1042
Depth of focus
(TYP)mm -500~+1800 -55~+100 -500~+1800
Throw Ratio 0.99 1.32 1.2
Precision um 1112 153 1292
Mode Orthographic projection Offset 100%
Dimension mm 110*104*48 110*104*48 150*104*55
Distortion <1% <0.5% <1%
Resolution 912*1140
Uniformity
JBMA >90%
Contrast 800:1
Light source RGB LED
OPR405100 Dimension OPR405100 Dimension

3
三、Port Description
3.1 PCB board port position description
Number Mates with part number Function
J1 MOLEX 51021-0600 Trigger input
J2 MOLEX 51021-0600 Trigger output
J3 2.0mm spacing jumper HOLD_BOOT_LOADER jumper
J5 USB TYPE C USB type C port
J10 MOLEX 51021-0600 JTAG BOUNDARY SCAN
J11 MOLEX 43645-0200 Power source 12V
J13 2.0mm spacing jumper LED switch off jumper
J15 MOLEX 51021-0400 USB port

4
J16 MOLEX 51021-0800 LED control signal
J35 MOLEX 87439-0800 LED drive power
J36 MOLEX 51021-0600 I2C port
J37 MOLEX 51021-0400 Fan port
SW1 DMD switch
3.1.2 Trigger input——J1
Pin num Pin name Function
1 EXT_TRIG1_VCC Trigger1 in voltage VCC
2 TRIG1_IN_CON Trigger1 input
3 GND Trigger GND
4 EXT_TRIG2_VCC Trigger2 in voltage VCC
5 TRGI2_IN_CON Trigger2 input
6 GND Trigger GND
3.1.3 Trigger output——J2
Pin num Pin name Function
1 EXT_TRIG1_OUT_VCC Trigger1 out voltage VCC
2 TRIG1_OUT_CON Trigger1 output
3 GND Trigger GND
4 EXT_TRIG2_OUT_VCC Trigger2 out voltage VCC
5 TRGI2_OUT_CON Trigger2 output
6 GND Trigger GND
3.1.4 JTAG BOUNDARY SCAN——J10
Pin num Pin name Function
1 TRSTZ JTAG
2 TDI JTAG
3 TMS1 JTAG
4 TDO1 JTAG
5 TCK JTAG
6 GND JTAG

5
3.1.5 Power source 12V——J11
Pin num Pin name Function
1 12V Power source 12V
2 GND Power source GND
3.1.6 USB connector——J15
Pin num Pin name Function
1 VBUS USB2.0
2 DAT_N USB2.0
3 DAT_P USB2.0
4 GND USB2.0
3.1.7 LED control signal——J16
Pin num Pin name Function
1 RED_LED_EN RED LED Enable
2 RED_LED_PWM RED LED brightness adjustment
3 GRN_LED_EN GREEN LED Enable
4 GRN_LED_PWM GREEN LED brightness adjustment
5 BLU_LED_EN BLUE LED Enable
6 BLU_LED_PWM BLUE LED brightness adjustment
7 THERMAL_AIN LED Thermistor voltage
8 GND LED Thermistor ground
3.1.8 LED drive power——J35
Pin num Pin name Function
1 12V 12V Power out
2 12V 12V Power out
3 12V 12V Power out
4 3.3V 3.3V Power out
5 5V 5V Power out
6 GND Power GND
7 GND Power GND
8 GND Power GND

6
3.1.9 I2C connector——J36
Pin num Pin name Function
1 Proj_on_ext_in DMD stand by (active low)
2 SCL0 I2C0
3 SDA0 I2C0
4 SCL1 I2C1
5 SDA1 I2C1
6 GND GND
3.1.10 Fan connector——J37
Pin num Pin name Function
1 GND Fan power GND
2 12V Fan power 12V
3 FAN_LOCKED Fan stuck detection
4 PAN_PWM Fan speed signal(test version Not used)
3.2 LED driver board port position description
Port Mates with part number Function
J1 MOLEX 87439-0900 RED LED Port
J2 MOLEX 51021-0800 LED Control signal input
J3 MOLEX 87439-1200 GREEN BLUE LED Port
J4 MOLEX 87439-0700 Drive power input

7
3.2.2 RED LED Port——J1
Pin num Pin name Function
1 Thermal Thermistor 1 pin
2 Thermal Thermistor 2 pin
3 Reserve Reserve
4,5,6 RED_ANODE RED LED Positive
7,8,9 RED_CATHODE RED LED Negative
3.2.3 LED Control signal input——J2
Pin num Pin name Function
1 RED_LED_EN RED LED Enable
2 RED_LED_PWM RED LED brightness adjustment
3 GRN_LED_EN GREEN LED Enable
4 GRN_LED_PWM GREEN LED brightness adjustment
5 BLU_LED_EN BLUE LED Enable
6 BLU_LED_PWM BLUE LED brightness adjustment
7 THERMAL_AIN LED Thermistor voltage
8 GND LED Thermistor ground
3.2.4 GREEN BLUE LED Port——J3
Pin num Pin name Function
1,2,3 GRN_ANODE GREEN LED Positive
4,5,6 GRN_CATHODE GREEN LED Negative
7,8,9 BLU_ANODE BLUE LED Positive
10,11,12 BLU_CATHODE BLUE LED Negative
3.2.5 Drive power input——J4
Pin num Pin name Function
1 12V 12V Power out
2 12V 12V Power out
3 12V 12V Power out
4 3.3V 3.3V Power out
5 GND Power GND
6 GND Power GND
7 GND Power GND

8
四、Operating Manual
4.1 Product Manual
This DLP projector is mainly for structured light application scenarios. It can
project 2D checkerboard test patterns and 1D 1bit or 8bit structured light patterns. The
functions of ordinary projectors have been simplified and cannot be used.
Note: Since this DLP projector has been deleted compared to the TI official
module, all official GUI functions cannot be used. In addition, TI official firmware is
not suitable for this module, please use the firmware provided by our company.
For specific usage, please refer to TI's official user manual《DLP® LightCrafter™
4500 Evaluation Module User's Guide (Rev. F)》。
For more application manuals, please refer to 《DLPLCR4500EVM 评 估 板 |
TI.com.cn》
4.2 Software and Documentation
4.2.1 Software
Controlling Software GUI:DLPLCR4500EVM Evaluation board | TI.com
Please use the basic firmware provided by our company for the firmware.
4.2.2 Software Installation
(1) Unzip the installation control interface
DLPLCR4500GUI-3.0.0-windows-installer.zip , and install the corresponding
program.
(2)Unzip and install the firmware DLPR350PROM-3.0.0-windows-installer.zip, and
install the corresponding firmware program.

9
4.3 Image Input and Control
Open the program interface is as follows:
When the DLP module is connected to the power supply, the USB interface of the
DLP is connected to the computer, the connected of the control interface turns
green. Click the button to connect.
Because the flash of the DLP control chip is only 48bit, and only 24bit images
can be uploaded when uploading. Upload a single image, the image must be 24bit. If
you want to upload four pictures according to our application, you need to combine
three 8bit black and white pictures into one 24bit, and then set another black and
white picture to 24bit for upload. Only when 48bit is full can the maximum speed of
switching pictures be guaranteed.In the following, we will upload four 8bit images as
an example according to the application scenario.

10
4.3.1 Three 8bits combined into a 24bit image
First of all, because we use the way of displaying pictures in sequence, we must
select Pattern sequence mode in Operating Mode.
①Click on the Image/Firmware tab
②Click Creat Image
③Browse the folder and select an 8bit image
④Choose a place to store the final composite image and name it
⑤Because it is an 8bit image, drop down here and select 8
⑥There are three color options after the drop-down, choose one such as
[G7,…,G0]
⑦Click Add to Output File

11
Then it becomes the following:
Repeat steps③⑤⑥⑦,Note that in step ⑥the second color selection is different
from the first one,such as choosing [R7,…,R0], becomes as follows:

12
Repeat steps again③⑤⑥⑦,Step ⑥The color selected for the third time is
different from the first two,such as choosing[B7,…,B0]
At this time, a 24-bit image synthesized by three 8-bit images is completed, and
the synthesized image is available under the corresponding path.
⑧Another 8bit image is re-saved as a 24bit image.

13
4.3.2 Firmware for making two 24bit images
①Click Image/Firmware choosing Firmware Build.
②Click Browse,the location of the installed firmware,select firmware file
(This is the default firmware file, and it is generally not wrong to make the
required firmware.)
③The name of the new firmware must be named in English or numbers.
④Click Remove,remove all original images.
⑤Click Add, browse and load the image synthesized in step A, and the 24bit
image in step B. The red circle in the picture below indicates the picture serial
number.

14

15
⑥Click Save Update.Rename the firmware and save.
In addition, step ④⑤ can also be directly replaced by clicking Change to browse
and load directly.
4.3.3 Upload firmware
①Click Image/Firmware choosing Firmware Upload.
②Clicked Browse, choosing step⑥saved firmware file.
③Click Upload,upload firmware.

16
4.3.4 Set display mode
①Make sure it's Pattern Squence because it's easy to automatically jump to
Video Mode.
②Click Sequence Setting under Pattern Sequence.
③Choose a color from the drop-down list, such as white.
④Select the trigger mode, and select Internal Trigger when it is always on; for
external trigger, select External Positive or External Negative according to the rising
edge or falling edge of the trigger signal.
⑤According to the order of the images generated by the firmware in the steps,
Flash Index 0 is the first image, and then select the number of image bits, we apply
selection 8.
⑥Load signal. For example, Flash Index 0, that is, the first image uploaded is a
composite of three images, that is, it contains three kinds of display information,
select G0---G7 in the color bar, click Add Pattern to Sequence, and then select R0-
--R7, click Add Pattern to Sequence, then select B0---B7, click Add Pattern to
Sequence (the colors in the color bar are selected in no order, but cannot be repeated).

17
There is only one picture of Flash Index 1, choose any color in the color bar, and then
click Add Pattern to Sequence.
⑦Set the exposure time of a single picture, and the picture display period (the
display period refers to the exposure time for displaying a picture, plus the time
without any display). Note that the time setting has the following basic requirements,
display period = exposure time, or display period - exposure time > 230μs, DLP
displays a picture with a minimum of 8333μs.
⑧Send setting mode, click send, the following interface will appear.

18
⑨Click Validate Sequence, then click Play. At this point, it can be displayed
according to the set mode. If it is in external trigger display mode, it needs to give
external trigger signal to display normally.
4.3.5 Save picture settings
The above setting method is not saved in Flash after power off and restart. In
order to be able to follow the set display every time the power is turned off and
restarted, you need to continue the following operations:
1Save the display mode, click Save Solution, name it and save it as an .ini file.
②Click Image/Firmware, click Firmware Bulid, click Select .ini File, and select

19
the .ini file saved in the previous step. Click Save Update again to re-save the
firmware. In this way, the firmware contains not only picture information, but also
display sequence information.
③Re-upload the firmware. At this time, the files saved in the Flash will be
displayed according to the original settings every time it is restarted. Otherwise, there
is only picture information in Flash, and no sequence display information.
This manual suits for next models
3
Table of contents
Other BOPIXEL Projector manuals
