BOREA Rayplicker Cobra User manual
Rayplicker Cobra
USER GUIDE
Version 1.0 - 11.2022
Ref. UG.RPC.EN.1.0

2
User guide Rayplicker Cobra
RAYPLICKER COBRA USER GUIDE
Document version 1.0
Ref. UG.RPC.EN.1.0 / Date 11.2022
Compatible with Rayplicker Cobra spectrophotometer
© Copyright, BOREA SAS.
This document is the property of BOREA SAS and may not be used,
reproduced or communicated to third parties without its written
authorization.
The most recent version is always available on the site:
www.borea-dental.com

3
User guide Rayplicker Cobra
Table of contents
1. ABOUT THIS USER GUIDE 5
1.1. Dear customers 5
1.2. Choice of terms 6
1.3. Safety instructions 6
1.4. Symbols description 8
2. RAYPLICKER SOLUTION DESCRIPTION 9
3. PACK CONTENT 10
3.1. Package content 10
3.2. Spare parts and accessories 11
4. FIRST START-UP 12
4.1. Fitting the calibration tip 12
4.2. Device charging 12
4.3. Turning on the device 13
5. DEVICE INTERFACES 13
5.1 User interface navigation 13
5.2. Note on device illustrations 14
5.3. Rayplicker Cobra interfaces tree 14
5.4. Wifi menu 15
5.5. Information menu 16
6. LOCKING AND SHUTTING DOWN THE DEVICE 17
6.1. Locking the Rayplicker Cobra 17
6.2. Automatic shutdown of the Rayplicker Cobra 17
6.3. Turning o the device 17
7. COLOR TAKING WITH RAYPLICKER COBRA 18
7.1. Make a shade-taking 18
7.2. Automatic calibration 19
7.3. Error messages 20
8. ACHIEVING A GOOD SHADE TAKING 21
8.1. Good practices for using the Rayplicker Cobra 21

4
User guide Rayplicker Cobra
9. CLEANING AND DISINFECTION 22
9.1. General recommendations 22
9.2. Disinfection and sterilization procedures 23
10. TECHNICAL SPECIFICATIONS 24
10.1 Identification 24
10.2 AC adapter 24
10.3 Handpiece 24
10.4 Battery 24
10.5 Environmental characteristics 25
10.6 Regulation and standardization 25
10.7 EMC 25
11. APPENDICES 26
11.1 Glossary 26
11.3 Patents 26
11.4 Warranty 26

5
User guide Rayplicker Cobra
1. ABOUT THIS USER GUIDE
1.1. Dear customers
Congratulations on your purchase. The Rayplicker Cobra is a dental shade and translucency
device according to known dental art standards with an accuracy of the order of ∆E=1. This self-
calibrated device is intended for dentists and prosthetists.
This wireless electro-optical device, made in France, makes it possible to determine exactly the
shade of natural teeth and prostheses according to most shade guides used to determine color
as well as on the basis of CIE L*a*b* values.
Precise and ergonomic, the Rayplicker Cobra solution is also equipped with a software allowing
the processing and recording of data as well as the creation of an order form with ease. The
«Pics App Solution» application will allow you to provide patient photos, essential for the proper
production of a prosthesis.
In order to achieve perfect shade taking, please read this user guide carefully.
We also invite you to refer to the software user manual mentioned in this document.
Forget the approximate measurements and gain in eciency and performance with the Rayplicker
Cobra.
BOREA team.

6
User guide Rayplicker Cobra
1.2. Choice of terms
The terms used in this manual are as follows:
Practitioner, dental surgeon, dental practice = Dentist
Prosthetist, dental prosthesis manufacturing laboratory = Prosthetist
Dentist and prosthetist = Users
1.3. Safety instructions
Warnings
Warning: Avoid electric shock, fire and explosion
• Do not use damaged plugs and chargers or loose electrical outlets.
• Do not touch the charger or the device when your hands are wet and do not pull on the
charger to unplug it.
• Do not bend or damage the charger cord.
• Do not cause a short circuit with the charger or the battery pack.
• Avoid contact of the battery pack terminals with metallic objects, as this may cause a
short circuit and cause temporary or permanent damage.
• Never use a damaged battery pack.
• Do not drop the charger or battery pack or subject them to shocks.
• Do not charge the device using a charger not approved by BOREA.
Protect the device and charger against damage
Environmental conditions
• Do not store your device in hot or cold places. Do not expose the device to temperatures
below 0°C (32°F) or above 40°C (104°F). Extreme temperatures can deform the device
and reduce charging capacity and lifespan.
• The device should be stored in a dry place.
• Protect the device from direct sunlight.
• Humidity, steam and all types of liquids can damage the parts or electronic circuits of your
device.
• Do not immerse the device or the charger in water or any other liquid.
Falls, Shocks
• Do not drop your device or subject it to impact: your device may malfunction or be
damaged and there may be a risk of electric shock.
• Do not place your device on slanted surfaces. If your device falls, it may be damaged.
Radio frequencies, magnetic fields
• Do not use your device near other electronic devices. Most electronic devices use radio
frequency signals, interference may cause certain malfunctions.
• Do not store your device near magnetic fields: your device may experience malfunctions
(slowness, degraded functions, discharge, etc.)

7
User guide Rayplicker Cobra
Precautions for use:
• Do not look directly in the direction of the light source.
• To ensure a clean work environment and patient safety, wear clean surgical gloves when
handling the device, such as when changing tips.
• Before each patient, you must disinfect the device and apply a new, previously sterilized
tip.
• Please follow the instructions given in the user manual for setting up the sterilizable
calibration tip.
• Please follow the cleaning, disinfection and sterilization instructions given in the device
user manual.
• When using the device, observe the safety measures applicable to dental practices and
dental laboratories.
• The temperature range for measurement should be between 10°C (50°F) and 40°C
(104°F).
• Do not use the device if its screen is cracked or broken. Broken glass may injure you. Take
your device to a BOREA after-sales service to have it repaired.
Preserve device and charger life
• Do not leave the device or the battery pack alone on charge for more than a week, as
overcharging may reduce its lifespan.
• When not in use for an extended period, the device will gradually discharge and must be
charged before use.
• When the charger is not in use, do not leave it plugged into a power outlet.
Only use battery packs, chargers, accessories and supplies approved by BOREA.
• Please only use the rechargeable battery packs supplied with the device. The use of other
power sources is prohibited and may damage the device.
• Please only use the mains charger supplied with the device by BOREA (5V, 2.4A). Using
generic chargers can shorten the life of your device or cause it to malfunction.
• BOREA cannot be held responsible for the user’s safety if the user uses accessories or
components not approved by BOREA.
• The use of accessories or elements not approved by BOREA voids the warranty.
Do not disassemble, modify or repair your device yourself
• Any repair or maintenance operation must be entrusted to authorized persons. More
specifically, access to and replacement of an electronic card can only be carried out by
BOREA. Failure to comply with this rule will void the warranty.
• Do not disassemble or puncture the battery pack, as this may cause an explosion or fire.
In case of equipment failure
If at any time the device shows signs of malfunctioning or you suspect that it is not working
properly:
• Do not use the device on a patient.
• Unplug the base and make sure it cannot be used before it is serviced (ax a message).
• Contact your dealer or BOREA.
Use your device only for the functions for which it is intended.

8
User guide Rayplicker Cobra
1.4. Symbols description
CEM Certification mark which indicates that the product complies with
the requirements of the German Product Safety Act (ProdSG).
The C-UL-US Mark confirms that representative samples of the
product have been tested and comply with applicable standards
for mechanical, fire, and electric shock hazards for the United
States.
CE
The Rayplicker Cobra device is a Class I medical device.
It bears the CE marking in accordance with European
Regulation (EU) 2017/745 relating to medical devices.
Date of first axing of CE marking: 2022.
Elimination
This device and all accessories marked with this symbol must not
be disposed of with unsorted household waste. Return of the old
device to BOREA SAS.
Protection
class Protection class II equipment.
Read the instructions before use.
Serial number
Catalogue number
Batch number
Non-sterile
Do not reuse
Place of manufacture
Operating limit temperatures
Recyclable
SN

9
User guide Rayplicker Cobra
2. RAYPLICKER SOLUTION DESCRIPTION
The Rayplicker Cobra is a device intended for the determination of dental color and translucency.
It is a multipoint spectral measurement device built around a two-dimensional optical sensor
and a spectrometer allowing the acquisition of spectral data at any point of the tooth and the
automatic production of a complete and precise cartography of the shade variations of this
tooth. The analysis is performed on specific spectral bands relevant for hue recognition. Thanks
to its geometry, this wireless device allows access to all the teeth of the mouth.
It has a sterilizable calibration tip allowing it to rest on the patient’s teeth, thus ensuring precise
positioning of the device.
These tips play an important role because they incorporate a chromatic reference (gray pattern)
necessary for the proper functioning of the device through a self-calibration step not perceived
by the user.
An oled screen is integrated into the device and displays the analyzed area in real time, thus
facilitating the positioning of the measuring head on the tooth. The video stream is also
available on the computer screen via the Rayplicker Vision software necessary for the analysis
and archiving of data in a patient file. The acquisition is carried out in less than a second and
instantly transmitted to the patient file by wifi. Once transmitted, the shade viewer allows you
to see a polarized photo, an overall shade map, a three-thirds analysis of the tooth (Cervical,
middle, incisal), a 9-zone analysis, a pixel-perfect analysis and an analysis of translucency. The
color information is communicated according to the standards of the commonly used shade
guides. It is also possible to analyze the color according to the L*a*b* and L*C* h standards.
10
User guide Rayplicker Cobra
3. PACK CONTENT
3.1. Package content
Articles Quantity Reference
Rayplicker Cobra device 1 -
Wireless battery pack 1 EA0207
Docking station 1 SF0210
Dongle 1 RA0201
Main charger 5V 2.4A 1 EA0211
Documentation:
• Quick Start Guide
• Disinfection and Sterilization Procedures
• Best practices for using Rayplicker Cobra
• Safety instructions
1 CA0207
Cleaning wipe 1 -
Calibration tips x6 (Autoclavable) 6 RA0209
1
2
5
6
4
3
2
4
5
6
1
7
7
3
8
8

11
User guide Rayplicker Cobra
The following spare parts and accessories are available from BOREA SAS or your distributor.
ACCESSORIES
6 Calibration tips (Autoclavable) Ref : RA0209
Main charger 5V 2.4A Ref : CA0204
Wireless battery pack Ref : EA0207
Docking station Ref : SF0210
Dongle Ref : EA0211
SPARE PARTS
3.2. Spare parts and accessories
12
User guide Rayplicker Cobra
4. FIRST START-UP
4.1. Fitting the calibration tip
The calibration tip is positioned (clipped)
at the end of the measuring head. Thanks
to its specific design, it can be supported
on the patient’s teeth, thus ensuring precise
positioning of the device.
It incorporates a chromatic reference (gray
pattern) necessary for the proper functioning
of the device through a self-calibration step
not perceived by the user.
It is necessary to ensure that the calibration
tip is clean and in good condition. It must also be protected from the sun’s rays and any other
type of external aggression. The condition of the tip attests to the quality of the calibration and
guarantees the quality of the data collected by the Rayplicker Cobra. We invite you to check
the condition of your tips, for this, please refer to the protocol for use of the Rayplicker Cobra
present on the BOREA website.
4.2. Device charging
Before its first use, the device must be charged.
Charging can take up to 4 hours. To do this, the
device must be placed on its base and then
connected using the cable to a mains socket.
When the device is charging, the base flashes
blue. Once charged, the base turns o.

13
User guide Rayplicker Cobra
4.3. Turning on the device
Turn on the device with a long press (2
seconds) on the button on the back of it. An
audible signal informs you that it has started
correctly.
The device screen lights up and the shade
taking icon appears (see «5.3. R a y p l i c k e r
Cobra interfaces tree», page 14). The
strength of the Wifi signal is indicated at the
top right of this screen.
5. DEVICE INTERFACES
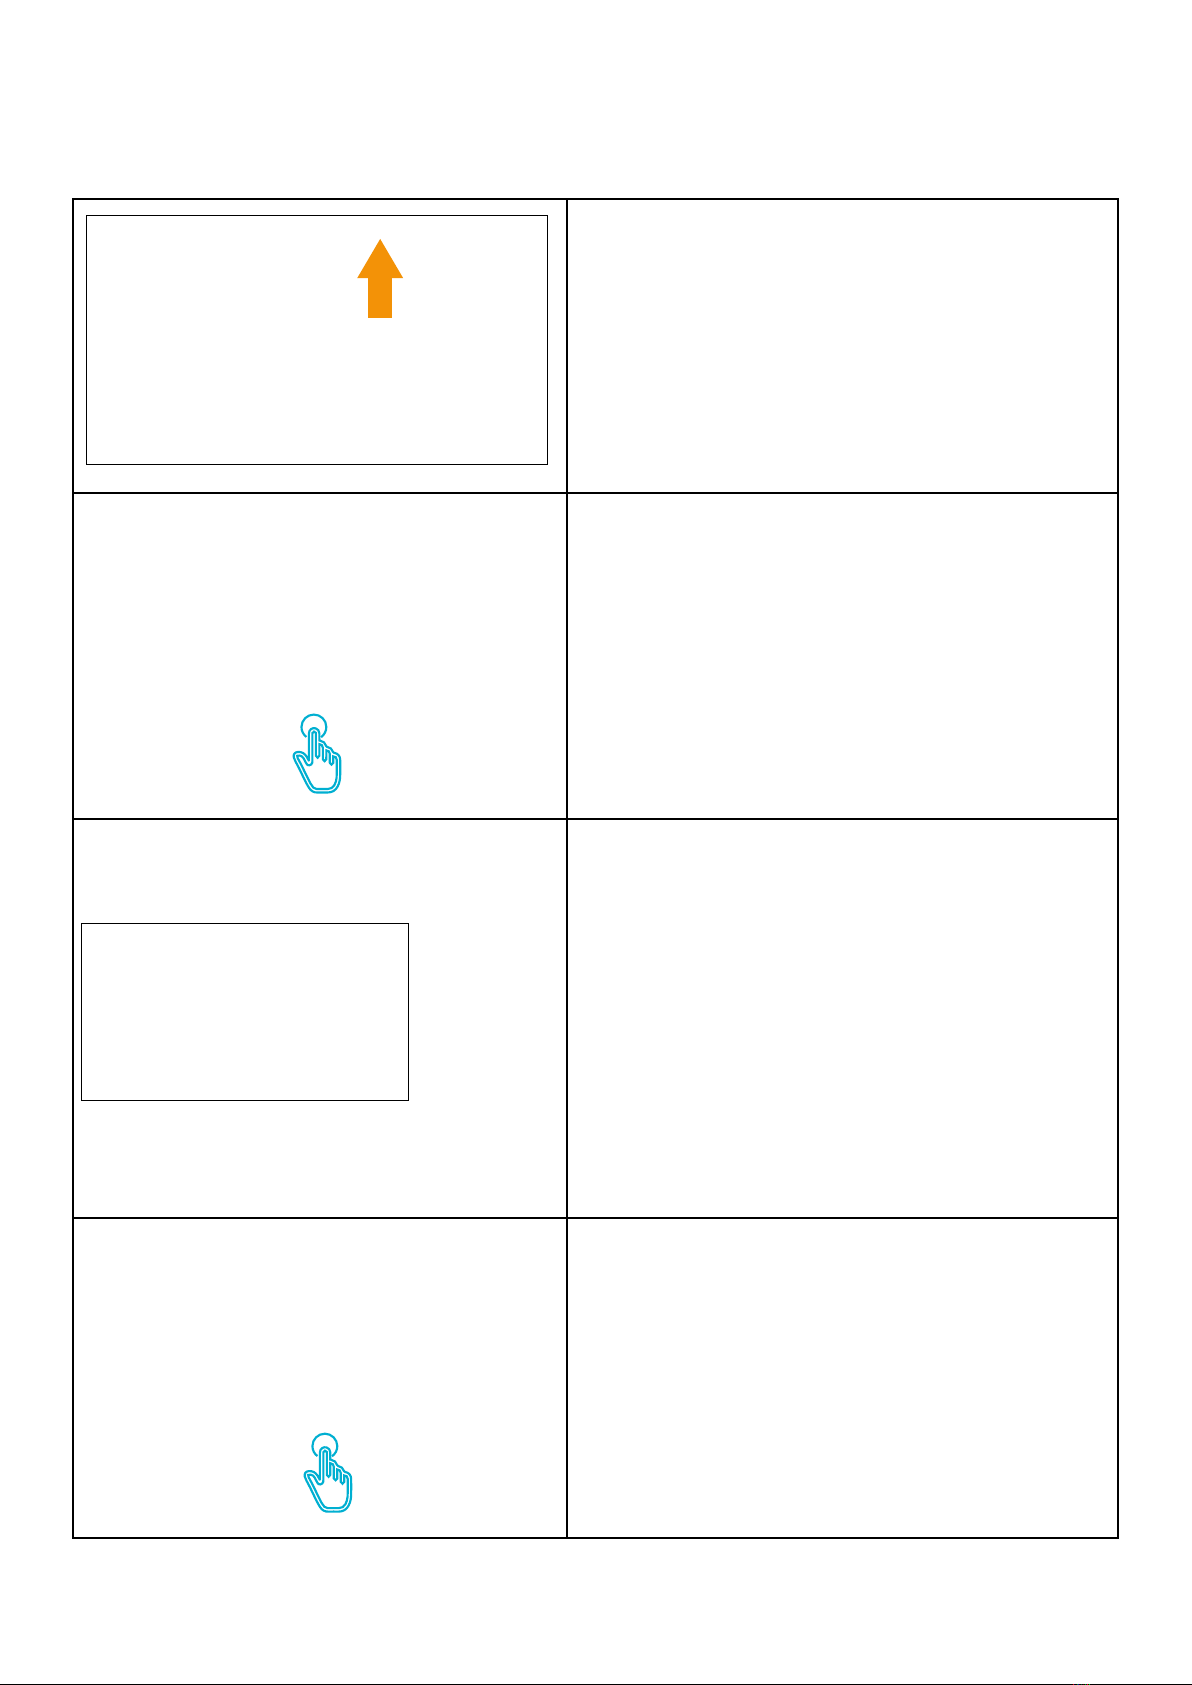
The Rayplicker Cobra device is equipped with an OLED touch screen. To navigate between the
dierent interfaces, follow the instructions below
A click on the screen enable you to enter the selected menu.
A swipe to the left scrolls the screens to the left.
A swipe to the right scrolls the screens to the right.
A swipe up acts as a return to the previous screen.
5.1 User interface navigation
14
User guide Rayplicker Cobra
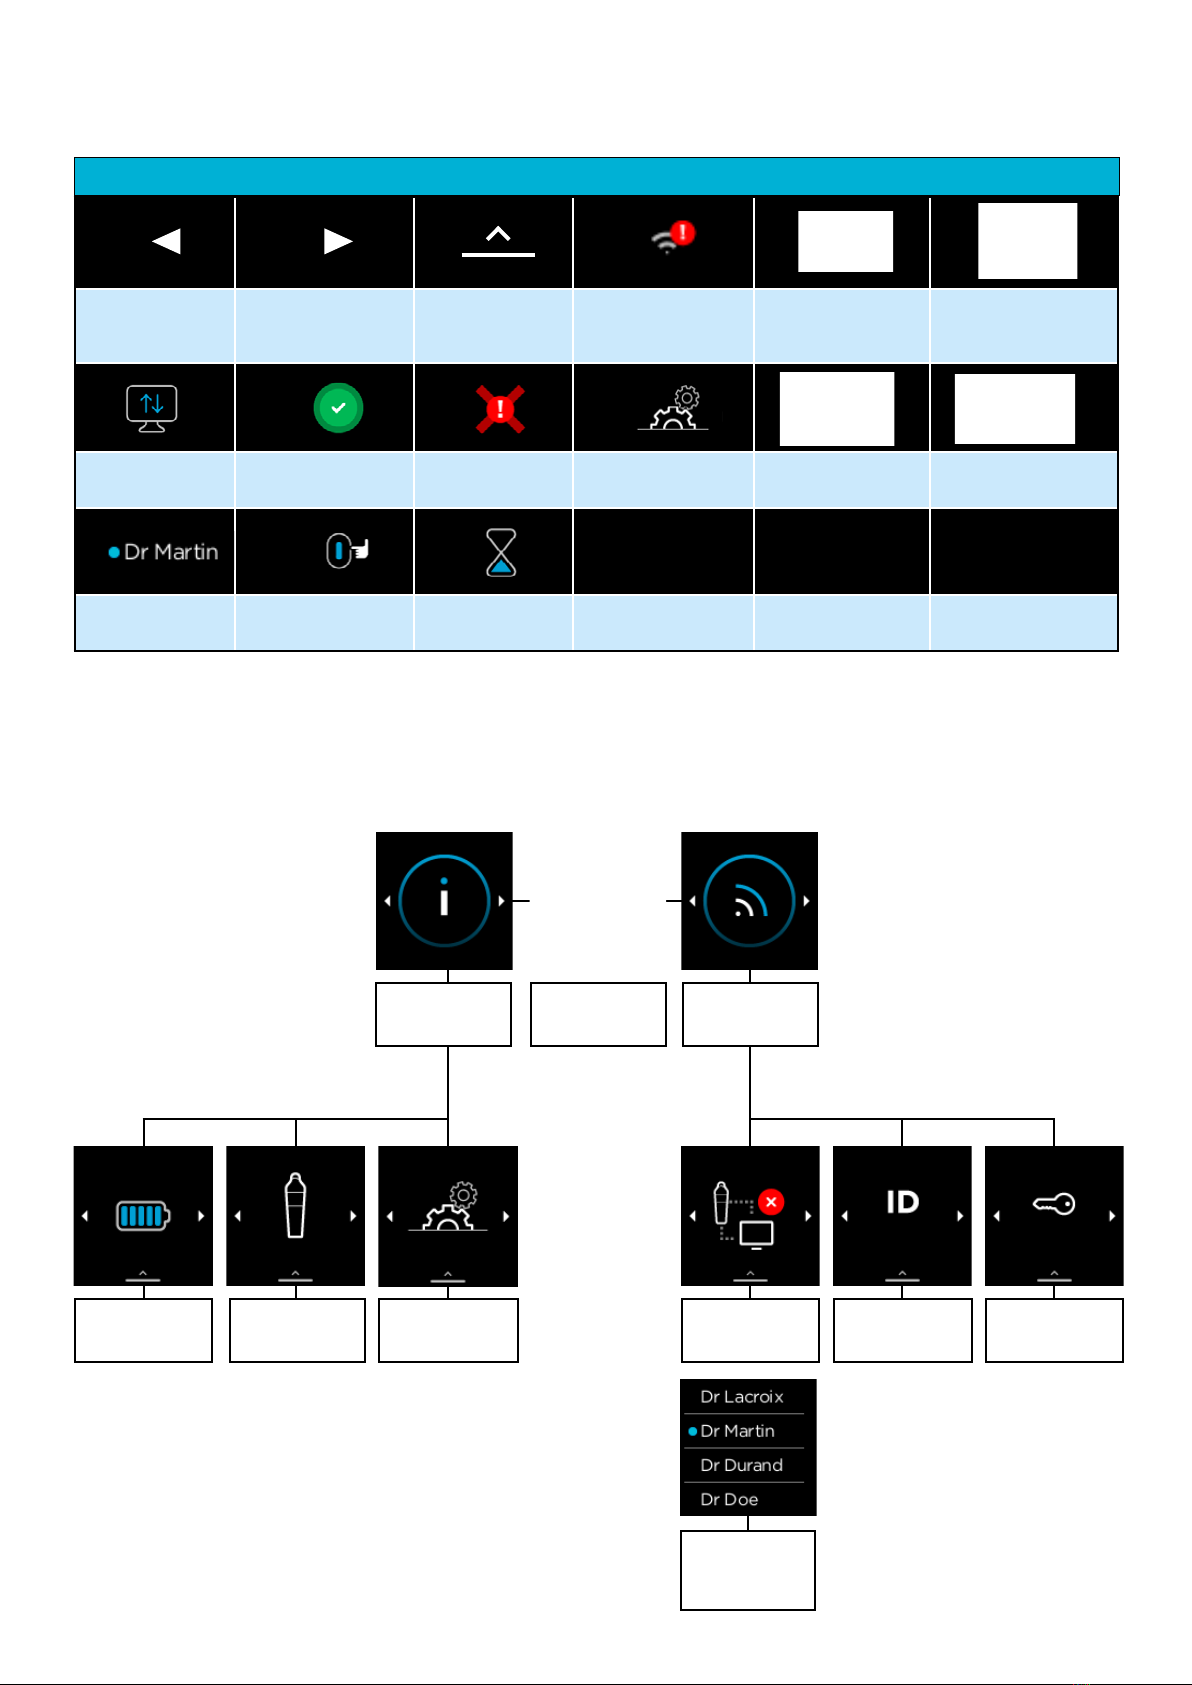
INFO SHADE
TAKING WIFI
BATTERY SERIAL
NUMBER
SOFTWARE
VERSION
NOT
CONNECTED
DEVICE
NAME PASSWORD
PROFILE
CHOICE
5.3. Rayplicker Cobra interfaces tree
Scroll left Scroll right Back
Device connected
but not
synchronized
Device connected
but not
synchronized
Don’t move
Transfer in
progress
Acquisition
validated
Error during
Acquisition
Software
version
Update
failed
Update
done
Selected
profile
Locked
screen Download
COBRA ICONS
5.2. Note on device illustrations

15
User guide Rayplicker Cobra
To use the Rayplicker Cobra, you must have the Rayplicker Vision software installed
on the computer. The software is free to download from www.borea-dental.com.
When the software is installed please follow the on-screen digital quick start guide.
In step 5, you must enter the Cobra password indicated in the wifi settings.
5.4. Wifi menu
Or
This interface indicates that the device is not connected to the
Rayplicker Vision software.
This interface only shows the device name. This can be customized
from the “Devices” settings in the Rayplicker Vision software.
This interface indicates the password for connecting the Cobra device
to the Rayplicker Vision software. This password can be customized
from the “Devices” settings in the Rayplicker Vision software.
This interface indicates that your device is connected and synchronized
with a user profile on Rayplicker Vision software. The connected
profile is the one with the blue dot. If you wish to change it, select
the profile of your choice from the list on the screen.
16
User guide Rayplicker Cobra
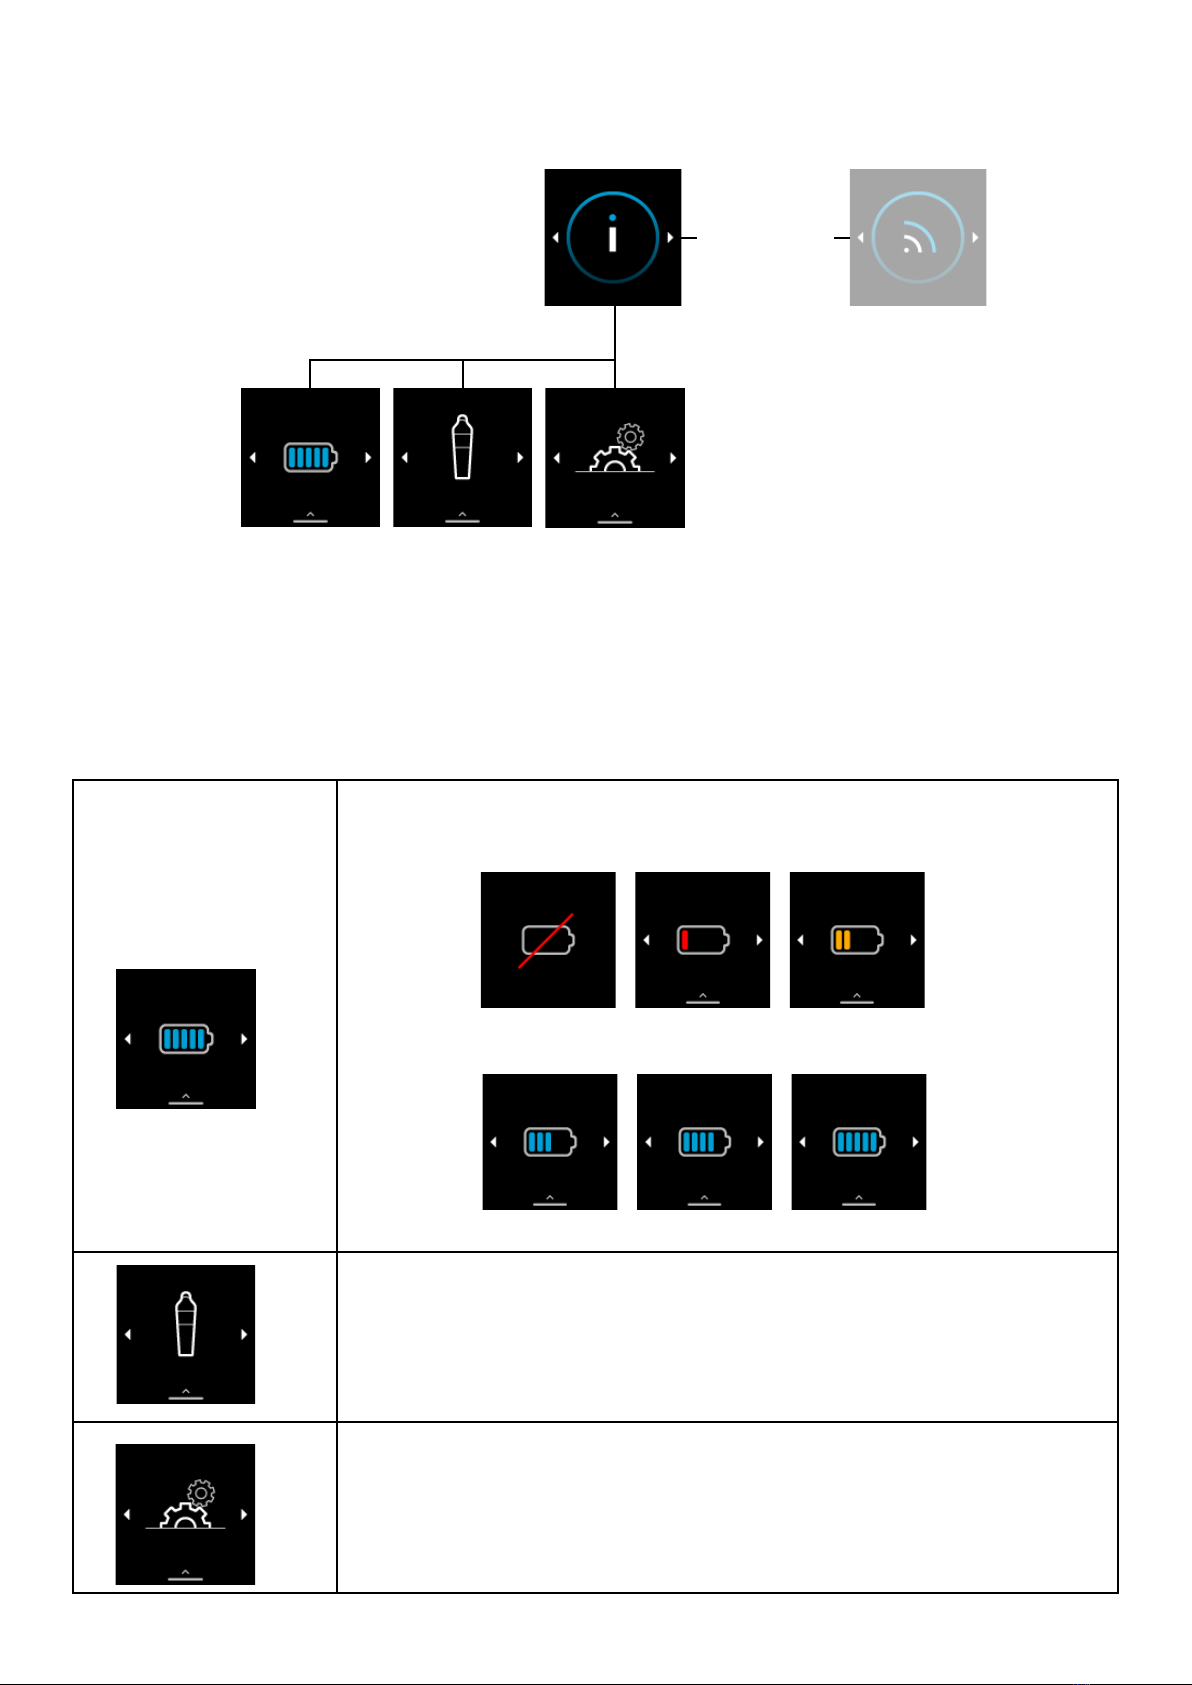
Here is displayed the battery level of your device.
<20% 20% 40%
5.5. Information menu
60% 80% 100%
Here is displayed your device serial number.
Here is displayed your device software version.

17
User guide Rayplicker Cobra
6.1. Locking the Rayplicker Cobra
6.3. Turning o the device
To turn o your Cobra device without
waiting for the automatic shutdown,
press and hold the trigger for 2
seconds then press the screen when
the “shutdown” symbol appears.
Step 1 :
By default, after thirty seconds of inac-
tivity, the Cobra locks. If this symbol is
displayed, press the trigger to access
the device functions again.
2nd step :
The system automatically shuts down after one minute and 30
seconds of inactivity.
These timeframe can be configured in the Rayplicker Vision
software in the Devices parameters tab (See Rayplicker Vision
manual).
6. LOCKING AND SHUTTING DOWN THE DEVICE
6.2. Automatic shutdown of the Rayplicker Cobra
18
User guide Rayplicker Cobra
7. COLOR TAKING WITH RAYPLICKER COBRA
7.1. Make a shade-taking
Launch shade taking mode by briefly pressing
the trigger, or by pressing the «shade taking»
icon
Open or create the patient file of your choice
on the Rayplicker vision software.
Make sure your device is connected and
synced.
A video stream is launched to help you po-
sition the appliance correctly in contact with
the patient’s tooth.
This video stream is displayed:
- on the screen of the Cobra device
- on the computer screen.
Briefly press the trigger or click on the touch
screen to start the acquisition.
19
User guide Rayplicker Cobra
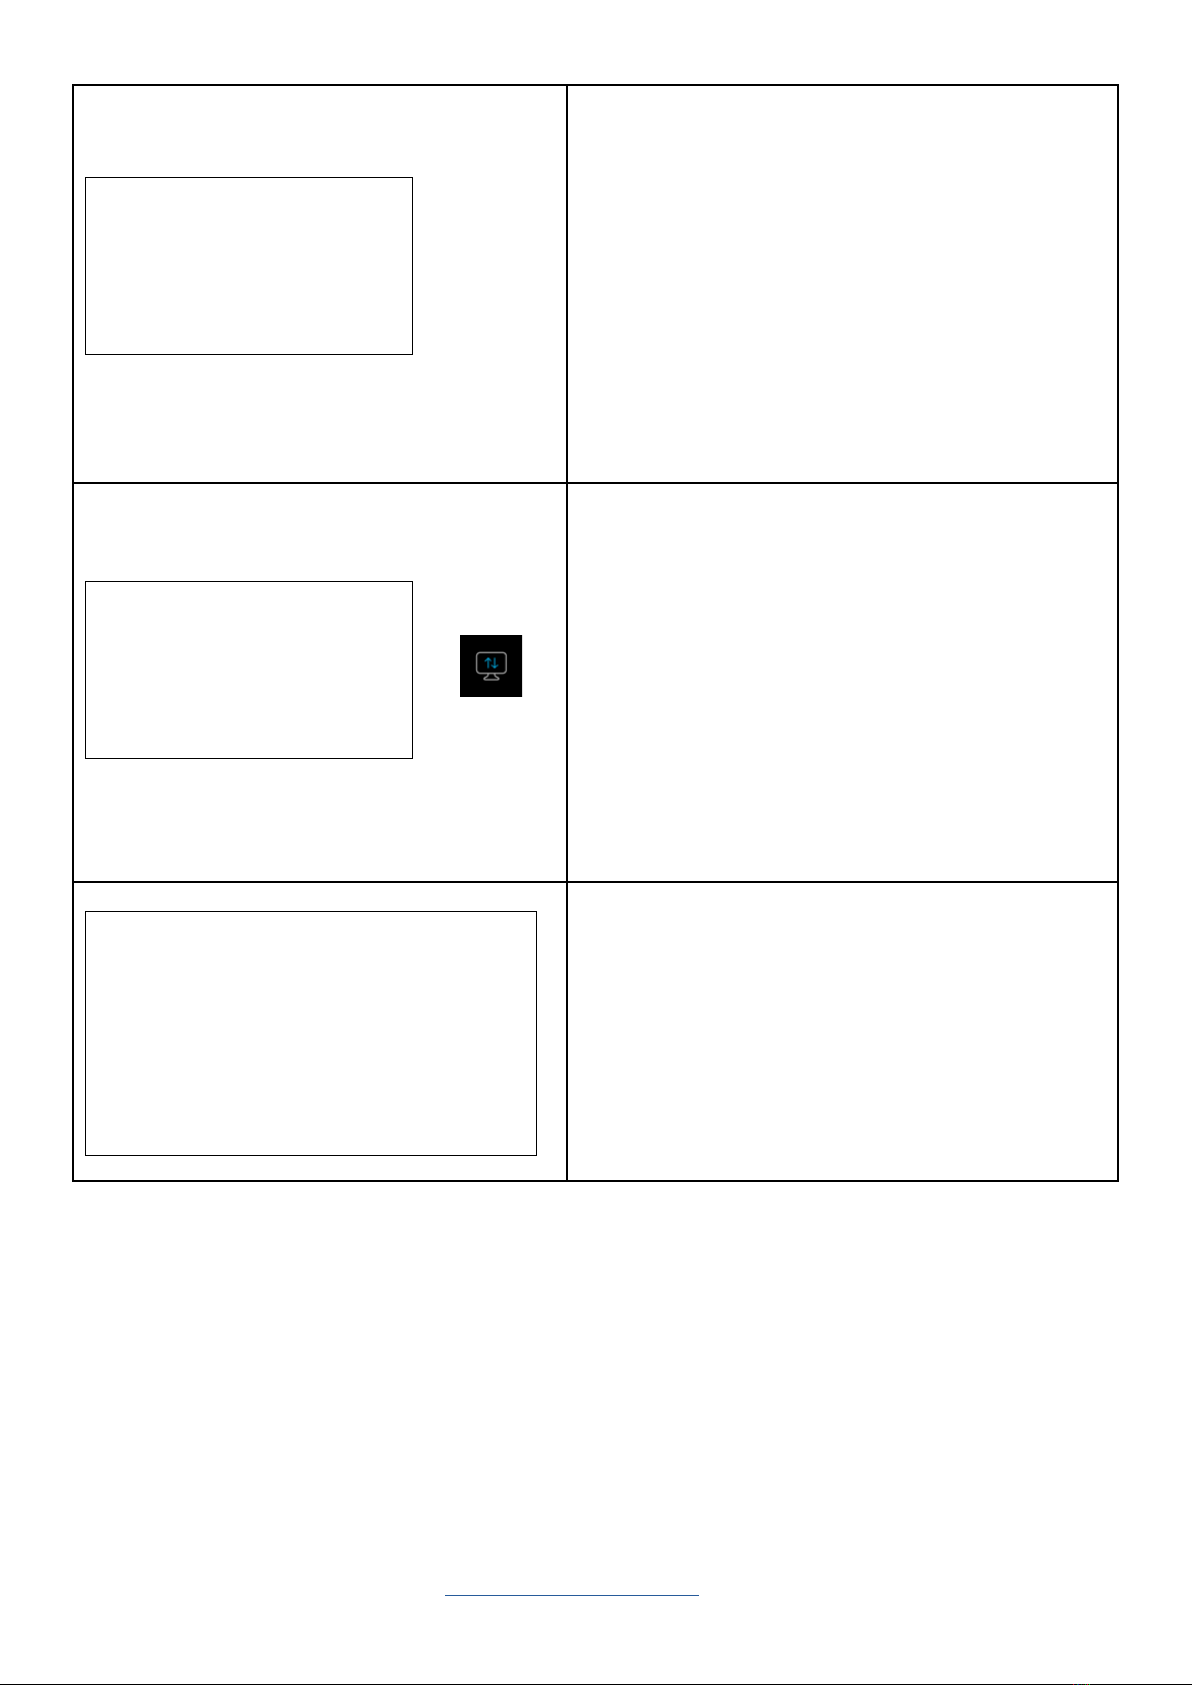
When the acquisition is complete, the
transfer to the patient file is automatic.
Take care not to move for 1 second, the time
of the spectral acquisition.
Once the transfer is complete, the shade
viewer opens on the Rayplicker Vision sof-
tware.
7.2. Automatic calibration
The Rayplicker Cobra device performs a self-calibration at each acquisition.
This is done using the sterilizable tip which has a gray pattern. It is necessary to ensure the
cleanliness and condition of this calibration tip. It must also be protected from the sun’s rays
and any other type of external aggression.
The condition of the tip attests to the quality of the calibration and guarantees the quality of
the data collected by the Rayplicker Cobra.
We invite you to check the condition of your tips. To do so, please refer to the Good Practices
guide presented here “8.1. Good practices for using the Rayplicker Cobra”, page 21, of this
manual and on the Borea website www.borea-dental.com.
20
User guide Rayplicker Cobra
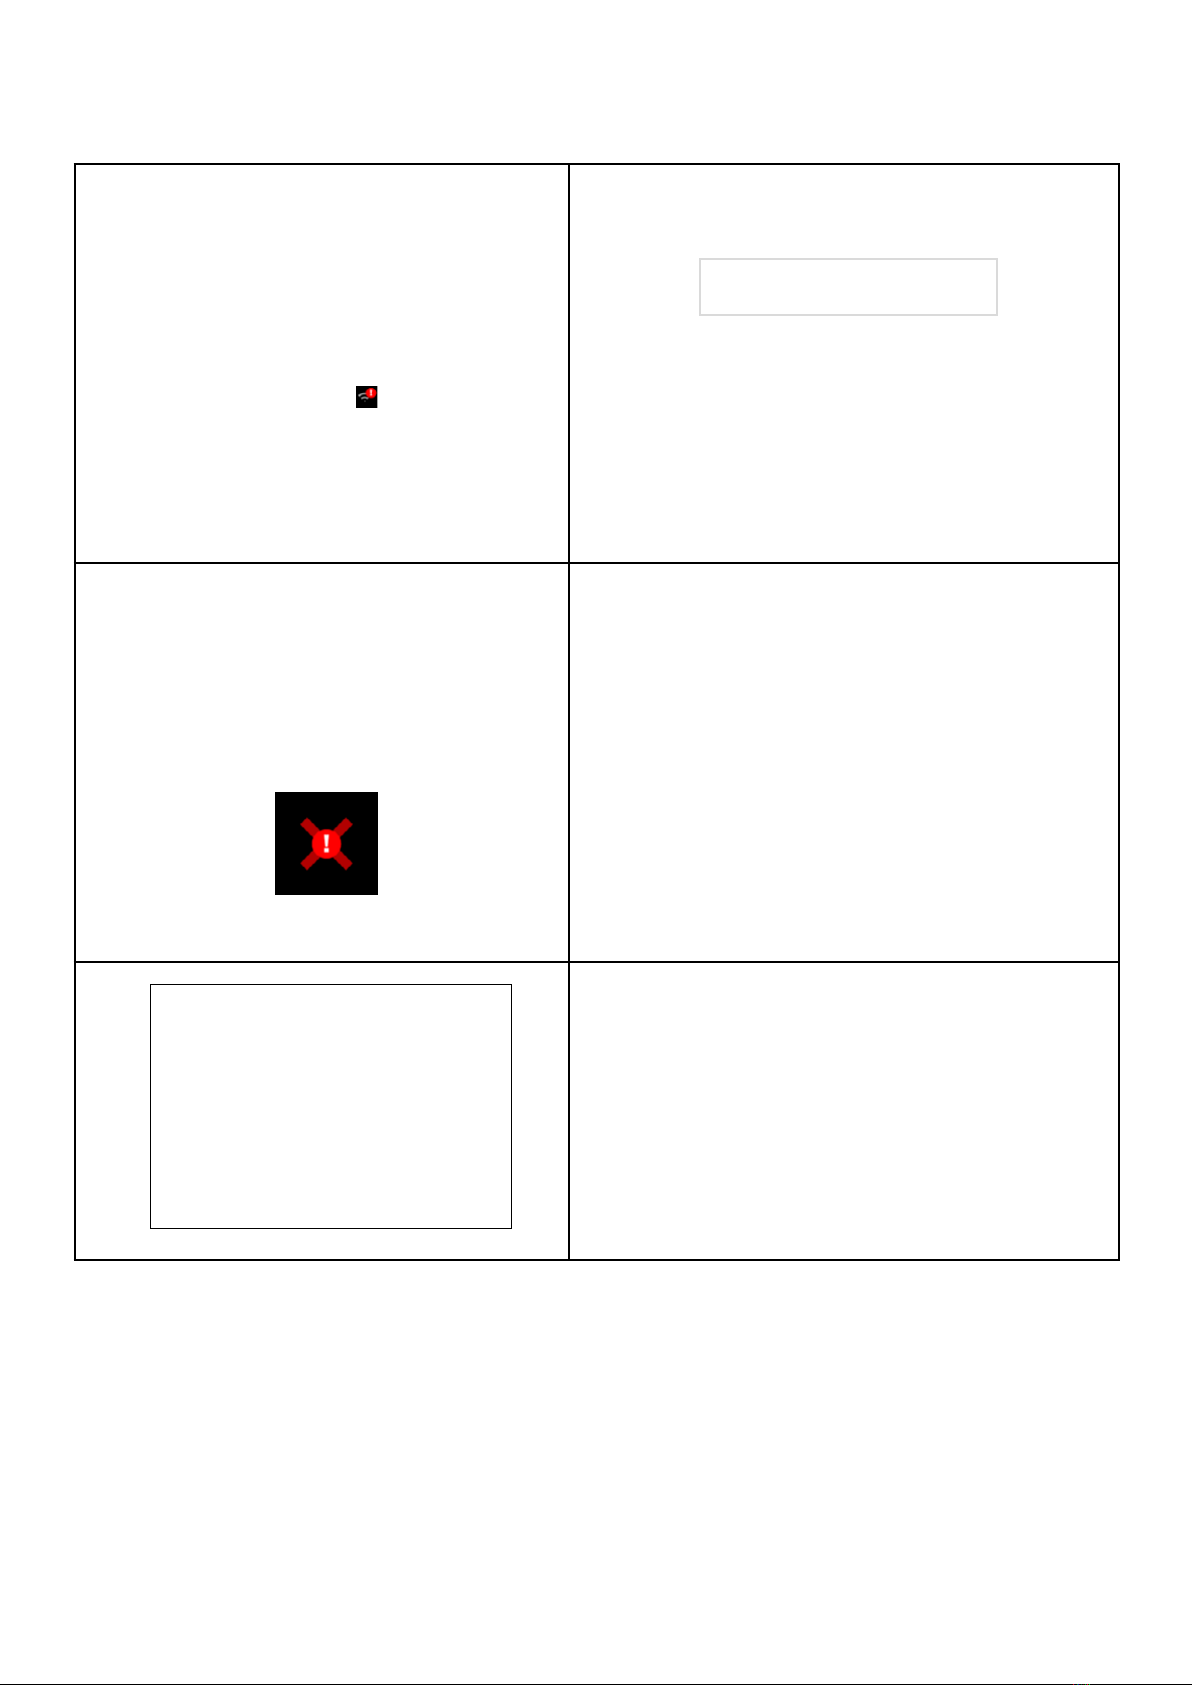
7.3. Error messages
The device is connected but not synchronized
with a user profile on the Rayplicker Vision.
An error occurred during acquisition.
Please redo the shade taking.
An error occurred during the transfer. Click on
“CANCEL” to resume a shade.
Another Rayplicker Vision software within your
structure may be synchronized with the device.
To sync to Cobra, go to your device’s network
settings, then select the profile you want. (See
«5.4. Wifi menu», page 15)
Table of contents
Other BOREA Dental Equipment manuals


