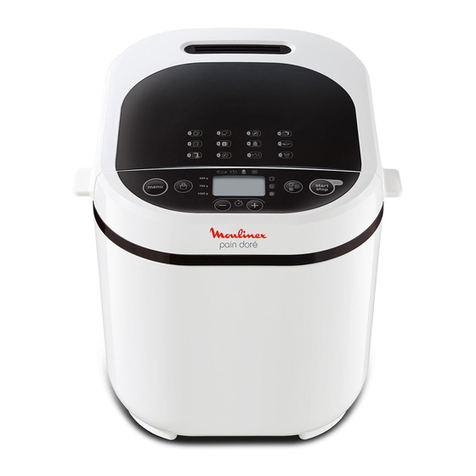
BORK X 780 User manual

BREAD MAKER X
780
INSTRUCTION MANUAL

INSTRUCTION MANUAL
BREAD MAKER
X
780

2 3
20 AUTOMATIC PROGRAMS
Allows cooking of a wide variety of bread products: Traditional, Rye,
French, Whole-grain, Sweet, Gluten-free, Yeast-free and other bread
types. Slow cooking modes increase the time of dough preparation and
rising, guaranteeing better baking results and a better shape. The "Home-
made bread" program allows users to get creative and cook exclusive
pastries based on their own recipes.
INFORMATIVE LCD DISPLAY
The LCD-display describes the current baking process, displays current
modes, shows messages and other information. Supports 2 languages
(Russian and English). Comes in 2 color variations.
3 WEIGHT OPTIONS AND 3 CRUST COLORS
OF BAKED PRODUCTS
It is necessary to consider how much bread you plan to bake in order
ensure that the bread is always fresh. The device allows the user
tochoose the weight of finished baking products, depending on their
needs: 500 g, 750 g and 900 g.

4 5
2 BAKING FORMS
Culinary experiments shall have no boundaries. The device comes with
2 baking forms included, which allows cooking not only traditional bread,
but real cakes: round and magnificent. Convenient silicone handles
ontheforms do not heat up during baking and can withstand even
thehighest temperatures inside the chamber.
DISPENSER FOR ADDITIONAL INGREDIENTS
An automatic dispenser is integrated into the device for additional
convenience.
It helps the device to load additional ingredients (such as raisins, nuts,
dried fruits, chocolate chips) into the dough automatically.
DELAYED START
The delayed start function (up to 15 hours) allows cooking at the chosen
time and to enjoy freshly baked, aromatic bread for breakfast, lunch and
dinner, without losing a moment of precious time.

6 7
Control Knob
LCD display
Control panel
Confirmation button
Button for starting/pausing/cancelling
Bread maker operation indicator
Back button 1 (step) use in order to enter the Settings section
Dispenser for additional ingridients
View window
Vent holes
Cover
Rubber feet
Button to open the top cover

8 9
BASIC
This mode is suitable for baking white bread
and bread with grain additives, where the main
ingredient is represented by the white flour.
RYE BREAD
The mode is adapted for cooking rye bread.
FRENCH
This mode is optimally suited for baking hard
and unsweetened bread with a porous structure
and a crispy crust.
WHOLE WHEAT
This mode is intended for production of whole
grain bread, in which raw grain is used.
The flour consisting of such grain includes all
necessary nutrients useful for the human body.
The grain shell contains fiber, vitamins B and E,
minerals and helpful micro elements, including
proteins. The whole-grain flour is considered
tobe healthier than white flour, which is made
from the inside part ofthe grain. With this mode,
it is possible to cook not only delicious, but also
healthy bread for the whole family.
SWEET BREAD
This mode is made specially for sweet bread
recipes with a high sugar and fat content.
It is recommended to use the light or medium
crust color in this mode.
QUICK
This mode allows users to shorten the cooking
time and is used in case an accelerated baking
process is required.
Measuring cup Measuring spoonBlade for doughBlade for jamBaking forms – 2 pcs.

10 11
Mode Crust Time
500 g 750 g 900 g
Basic Light 3:05 3:10 3:15
Medium 3:10 3:15 3:20
Dark 3:15 3:20 3:25
Basic — Slow cook
(baking)
Light 4:05 4:10 4:15
Medium 4:10 4:15 4:20
Dark 4:15 4:20 4:25
Rye bread Light 3:30 3:35 3:40
Medium 3:35 3:40 3:45
Dark 3:40 3:45 3:50
GLUTEN-FREE
This mode allows users to cook gluten-free
bread, which is intended for people who can not
tolerate gluten, present in many different flours:
wheat, barley, rye, oat.
KULICH
This mode is suitable for cooking both
traditional cakes and cakes with additives.
HOME MADE
This mode allows users to adapt the bread
maker to their own recipes by changing the time
planned for each cycle.
DOUGH
This mode is used only for kneading and lifting
yeast dough, for example pie dough.
PASTA DO UGH
This mode is used for kneading yeast-free
dough. For example, dough intended for ravioli
or noodles.
YOG U R T
This mode is made for cooking natural yogurt
athome.
RYAZHENKA
This mode is for cooking fermented baked milk.
JAM
This mode is for cooking delicious natural fruit
or berry jams and sauces.
BAKE
This mode is ideal for baking and preheating
easy-bake bread.
SLOW MAKING MODES
Slow cooking modes increase time of dough preparation and lifting,
guaranteeing better loaf shape and baking results.
This mode can be applied to the following modes: Basic mode,
Ryebread, French bread, Whole wheat bread, Sweet bread.

12 13
Mode Crust Time
500 g 750 g 900 g
Sweet bread — Slow cook
(baking)
Light 3:45 3:50 3:55
Medium 3:50 3:55 4:00
Dark 3:55 4:00 4:05
Quick — 1:30 (750 g)
Gluten-free Medium 2:45 (750 g)
Kulich — 4:35 (750 g)
Home made — Heating time (0—0:20)
Kneading (0—0:30)
Dough preparation (0—0:30)
Kneading (0—0:30)
Lifting (0—2:00) (25—50°С)
Baking (0—2:00) (70—160°С)
Heating (0—1:00)
Mode Crust Время
Dough — 1:30 (0:30 Kneading / 1:00 Lifting)
Paste dough — 0:25
Yogurt (2.5 l) — 6:00
Ryazhenka (2 l) — 7:20
Jam — 0:45—3:00
Bake — 0:10—2:00 / 140/150/160°С
Mode Crust Time
500 g 750 g 900 g
Rye bread — Slow cook
(baking)
Light 4:20 4:25 4:30
Medium 4:25 4:30 4:35
Dark 4:30 4:35 4:40
French Light 3:30 3:35 3:40
Medium 3:35 3:40 3:45
Dark 3:40 3:45 3:50
French — Slow cook
(baking)
Light 4:30 4:35 4:40
Medium 4:35 4:40 4:45
Dark 4:40 4:45 4:50
Mode Crust Time
500 g 750 g 900 g
Whole wheat Light 3:30 3:35 3:40
Medium 3:35 3:40 3:45
Dark 3:40 3:45 3:50
Whole wheat — Slow cook
(baking)
Light 4:20 4:25 4:30
Medium 4:25 4:30 4:35
Dark 4:30 4:35 4:40
Sweet bread Light 3:05 3:10 3:15
Medium 3:10 3:15 3:20
Dark 3:15 3:20 3:25

14 15
CHOOSING THE MODE
• Use the knob and chose "Selection mode",
press the OK button.
• Use the knob to select the desired mode.
• Press OK to confirm. The display will show
the selected mode.
WEIGHT SELECTION
• Use the knob in order to set the weight
andpress the OK button.
• Use the knob to select.
500 g →750 g →900 g
• Press OK to confirm. The display will show
the chosen mass.
CHOICE OF CRUST COLOR
• Use the knob in order to set the crust color
and press the OK button.
• Use the knob to select the crust color.
Light crust →Medium crust →Dark crust
• Press OK to confirm. The display will show
the chosen crust color.
CONNECTING TO A POWER OUTLET
• Do not touch the plug with wet hands.
• Connect the device only to a grounded
outlet (the manufacturer (person authorized
by the manufacturer) does not assume any
responsibility for damage in case of absence
of grounding, made in accordance with local
regulations).
• Do not pull on the cord, only pull on the plug
when disconnecting the appliance from the
power outlet.
• Prior to device operation, make sure that
local power supply parameters correspond
toproducts’ parameters.
• Connect the device to the power outlet.
• Install the bread baking form into the device.
• Install the blade, used to mix dough, on the
motor shaft.
• In order to prevent dough from sticking to the
blade during the course of kneading, apply
sunflower or olive oil to the blade.
• Place all the necessary ingredients inside the
baking form.
• Close the cover (lid).
• Chose the desired mode of operation.
INGREDIENTS
It is necessary to add the ingredients
inthefollowing order: firstly – liquid ingredients,
secondly – dry ingredients.
Yeast should only be placed only on dry flour.
Yeast should not come in contact with salt.
Donot add perishable products such as eggs
or fruit into the baking form if the recipe requires
a long delay.
The amount of ingredients is shown
intherecipe selction of the instruction manual,
as well as the recipe book "Hand-made bread".

16 17
• Press OK to enter the delayed start settings
menu.
• Use the knob to select the "Total delayed start
time".
Total delayed start time = Delayed start time +
Cooking time (selected mode).
Total time setting range – up to 15 hours.
• Press the OK button – the display will show
the total cooking time.
• Press the button to start the program.
SETTINGS
• In order to enter the Settings menu, press
andhold the button for 3 seconds.
Language setting
• Use the knob to select Language, and then
press OK.
• Select the language and press OK.
–English
–Russian
Display color adjustment
• Use the knob to choose the Display colour
section, and then press OK.
• Use the knob to choose the display colour
and then press OK.
–Pattern 1
–Pattern 2
Sound configuration
• Use the knob to select the Sound and press
OK.
• Use the knob to select the desired sound
settings and press OK.
–Voice on
–Voice off
–Sound off
CHAMB ER LIGHT
• In order to turn the device chamber light on
during cooking, press the OK button or lower/
raise the knob. The display will show current
settings.
• The device chamber light will be turned
onfor10 seconds.
Condensation may form on surfaces and
between elements of the control window during
the cooking process and after it is completed.
The condensation will evaporate through the
vents a short time after the end of device use.
SLOW COOKING MODE
• Use the knob to select the slow
cooking mode. The display will provide
the indication .
• Press OK. The display will show ON and OFF
buttons.
ON – enable the slow cooking mode.
OFF – disable the slow cooking mode.
• Use the knob to select the mode.
• Press OK to confirm.
The slow cooking is used with the following
modes:
–Basic mode
–Rye bread
–French bread
–Whole wheat bread
–Sweet bread
DELAYED START FU NCTION
This function allows delaying the start
ofthecooking process.
• Use the knob to select the delayed start
function. The display show a flashing
indication .

18 19
CLEANI NG
• Disconnect the device from power outlet.
• It is necessary to wait until the device cools
down after the end of cooking.
• Wash the baking form and blade used
to mix the dough under running water,
applying a small amount of liquid detergent
ifnecessary.
• If the blade can not be removed from the
baking form, pour a small amount of warm
water into it and let it soak for a few minutes.
• Wipe outer and inner surfaces of the body
with a damp cloth and then – wipe off any
leftover water with a dry cloth.
• Clean the inside surfaces of the baking form
and the device itself thoroughly after each
use.
Do not use sharp objects, abrasive or chemical
cleaning substances or solutions.
Do not wash the bread baking form or the
kneading blade in the dishwasher.
The bread case and the kneading blade must be
washed after each use.
DISPENSER CLEANING
Disassembly
• Open the dispenser cover at the angle of 90°
by pressing on the icon.
• Install the screwdriver into the groove
(asshown in the photo) and pry the pin
totheleft in accordance with the directional
arrow.
ENERGY SAVING MODE
The device will switch to energy-saving mode
automatically if the controls are not activated
within 3 minutes – the brightness of the display
will decrease.
• Press any button on the device in order exit
the energy saving mode.
AFTER THE COOKING PROCEDURES
• Be careful at the end of the cooking process,
the device and the chamber will be very hot.
It is necessary to extract the bread from the
device after the baking process is complete to
avoid condensation forming on the crust. Due to
condensation the bread can become damp and
the crust can lose its crispiness.
• Remove the bread from the baking form after
cooking. Always use thermal mitts when
removing the baking forms from inside the
appliance.
• If the blade is stuck in a loaf, remove it with
the hook which comes with the device.
Do not use knives or any other metal objects
to remove the bread from the baking forms to
avoid causing damage to the non-stick surface.
HEATING FUNCTION
The device will be automatically switched to
the heating mode 2 minutes after the cooking
process is completed.
The display will show the icon, a voice
prompt will be issued and a corresponding
indicator will start to blink. The display will
also show a countdown until the end of
the heating cycle. The heating cycle lasts
58 minutes, after which the device is turned off.

20 21
• Remove the cover (lid), lowering it
as shown in the photo).
• Clean the dispenser from the remainder
ofingredients using a damp cloth and then
wipe it with a dry cloth.
Assembly
• Install the cover using a screwdriver.
STORAG E
It is recommended to store the device
assembled in a dry cool place, away from acids
and alkalis, at a temperature from 5 to 30°C
anda relative humidity of not more than 65%.
Protect the device from substantial changes
intemperature and exposure to direct sunlight.
When cooking bread from the provided recipes, it is recommended to keep the specified ingredients and their
amounts. It is also necessary to add the ingredients in the sequence provided in the recipe.
Control the flour mixing process and, if necessary, scrape the flour from sides of the baking form using a silicone
spatula.
HOME BREAD
Mode – Basic, weight – 750 g
–197 ml of water at room temperature
–5.5 tbsp of vegetable oil, refined
–387 g of the highest grade wheat flour
–1 tbsp of salt
–1 tbsp of granulated sugar
–0.5 tbsp of dry yeast
Pour water and vegetable oil into the baking form,
then add flour, salt, sugar and dry yeast. Set the mode
to Basic. Crust – Medium.
GLUTEN-FREE BREAD
Mode – Gluten-free, weight – 750 g
–100 ml of water at room
temperature
–100 ml of yogurt
–1 egg
–2 tablespoons
ofvegetable oil
–1 tbsp of apple cider
vinegar
–190 g of fine ground
rice flour
–190 g of cornstarch
–1 tbsp of granulated
sugar
–1 tbsp of salt
–1.5 tbsp of dry yeast
Whip the egg. Pour water, yogurt, whipped egg,
vegetable oil, apple cider vinegar into the baking form,
then add rice flour, cornstarch, sugar, salt and dry yeast.
Set the Bread mode (Gluten-free). There is nochoice
ofcrust parameters in this mode.

22 23
FRU IT BREAD
Mode — Sweet bread, weight — 900 g
–200 ml of fresh orange
juice(2 oranges)
–90 ml of water at room
temperature
–50 g of butter
–540 g of premium wheat
flour
–2.5 tbsp of granulated
sugar
–1 tbsp of salt
–1.5 tbsp of dry yeast
–100 g of candied fruits
–35 g of almonds
Pour the freshly squeezed orange juice and water
into the baking form, then add softened sweet butter,
wheat flour, candied fruits, salt, sugar and dry yeast.
Put the almonds into the dispenser for dry ingredients.
Set the mode to Sweet bread. Crust – Medium.
50% WHEAT/RYE BREAD
Mode — Rye bread, weight — 900 g
–210 of water at room
temperature
–160 ml of kefir
–1 tbsp of apple cider
vinegar
–2 tablespoons of
vegetable oil
–1 tbsp of honey or
granulated sugar
–270 g of wheat flour
–270 g of rye flour
–1 tbsp of dry rye malt
–0.2 tbsp of ground
–coriander
–0.2 tbsp of ground
caraway seed
–2 tbsp of salt
–2 tbsp of dry yeast
Fill the baking form with water, kefir, apple vinegar,
vegetable oil, and honey, then add wheat and rye flour,
salt, dry yeast, dry rye malt. Add the coriander and
the caraway seed to the dispenser for dry ingredients.
Setthe mode to Rye bread. Crust – Medium.
BRIOCHE
Mode – French, weight – 750 g
–120 ml of milk at room temperature
–2 eggs
–100 g of sweet butter
–340 g of the highest grade wheat flour
–1 tbsp of salt
–2 tbsp of granulated sugar
–1 tbsp of dry yeast
Whip the eggs. Pour in the milk and whipped eggs,
then add softened sweet butter, flour, salt, sugar and
dry yeast. Set the mode to French baking.
Crust – Medium.
Mode — Quick, weight —750 g
–170 ml of milk at room
temperature
–340 g of wheat flour
–2 eggs
–1 tbsp of salt
–2 tbsp of granulated
sugar
–100 g of sweet butter
–2.5 tbsp of dry yeast
Whip the eggs. Pour in the milk and whipped eggs,
then add softened sweet butter, flour, salt, sugar
anddry yeast. Set the mode to Quick baking.
Crust – Medium.
PEA BR EAD
Mode – Slow cook, whole-grain, weight – 900 g
–220 ml of water at room
temperature
–60 g of wheat
–120 ml of fermented
baked milk (ryazhenka)
–1.5 tablespoons
ofvegetable oil
–380 g of whole-grain
wheat flour
–90 g of pea flour
–1 tbsp of wheat bran
–2 tbsp of salt
–2 tbsp of granulated
sugar
–1 tbsp of dry yeast
Fill the baking form with water, fermented baked milk,
vegetable oil, then add the pea and wheat whole-grain
flour, wheat bran, salt, granulated sugar and dry yeast.
Set the Whole-wheat bread mode and choose slow
cooking. Crust – Medium.

24 25
RYAZHENKA – FERMENTED BAKED MILK
Mode – Ryazhenka
–2 l of pasteurized milk (3.5%)
–8 tbsp of sour cream 42%
Fill the baking form with milk and set the Ryazhenka
mode. After the first stage of cooking, cool the milk
to40°C (leave the cover (lid) open for 1 hour).
Stir the sour cream in the cooked milk.
Pour the resulting mixture back into the baking form
and press the OK button.
The maximum loading time of the ingredients should
not exceed 3 hours after the end of the first stage.
Store the prepared fermented baked milk
intherefrigerator.
YOG U R T
Mode — Yogurt
–2 l of pasteurized milk (3.5%)
–500 g of natural yogurt
Mix the milk with the yogurt, pour into the baking form
andset the Yogurt mode. Refrigerate the cooked
yogurt for 6 hours after cooking.
RASPBE RRY JAM
Mode — Jam
–600 g of raspberries (possible to use frozen)
–200 g of granulated sugar
Defrost raspberries, if using frozen. Put raspberries
and granulated sugar into the baking form, set the Jam
mode.
CAKES
Mode – Kulich
Dough
–17 g of wheat flour
–50 ml of milk
–1 tbsp of granulated sugar
–7 g of yeast
–250 g of flour
–60 g of melted butter
–50 g of sour cream
–50 ml of milk
–3 egg yolks
–110 g of granulated
sugar
–40 g candied fruits
–40 g raisins
–peel (1/2 lemon)
–peel (1/2 orange)
–1/2 tbsp of vanilla sugar
–1/4 tbsp of salt
Dough preparation: pour milk into the baking form,
add flour, sugar and yeast, set the cake mode.
Whip the egg yolks.
At the end of the first stage, fill the baking form
with milk, whipped yolks with sugar, then add flour,
softened butter, sour cream, vanilla sugar, salt, lemon
and orange peels. Put candied fruits and raisins into
the dispenser. Press the OK button. The maximum
loading time of the ingredients should not exceed
30 minutes after the end of the first stage (Dough).
PASTRY DOU G H
Mode – Pasta dough
–200 ml of milk
–1 egg
–7 tbsp of sweet butter
–4400 g of wheat flour
–1/2 tbsp of salt
–4 tbsp of granulated
sugar
–1 and 1/2 tbsp of dry
yeast
Whip the egg. Pour the milk into the baking form, add
the whipped egg, then add softened sweet butter,
flour, salt, sugar and yeast. Set the Dough Mode.
Take the dough out of the device. Divide the dough
evenly into 20 even balls. Prepare the filling. Make the
pastry forms. Cover the baking tray with oil. Put
the pastries on the baking tray, lightly moisten with
water and let stand for 20-30 minutes. Bake in the
oven for 10 minutes at 220°C, then bake for another
15–20 minutes at 180°C. Cool before consuming.

26 27
Problem Reason / Solution
Bread loses its volume
immediately or during the first
stage of baking, after having
risen
• Bread has risen too high: reduce the amount of yeast.
• Excess liquid. Reduce the volume of liquid by 1-2 tbsp or add some flour.
• Insufficient amount of salt.
• The baking process is influenced by a draft or components were moved or shaken during dough preparation.
• High humidity.
• Large volume of additional ingredients (for example, cheese).
Bread did not bake
inthemiddle or on top
• Excess liquid. Reduce the volume of liquid by 1 tbsp or add some flour.
• Large number of ingredients – the device could not cook the dough.
• Dough contains too muh fat. Too much oil, sugar, eggs, or nuts were added.
• The device cover (lid) was opened or the device was located in a cool / cold location.
• The flour is too dense. In the cases of rye flour, bran or wholemeal flour – partialy replace it with wheat flour during the next cooking cycle.
The crust is burnt • Excess sugar in the dough. Use less sugar or set the mode "Light crust" for sweet baking
• Use the “Sweet bake” mode.
Pale crust • Add some milk.
• Set the mode to “Dark crust”.
• Increase the amount of sugar.
A user may face problems if there is a difference in the ingredients, if there are inconsistencies with the ingredient amounts or if there are changes to the sequence
ofadding them into the baking forms during preperation and cooking. We recommend using a kitchen scale for better accuracy.
Problem Reason / Solution
Dough does not rise /
rises insufficiently
• Insufficient yeast / expired yeast.
• Yeast came in contact with salt prior to kneading. Add ingredients to different points of the baking form so that they do not touch each other.
• Too much salt. Consider added ingredients, containing salt: salted nuts or feta cheese.
• Use of whole-grain flour. Such flour contains shells of wheat grains and gluten. It is heavier than ordinary flour and contains more nutrients.
Bread made from such flour is usually smaller in terms of its volume.
• Ingredients are the “wrong” temperature: “hot” ingredients kill yeast, “cold” – slow yeast effects.
• Insufficient amount of water. Dough must be elastic and soft in order to rise correctly. It is necessary to add some liquid if the dough is too dry
and stiff.
• The device cover (lid) is opened during the kneading process.
• No sugar was added. Sugar is a very important ingredient, it creates the correct crust color and sweet taste, it also serves as food for the yeast
in bread.
The bread rises too much • Too much yeast, it is necessary to reduce the amount.
• Excess sugar, reduce the amount of sugar.
• Insufficient amount of salt.
• Large amount of liquid. Reduce the volume by 1-2 tbsp.
• Live yeast was used instead of dry yeast specified in the recipe.

28 29
Problem Solution (voice prompt)
Attention!
If overheating occurs, it is necessary to let the device cool
Overheating of the device chamber. It is necessary to let the device cool.
Openthecover, remove the baking form and allow the device to cool.
Attention!
Low temperature inside the device, place it in a warmer environment
Low temperature inside the device. Place the device in a warmer environment.
The room temperature should not be lower than 10°C.
Attention!
The device short circuited , contact an authorized service center
The device short circuited , contact an authorized BORK service center for diagnostics
and/or repairs.
Attention!
The temperature sensor has failed, contact the service center
The temperature sensor has failed, contact an authorized BORK service center
fordiagnostics and/or repairs.
Dear customers, if you have any questions related to purchase, operation and maintenance of BORK equipment,
please call this phone number
8 800 500 88 99
(Information and support).
• Please read this manual before using the device.
Non-compliance to the guidelines may lead to
personal injury and/or property damage.
• Before device operation make sure that
characteristics of the power supply are in
compliance with the product rating label.
• Connect the device to a grounded power outlet
only (the manufacturer (person authorized by the
manufacturer) does not assume any responsibility
for damages in absence of grounding, set in
accordance with local regulations).
• This device is not intended for use by persons
(including children) with reduced physical, sensory
or mental capabilities, or lack of experience and
knowledge of the product.
• This device is intended for use only in home
conditions.
• Make sure to remove all packing materials before
turning the device on for the first time.
• Do not allow the power cord to come into contact
with hot surfaces.
• Place the device only on even, stable, and heat
resistant surfaces.
• Make sure that there is space between the device
and any outlying obstacles or walls. Do not place
the device near any object that could be affected
by heat.
• Do not place the device on any heated surfaces,
gas or electric burners.
• Do no connect or disconnect the device from the
power outlet with wet hands.
• The housing of the device can become heated
during its operation.
• Avoid direct sunlight. Do not install the device near
other sources of heat.
• Keep the device clean. Clean the device after
each use. In the course of cleaning: follow the
instructions, provided in the “Cleaning” section.
• Do not use wire sponges, chemicals, abrasive
cleaners, or products containing sulfonylamide or
citric acid in order to clean the device.
• It is prohibited to insert any foreign objects or
liquids into the product’s housing and/or body, this
could damage the product.
• Unplug the power cord from the power outlet when
leaving the device unattended, at the end of use,
before cleaning, moving and before storage.
• Check the power cord, plug and housing regularly
for damage. Regularly check the power cord, plug
and bread maker itself for absence of damage.
• Transport the device only in the original packaging,
and in a fixed position.

30 31
CORRECTIVE MEASU RES
• In case of faults in the device’s functionality,
itisnecessary refer to the Troubleshooting section.
If it is not possible to fix the problem, immediately
stop using the device refer to the nearest BORK
service center for testing, replacement or repair.
• For safety reasons, all repair procedures and
maintenance of the device must be performed only
in authorized BORK service centers. Addresses
and telephone numbers of service centers can
befound on the site www.bork.ru or by calling
thephone number 8 800 700 88 99.
• If there is damage of any kind, stop using the
device and contact the nearest BORK service
center for testing, replacement or repair. Do not
remove the product rating label, it is necessary
foraccurate identification of the device in the event
ofa malfunction.
• The device must be disposed in accordance with
law requirements of the country, in which it is used.
• It is prohibited to immerse the device, its cord
or plug into water or other liquid. It is prohibited
to allow formation of condensation water on
the device, it is prohibited to operate the device
inareas with high humidity.
• In the case of transportation or storage
ofthedevice at a negative temperature and after
itstransfer to warm temperatures, it is necessary
tokeep it turned off for at least 4 hours before use.
• Do not operate the device without the internal
baking form installed.
• Carefully handle the baking forms and blades
intended for kneading and mixing. Avoid damage
to non-stick coatings. Forms for baking and
blades have natural wear and tear, their service
life depends on the application frequency and
correctness of use.
• It is prohibited to spray or apply any chemicals
tothe device.

33
INFORMATION ABOUT CERTIFICATION
The product is certified.
SPECIFICATIONS
Voltage: 220-240 V
Frequency: 50-60 Hz
Power: 520 W
Dimensions (H × W × D): 307×240×398 mm
Weight: 7.65 kg
Made in China
Information about the purpose of the product: the
device is intended for baking of bread products and
pastry.
EQUIPMENT KIT
Bread maker: 1 pc.
Baking form: 2 pcs.
Jam mixing blades: 1 pc.
Dough mixing blades: 1 pc.
Hook for blade removal 1 pc.
Measuring cup (450 ml): 1 pcs.
Measuring spoon: 1 pcs.
Instruction manual with the warranty card: 1 pcs.
Attention! Due to continuous product improvement
we reserve the right to make changes in design,
packaging and specifications of the device. The latest
version of this manual can be found on the website
www.bork.ru.

WARRANTY CARD
The BORK company carries warranty for 1 year from the date of sale of this product.
To avoid misunderstandings, we kindly ask you to carefully study the Operating Instructions,
the conditions of warranty, check the correctness of the warranty card. Warranty is valid if
correctly and legibly indicated: model, serial number of the product, the date of sale, clear
stamps of the firm-seller, the buyer’s signature. The model and serial number of the product
must correspond to those in the warranty card.
If any of these conditions or when the data specified in the warranty card, altered, deleted
or overwritten, the warranty card shall be deemed invalid. If the date of the sale cannot be
established, in accordance with the legislation on consumer protection, the warranty period
and service life are counted from the date of manufacture.
Product BREAD MAKER The date of manufacture is encoded in the serial number, for example:
1 and 2 signs — the week of manufacture; 3 and 4 signs — the year of manufacture;
the last 5 signs — serial number.
The product tested, staffed, mechanical damage is absent.
I agree to the terms of the warranty and service.
Customer Signature Seller Signature
STAMP HERE
Model
Serial number
Date of purchase
Information about the Seller
(name, legal address)
X78 0
Name and address of the manufacturer (the person authorized by the manufacturer), the importer, contact information are shown on the product packaging.
Premium home appliances collection,
BORK product customer reviews,
useful tips and news from official
brand boutiques.
Tips for choosing home appliances,
recipes from the brand-chef, design
solutions and other ideas for
a wonderful and comfortable life
from BORK experts.
Video reviews of home appliances
premium class, expert advice,
recipes and star guests – all this
you will find on the official BORK
channel on Youtube.
Name and address of the manufacturer (the person authorized by the manufacturer), the importer, contact information are shown on the product packaging.

TERMS OF SERVICE
The manufacturer reserves the right to refuse satisfying consumer demands for warranties in case of non-compliance with operating conditions, installation procedure, intentional or
careless actions of the buyer (customer) or third parties, which caused damage to the product.
Warranty does not cover:
• elements and details, with natural wear. Natural wear
means the consequences of product use which
caused the deterioration of its technical condition and
appearance due to the prolonged use of the product.
The warranty does not cover products
with damage caused by:
• misuse, neglect, improper storage, improper connection,
failure to observe the supplied operating instructions;
• foreign objects, substances, liquids, insects or animals
inside the body of the appliance;
• impact of high and low ambient temperatures on heat
sensitive parts of the product;
• physical or mechanical damage;
• Improper repairs and other interventions resulting
inchanges to the product design;
• connecting a power outlet with a voltage other than
specified in the instructions for use of the product,
ora non-compliance of the local government power
supply rules and regulations;
• using the product for industrial and/or commercial
purposes;
• damaged electrical cords;
• using cleaning products, not specified in the operation
manual;
• the use of non-standard (non-original) consumables,
accessories, spare parts;
• force majeure circumstances (fire, flood, lightning).
Replacing faulty parts in the product (parts, components,
assembly units) during the warranty period does not lead
to the establishment of a new warranty period either for the
entire product or the part replaced.
SERVICE CENTER ADDRESSES
JSC "Сервис", Moscow, 10 Bolshaya Sadovaya St.
Current information about service centers
in your area can be found at www.bork.com.
Table of contents
Popular Bread Maker manuals by other brands
Rosewill
Rosewill R-BM-01 instruction manual

Panasonic
Panasonic SD-ZB2512 Operating instructions and recipes
Panasonic
Panasonic Bread Bakery SD-251 Operating instructions & recipes
Beyond
Beyond Beyond WBYBM2 owner's manual
Bifinett
Bifinett KH 2231 operating instructions
Curtis Stone
Curtis Stone 676-748 instruction manual
