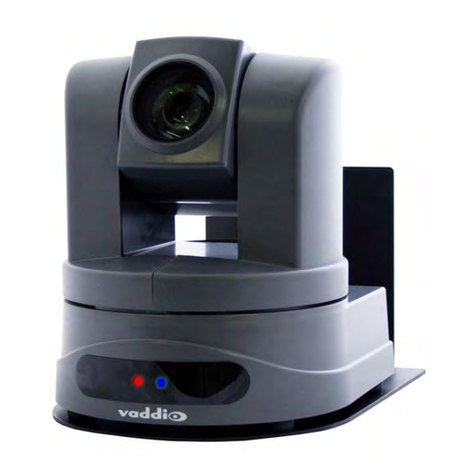
BOS BS-IPT4002LPR User manual

1
BS-IPT4002LPR / BS-IPT4012LPR USER GUIDE
BS-IPT4002LPR / BS-IPT4012LPR
USER GUIDE

2
BS-IPT4002LPR / BS-IPT4012LPR USER GUIDE
1.1 Product Overview
This product which provides a consistent range of cost-effective and reliable network cameras
can fully meet your requirements. Based on embedded Linux operating system, network
cameras could be easily accessed and managed either locally or remotely with great reliability.
With built-in high-performance DSP video processing modules, the cameras pride on low power
consumption and high stability. They support state-of-the-art H.265/ H.264/ MJPEG video
compression algorithm and industry-leading HD dual-stream technology to achieve the highest
level of video image quality under the limited network resources. It is fully functional, supporting
for flexible and comprehensive alarm linkage mechanism, day and night auto switch and privacy
masking, etc.
In practical applications,network cameras could either work independently in the LAN, or be
networked to form a powerful safety monitoring system. It is widely used in fields such as
finance, education, industrial production, civil defense, health care for security’s sake.
1.2 Key Features
Based on Linux OS with high reliability
H.265/ H.264/ MJPEG video compression capability
Support Plugin-Free mode
Support Smart Stream
Support ONVIF Profile G & Q & S & T
Support activation and set-up of the security questions for cameras(for V4x.7.0.69 or
above)
Support Primary Stream/ Secondary Stream/ Tertiary Stream
Support PoE for power supply
ICR filter with auto switch, true day/night
Built-in WEB server, support IE/ Firefox/ Chrome/ Safari browser
UPnP protocol for the easy management of IPC
Motion Detection, Privacy Masking, Network Fault Detection and ROI
Support Heat Map function
FTP upload, SMTP upload, SD card record and SIP phone
G.711/AAC audio compression capability
Real-time video electronic amplification
Three-privilege levels of users for flexible management
microSD/SDHC/SDXC card local storage support, expand the edge storage

3
BS-IPT4002LPR / BS-IPT4012LPR USER GUIDE
2.1 Setting the Camera over the LAN
Connecting the camera to a switch or a router is the most common connection method. The
camera must be assigned an IP address that is compatible with its LAN.
2.1.1 Connect the Camera to the PC Directly
In this method, only the computer connected to the camera will be able to view the camera. The
camera must be assigned a compatible IP address to the computer. Details are shown as the
following figure.
Figure 2-1-1 Connect the camera to the PC directly
2.1.2 Connect via a Switch or a Router
Refer to the following figure to set network camera over the LAN via the switch or router.
Figure 2-1-2 Connect via a switch or a Router
2.2 Dynamic IP Connection
◆Connecting the network camera via a router
Step1: Connect the network camera to a router;
Step2: On the camera, assign a LAN IP address, the Subnet mask and the Gateway;
Step3: On the router, set port forwarding. E.g. 80, 8000 and 554 ports. The steps for port
forwarding vary depending on different routers. Please look up the router's user manual for
assistance with port forwarding;
Step4: Apply a domain name from a domain name provider;
Step5: Configure the DDNS settings in the setting interface of the router;
Step6: Visit the camera via the domain name.

4
BS-IPT4002LPR / BS-IPT4012LPR USER GUIDE
Figure 2-2 Connect the network camera via a router using dynamic IP

5
BS-IPT4002LPR / BS-IPT4012LPR USER GUIDE
Chapter III Accessing the Network Camera
The camera must be assigned an IP address to be accessible.
3.1 Assigning An IP Address
The Network Camera must be assigned an IP address to be accessible. The default IP address of
Network Camera is 192.168.5.190.
You can either change the IP address of the camera via Smart Tools or browser. Please connect the
camera in the same LAN of your computer.
3.1.1 Assigning An IP Address Using Smart Tools
Smart Tools is a software tool which can automatically detect multiple online network cameras
connected in the LAN, set IP addresses, and manage firmware upgrades. It’s recommended when
assigning IP addresses for multiple cameras.
Step1: Install Smart Tools (The software could be downloaded from our website);
Step2: Start Smart Tools, click the IPC Tools page, then enter the device information including IP
address, MAC address, Status, Port number, Netmask, and Gateway of all network cameras
will be displayed. Details are shown as shown below;

6
BS-IPT4002LPR / BS-IPT4012LPR USER GUIDE
Step3: Select a camera or multiple cameras according to the MAC addresses;
Select single camera
Select multiple cameras
Step4: If the selected camera shows "Active" in the status bar, you can directly type the User Name
and Password (Camera with version lower than 4x.7.0.69 is using admin/ms1234 by default),
change the IP address or other network values, and then click “Modify” button;

7
BS-IPT4002LPR / BS-IPT4012LPR USER GUIDE
If the selected camera shows "Inactive" in the status bar(Camera with version V4x.7.1.69 or
above), click to set the password when using it for the first time. You can also set the
security questions when activating the camera in case that you forget the password(you can reset
the password by answering three security questions correctly). Click ‘Save’ and it will show that the
activation was successful.
Note:
(1) Password must be 8 to 32 characters long, contain at least one number and one letter.
(2) You need to upgrade Smart Tools version to V2.4.0.1 or above to activate the camera.
After activation, you can change the IP address or other network values, and then click “Modify”
button.

8
BS-IPT4002LPR / BS-IPT4012LPR USER GUIDE
Step5: Change the IP address successfully;
Step6: By double clicking the selected camera, you can access the camera via web browser directly.
The Internet Explorer window will pop up.

9
BS-IPT4002LPR / BS-IPT4012LPR USER GUIDE
3.1.2 Assign An IP Address via Browser
If the network segment of the computer and that of the camera are different, please follow the
steps to change the IP address:
Step1: Change the IP address of computer to 192.168.5.0 segment, here are two ways as following:
a. Start→Control Panel→Network and Internet Connection→Network Connection→
Local Area Connection, and double click it. (Refer to Figure 3-1-8);
b. Click “Advanced”, and then click “IP settings” →“IP address” →“Add” (See Figure 3-1-
9). In the pop-up window, enter an IP address that in the same segment with network
camera ( e.g. 192.168.5.61, but please note that this IP address shall not conflict with
the IP address on the existing network);

10
BS-IPT4002LPR / BS-IPT4012LPR USER GUIDE
Step2: Start the browser. In the address bar, enter the default IP address of the camera:
http://192.168.5.190
Step3: If the camera’s firmware version is lower than V4x.7.1.69, it will directly display the login
page, enter the user name and password when the LOGIN page appears;
Default user name: admin
Default password: 123456
If the camera’s firmware version is V4x.7.1.69 or above, you need to set the password first
when using it for the first time. And you can also set three security questions for your device
after activation. Then, you can log in the device with the username(admin) and a custom
password.
Note:
(1) Password must be 8 to 32 characters long, contain at least one number and one letter.
(2) You can click the “forget password” in login page to reset the password by answering three security
questions when you forget the password, if you set the security questions in advance.
Step4: After login, please select “Configuration”→“Basic Settings”→“Network”→“TCP/IP”. The
Network Settings page appears (Shown as following Figure);
Step5: Change the IP address or other network values. Then click “Save” button;
Step6: The change of default IP address is completed.

11
BS-IPT4002LPR / BS-IPT4012LPR USER GUIDE
3.2 Accessing from the Web Browser
The camera can be used with the most standard operating systems and browsers. The
recommended browsers are Internet Explorer, Firefox, Chrome, Microsoft Edge, Safari.
3.2.1 Access with Plugin
Currently you can only access the camera with plugin via Internet Explorer.
Access over IE Browser
Before using the browser to get access to your camera, you need to install the MsActiveX firstly.
You can refer the steps as follows:
Step1: Launch the IE browser and enter the IP address of the camera;
Step2: Enter the User Name and Password and click “Login”;
Step3: At the first time to log in the device, the browser will prompt to install Controls, please click
“Click here to download and install controls manually” as Figure 3-2-1;
Note:
1) During installing the controls, please keep the browsers close.
Step4: Follow the prompts to install the Controls, when it`s finished, it will pop out a window as
Figure 3-2-2. Please click “Finish” and refresh the browser, then you will see the video.
If IE9 or higher version browser is used, it is suggested that the camera web link should be added
as a trusted site. See the instructions as follows:
Step1: Start the IE9 or higher version browser, and select “Tools”→“Internet Options”;

12
BS-IPT4002LPR / BS-IPT4012LPR USER GUIDE
Step2: Select “Security” to “Trusted”;
Step3: Enter the IP address of the camera in the blank and click “Add”;

13
BS-IPT4002LPR / BS-IPT4012LPR USER GUIDE
Step4: Enter the IP address. After logging on network camera’s web GUI successfully, user is
allowed to view live video as follows.
3.2.2 Access without Plugin
As browser security becomes more and more important, some browsers don’t support installing
plugin. In order to normally preview the video on the browser, we upgraded the camera to support
Plugin-Free Mode. In Plugin-Free Mode, you can preview the video on the browser without plugin.
Currently Plugin-Free Mode is supported in Firefox & Google Chrome & Safari & Edge browser for
Windows system, MAC system, iOS system and Android system. Both H.265&H.264 video codec are
supported in Plugin-Free Mode for camera, and it will play the secondary stream by default.
Note:
1) You need to upgrade camera to V4x.7.0.70 or above to use Plugin-Free Mode.
2) For the firmware which below V4x.7.0.74, please upgrade the Network Camera to V4x.7.0.74 or above (Please
upgrade the browser to the latest version).
3) For V4x.7.0.74 or above, you can enjoy Plugin-Free Mode without any configuration about the browser (Please
upgrade the browser to the latest version).
You can preview the video without plugin by selecting Plugin-Free Mode in Live View interface.

14
BS-IPT4002LPR / BS-IPT4012LPR USER GUIDE
Chapter IV System Operation Guide
4.1 Live Video
After logging in the network camera web GUI successfully, user is allowed to view live video as
follows.
Table 4-1-1 Description of the buttons
No.
Parameter
Description
1
Brightness: Adjust the Brightness of the scene
Contrast: Adjust the color and light contrast

15
BS-IPT4002LPR / BS-IPT4012LPR USER GUIDE
Image Config
Saturation: Adjust the Saturation of the image.Higher
Saturation makes colors appear more "pure" while
lower one appears more “wash-out”
Sharpness: Adjust the Sharpness of image. Higher
Sharpness sharps the pixel boundary and makes the
image looks “more clear”
2D DNR/3D DNR: Adjust the noise reduction level
Default: Restore brightness, contrast and saturation to
default settings
2
Click to access the configuration page
3
Choose the Stream (Primary/Secondary/Tertiary)to
show on the current video window
4
Only available for camera whose software version is 43
or above
Web Components: Support Firefox, Safari, Chrome
(Chrome version 44 or below); need to install the
component to display the view;
MJPEG: Support to display the view on Firefox, Safari,
Chrome (Chrome version 45 or above);
(NOTE: IE choose Web Components mode for default, in
this case, it will not show the options)
5
TCP: More reliable connection;
UDP: More instantaneous connection, but if you cannot
get the live view successfully, please turn into TCP
connection;
HTTP: Faster and safer connection especially in Internet
environment.
6
Least Delay: The most instantaneous mode;
Balanced: A balanced mode between Least Delay and
Best Fluency, maintains the fluency while keeps an
acceptable delay;
Best Fluency: The most fluent mode;
7
Window size
Click to display images at a window size
8
Real size
Click to display images at a real size
9
Full Screen
Click to display images at full-screen
10
Recording
When recording, the icon will turn red
11
Alarm
When an alarm of Smart Event was triggered, the icon
appears
12
Alarm
When an alarm of Motion Detection was triggered,
the icon appears
13
Except for the two kinds of alarms above, when other
alarms were triggered, the icon appears

16
BS-IPT4002LPR / BS-IPT4012LPR USER GUIDE
Alarm
Adjust the Zoom length of the lens(Only work when
your camera is equipped with motorized lens)
Adjust focus of the lens(Only work when your camera
is equipped with motorized lens)
Adjust the size of Iris(Only work when your camera is
equipped with P-Iris)
Auxiliary Focus and Lens Initialization(Only work when
your camera is equipped with motorized lens)
Adjust iris automatically if check this box(Only work
when your camera is equipped with P-Iris)
14
/
Start/Stop live view
15
Capture
Click to capture the current image and save to the
configured path. The default path is
C:VMS\+-1\ IMAGE-MANUAL
16
/
Start Recording
Click to start recording video and save to the configured
path. The default path is C:VMS\+-1\MS_Record. Click
again to stop recording
17
Play Audio
Enable Audio Input/Output. It can also be set in Audio
configuration page
18
Saving Path Settings
Set the saving path for captured images and video
recordings of operating on the live view
19
Enable Digital Zoom
When enabled, you can zoom in in a specific area of
video image with your mouse wheel
20
Start Talking
When it is enabled, you can start real-time talking.
21
Click to select system language
4.2 Playback
This section explains how to view the recorded video files stored in SD cards or NAS.
Step1: Click [Playback] on the menu bar to enter playback interface;

17
BS-IPT4002LPR / BS-IPT4012LPR USER GUIDE
Step2: Click the date button, choose the date when date window pops up;
Note:
1) The date with bright red means current date; one with a dark red number and white background means
weekend day; one with a dark red number and blue background means that the date is selected now.
2) It supports Pluginfree Playback function which allows to preview the playback without installing plugin in
Firefox (Version 65 and above) & Google Chrome (Version 69 and above) ;
You need to configure the browser properties before using this function.
Step3: Click to play the video files found on this date.
The toolbar on the button of playback interface can be used to control playing progress.
Table 4-1-2 Description of the buttons
Button
Operation
Play
Pause
Stop
Slow Forward
Fast Forward

18
BS-IPT4002LPR / BS-IPT4012LPR USER GUIDE
/
Audio On/Off
Search
Go To
/
Time Narrow/Expand
/
Start/Stop Recording
Snapshot
/
Zoom On/Off
Full Screen
Note:
1) Drag the progress bar with the mouse to locate the exact playback point. You can also input
the time and click to locate the playback point in the Set Playback Time filed. You can
also click /to zoom out/in the progress bar.
4.3 Local Settings
Record File Length and storage path can be customized in this setting page.

19
BS-IPT4002LPR / BS-IPT4012LPR USER GUIDE
4.4 Basic Settings
4.4.1 Video
Stream parameters can be set in this module, adapting to different network environments and
demands.
Primary Stream Settings
Record Stream Type (General)
Record Stream Type (Event)
Secondary Stream Settings

20
BS-IPT4002LPR / BS-IPT4012LPR USER GUIDE
Tertiary Stream Settings
Table 4-4-1 Description of the buttons
Parameters
Function Introduction
Record Stream Type
General & Event are available only for Primary Stream. General refers to
continuous recording video, while Event includes events that can trigger alarms,
such as Motion, Exception, LPR and so on.
This item can separately set different bit rate and frame rate for different
Recording Stream Types. If user chooses Event, video will be recorded according
to the configuration of video stream type when an event happens, thereby
greatly reducing the recording storage space.
Enable Event Stream
This item is optional only if you selected the Event.
Video Codec
There are difference for the camera with “-A” and “-B”
-A: H.264/MJPEG are available
-B: H.265/H.264/MJPEG are available
Frame Size
Options include 8M(3840×2160), 6M(3072×2048), 5M(2592*1944),
5M(2560*1920), 5M(2560*1440), 4M(2592*1520), 3M(2304*1296),
3M(2048*1536), 1080P(1920*1080), 2M(1600 *1200), 1.3M(1280*960),
720P(1280*720), D1(704*576).
For Secondary Stream, it includes 704*576, 640*480, 640*360, 352*288,
320*240, 320*192, 320*176.
For Tertiary Stream, it include 1920*1080, 1280*720, 704*576, 640*480,
640*360, 352*288, 320*240, 320*192, 320*176.
Maximum Frame Rate
Maximum refresh frame rate of per second
Bit Rate
Transmitting bits of data per second, this item is optional only if you select the
H.265/H.264
Smart Stream
Smart Stream mode remarkably reduces the bandwidth and the data storage
requirements for network cameras while ensuring the high quality of images, and
it is a 10-level adjustable codec.
It is optional to turn On/Off Smart Stream mode.
Level: Level 1~10 are available to meet your need.
This manual suits for next models
1
Table of contents
