Bosch BOSBGH96M100D5A Guide

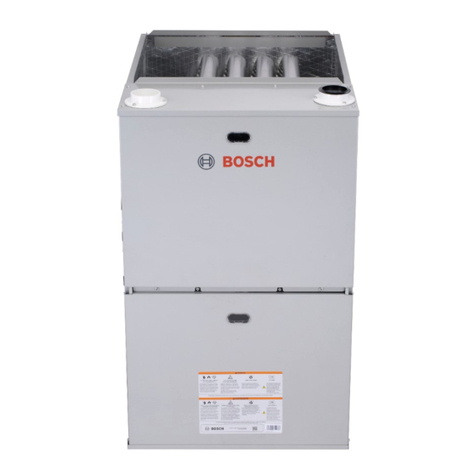
Bosch 96% AFUE Gas Furnace BGH96 Model
Condensing Gas Furnace
User's Information Manual
3124627

2 |Bosch 96% AFUE Gas Furnace User's Information Manual
11.2018 |Bosch Thermotechnology Corp.
Data subject to change

User's Information Manual Bosch 96% AFUE Gas Furnace | 3
Bosch Thermotechnology Corp. | 11.2018 Data subject to change
Table of Contents
1 Key to Symbols and Safety Instructions 4
1.1 Key to Symbols 4
1.2 Safety 4
2 Introduction 6
3 Furnace Components 6
4 Operating Your Furnace 7
4.1 Furnace Start-Up 7
4.2 Furnace Shutdown 7
5 Routine Maintenance 8
5.1 Annual Inspection 8
5.2 Filters 8
5.3 Burners 9
5.4 Replacement Parts 9

4 |Bosch 96% AFUE Gas Furnace User's Information Manual
11.2018 |Bosch Thermotechnology Corp.
Data subject to change
1 Key to Symbols and Safety Instructions
1.1 Key to Symbols
Warnings
Warnings in this document are identified by a warning triangle
printed against a grey background.
Keywords at the start of a warning indicate the type and seriousness
of the ensuing risk if measures to prevent the risk are not taken.
The following keywords are defined and can be used in this document:
DANGER indicates a hazardous situation which, if not avoided, will
result in death or serious injury.
WARNING indicates a hazardous situation which, if not avoided, could
result in death or serious injury.
CAUTION indicates a hazardous situation which, if not avoided, could
result in minor to moderate injury.
NOTICE is used to address practices not related to personal injury.
Important information
This symbol indicates important information where
there is no risk to people or property.
1.2 Safety
Please read all instructions in the manual and retain all manuals for future
reference.
INSTALLER: This manual must be left with the equipment user.
USER: Please keep this booklet of information for future reference.
WARNING:
Untrained personnel (homeowners) may only clean and
replace filters and replace fuses as required by basic
maintenance. All other operations, including installation,
repair, and service must be performed by a qualified
installer, service agency, or the gas supplier.
WARNING: FIRE OR EXPLOSION HAZARD
Do not store or use gasoline or other flammable vapors and
liquids in the vicinity of this or any other appliance.
WHAT TO DO IF YOU SMELL GAS:
—Do not try to light any appliance.
—Do not touch any electrical switch; do not use any
phone in your building.
—Leave the building immediately.
—Immediately call your gas supplier from a safe
location. Follow the gas supplier's instructions.
—If you cannot reach your gas supplier, call the fire
department.
Installation and service must be performed by a qualified
installer, service agency, or the gas supplier.
WARNING: FIRE OR EXPLOSION HAZARD
Do not use this furnace if any part has been under water. A
flood-damaged furnace is extremely dangerous. Attempts
to use the furnace can result in fire or explosion. A qualified
service agency should be contacted to inspect the furnace
and to replace all gas controls, control system parts, and
electrical parts that have been wet, or the furnace if deemed
necessary.

User's Information Manual Bosch 96% AFUE Gas Furnace | 5
Bosch Thermotechnology Corp. | 11.2018 Data subject to change
WARNING: FIRE OR EXPLOSION HAZARD
The furnace is designed and approved for use with Natural
Gas and Propane Gas (LP) ONLY.
DO NOT BURN ANY LIQUID FUEL OR SOLID FUEL IN THIS
FURNACE.
Burning any unapproved fuel will result in damage to
the furnace's heat exchanger, which could result in Fire,
Personal Injury, and/or Property Damage.
WARNING:
This product can expose you to chemicals including Lead
and Lead components, which are known to the State
of California to cause cancer and birth defects or other
reproductive harm. For more information go to www.
P65Warnings.ca.gov.
WARNING: FIRE, EXPLOSION, ELECTRICAL SHOCK, AND
CARBON MONOXIDE POISONING HAZARD
Failure to follow this warning could result in dangerous
operation, serious injury, death, or property
damage. Improper installation, adjustment, alteration,
maintenance, or use could cause carbon monoxide
poisoning, explosion, fire, electrical shock, or other
conditions which may cause personal injury or property
damage. Consult a qualified service agency, local gas
supplier, or your distributor for information or assistance.
WARNING: FIRE HAZARD
The furnaces must be kept free and clear of insulating
materials. Inspect surrounding area to ensure insulation
material is at a safe distance when installing furnaces or
adding insulation materials. Insulation materials may be
combustible.
See Section 3, Fig. 3 as seen in the Installation, Operation, and
Maintenance Manual for required clearances to combustible
construction.
Maintain a 1 in. clearance from combustible materials to supply
air ductwork for a distance of 36 in. horizontally from the
furnace. See NFPA 90B or local code for further requirements.
These furnaces SHALL NOT be installed directly on
carpeting, tile, or any other combustible material other than
wood flooring.
WARNING: CARBON MONOXIDE POISONING HAZARD
Failure to follow instructions could result in severe personal
injury or death due to carbon-monoxide poisoning, if
combustion products infiltrate into the building.
Check that all openings in the outside wall around the vent
(and air intake) pipe(s) are sealed to prevent infiltration of
combustion products into the building.
Check that furnace vent (and air intake) terminal(s) are not
obstructed in any way during all seasons.
CAUTION:
Before heating season begins, a qualified installer or service
agency must examine the furnace to ensure that:
1. All flue gas carrying areas external to the furnace
(i.e. chimney, vent connector) are clear and free of
obstructions.
2. The vent connector is in place, slopes upward and
is physically sound without holes or exccessive
corrosion.
3. The return-air duct connection(s) is physically sound,
is sealed to the furnace cabinet, and terminates
outside the space containing the furnace.
4. The physical support of the furnace is sound without
sagging, cracks, gaps, etc around the base so as to
provide a seal between the support and the base.
5. There are no obvious signs of deterioration of the
furnace.
6. The burner flames are positioned correctly by
comparing with pictorial sketches of the main burner
flame (see Section 12, Fig 42 in the Installation,
Operation, and Maintenance Manual).
WARNING: FIRE, EXPLOSION
Should the gas supply fail to shut off or if overheating
occurs, shut off the gas valve to the furnace before shutting
off the electrical supply.
WARNING:
Furnace operation requires air for combustion and
ventilation. Do not block or obstruct air openings on furnace
or spacing around furnace required for supplying sufficient
combustion air and ventilation.

6 |Bosch 96% AFUE Gas Furnace User's Information Manual
11.2018 |Bosch Thermotechnology Corp.
Data subject to change
2 Introduction
This Bosch 96% AFUE Gas Furnace has been designed for quality, performance,
and comfort, for years to come! Bosch strongly recommends that you read through
this manual to learn about how the furnace operates, as well as some basic
maintenance and up-keep to ensure your furnace is always running at its optimal
performance.
3 Furnace Components
The furnace below is shown in the upflow orientation (your furnace may have been
installed in a different orientation)
Figure 1
12
3
4
5
67
9 8
10
11
12
Component Identification:
1. Air Inlet
2. Primary Heat Exchanger
3. Exhaust
4. Burners
5. Gas Valve
6. Condensate Collector
7. Inducer
8. Secondary Heat Exchanger
9. Pressure Switch
10. Door Safety Switch
11. Circulating Fan Motor
12. Circulating Fan Blower

User's Information Manual Bosch 96% AFUE Gas Furnace | 7
Bosch Thermotechnology Corp. | 11.2018 Data subject to change
4 Operating Your Furnace
4.1 Furnace Start-Up
1. Close the manual gas shutoff valve external to the furnace.
2. Turn off the electrical power to the furnace.
3. Set the room thermostat to the lowest possible setting.
4. Remove the burner access panel.
WARNING:
This furnace is equipped with an ignition device which
automatically lights the burner. Do not try to light the burner
by hand.
5. Push the gas valve switch to the OFF position (See Fig. 2).
Figure 2
HIGH FIRE COIL TERMINAL (HI)
COMMON TERMINALS (C)
COAXIAL COIL
TERMINAL (M)
ON/OFF SWITCH
INLET PRESSURE
TAP
MANIFOLD PRESSURE
TAP
REGULATOR VENT
LOW FIRE
REGULATOR
ADJUSTMENT
HIGH FIRE
REGULATOR
ADJUSTMENT
6. Wait five minutes to clear out any gas. Then smell for gas including near the
floor.
7. If gas can be smelled following the five minute waiting period, repeat step 6.
If you have waited more than 10 minutes and still smell gas, check for leaks
using a soap and water solution.
8. If you do not smell gas after five minutes, push the gas valve switch to the
ON position (See Fig. 2).
WARNING: FIRE AND EXPLOSION HAZARD
Never test for gas leaks with an open flame. Use a
commercially available soap solution made specifically for
the detection of leaks to check all connections.
9. Replace the burner access panel on the front of the furnace.
10. Open the manual gas valve external to the furnace.
11. Turn on the electrical power supply to the furnace.
12. Set the room thermostat to slightly above room temperature. This signals
the furnace to start (the inducer motor starts and the hot surface igniter
energizes).
13. After 17-21 seconds, the gas valve energizes, letting gas flow to the
burners, where it is then ignited.
If flame is not detected, the furnace control goes into the “retry”
sequence. The “retry” sequence provides a 60-second wait following
an unsuccessful ignition attempt (a flame not detected). After this wait,
the ignition sequence is restarted with an additional 2 seconds of ignitor
warm-up time. If this ignition attempt is unsuccessful, one more retry will
be made before the control goes into system lock out.
14. If the burner flame is proven, the blower motor is energized on HEAT-H
speed 30 seconds after the gas valve is energized.
15. Set the room thermostat to the desired temperature. The furnace is now
running correctly and will be controlled by the thermostat.
There is an approximate 48 second delay between thermostat energizing
and burner firing.
4.2 Furnace Shutdown
In case of furnace malfunction, you may need to shut it down. Use the following
procedure to do this.
1. Set the thermostat to OFF or it's lowest temperature setting.
2. Turn off the electrical power supply to the furnace.
3. Turn OFF the main gas supply to the appliance at the manual valve, outside
of the appliance cabinet.
4. Remove the burner access panel.
5. Move the appliance gas valve switch to the “OFF” position (See Fig. 2).
6. Replace burner access panel.
7. If the furnace was shut down due to malfunction, contact your contractor
immediately.

8 |Bosch 96% AFUE Gas Furnace User's Information Manual
11.2018 |Bosch Thermotechnology Corp.
Data subject to change
5 Routine Maintenance
5.1 Annual Inspection
WARNING:
The furnace must be inspected by a qualified installer or
service agency at least once per year.
Homeowners: Homeowners may only clean and replace
filters and replace fuses as required by basic maintenance.
All other operations, including installation, repair, and
service must be performed by a qualified installer, service
agency, or the gas supplier.
Service Reminder:
Call your service technician if the unit will not operate. Before calling,
always check the following to be sure service is required:
1. Check that electrical disconnect switches are ON.
2. Check all wiring for loose connections.
3. Check room thermostat for proper setting.
4. Replace any blown fuses or reset circuit breakers.
5. Gas valve should be ON.
6. Air filter should not be clogged/dirty, which will limit air flow.
7. Is gas turned on at the meter?
8. Is manual main shut-off valve open?
Record the model and serial number of the furnace. These numbers are
available on the warning label located on the blower access panel.
Serial Number: __________________________________________
Model Number: __________________________________________
Your qualified service professional must perform the following checks at the
beginning of the heating season. This will ensure that all furnace components are in
proper working order and that the heating system functions appropriately.
1. The Venting System
a. All flue gas carrying areas external to the furnace (i.e. chimney,
vent connector, vent pipe) are clear and free of obstructions.
b. Inspect heat exchangers and blowers for corrosion, deterioration,
or deposits of debris. Remove any obstructions.
c. The vent connector is in place, slopes upward and is physically
sound without holes or excessive corrosion.
d. The return-air duct connection(s) is physically sound, is sealed to
the furnace casing, and terminates outside the space containing
the furnace.
e. The physical support of the furnace is sound without sagging,
cracks, gaps, etc. around the base so as to provide a seal between
the support and the base.
f. There are no obvious signs of deterioration of the furnace.
g. The burner flames are in good adjustment (by comparison with
pictorial sketches or drawings of the main burner flame. Refer
to the Installation, Operation, and Maintenance Manual for more
information).
h. In applications which include a cooling coil, the condensate drain
and trap should be checked for leaks and cracks. The trap must be
filled with water and the drain and trap should be cleaned.
2. The Blower
The bearings in the induced draft blower and circulator blower motors
are permanently lubricated by the manufacturer. No further lubrication is
required. Check motor windings for accumulation of dust which may cause
overheating. Clean as necessary.
3. The Flame Sensor
Under some conditions the fuel or air supply can create a nearly invisible
coating on the flame sensor. This coating acts as an insulator causing a
drop in the flame sense signal. If the flame sense signal drops too low. The
furnace will not sense flame and will lock out. The flame sensor should be
carefully cleaned by a qualified servicer using emery cloth or steel wool.
Following cleaning the flame sense signal should be 1 to 6 microamps at
115 volts.
4. The Heat Exchanger
Inspect the heat exchanger for excessive rust, cracks, or holes. Visual
inspection is always best, but requires training and practice. There are tools
(field supplied) available to assist, such as inspection cameras and dye
penetration inspection systems. Inspect the metal flue for rust or holes, and
make sure it’s supported properly.
NOTICE:
If the heat exchangers get a heavy accumulation of soot and
carbon, they must be replaced rather than cleaning them. A
heavy build-up of soot and carbon indicates that a problem
exists which needs to be corrected, such as improper
adjustment of manifold pressure, insufficient or poor
quality combustion air, incorrect size or damaged manifold
orifice(s), improper gas, or a restricted heat exchanger.
In these scenarios, the heat exchanger assembly must be
replaced.
5. Condensate Drain
Inspect all condensate drain tubes and condensate trap assembly for leaks
and proper drainage.
5.2 Filters
A return air filter is not supplied with this furnace; however the installer will supply
filter(s) at the time of installation. Filters are installed external to the unit. Have
your installer instruct you on how to access your filters for routine maintenance.
Filter Maintenance
Improper filter maintenance is the most common cause of inadequate heating or
cooling performance. Inspect filters every month and clean (permanent) or replace
(disposable) as required. When replacing a filter, it must be replaced with a filter
of the same type and size. Become familiar with filter location and procedures for
removal cleaning and replacing them. If help is needed, contact the installer of the
furnace or a qualified service agency.

User's Information Manual Bosch 96% AFUE Gas Furnace | 9
Bosch Thermotechnology Corp. | 11.2018 Data subject to change
Filter Removal Procedure
1. Turn OFF electrical power to the furnace.
2. Remove filter cabinet door.
3. Slide out filter.
4. If the filter is damaged, replace it with a new one.
5. For reusable filters, use cold tap water and mild liquid detergent (if needed)
to rinse the filter.
6. Once dry, reinstall filter.
7. Replace filter cabinet door.
8. Turn ON electrical power to furnace.
Depending on the installation, differing filter arrangements can be applied. A
media air filter or electronic air cleaner can be used as an alternate filter. If a
filter replacement is necessary, follow the filter sizes given in the Recommended
Minimum Filter size (Table 1) to ensure proper unit performance. Also, be sure the
replacement filter is rated for high airflow. For further details, call your contractor
or distributor.
Upright Filter Removal
To remove filters from an external filter rack in an upright upflow installation, follow
the directions provided with the external filter rack kit. Clean, wash and dry a
permanent filter. When using a permanent filter, both sides should be sprayed with
a dust adhesive as recommended on the adhesive container. Spray adhesives for
use with permanent filters can be found at some hardware stores.
Be sure airflow direction arrow points towards the blower.
Inspect filter. If the dirty filter is the disposable type, replace dirty filter with the
same type and size filter. If the dirty filter is a permanent filter, clean as follows:
Clean, wash and dry a permanent filter. When using a permanent filter,
both sides should be sprayed with a dust adhesive as recommended on
the adhesive container.
If badly torn or uncleanable, these filters must be replaced by equal size
permanent, high velocity filters. Throwaway filters must not be used as
replacement for permanent filters.
Furnace cabinet
width
Filter size Filter type
Side return Bottom return
17-1/2 16X25 16X25 High Velocity (600 FPM)
21 16X25 20X25 High Velocity (600 FPM)
24.5 16X25 24X25 High Velocity (600 FPM)
Table 1 Manufacturer recommended high velocity filter sizes - Inch
5.3 Burners
Periodically during the heating season perform a visual check of the burner flames.
Turn the furnace on at the thermostat. Wait a few minutes since any dislodged dust
will alter the normal flame appearance. Flames should be stable quiet soft and blue
with slightly orange tips. They should not be yellow. They should extend directly
outward from the burner ports without curling downward, floating, or lifting off the
ports. Contact a qualified service agent at once if an abnormal flame appearance
should develop.
WARNING:
Only a qualified contractor, installer or service agency can
clean the burners if the burners get a heavy accumulation of
soot and carbon.
5.4 Replacement Parts
Replacement parts as well as information regarding parts are available through your
contractor or distributor. All service must be performed by a qualified professional
installer. When ordering any of the listed functional parts, be sure to provide the
furnace model and serial numbers with the order, this information is available on
the warning label located on the blower access panel. Common spare parts are
listed below.
Cabinet Parts
—Panel, Top
—Panel, Lower Front
Electronics
—Transformer
—Main PCB Board
—Door Switch
—Pressure Switches
—Limit Switch(es)
—Capacitor
Blower Parts
—Motor
—Blower Assembly (with wheel)
—Motor Bracket assembly
Heating Parts
—Inducer
—Ignitor
—NG Orifice / LP Orifice
—Burner
—Burner tray
—Gas Valve
—Flame Sensor
—Heat exchanger assembly
—Gas Manifold assembly
—Rollout switch - resettable

10 |Bosch 96% AFUE Gas Furnace User's Information Manual
11.2018 |Bosch Thermotechnology Corp.
Data subject to change

User's Information Manual Bosch 96% AFUE Gas Furnace | 11
Bosch Thermotechnology Corp. | 11.2018 Data subject to change

United States
Bosch Thermotechnology Corp.
65 Grove Street
Watertown, MA 02472
Tel: 866-642-3198
Fax: 603-965-7581
www.boschheatingandcooling.com
BTC 770504101 A / 11.2018
This manual suits for next models
6
Table of contents
Other Bosch Furnace manuals
Popular Furnace manuals by other brands

Empire
Empire DV-210-7SG Installation instructions and owner's manual

Wood master
Wood master MAXIM M255 PE owner's manual

Carrier
Carrier 58MCA Users information manual for the operation and maintenance

Nordyne
Nordyne SC Series installation instructions

Empire Heating Systems
Empire Heating Systems GWT-25-3 Installation instructions and owner's manual

Bryant
Bryant PG96VTA Installation, start-up, operating and service and maintenance instructions