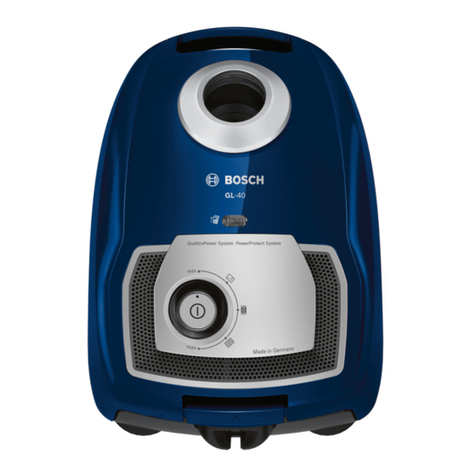
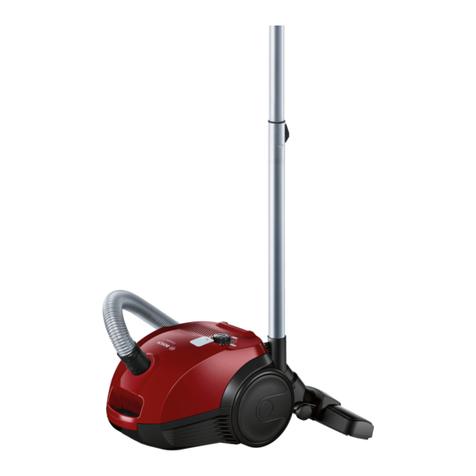
Bosch BGL8SI59GB/10 User manual

A B
C D
11
12
13
3
1
4
5
7
6
8
15
14109
16 1817 19
2
21*
Click!
1
1
2
19*
1
1
24h
Drying
2
20*
20*
21* Micro
Click!
1
1
2
24h
Drying
22* (H)EPA
8001059301 970508
Register your new Bosch now:
ZZZERVFKKRPHFRPZHOFRPH
HQ ,QVWUXFWLRQPDQXDO
5REHUW%RVFK+DXVJHUlWH*PE+
&DUO:HU\6WUDH
0QFKHQ*(50$1<
ZZZERVFKKRPHFRP
%HUDWXQJXQG5HSDUDWXUDXIWUDJEHL6W|UXQJHQ
'(
$7
&+
'LH.RQWDNWGDWHQDOOHU/lQGHUILQGHQ6LHLPEHLOLHJHQGHQ.XQGHQGLHQVW9HU]HLFKQLV
Ř
DUϡΩΧΗγϻΕΩΎηέ·
ϡ
]K ┶䫟憫㯅␝
BGL8SI59GB

12
91
Click!
8
13
10
4
1
Click!
2
7
16
3
1
Click!
2
14
1
2
15
17
18 a
18 b
Click!
2
1
1
ab
2
6ab
11 abc
1
2
Click!
5
1
2

1
en Safety information ............................................................................................................................. 2
Your vacuum cleaner.......................................................................................................................... 8
zh 安全信息 .......................................................................................................................................... 4
您的吸塵機..................................................................................................................................... 12
7
18
ar
£fH&¶*m*2f74(*
5f¤qG*8K

2
vised or have been instructed
on the safe use of the appli-
ance and the have under-
stood the potential dangers
of using the appliance.
Children must never play with
the appliance.
Cleaning and user mainte-
nance must never be carried
out by children without su-
pervision.
Plastic bags and films must
be kept out of the reach of
children before disposal.
>= Risk of suffocation.
Proper use
Only connect and use the vacuum cleaner in ac-
cordance with the specifications on the rating plate.
Never vacuum without the dust bag or dust container,
motor protection or exhaust filter.
>= This may damage the vacuum cleaner.
Always keep the vacuum cleaner away from your head
when using nozzles and tubes.
>= This could cause injury!
When vacuuming stairs, the appliance must always be
positioned below the user.
Do not use the power cord or the hose to carry or
transport the vacuum cleaner.
For safety reasons, if this appliance's mains power
cable becomes damaged, it must be replaced by the
manufacturer, their after-sales service department or a
similarlyqualified person.
If using the appliance for longer than 30 minutes, pull
out the power cord completely.
When disconnecting the appliance from the mains,
pull on the plug itself to remove it; do not pull on the
power cord.
Do not pull the power cord over sharp edges or allow
it to become trapped.
When the cable is being automatically rewound, en-
sure that the mains plug is not thrown towards per-
sons, body parts, animals or objects.
>= Use the mains plug to guide the power cord.
Pull out the mains plug before carrying out any work
on the vacuum cleaner.
Do not operate the vacuum cleaner if it is damaged.
Unplug the appliance from the mains if a fault is de-
tected.
For safety reasons, only authorised after-sales service
personnel are permitted to carry out repairs and fit re-
placement parts to the vacuum cleaner.
Protect the vacuum cleaner from the weather, moistu-
re and sources of heat.
Do not pour flammable substances or substances con-
taining alcohol onto the filters (dust bag, motor protec-
tion filter, exhaust filter, etc.).
en
Please keep this instruction manual. When passing the
vacuum cleaner on to a third party, please also pass on
this instruction manual.
Intended use
This appliance is intended for domestic use only. This ap-
pliance is intended for use up to a maximum height of
2000 metres above sea level. Only use this vacuum clea-
ner in accordance with the instructions in this instruction
manual.
In order to prevent injuries and damage, the vacuum
cleaner must not be used for:
Vacuum-cleaning persons or animals
Vacuuming up:
− hazardous, sharp-edged, hot or glowing substances.
− damp or liquid substances.
− highly flammable or explosive substances and ga-
ses.
− ash, soot from tiled stoves and central heating sys-
tems.
− toner dust from printers and copiers.
Spare parts, accessories, dust bags
Our original spare parts, original (special) accessories
and original dust bags are designed to work with the
features and requirements of our vacuum cleaners. We
therefore recommend that you only use our original spa-
re parts, original (special) accessories and original dust
bags. This will ensure that your vacuum cleaner has a
long service life and that the quality of its cleaning per-
formance will remain consistently high throughout.
!Please note:
Using unsuitable or inferior-quality spare parts, (spe-
cial) accessories and dust bags can damage your
vacuum cleaner. Damage caused by the use of such
products is not covered by our guarantee.
Safety information
This vacuum cleaner complies
with the recognised rules of
technology and the relevant sa-
fety regulations.
The appliance may be used
by children over the age of
8 years and by persons with
reduced physical, sensory or
mental capacity or by persons
with a lack of experience or
knowledge if they are super-

3
The vacuum cleaner is not suitable for use on con-
struction sites.
>= Vacuuming up building rubble could damage the
appliance.
When not in use, switch off the appliance and pull out
the mains plug.
At the end of its life, the appliance should immediately
be rendered unusable, then disposed of in an approp-
riate manner.
!Please note
The mains socket must be protected by at least a 16
amp circuit breaker.
If a circuit breaker is tripped when you switch on the
vacuum cleaner, this may be because other electrical
appliances which have a high current draw are con-
nected to the same power circuit.
To prevent the circuit breaker from tripping, select
the lowest power setting before switching the appli-
ance on, and increase the power only once it is run-
ning.
Disposal information
Packaging
The packaging is designed to protect the vacuum
cleaner from being damaged during transportation. It
is made of environmentally friendly materials and can
therefore be recycled. Dispose of packaging that is
no longer required at an appropriate recycling point.
Old appliance
Old appliances still contain many valuable materials.
Therefore, please take appliances that have reached
the end of their service life to your retailer or recyc-
ling centre so that they can be recycled. For current
disposal methods, please enquire at a retailer or your
local council.
Disposal of filters and dust bags
Filters and dust bags are manufactured from en-
vironmentally friendly materials. Provided they do
not contain substances that are not permitted in
household waste, you can dispose of them with your
normal household waste.
Notes on the energy label
This vacuum cleaner is a general purpose vacuum clea-
ner with a primary hose.
To achieve the declared energy efficiency and cleaning
performance class on carpet, please use the interchan-
geable universal nozzle. To achieve the declared energy
efficiency and cleaning performance class on hard floor
with nooks and crannies, please use the hard floor nozz-
le provided
These calculations are based on the Commission Dele-
gated Regulation (EU) No. 665/2013 of 3rd May 2013
supplementing Directive 2010/30/EU. Unless otherwi-
se stated, all the procedures referred to in these ins-
tructions were carried out in accordance with the EN
60312-1:2017* standard.
*As the motor service test is carried out with the dust
collector empty, the stated motor service life must be
increased by 10% for tests with the dust collector half
filled.

4
zh
請妥善保存本說明書,作為未來使用參考。如果將此吸塵機轉
交給他人,請同時轉交本說明書。
符合規定使用
本機僅限於私人家庭及非商業環境中使用。本機適合在海拔最高
2,000 公尺以下使用。
僅可依照使用說明書上的指示使用本吸塵器。
為了避 免 人 身受 傷 與 機 器 損 壞 ,不可將本吸塵器用在:
人類和動物。
吸入:
− 有害健康、尖銳、高熱或灼熱的物質。
− 潮濕或液態的物質。
− 容易起燃或爆炸的物質和氣體。
− 煙灰、爐具和中央暖氣設備的煤灰。
− 印表機和複印機的碳粉塵。
備件、配件、集塵袋
如同本公司的原廠集塵袋,我們的原廠備件、原廠配件和特殊配
件皆特別依照吸塵器的特性需求而設計。因此,建議您只使用原
廠備件、原廠配件和特殊配件和本公司的原廠集塵袋。才可確保
您吸塵器能擁有長期使用壽命和持久的高品質清潔性能。
!注意事項:
使用非精準密合或低品質的備件、配件/特殊配件和集塵袋可
能造成您吸塵器的損壞,如因使用上述產品而導致損壞,則無
法涵蓋在保固範圍內。
安全信息
此吸塵機符合認可的技術規範和相關的安全守
則。
在受監督,或已被指導如何安全使用,及理
解使用此產品的潛在危險下,此產品可供8歲
以上兒童,及行動不便、感覺或智力退化,
及缺乏經驗或知識的人使用。
兒童絕不可將此產品當作玩具。
在沒有監督情況下,兒童絕不可以清潔及維
修此產品。
塑料袋和薄膜在被棄置前必須放置於遠離兒
童的位置。
=>有窒息的危險。
正確使用
請按指示牌上所列的規格要求連接和使用吸塵機。
切勿在無配備塵袋或容器、摩打保護或排氣濾網時吸塵。
=>這可能令吸塵機損壞。
使用刷頭和延伸管吸塵時切勿貼近頭部。
=>這可能導致受傷!
進行樓梯吸塵時,吸塵機必須經常保持放在使用者下方。
請勿使用電線或喉管拖曳吸塵機。
為安全起見,如果吸塵機主電源線損壞,請聯絡本公司客
戶服務部安排合資格技師替換。
如吸塵持續數小時,請將電線完全拉出。
要切斷吸塵機電源時,請拔掉插頭,切勿拉扯電線。
請勿在鋒利邊上拉扯電線,或令電線纏繞。
要為吸塵機作出任何修整前,請先拔掉電源插頭。
請勿使用已損壞的吸塵機。如發現有異常情況,請切斷吸
塵機電源。
為安全起見,只有本公司技師才可以維修和替換吸塵機
配件。
請保護好吸塵機,勿暴露在惡劣天氣下,及潮濕和接近熱
源的地方。
請勿把易燃物質或含酒精物質倒在濾網上(塵袋、摩打保護
濾網、排氣濾網等)。
此吸塵機不適合在建築工地使用。
=>吸取建築碎屑可能會損壞吸塵機。
不使用時請關掉吸塵機。
當吸塵機的壽命完結時,應立即停止使用,然後以適當的
方法棄置。
!請注意
電源插座必須有至少16安培斷路器保護。
開動吸塵機時如果斷路器跳掣,可能是有消耗較高電流的
電器連接在同一電路上。
為防止電流短路,請在開動吸塵機前選用最低功率,然後
在運行時才將功率調高。
能源標籤的備註
本吸塵器為配備主要吸塵管之一般用途吸塵器。
如需在地毯上達到最佳的能源效益和清潔效果,請使用可替換的
通用吸嘴。
計算方式基於授權規定(歐盟)編號665/2013由委員會於2013
年5月3日制訂以補充規範2010/30/EU的內容。
指示內未有詳述的所有程序已按照DIN EN 60312-1:2017*列
出。
*由於馬達運轉試驗是在集塵容器為空時進行,在集塵容器半滿
時,所述之馬達運轉壽命必須增加10%。

5
ϱϡϙϥΕεύϱϝϩΫϩϝΝϩίΓαϭ˯ϡωαΕΥΩϡϙϱα
ΕέΏΓϭιϥΩϭϕΕέΏΓϑϱΡΝϱέΓϝΕέΏΓ
ϭΕαέϱϝϕϱϡϝϡϭνΡΓωϝϯαΕωϡϝϝΝϩίϑϱ
ΡϝΓαΕΥΩϡϙϱαϝΕέΏΓ
·έεΩΕΏΥιϭιϡϝιϕϝρϕΓ
ΪϤΘόΗΕΎΑΎδΤϟϰϠϋϊϳήθΘϟϲϋήϔϟ
ΩΎΤΗϻϲΑϭέϭϷ
ϲ
Ϣϗέ
Ϣ
έΩΎμϟϦϋΔϨΠϠϟ
ΦϳέΎΘΑ
Φ
ϮϳΎϣ
Ϯ
˱ϻΎϤϜΘγΔΤϼϟΩΎΤΗϻϲΑϭέϭϷ
ϲ
ϊϴϤΟΕ˯ήΟϹήϴϏΔΣϭήθϤϟϲϓϩάϫΕΎϤϴϠόΘϟΔϗΪΑ
ϢΗΎϫήϛΫϞϴμϔΘϟΎΑϲϓΔϔλϮϤϟΔϴγΎγϷ
˱ήψϧϪϧϷΪϗϢΗ˯ήΟ·έΎΒΘΧήϤόϟϲοήΘϓϻϙήΤϤϠϟΎϤϨϴΑ˯Ύϋϭ
ΔΑήΗϷˬύέΎϓϪϧΈϓΐΠϳΓΩΎϳίϟήϤόϲοήΘϓϻέϮϛάϤϟϙήΤϤϠϟΪϨϋ
˯ήΟ·έΎΒΘΧϻ˯ΎϋϮΑΔΑήΗϒμϧΊϠΘϤϣέΪϘϤΑ
έ
ϩάϫΔδϨϜϤϟΔϴΎΑήϬϜϟήΒΘόΗΔδϨϜϣΓΩΪόΘϣΕΎϣΪΨΘγϻΓΩϭΰϣϡϮ
ρ
ήΨΑϲδϴέ
ϲ

6
()*&$*')*')(*') &)$*#"*)(&%*#)($) #!"*')(!'*$*)(! ****
%*)("*)(&%(*($"*&%*(**%"*) '*)'(*)(&#%(*)(!')%*')()$(*(()!*
)!*(*$!))"*()*%*)()' *)(!')%*')&)*!)*#*)*$*)( $*#*%#))&*#*!)****
*)( '*)(#&#$)&%%*(()'(**$*'&#%*)'(*)(&#%(*)(!')%*'#) "*)()' *)(!')%
#*)()*#) '*)()' *)(!')%*%*)("*$*)(%)$*')(*

7
ΔΑέΗϷαΎϳϛϭˬΔϳϠϳϣϛΗϟΕΎϘΣϠϣϟϭˬέΎϳϐϟϊρϗ
ΔλΎΧϟΕΎϘΣϠϣϟϭΔϳϠλϷΔϳϠϳϣϛΗϟΎϧΗΎϘΣϠϣϭˬΔϳϠλϷΎϧέΎϳϏϊρϗ
ιΎλΧϊϣˬΔϳϠλϷΔΑέΗϷαΎϳϛϝΛϣˬΔϘϓϭΗϣΔϳϠλϷ
ϡΩΧΗγϻέΎλΗϗΎΑϙΣλϧϧϙϟΫϟΎϧΑΔλΎΧϟαϧΎϛϣϟΕΎΑϠρΗϣϭ
ϰϠϋΕΎϘΣϠϣϟϭΔϳϠλϷΔϳϠϳϣϛΗϟΎϧΗΎϘΣϠϣϭˬΔϳϠλϷΎϧέΎϳϏϊρϗ
ϭΔϳϠλϷΔλΎΧϟϩΫϬΑϭΎϧΑΔλΎΧϟΔϳϠλϷΔΑέΗϷαΎϳϛ
ΔϘϳέρϟϑϳυϧΗϟ˯ΩϷέέϣΗγΎΑΔϳϟΎϋΓΩϭΟϭ˱ϼϳϭρ ˱έϣϋϥϣοΗ
ϙΗγϧϛϣΑ
ΔυϭΣϠϣ
ΔΑέΗαΎϳϛϭΔλΎΧΕΎϘΣϠϣΔϳϠϳϣϛΗΕΎϘΣϠϣϭˬέΎϳϏϊρϗϡΩΧΗγ
ϱΩ΅ϳΩϗΓΩϭΟϟΙϳΣϥϣΔοϔΧϧϣΔϣϳϗΕΫϭΔϗΩΑΔϘΑΎρϣέϳϏ
ϣΑέέοωϭϗϭϰϟ·ϥΎϣοϟΎϬϳρϐϳϻέέοϷϩΫϫϭˬϙΗγϧϛ
ΕόϗϭΎϬϧΎϣϟΎρˬΎϧΑιΎΧϟΕΎΟΗϧϣϟϩΫϫϝΛϣϡΩΧΗγΏΑγΑ
ρϕϑϱϝΥΩϝϕρϥϝϱϑϭϱϝίϥϡϝϡΩΥΕαϝϝιιΥϡίϩΝϝΫϩ

8
en
Congratulations on your purchase of the Bosch GL80
In'genius vacuum cleaner.
This instruction manual describes various GL80
In'genius models, which means that some of the equip-
ment features and functions described may not apply
to your model. You should only use original Bosch
accessories, which have been specially developed
for your vacuum cleaner, in order to achieve the best
possible vacuuming results.
Please keep this instruction manual for future refe-
rence. When passing the vacuum cleaner on to a third
party, also pass on this instruction manual.
Fold out the picture pages.
Your vacuum cleaner
1 Adjustable floor nozzle* (For the same functions,
the appearance of the nozzle may differ from the
picture)
2 Hard-floor nozzle*
3 Telescopic tube with sliding switch (and accessory
connection)
4 Crevice nozzle
5 Accessories holder
6 Upholstery nozzle
7 Flexible hose
8 Hose handle
9 Dust bag change indicator
10 Power rotary control and on/off switch
11 Exhaust filter
12 Parking aid
13 Power cord
14 Rear flap
15 Carrying handle
16 Dust bag compartment lid
17 Storage aid (on the underside of the appliance)
18 Dust bag
19 Motor protection filter
Replacement parts and special accesso-
ries
A Replacement filter package
Type PowerProtect Dustbag
No.: 00575069
Contents:
- 4 dust bags with fasteners
- 1 micro-hygiene filter
!PLEASE NOTE
We therefore recommend that you only use our origi-
nal dust bags.
Your appliance is a highly efficient vacuum cleaner
that achieves excellent cleaning results when used
with high-quality dust bags. Only by using high-
quality dust bags (such as Bosch original dust bags)
can you ensure that your vacuum cleaner is working
at the energy efficiency class, dust pick-up rate and
dust retention capacity listed on its EU energy label.
The use of inferior-quality dust bags (e.g. paper
bags) can have a negative effect on the service life
and performance of your appliance. Using unsuitable
or inferior-quality dust bags can also damage your
vacuum cleaner. Such damage is not covered by our
guarantee.
You can find more information about this at
www.bosch-home.com/dust-bag. You can order our
original vacuum cleaner bags here.
B Washable motor protection filter
Protects the motor of your vacuum cleaner, thus in-
creasing its service life.
C Hard-floor nozzle BBZ123HD
For vacuuming hard floors
(parquet, tiles, terracotta, etc.)
D Hard-floor nozzle BBZ124HD
Innovative "soft & roll" hard-floor nozzle:
2 rotating brush rollers made from natural hair.
Coarse dirt is not pushed away.
* Depending on model

9
* Depending on model
Before using your appliance for the first
time
Fig. 1
Push the handle onto the flexible hose and lock it in
place.
Initial use
Fig. 2
a) Push the flexible hose adapter into the air intake
opening in the lid until it locks in place.
b) To remove the flexible hose, press the two catches
together and pull out the hose.
Fig. 3
Push the handle into the telescopic tube until it
locks into place.
To release the connection, press the locking collar
and pull out the telescopic tube.
Fig. 4
Push the telescopic tube into the connecting piece
of the floor nozzle until it locks in place.
To release the connection, press the locking collar
and pull out the telescopic tube.
Fig. 5
Unlock the telescopic tube by moving the sliding
switch in the direction of the arrow, and adjust to
the desired length.
Fig. 6
a) Place the accessories holder in the required positi-
on on the telescopic tube.
b) Use some pressure to insert the upholstery nozzle
and the crevice nozzle into the accessories holder
from above or below.
Fig. 7
Holding the power cord by the plug, pull it out to the
required length and insert the plug into the mains
socket.
!If using the appliance for longer than 30 minutes,
pull out the power cord completely.
>= Risk of overheating and subsequent damage.
Fig. 8Switching on and off
To switch the vacuum cleaner on or off, press the
rotary control.
Fig. 9Controlling the suction level
Turn the rotary control to infinitely adjust the suction
level to the level required.
min - For vacuuming curtains and delicate textiles
- For vacuuming upholstered furniture and
cushions
- For vacuuming delicate rugs und for daily vacu-
uming of lightly soiled floors
- For vacuuming durable floor coverings
max - For vacuuming hard floors and heavily soiled
rugs and carpets
Vacuuming
!Caution:
Floor nozzles are subject to a certain amount of
wear, depending on the type of hard floors you have
(e.g. rough, rustic tiles). You must therefore check
the underside of the floor nozzle at regular intervals.
Worn undersides of floor nozzles may have sharp
edges that can damage sensitive hard floors, such as
parquet or linoleum. The manufacturer does not ac-
cept any responsibility for damage caused by worn
floor nozzles.
Fig. 10
Set the adjustable floor nozzle:
Rugs and carpets =>
Hard floors/parquet =>
Fig. 11 Vacuuming with accessories
Attach the nozzles to the suction pipe or handle as re-
quired:
a) Crevice nozzle for vacuuming crevices and corners,
etc.
b) Upholstery nozzle for vacuuming upholstered furni-
ture, curtains, etc.
After use, reinsert the crevice nozzle and upholstery
nozzle into the accessories holder.
c) Hard-floor nozzle
For vacuuming hard floor coverings
(tiles, parquet, etc.)
Push the telescopic tube into the connecting piece
of the hard-floor nozzle until it locks in place.
To release the connection, press the locking collar
and pull out the telescopic tube.
Fig. 12
You can use the parking aid on the back of the vacu-
um cleaner if you want to stop vacuuming for a short
time.
After switching off the appliance, slide the hook on
the floor nozzle into the recess on the back of the
appliance.
Fig. 13
To overcome obstacles, e.g. steps, the appliance can
also be carried by the handle on the appliance body.

10 * Depending on model
After using the appliance
Fig. 14
Pull out the mains plug.
Briefly pull on the power cord and release it (the
cable retracts automatically).
Fig. 15
To store or transport the appliance, you can use the
storage aid on the underside of the appliance.
Stand the appliance upright on its end. Slide the
hook on the floor nozzle into the recess on the un-
derside of the appliance.
Changing the filter
!Caution: Always switch off the appliance before
changing the filter.
Replacing the dust bag
Fig. 16
If the dust bag change indicator lights up conti-
nuously when the nozzle is lifted from the floor and
the highest power setting has been selected, the
dust bag must be changed, even though it may not
yet be full. In this case, it needs to be changed due
to the type of dust which has been vacuumed.
The nozzle, suction pipe and flexible hose must not
be blocked, even if this does not trigger the dust bag
change indicator.
Fig. 17 Opening the lid
Open the lid by moving the locking lever in the direc-
tion of the arrow.
Fig. 18
a) Close the dust bag by pulling on the locking tab, and
remove the bag.
b) Push the new dust bag into the holder until it clicks
into place. When doing so, leave the dust bag folded
as it was when removed from the packaging. Do not
crease or kink the dust bag, and ensure that it is not
pinched when the lid is closed.
!Caution: The lid will only close if a dust bag has
been inserted.
Motor protection filter
!Caution: The vacuum must not be operated without
the motor protection filter.
Cleaning the motor protection filter
The motor protection filter should be cleaned regularly
by tapping out the dirt and rinsing.
Fig. 19*
Open the dust bag compartment lid. Fig. 17
Release the motor protection filter by pulling on the
side tabs and pull it out in the direction of the arrow.
Clean the motor protection filter by tapping out the
dirt.
If it is very dirty, the motor protection filter should
be rinsed.
The filter must then be left to dry for at least
24 hours.
After cleaning, refit the motor protection filter into
the appliance and lock it in place at the top. Close
the dust bag compartment lid.
Cleaning the foam filter
If your appliance is fitted with a filter frame and foam
filter, the foam filter should be cleaned at regular inter-
vals by tapping out the dust.
Fig. 20*
Open the dust bag compartment lid. Fig. 17
Pull out the filter frame and foam filter in the direc-
tion of the arrow.
Remove the foam filter from the filter frame and
clean it by tapping out the dust.
After cleaning, place the foam filter back in the filter
frame, insert the filter frame with foam filter in the
appliance and close the dust bag compartment lid.
!
Caution: The vacuum cleaner must not be operated
without the motor protection filter.

11
* Depending on model
Exhaust filter
The exhaust filter must be cleaned or replaced at least
once a year.
Replacing the micro-hygiene exhaust filter
Fig. 21*
Open the rear flap.
Unlock the filter holder by moving the locking tab in
the direction of the arrow.
Remove the foam filter* from the filter holder and
tap it out.
Replace the old micro-hygiene filter with a new one.
(This is included in the filter pack when you purchase
original dust bags).
Insert the foam filter into the filter holder.
Insert the filter holder into the appliance and lock it
in place.
Cleaning the (H)EPA* exhaust filter
The (H)EPA* filter is designed so that it does not need
to be replaced, provided the appliance is used as inten-
ded in the household.
To ensure that the vacuum cleaner is working at its op-
timum power level, the (H)EPA* filter should be rinsed
out after one year. The filtering action of the filter re-
mains intact, even if the filter surface becomes disco-
loured.
Fig. 22*
Open the rear flap.
Unlock the (H)EPA* filter by moving the locking tab
in the direction of the arrow, and remove it from the
appliance.
Tap out the filter unit and rinse it under running wa-
ter.
Alternatively, the unit can be cleaned in a washing
machine at max. 30 °C using a gentle programme and
the lowest spin speed.
TIP: To protect other laundry items, put the filter
unit into a laundry bag.
Once the (H)EPA* filter has dried completely (at
least 24 hours), insert it back into the appliance and
lock it in place.
Close the rear flap.
After vacuuming fine dust particles (e.g. gypsum, ce-
ment, etc.), clean the motor protection filter by tapping
it out or, if necessary, replace the motor protection fil-
ter and exhaust filter.
Care
Always switch off the vacuum cleaner and disconnect
the power cord from the mains before cleaning the va-
cuum cleaner. The vacuum cleaner and plastic acces-
sories can be cleaned with an ordinary plastic cleaner.
!Do not use abrasive materials, glass-cleaning agents
or all-purpose cleaning products. Never immerse the
vacuum cleaner in water.
The dust compartment can, if necessary, be cleaned
with a second vacuum cleaner or simply wiped with a
dry cloth or dusting brush.
Subject to technical modifications.

12
zh 更換零件和特殊配件
A 塵袋
為了達到最佳集塵效果,我們建議您使用PowerProtect
原廠集塵袋(00575069)。
內容:
- 4個塵袋,含扣件
- 1個微細濾網
! 請注意
使用原廠塵袋,您的吸塵機才能達到最佳的清潔效果。
只有使用高品質的原廠博世塵袋,才能達到歐盟能源標籤所
標示的節能效率分級、吸力和集塵能力。
如果使用品質不佳的塵袋(例如紙袋),將會大幅影響電器使
用壽命和效能。
未使用原廠博世塵袋或會導致保養失效。
關於訂購原廠博世塵袋的資訊,請瀏覽
www.bosch-home.com/dust-bag
B 可水洗微細濾網
保護吸塵機的摩打,延長使用壽命。
C 硬質地板吸嘴BBZ123HD
硬質地板吸塵專用
(木質地板、瓷磗、紅土等)
D 硬質地板吸嘴BBZ124HD
創新「軟質滾動式」硬質地板吸嘴:
2個以天然動物毛製成的刷頭滾輪。 清理粗糙灰塵的效果更
佳。
首次使用電器前
圖 1
將握柄推入伸縮軟管並鎖至定位。.
初次使用
圖 2
a) 將 伸縮軟管推入吸塵機蓋的入氣開口,直到鎖定為止。
b) 若要拆下伸縮軟管,請同時按下兩個固定扣,然後拉出軟管。
圖 3
將握柄推入伸縮管,直到鎖定為止。
若要將兩者分開,請按住固定環並拉出伸縮管。
圖 4
將伸縮管推入地板吸嘴的連接部分,直到鎖定為止。
若要將兩者分開,請按住固定環並拉出伸縮管。
圖 5
依照箭頭方向移動滑動按鈕以解鎖伸縮管,並調整所需長
度。
感謝您購買博世GL80 In'genius吸塵機。
本說明書為GL80 In'genius系列通用,某些功能與配備或不
適用於您的型號。請務必使用此吸塵機專用的博世原廠配件,
以達到最佳吸塵效果。
請妥善保存本說明書,作為未來使用參考。如果將此吸塵機轉
交給他人,請同時轉交本說明書。
請展開圖片頁面!
您的吸塵機
1 可調式地板吸嘴(吸嘴外觀可能與圖片不同,但功能相同)
2 硬質地板吸嘴
3 伸縮管含滑動開關(以及配件連接頭)
4 尖頭吸嘴
5 配件固定座
6 室內吸嘴
7 伸縮軟管
8 軟管手把
9 塵袋更換指示燈
10 功率控制旋鈕與電源開關
11 排氣濾網
12 輔助掛鉤
13 電源線
14 後蓋板
15 手把
16 塵袋艙
17 存放輔助設計(在電器底部)
18 塵袋
19 摩打保護濾網

13
圖 6
a) 將配件固定塵放置在所需的伸縮管位置
b) 室內裝潢噴嘴和縫隙噴嘴插入與輕微的壓力,從頂部或底部
的持有者
圖 7
抓住插頭,視乎所需長度拉出電源線,然後將插頭插入電源插
座中。
!若要使用電器的時間超過30分鐘,請將電源線完全拉出。
>= 有過熱的風險及造成後續損壞的危險。
圖 8 開啟和關閉
若要啟動吸塵機,請按下控制旋鈕。
圖 9 控制吸力
請旋轉控制旋鈕,調較至所需吸力。
min - 適合清理窗簾和纖幼織品
- 適合清理軟墊傢俬和坐墊
- 適合清理纖幼地墊,以及日常輕微骯髒的地板
- 適合清理抗磨的地板覆蓋物
max - 適合清理硬質地板和非常骯髒的地墊或坐墊
吸塵
!注意:
地板吸嘴會受到一定程度的磨損,視乎地板的種類而定(例如
表面粗糙的瓷磗)。因此,每隔一段時間必須檢查地板吸嘴的
底部。地板吸嘴底部因磨損所造成的尖銳表面或會造成拼花
或亞麻地板等精緻的硬質地板表面受損。因磨損的地板吸嘴
所造成的損壞,製造商將不負任何責任。
圖 10
設定可調式地板吸嘴:
地墊或地毯 =>
硬質地板 =>
圖 11 使用配件吸塵
視乎需要,在吸塵管或握柄上安裝吸嘴:
a) 適合清理縫隙和角落等的尖頭吸嘴。
b) 適合軟墊傢俬、窗簾等的室內吸嘴。
使用後,請將尖頭吸嘴和室內吸嘴重新插入配件固定座。
c) 硬質地板吸嘴
清理硬質地板覆蓋物
(瓷磗、拼花地板等)
將伸縮管推入硬質地吸嘴的連接部分,直到鎖定為止。
若要將兩者分開,請按住固定環並拉出伸縮管。
圖 12
若您想暫停吸塵,可以使用吸塵機後方的輔助掛鉤。
關閉電器後,將地板吸嘴上的掛鉤推入電器後方的凹槽。
圖 13
電器上有一個手把,方便越過階梯等障礙物。
電器使用後
圖 14
請拔掉電源插頭。
稍微拉出電源線後放開(電源線將會自動捲回)。
圖 15
若要存放或運送電器,您可以使用電器底部的存放輔助設計。
將電器立起。將地板吸嘴上的掛鉤推入電器後方的凹槽。
更換濾網
! 注意:更換濾網前必須將電器關掉
更換塵袋
圖 16
選擇最高功率時,如果地板吸嘴立起且蓋子上的塵袋更換指
示燈持續亮起,即使塵袋並未全滿,此時仍應更換。由於之前
清理的灰塵種類,需要更換塵袋。
檢查吸嘴,吸塵管或軟管有否阻塞,因為阻塞也可能會令
塵袋指示燈亮起。
圖 17 打開蓋子
依照箭頭方向移動鎖定撥片並打開蓋子。
圖 18
a) 拉起塵袋的凸出部分以關上塵袋,然後取出塵袋。
b) 將新的塵袋放入固定座,直到卡入為止。從包裝中取出塵袋
時,請保持塵袋折疊。切勿擠壓或扭曲塵袋,並確定蓋子關上
時沒有夾到塵袋。
!注意:如果未放入塵袋,蓋子將無法關上

14
摩打保護濾網
! 注意:若未安裝摩打保護濾網,吸塵機將無法操作。
清潔摩打保護濾網
應定期清潔摩打保護濾網上方的灰塵,並用水沖洗。
圖 19*
打開塵袋艙。圖 17
拉起摩打保護濾網側面的凸起部分,然後依照箭頭方向取
出。
清理摩打保護濾網上的灰塵。
如果摩打保護濾網非常骯髒,請以水沖洗。
濾網需要至少24小時晾乾。
清洗完成後,將摩打保護濾網重新裝回並鎖定在頂端。關上
塵袋艙。
清潔海棉濾網
如果電器上安裝有濾網架和海棉濾網,請定期清理海棉濾網上的
灰塵。
圖 20*
打開塵袋艙。圖 17
依箭頭方向拉出濾網架和海棉濾網。
從濾網架上取出濾網,並將灰塵清理乾淨。
清洗完成後,將海棉濾網重新裝回濾網架,將濾網架插入然
後關上塵袋艙。
!
注意:若未安裝摩打保護濾網,吸塵機將無法操作。
排氣濾網
排氣濾網每年至少必須更換一次。
更換微細排氣濾網
圖 21*
開啟後蓋。
依照箭頭方向移動鎖定撥片以解開濾網固定座。
從濾網固定器中取出海棉濾網*並清理乾淨。
更
換新的微細濾網。
(原廠塵袋包裝中包含濾網包)。
將海棉濾網裝入濾網固定器。
插入濾網固定器並固定。
清潔(H)EPA*排氣濾網
(H)EPA*濾網專為此電器所設計,使用壽命與電器相同毋須更
換。
為確保吸塵機保持最佳狀態,(H)EPA*濾網應每年清洗一次。即
使濾網表面褪色,濾網功能並不受影響。
圖 22*
開啟後蓋。
依照箭頭方向移動固定點以解開(H)EPA*濾網,然後取出濾
網。
清理濾網並用水沖洗。
或是將濾網放入洗衣機中,以不超過30 °C的水溫、使用溫和
程序和最低脫水轉速清洗。
提示:為保護其他衣物,請將濾網放入洗衣袋中。
(H)EPA*濾網完全晾乾後(至少24小時),請將濾網裝回電器
中並固定。
關上後蓋。
清理細微灰塵(例如石膏粉、混凝土等)後,請清潔摩打保護濾
網,並視乎需要更換摩打保護濾網與排氣濾網。
護理
清潔吸塵機前,請務必關閉吸塵機電源並拔下插頭。您可以使用
一般塑膠清潔劑保養吸塵機和塑膠配件。
!切勿使用含研磨效果的物品、玻璃清潔劑或其他清潔產
品。切勿將吸塵機浸在水中。
如有需要,可以使用其他吸塵機清潔塵袋艙,或用乾布/塵刷清
潔
本說明書可能因技術變更而修改。

15
jMf¡G*
+fG* ~IK f¤DfM(* hqM j¡G* ©¡- f¤©D kM ,|H F gE
m
ftG*Kj¡Gf+jMf¡G*k-£&*¢M4f©kG*4zH¢Hª)f+|¤G*
©
k6ÏgG*mf¡Hz0&**zwk6f+©k6ÏgG*¢Hj<§¡G*j©©kG*
*§6&¶*ªDjGK*zkG*
!
sf/~Gf+j8fwG*mf¡G*K&*j72f12*§HjM&*zwk-·
|-·K9*|=&·*ªqGzwk-«kG*mf¡G*-K&*
*z+&*$fG*«Dj¡G*
&
j©If.j¡H *zwk6f+K~G*z¡<j+|-&¶*,|©q0©¡-¢M
jDf/j+|-&*,f7|Df/j+|-&*Mz¡H*zwk6f+j:fg+f¤©¡-
j©¡DmÏMz-jM&*f12(*t+ktI

16 ~©¤qkG*h0*
|kG*|ªª-
!
|kG|©©-FgE5f¤qG*fM(f+E¥ªg¡-
|kG*ªF*zgk6*
16 ,4§8
(aj<§D|H©¡kG*6&*4f¡©+|kG*|©©-¢©gH4*|k6f+$f9&**3(*
©F|©©-,4K|9ª¡M*{¤D,4zE9K¨<&*HK94&¶*¢<
*|H&*|©©kG*£§MjGftG*¦{JªDfckH¢MG£(*K¨k0|kG*
jqG*mf1f-¶*j©<§I¨<$f¡+fM4K|9
K&*©¡kG*6&*4ªD2*zI*f¡J£§M¶&*ªg¡M$f¡.&¶*-ªD
©-¨G(*G3«2'§MG£(*K¨k0G*§:|1K&*G*,4§6fH
|kG*|©©-¢©gH
(b
!
¥ªg¡-
fNgF|H|kG*©F£§MfHz¡<¶(*$fG*=¢M¶
|tG*jMf0|kD
!
|tG*jMf0|kD£Kz+j¡G*ª-5§qM·¥ªg¡-
|tG*jMf0|kDª¡-
¥-Ï1¢Hjk¡Hm*|kD¨<|tG*jMf0|kD©¡-ªg¡M
¥=K&*
ΩΥϝϙϱαϝϑϝΕέϝΝΩϱΩϑϱϡϭνω
ϝΕΙΏϱΕˬ·ϝϯϥϱΙΏΕΏεϙϝϡϝΡϭυϭϑϱΕϝϙϝΙϥ˯
ΩωϙϱαϝϑϝΕέϡρϭϱϡωΏωνϩϝΏωνωϝϯϝϥΡϭϝΫϱ
ΥέΝΕϩΏϩϡϥϝωΏϭΓϭϝΕϕϡΏρϱϭΙϥϱϙϱαϝϑϝΕέ
ϭΡέιωϥΩύϝϕϝύρ˯ωϝϯϡέωΓϝϱΕωένϙϱα
ϝϑϝΕέϝϝϥΡιέ
2|G*|kD
¥G*zgk6*K&*j¡G*ªD,z0*K,|H2|G*|kD©¡-hqM
Ultra Air II«tG*|kG*K|ªG*«tG*2|G*|kD*zgk6*
20*,4§8
ªwG*$fG*ukD*
¤G*¦fq-*ªDG*|:9Ï1¢H|kG*lgnH|M|tk+E
|kG* zgk6* ¥¡+ EK |kG* lgnH ¢H *|kG* r¡6(* s|1&*
ªD|kG*,§g<ªDf¡RH£§MzMz/|1%f+MzG*K|©G*ªtG*
j©8&¶*|kG*6f©F&*$*|7jGf0
|kG*lgnHªD|kG*r¡6(*h©F|k+E
¥k©gnk+EK5f¤qG*ªD|kG*lgnHh©F|k+E
Ultra Hepa«tG*|kG*Hepa2|G*|kDª¡-
+5f¤qG**zwk6*-*3(*¦|©©kG|-¶o©t+HHepa|kD
j©G~¡G*9*|=&¶*ªDmf©kG+fH
z+Hepa|kD=ªg¡MªGfnG*f¤-4zEL§k+j¡G*-ªG
|¡G*+|kG*$*2&*j©GfD¨<ftG*kMfF,z0*Kj¡64K|H
|kGª/4fwG*uG*£§G|©-fk0*¢<
21*,4§8
ªwG*$fG*ukD*
¤G*¦fq-*ªDG*|:9Ï1¢HHepa|kD|M|tk+E
5f¤qG*¢H¥/|1&*K
«4fqG*$fG*lt-f¤=*K|kG*,z0K¡+E
,4K2ªDfg:&¶*jGf=ªD«4f©k1*+,z0§G*©¡-¢M
mfG 2z< ¨I2&*K °30 L§E,4*|0j/42z¡<jM2fkE*=
|G
j©+ jMf0 9|G = ©F ªD |kG* ,z0K 9jtªI
©G*
E&¶*¨<fHf-qM£&*z+5f¤qG*ªDHepa |kDh©F|-z<&*
¥¡©H&fk+EKj<f624
ªwG*$fG*=&*
l¡6(¶*gqG*fnG*©g6¨<j©EzG*j+|-&¶*mfcM~/7z+
K~G*z¡<K¥IÏ1¢H|tG*jMf0|kD©¡k+E¥DÏ1K
2|G*|kDK|tG*jMf0|kD*zgk6f+E
,4§8
22*
$fG*ukD 17 ,4§8
¤G*¦fq-*ªDG**439Ï1¢H$fG*ukD*
18 ,4§8
(a¥/|1&*KG*|:¢HhtG*Ï1¢H|kG*©F=&*
έΎρΈΑ˱ΩϭίϣϙίΎϬΟϥΎϛΫ·έΗϠϓˬϳηέΗΞϧϔγ·ϪΑϓϪοϔϧϝϼΧϥϣϙϟΫϭΔϣυΗϧϣΕέΗϓϰϠϋϳηέΗϟΞϧϔγ·ϑϳυϧΗϲϐΑϧϳ
21*
20*,4§8
19*,4§8
17 ,4§8j+|-&¶*,|©q0$f=ukD*
htG*Ï1¢Hl©gnkG*9*§H¢H|tG*jMf0|kDt+E
¤G*¦fq-*ªD¥/|1&*Kj©gIfqG**|:&¶*¢H
¥IÏ1¢H|tG*jMf0|kD©¡k+E
|tG*jMf0|kD=ªg¡MzMzG*yf-¶*jGf0ªDK
j<f624¢<-¶,zGq©G|kG*|-*G3z+
¢H¥kg.K5f¤qG*ªD|tG*jMf0|kDh©F|k+E©¡kG*z+
j+|-&¶*,|©q0$f==&*K¨<&*

17
~©¤qkG*h0*
m*2f6§G*Kpf.&¶*7|D©¡kG
jGf0 ªD ªH§©G* ©¡kGK 6ftG* 2fqG* ©¡kG
j©gG*mf1f-¶*
jkG*mf©94&¶*©¡kG
zMz7 l©F§G*K 2fqG*K jgG* mf©94&¶* ©¡kG ¨E&*z0
yf-¶*
3,4§8
lgnM¨k0j©+§kG*,4§6fG*ªDgG*12&*
j©+§kG*,4§6fG*ht6*K|M|tkG*j0¨<9*j8§G*tG
s4fwG
10 ,4§8
mf©94&¶*©¡kGjG§tkG*6&*|G*g9
<= l©F§G*K2fqG*
<= ¥©F4fgG*jgG*j©94&¶*
G*
!
¥ªg¡-
j©gGfNg-fHPj/4z+F%fkGmf©94&¶*©¡-6K'K49|k-
©<¢©kM*{G«|qtG*K&*¢wG*ÏgG*ÏnHjgG*j©94&¶*
z<*§G*jk¡Hm*|kD¨<©¡kG*6&*|GjF|tkG*,z<fG*tD
pKz0ªDhgk-£&*¢M©¡kG*6&*|G*§tG*,2f0jF%fkG*
mf©94&¶*K&*¥©F4fgG* nH j6ftG*jgG*mf©94&¶f+4*|9&*
zEªkG*4*|9&¶*¢<j©GK'§HjM&*jIfG*j¤qG*tk-¶KG*
mf©94&¶*©¡kGjF%fkH6&*4*zwk6*¢<rk¡-
4,4§8
©¡- 6&*4 ¡< ªD lgn- ¨k0 j©+§kG* ,4§6fG* |0
mf©94&¶*
j©+§kG*,4§6fG*ht6*K|M|tkG*j0¨<9*j8§G*tG
s4fwG
5*,4§8
|M|tk+E¤G*¦fq-*ªDªE¶~I¶*§G*4~G*i{/Ï1¢H
i§=|G*§G*g9*Kj©+§kG*,4§6fG*
6,4§8
(aªDj©+§kG*,4§6fG*¨<j©©kG*mftG*Hf0h©F|k+E
i§=|G*
9§G*
(c6&*4K pf.&¶* ©¡- ,f7|D H mf7K|G* ©¡- 6&*4 12&*
j©©kG*mftG*Hf0ªD6&*¢HK&*¨<&*¢H§G*©¡-
N
ϩEG*H
7,4§8
¨G(*M¨k0s4fwG¥+{/*K+fG*¢H$f+|¤G*+fFH&*
gG*ªDª)f+|¤G*+fG*9.i§=|G*§G*
!
ªkG*jGf0«Ds4fwGHfGf+$f+|¤G*+fFht6*
jªE230¨<zM~-,zG
=<4*|9&*pKz0Kj:|G*jI§wG*|1
fM(·*ªkG* 8,4§8
4*KzG*¡G*¨<Gf+j¡G*fM(*K&*©k+E
G*,§Eg9 9,4§8
j6Ï+j+§=|G*G*,§Eg9¢M4*KzG*¡G*,4*2(*Ï1¢H
j6ftG*mf/§¡G*K|)fkG*©¡kG ¨I2&*z0
(b
5
13 ,4§8
fM&*gG*¢H5f¤qG*I¢MGÏG*ÏnH)*§G*¨<hkG
G*¢H$f¤kI·*z+
14 ,4§8
ª)f+|¤G*+fG*~I*
f©©-fH§-K&*+fG*Gk©D¥F|-*. N
Ï©E$f+|¤G*+fFht6*
15 ,4§8
hIfqGf+,2§/§G*,2f¡G**zwk6*¡M5f¤qG*Iz¡69|G
5f¤qGªG*
6&*|+ 2§/§G* fwG* 12&*K j)fE j©9K ªD 5f¤qG* 9
5f¤qGªG*hIfqGf+2§/§G*M§qkG*ªDmf©94&¶*©¡-
©¡- 6
&
*4K §G* ©¡- 6
&
*4 h©F|- z<
&
* *zwk6¶* z+
j©©kG*mftG*Hf0ªDmf7K|G*
(djgG*mf©94&¶*©¡-6&*4
jgG*mf©94&¶*©¡kG
¥DÏ1K¥©F4fgG*ÏgG*
©¡- 6&*4 ¡< ªD lgn- ¨k0 j©+§kG* ,4§6fG* |0
jgG*mf©94&¶*
j©+§kG*,4§6fG*ht6*K|M|tkG*j0¨<9*j8§G*tG
s4fwG
12 ,4§8
lgnH fk6* ¡M ,|©E m*|kG ©¡kG* ¢< E§kG* z¡<
5f¤qG*,|1'§+§:|wG*
mf©94&¶*©¡-6&*|+2§/§G*fwG*12&*5f¤qG*fM(*z+
5f¤qG*,|1'§+2§/§G*M§qkG*ªD
jªDf9(·*jªªkG*mftG**zwk6f+ª¡kG*11*,4§8
ªDK&*G*,4§6fHªDfH(*j/ftG*h0©¡kG*6K'K4h©F|k+E
gG*
(a¥DÏ1K£fF4&¶*K§G*©¡-9|G§G*©¡-6&*4
(b|)fkG*K pf.&¶* 7|D ©¡- 9|G mf7K|G* ©¡- 6&*4
¥DÏ1K
(c
11

18
4§G*mft82|D¨/|M
5f¤qG*8K
1£&*¢M©¡kG*6&*47*mf©94&¶*©¡kGjG§tkG*6&*|G*
G*jM|:IH,4§G*¢<kwM
2*jgG*mf©94&¶*©¡-6&*4
j8fwG*jªªkG*mftG*K4fªG*E
VZ123HDjgG*mfª94&·*ª¡-6&*4 D
$fG*mf©94&¶*©¡kG
f-§F*|©kG*ÏgG*¥©F4fgG*
jH§¡G*jMf=ªDª©g:|7m*3,f7|DH
VZ124HDjgG*mfª94&·*ª¡-6&*4 E
jgG*mf©94&ÏG,|MzkHKj<fI,|kgH©¡-6&*4
ª©gG*|G*¢H,4*K2,f7|D2
j¡wG*mf1f-ÏGgHD2z/§M¶
,|HK&·*zwk6·*gE
1,4§8
¥k©gnk+EKG*§:|1¨<gG*h©F|k+E
ªkG*
2,4§8
(a$fGf+G*jtkDªDG*§:|1jJ§Dl©gnk+E
(b§:|wG*ht6*KfHl©gnkG*ªD|:9*G*§:|1Dz¡<
s4fwG
~©¤qkG*h0*
B
ϱΡϡϱϡΡέϙϡϙϥαΕϙϝϙϩέΏΉϱΓˬϭΏΫϝϙϱ˵ρϱϝϡϥωϡέϩ
ϝϑΕένϱ
C
ϡϝΡϭυΓ
ΝϩίϙϩϭϡϙϥαΓϙϩέΏΉϱΓϑΉϕΓϝϑωϝϱΓˬϭϝϱΕϡϝΡιϭϝ
ωϝϯϑνϝϥΕΉΝΕϥυϱϑϡϥϩ·ϝϑϱυϝαΕΥΩϡϙϱα
ϝΕέΏΓϝιϝϱΓ
ϝϱΕϡϝϭιϭϝ·ϝϯϝϕϱϡϝϡΫϙϭέΓϑϱϡϝιϕϝρϕΓϝϝΕΡΩ
ϝϭέϭΏϱ(8ΏΥιϭιϑΉΓϑωϝϱΓαΕύϝϝϝρϕΓϭεϑρ
ϝΕέΏΓϭϙϑ˯ΓΡΕΝίϝΕέΏΓ·ϝωϥΩαΕΥΩϡϙϱαϝΕέΏΓ
ωϝϱΓϝΝϭΩΓˬϡΙϝϙϱαϝΕέΏΓϝιϝϱΓϡϥΏϭε
ϭϑϱΡϝΓαΕΥΩϡϙϱαΕέΏΓΏΩέΝΓΝϭΩΓϕϝϡΙϝϝϙϱα
ϝϭέϕϱΓϑϕΩϱϥΥϑνΏϝ·νϑΓ·ϝϯΫϝϙωϡέϭϙϑ˯ΓΩ˯Νϩίϙ
ΏΩέΝΓϙΏϱέΓ
ϝΕ˵ΕΡϝϙΡϕϭϕϝνϡϥ·ϝϑϱΡϝΓαΕΥΩϡϙϱαϝΕέΏΓ
ϝιϝϱΓ
ΕΝΩϝϡίϱΩϡϥϝϡωϝϭϡΕϭ·ϡϙϥϱΓρϝΏϙϱαϝΕέΏΓϝιϝϱΓ
ωϝϯϡϭϕωϝ·ϥΕέϥΕ
ZZZERVFKKRPHFRPGXVWEDJ
D
BBZ123HD
BBZ124HD
ar
G*§:|1
§:|wG*gH
|kG*|©©-¢©gH
fM(¶*©kG*vfkHK4*KzG*,4zG*¡H
2|G*|kD
§:|wG*lgnH
$f+|¤G*+fF
ªwG*$fG*
tG*gH
j+|-&¶*,|©q0$f=
5f¤qGªG*hIfqG*¨<,2f¡G*
|kG*©F
*|tG*jMf0|kD
ϥϳίϳΎΟ έΗϠϳϓ ϪΗγΑ A
3RZHU3URWHFWϗέΑϭέΎΟϪγϳϛ
ϩέΎϣη
ϝϣΎη
ΎϫΕγΑϩέϣϫϪΑϗέΑϭέΎΟϪγϳΩΩϋ
ΗηΩϬΑϭέϳΎϣέΗϠϳϓΩΩϋ
3
4
5
6
7
8
9
10
11
12
13
14
15
16
17
18
19
*l©gn-j8KKªE¶~I*4~+,2K~G*j©+§kG*,4§6fG*
§G*©¡-6&*4
j©©kG*mftG*Hf0
mf7K|G*©¡-6&*4
This manual suits for next models
4
Other Bosch Vacuum Cleaner manuals

Bosch
Bosch BGS5 series Relaxx'x User manual

Bosch
Bosch BSG82070 User manual

Bosch
Bosch BGL3B112 User manual

Bosch
Bosch BBS61 User manual

Bosch
Bosch BGB8A32W User manual

Bosch
Bosch BBH52550 User manual

Bosch
Bosch GL-50 User manual

Bosch
Bosch 0.600.8B7.000 User manual

Bosch
Bosch BBHF214R User manual

Bosch
Bosch BGL4ZOOO User manual

Bosch
Bosch BGC2 Series User manual

Bosch
Bosch 15 User manual

Bosch
Bosch BGS05 Series Specification sheet

Bosch
Bosch BGL8SIL5 User manual

Bosch
Bosch GAS 25 Professional User manual

Bosch
Bosch BSA28 Series User manual

Bosch
Bosch BBZ User manual

Bosch
Bosch BGL35 User manual

Bosch
Bosch BCH65ALL User manual

Bosch
Bosch BGL32500 User manual