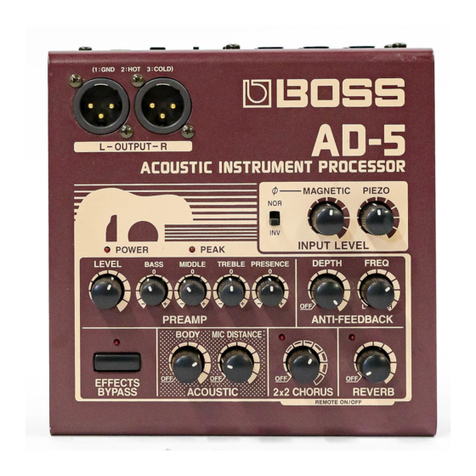
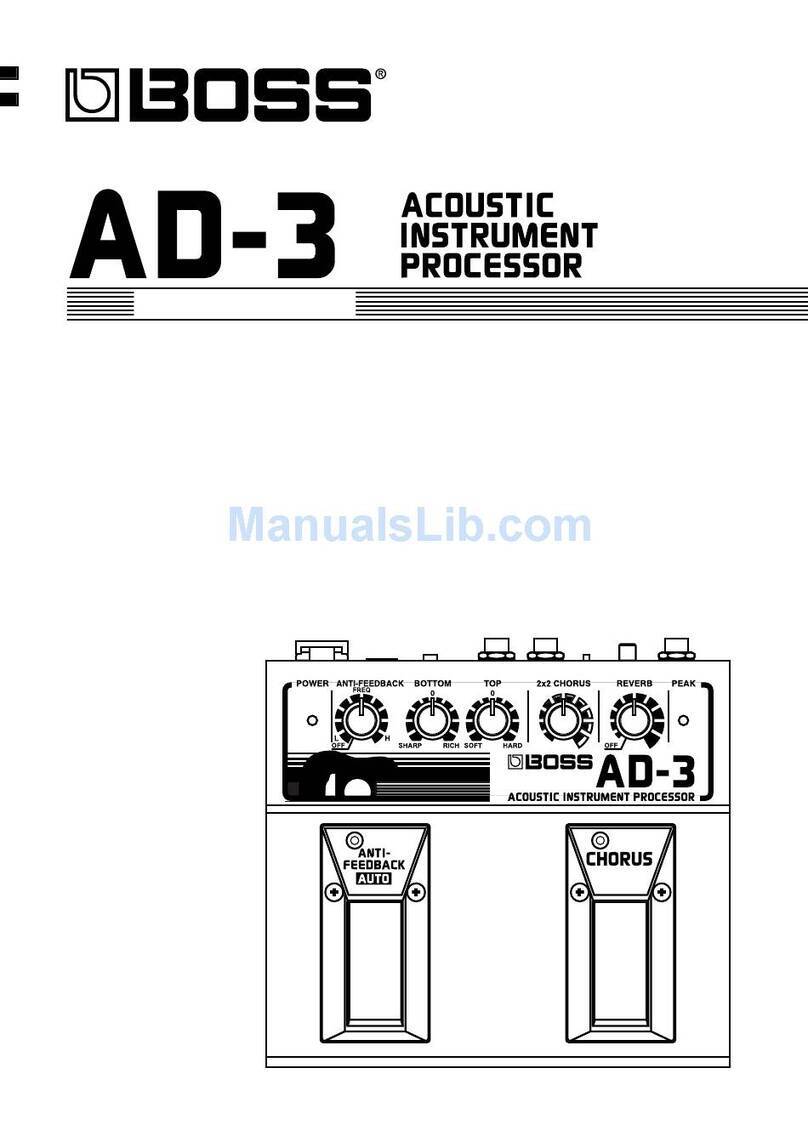
BOSSCO AD-5 User manual

Owner's Manual
01230389 '02-3-B2-32N

2
USING THE UNIT SAFELY
ALWAYS OBSERVE THE FOLLOWING
Used for instructions intended to alert
the user to the risk of injury or material
damage should the unit be used
improperly.
* Material damage refers to damage or
other adverse effects caused with
respect to the home and all its
furnishings, as well to domestic
animals or pets.
Used for instructions intended to alert
the user to the risk of death or severe
injury should the unit be used
improperly.
The
●
symbol alerts the user to things that must be
carried out. The specific thing that must be done is
indicated by the design contained within the circle. In
the case of the symbol at left, it means that the power-
cord plug must be unplugged from the outlet.
WARNING
CAUTION
The symbol alerts the user to important instructions
or warnings.The specific meaning of the symbol is
determined by the design contained within the
triangle. In the case of the symbol at left, it is used for
general cautions, warnings, or alerts to danger.
The symbol alerts the user to items that must never
be carried out (are forbidden). The specific thing that
must not be done is indicated by the design contained
within the circle. In the case of the symbol at left, it
means that the unit must never be disassembled.
• Before using this unit, make sure to read the
instructions below, and the Owner's Manual.
......................................................................................................
• Do not open (or modify in any way) the unit or
its AC adaptor.
......................................................................................................
• Do not attempt to repair the unit, or replace
parts within it (except when this manual pro-
vides specific instructions directing you to do
so). Refer all servicing to your dealer, or quali-
fied Roland service personnel.
......................................................................................................
• Never use or store the unit in places that are:
•Subject to temperature extremes (e.g., direct
sunlight in an enclosed vehicle, near a heat-
ing duct, on top of heat-generating equip-
ment); or are
•Damp (e.g., baths, washrooms, on wet
floors); or are
•Humid; or are
•Dusty; or are
•Subject to high levels of vibration.
......................................................................................................
• Make sure you always have the unit placed so
it is level and sure to remain stable. Never
place it on stands that could wobble, or on
inclined surfaces.
......................................................................................................
• Be sure to use only the AC adaptor supplied
with the unit. Also, make sure the line voltage
at the installation matches the input voltage
specified on the AC adaptor's body. Other AC
adaptors may use a different polarity, or be
designed for a different voltage, so their use
could result in damage, malfunction, or electric
shock.
......................................................................................................
• Avoid damaging the power cord. Do not bend
it excessively, step on it, place heavy objects on
it, etc. A damaged cord can easily become a
shock or fire hazard. Never use a power cord
after it has been damaged.
......................................................................................................
• This unit, either alone or in combination with
an amplifier and headphones or speakers, may
be capable of producing sound levels that
could cause permanent hearing loss. Do not
operate for a long period of time at a high vol-
ume level, or at a level that is uncomfortable. If
you experience any hearing loss or ringing in
the ears, you should immediately stop using
the unit, and consult an audiologist.
......................................................................................................
• Do not allow any objects (e.g., flammable
material, coins, pins); or liquids of any kind
(water, soft drinks, etc.) to penetrate the unit.
......................................................................................................
WARNING
WARNING

3
•Immediately turn the power off, remove the
AC adaptor from the outlet, and request ser-
vicing by your dealer or qualified Roland ser-
vice personnel when:
•The AC adaptor or the power-supply cord
has been damaged; or
•Objects have fallen into, or liquid has been
spilled onto the unit; or
•The unit has been exposed to rain (or other-
wise has become wet); or
•The unit does not appear to operate normally
or exhibits a marked change in performance.
......................................................................................................
•In households with small children, an adult
should provide supervision until the child is
capable of following all the rules essential for
the safe operation of the unit.
......................................................................................................
•Protect the unit from strong impact.
(Do not drop it!)
......................................................................................................
•Do not force the unit's power-supply cord to
share an outlet with an unreasonable number
of other devices. Be especially careful when
using extension cords—the total power used
by all devices you have connected to the exten-
sion cord's outlet must never exceed the power
rating (watts/amperes) for the extension cord.
Excessive loads can cause the insulation on the
cord to heat up and eventually melt through.
......................................................................................................
•Before using the unit in a foreign country, con-
sult with your dealer, or qualified Roland ser-
vice personnel.
......................................................................................................
•The unit and the AC adaptor should be located
so their location or position does not interfere
with their proper ventilation.
......................................................................................................
•Always grasp only the plug or the body of the
AC adaptor when plugging into, or unplug-
ging from, an outlet or this unit.
......................................................................................................
•Whenever the unit is to remain unused for an
extended period of time, disconnect the AC
adaptor.
......................................................................................................
•Try to prevent cords and cables from becoming
entangled. Also, all cords and cables should be
placed so they are out of the reach of children.
......................................................................................................
•Never climb on top of, nor place heavy objects
on the unit.
......................................................................................................
•Never handle the AC adaptor body, or its
plugs, with wet hands when plugging into, or
unplugging from, an outlet or this unit.
......................................................................................................
•Before moving the unit, disconnect the AC
adaptor and all cords coming from external
devices.
......................................................................................................
•Before cleaning the unit, turn off the power
and unplug the AC adaptor from the outlet
(page 7).
......................................................................................................
•Whenever you suspect the possibility of light-
ning in your area, disconnect the AC adaptor
from the outlet.
......................................................................................................
CAUTION
WARNING
4
Introduction
Thank you, and congratulations on your choice of the BOSS AD-5 Acoustic Instrument Processor.
Beforeusingthisunit,carefullyreadthesectionsentitled:"USINGTHEUNITSAFELY"and"IMPORTANT
NOTES" (page 2; page 5). These sections provide important information concerning the proper operation
of the unit. Additionally, in order to feel assured that you have gained a good grasp of every feature
providedbyyournewunit,thismanualshouldbereadinitsentirety.Themanualshouldbesavedandkept
on hand as a convenient reference.
Main Features Chorus and Reverb Customized Exclu-
sively for Acoustic Guitar
Since the unit is designed so signals are divided
into separate frequency ranges, Chorus can be
appliedindependentlytothebassandtrebleranges.
Moreover, the Reverb has been newly designed so
it is optimized for acoustic guitar sounds.
Additionally, you can use a footswitch connected
totheRemotejack toswitch Chorusand Reverbon
and off.
Anti-Feedback
An anti-feedback function is included, virtually
eliminating howling.
Balanced Output
Alsoprovidesbalancedoutput,makingitpossible
for you to connect directly to PA systems.
Insert Jack Offers Greater Sound Cre-
ation Possibilities
An insertion jack specifically for external effects is
included with the AD-5, allowing you to use it in
conjunction with other effects devices.
New “Acoustic” Function
The AD-5 offers newly-developed acoustic pro-
cessing that enhances the sound from electronic
sourcessuchasanelectric-acousticguitar’spickup.
The resulting sound has the full-bodied richness
and warmth of that traditionally captured by mi-
crophones placed near an acoustic guitar.
Handles Both Piezo and Magnetic Pickups
The unit comes with separate dedicated jacks for
input from piezoelectric and magnetic pickups.
With the AD-5, you can mix the input of both
pickups.
High-Performance Preamplifier
TheAD-5offersanonboardpreamplifierequipped
withafour-band(includinganultra-highfrequency
“presence”band) equalizer.
This equalization really comes in handy when you
need to adjust the tone of the sound produced by a
pickup that has no tone controls of its own.
Copyright © 1997 BOSS CORPORATION
All rights reserved. No part of this publication may be reproduced in any form without the written
permission of BOSS CORPORATION.

5
IMPORTANT NOTES
In addition to the items listed under "USING THE
UNITSAFELY"onpage2,pleasereadandobserve
the following:
Power Supply
•Do not use this unit on the same power circuit with
any device that will generate line noise (such as an
electric motor or variable lighting system).
•The AC adaptor will begin to generate heat after long
hours of consecutive use. This is normal, and is not a
cause for concern.
•Before connecting this unit to other devices, turn off
thepower toall units.This willhelp preventmalfunc-
tions and/or damage to speakers or other devices.
Placement
•Using the unit near power amplifiers (or other equip-
ment containing large power transformers) may in-
ducehum. To alleviate theproblem, change theorien-
tation of this unit; or move it farther away from the
source of interference.
•This device may interfere with radio and television
reception.Donotusethisdeviceinthevicinityofsuch
receivers.
•Do not expose the unit to direct sunlight, place it near
devices that radiate heat, leave it inside an enclosed
vehicle, or otherwise subject it to temperature ex-
tremes.Excessiveheatcandeformordiscolortheunit.
Maintenance
•For everyday cleaning wipe the unit with a soft, dry
clothoronethathasbeenslightlydampenedwithwater.
To remove stubborn dirt, use a cloth impregnated with
a mild, non-abrasive detergent. Afterwards, be sure to
wipe the unit thoroughly with a soft, dry cloth.
•Never use benzene, thinners, alcohol or solvents of
any kind, to avoid the possibility of discoloration
and/or deformation.
Additional Precautions
•Usea reasonable amount of care whenusingtheunit's
buttons, sliders, or other controls; and when using its
jacks and connectors. Rough handling can lead to
malfunctions.
•Whenconnecting / disconnecting all cables, grasp the
connector itself—never pull on the cable. This way
youwillavoidcausingshorts,ordamagetothecable's
internal elements.
•To avoid disturbing your neighbors, try to keep the
unit's volume at reasonable levels (especially when it
is late at night).
•When you need to transport the unit, package it in the
box (including padding) that it came in, if possible.
Otherwise,you will needto use equivalent packaging
materials.
Contents
USING THE UNIT SAFELY............................ 2

Main Features ..................................................... 4
IMPORTANT NOTES...................................... 5
Panel Descriptions............................................. 6
Before Performing with the AD-5 .................. 7
Connections ........................................................ 7
Turning on the Power ....................................... 8
Adjusting the Input Level ................................ 8
Names of Things / What They Do .................. 9
INPUT LEVEL....................................................9
PREAMP ............................................................. 9
ANTI-FEEDBACK ...........................................10
ACOUSTIC ....................................................... 10
2x2 CHORUS .................................................... 11
REVERB.............................................................11
Other Functions ............................................... 12
EFFECTS BYPASS............................................12
INSERT FUNCTION ....................................... 12
REMOTE ...........................................................13
Appendix........................................................... 14
Troubleshooting............................................... 14
Block Diagram.................................................. 14
Setting Samples ................................................ 15
Specifications ................................................... 18

6
Panel Descriptions
EFFECTS BYPASS (page 12)
ACOUSTIC (page 10)
PREAMP
(page 9)
REVERB (page 11)
2x2 CHORUS (page 11)
OUTPUT Jacks (L,R) (Balanced) (page 7)
POWER Indicator
(page 8)
ANTI-FEEDBACK
(page 10)
PEAK Indicator
(page 8) INPUT LEVEL
(page 8,9)
INSERT Jack (page 12)
INPUT Jacks (PIEZO,MAGNETIC) (page 7)
REMOTE Jack (page 13)
AC Adaptor Jack (page 7)
BALANCED OUTPUT Switch (page 7)
POWER Switch (page 8)
OUTPUT Jacks (L(MONO),R) (1/4 inch phone) (page 7)

7
Before Performing with the AD-5
MTRMixer
Guitar Amplifier
(Chorus Remote)
Footswitch
(FS-5U: Optional)
(Reverb Remote)
Footswitch
(FS-5U: Optional)
(White)(Red)
Cord
(Roland PCS-31:
Optional)
Cord
(Roland PCS-31:
Optional)
AC Adaptor
(Including)
(White)(Red)
Electric
Acoustic Guitar External
Effects Device
MTRMixer
Connections
After connecting the AD-5 to your guitar and am-
plifier as shown below, connect the AC adaptor
that is included with the unit.
* To prevent malfunction and/or damage to speakers or other
devices,alwaysturndownthevolume,andturnoffthepower
on all devices before making any connections.
* Turn on the power on all connected equipment before you
turn up the volume on your amplifier.
* To output in monaural via the 1/4" phone outputs, connect
the cable to the OUTPUT L (MONO) jack.
* To output monaurally via the balanced outputs, switch the
BALANCED OUTPUT switch to MONO.
* The pin assignment for the XLR connectors is as shown
below. Before making any connections, make sure that this
pin assignment is compatible with that of all your other
devices.
121: GND
2: HOT
3: COLD
3

8
Adjusting the Input Level
The level of the output from a guitar can vary
greatly depending on the particular guitar pickup
used. You may be unable to enjoy the AD-5’s
features to the full if you use inappropriate levels.
Refer to the following, and adjust the Input Level
knob for the type of pickup being used (PIEZO or
MAGNETIC).
1,3
2
1. Press the EFFECTS BYPASS button and con-
firm that the EFFECTS BYPASS indicator has
lit. (The Bypass function is now active.)
2. Adjust the INPUT LEVEL knob for the input
jacktowhichyourguitarisconnecteduntilyou
have it so the PEAK indicator lights up only
briefly, at the moments the guitar is played
most strongly.
* If using both input jacks simultaneously, also adjust the
relative balance for the two inputs while adjusting each
input level.
3. When adjustment is complete, press the EF-
FECTSBYPASSbuttonagain,andtheEFFECTS
BYPASS indicator will go out.
* ThePEAKindicatorlightsupat3dBbelowclippinglevel
(when distortion begins to occur).
* After adjusting the input level, if the PEAK indicator
lights frequently when the guitar is played, lower the
preamp level (page 9).
Turning on the Power
Once the connections have been completed (page
7), turn on power to your various devices in the
orderspecified.Byturningondevicesinthewrong
order, you risk causing malfunction and/or dam-
age to speakers and other devices.
External Effects Device
AD-5
Output Equipments
(Guitar Amp or Other Device)
Afterswitching on the AD-5, youcan start playing
as soon as the Peak indicator has stopped flashing
on and off (after a few seconds).
* This unit is equipped with a protection circuit. A brief
interval (a few seconds) after power up is required before the
unit will operate normally.

9
Names of Things / What They Do
PREAMP
TheAD-5’spreamplifier(preamp)featuresafour-
bandEQ,includinganultra-highfrequency“pres-
ence” band.
LEVEL
Adjusts the preamp volume level. Turning the
knob clockwise increases the volume.
* IfthePEAKindicatorseemstolightratherfrequentlyeven
after adjusting the input level (page 8), lower this level.
BASS
Adjusts the low range. Turning the knob clock-
wise away from “0”increases the bass; turning
the knob counterclockwise decreases the bass
content.
MIDDLE
Adjusts the midrange. Turning the knob clock-
wise away from “0”causes the midrange to
becomemoreprevalent;turningtheknobcoun-
terclockwise decreases the midrange content.
TREBLE
Adjusts the high range. The more the knob is
moved clockwise away from “0,”the more
prevalent the upper range becomes; turning
theknobcounterclockwisedecreasestheupper
range content.
PRESENCE
Adjusts the ultra-high range. Turning the knob
clockwiseawayfrom“0”increasestheultra-high
range portions; turning the knob counterclock-
wise decreases the ultra-high range content.
+12dB BASS
MIDDLE
PRESENCE
TREBLE
-12dB
0dB
320Hz
500Hz1.2kHz 6.3kHz
INPUT LEVEL
Adjusts the overall input volume level. Input
from the two input jacks is mixed here.
PIEZO
Adjusts the volume of the PIEZO input.
MAGNETIC
Adjusts the volume of the MAGNETIC input.
(Phase Switch)
Selects the phase for the input from the MAG-
NETIC input jack. Use this to get the phase for
the input of both input jacks to work well to-
gether. Ordinarily, you will probably want to
keep it at NOR (Normal). However, if the tone
does not sound quite right when both inputs
are mixed—perhaps with a reduction in vol-
ume being experienced—try switching to INV
(Inverted).

10
ANTI-FEEDBACK
What anti-feedback does is reduce the howling
soundthatcan arise due to feedback between the
guitar and amplifier. The sound at frequencies
where howling occurs is compressed, thereby
suppressing the howl.
DEPTH
Adjusts the manner in which the anti-feedback
effect is applied. Turning the knob clockwise
suppresseshowlingmore;turningitcompletely
counterclockwise turns the effect off.
* Wheneversuchhowlingisnotaproblem,orattimessuch
as when using the AD-5 during recording, set this to the
“Off” position.
FREQ (Frequency)
Adjusts the frequency at which the anti-feed-
back effect is applied. Turning the knob clock-
wise raises this frequency.
When howling occurs, rotate the Depth knob
completely clockwise, adjust the Frequency
knobtofindtheposition thatreduces thehowl-
ing, then turn the Depth knob counterclock-
wise to the point just before howling again
begins to occur.
0dB
DEPTH
FREQ HL
ACOUSTIC
Withthis feature,youcanchangethe soundfrom
a pickup on an electric-acoustic guitar into a
richersound, similar to that obtained by a micro-
phone placed near a guitar.
BODY
This simulates the characteristic resonance in-
side the body of an acoustic guitar. The nature
of this resonance changes according to the con-
trol setting position, so determine your own
preferred setting to match the guitar you use.
Turn the knob completely counterclockwise
turns the effect off.
MIC DISTANCE
This simulates the distance between the micro-
phonecapturingthesoundofanacousticguitar
and the guitar itself. Turning the control clock-
wise creates a sound obtained by placing the
microphone at a greater distance; turning it
completely counterclockwise turns the effect
off.

11
2x2 CHORUS
Chorus is an effect that gives sounds more of a
feeling of spaciousness, and makes them sound
fatter.
Thechorususedinthe AD-5 is a separated stereo
type for acoustic guitars. Chorus can be applied
to both bass and treble ranges, on both left and
right channels.
Turning the knob clockwise deepens the chorus
effect;turningitcompletelycounterclockwiseturns
the effect off. Additionally, by using a footswitch
connectedto the Remote jack, you can temporarily
turn the effect on or off (page 13). The Chorus
indicator lights up when chorus is on.
CHORUS
High Pass Filter
INPUT L
INPUT R
OUTPUT L
OUTPUT R
Low Pass Filter CHORUS
CHORUS
High Pass Filter
Low Pass Filter CHORUS
REVERB
Reverberationisthesoundreflectedbywallsand
floors, which overlaps and blends. Reverb
changes according to factors such as the size and
shape of the space (such as a room or hall), the
differences in the material of the surface (a wall,
for example) that is reflecting the sound, and so
on.
With the AD-5, these elements are tailored to the
acoustic guitar and digitally processed to simu-
late these sounds.
Turning the knob clockwise deepens the reverb
effect;turningitcompletelycounterclockwiseturns
the effect off. Additionally, by using a footswitch
connectedto the Remote jack, you can temporarily
turn the effect on or off (page 13). The Reverb
indicator lights while reverb is on.

12
Other Functions
EFFECTS BYPASS
WhenusingtheEffectsBypassfunction,youswitch
to “effects bypass”state, whereby the sound right
after the input level stage is routed directly to the
output.
Pressing the EFFECTS BYPASS button turns the
Effects Bypass on and off. The EFFECTS BYPASS
indicator comes on when Effects Bypass is on.
INSERT FUNCTION
When an external effect (such as ones in the BOSS
CompactSeries)isconnectedtotheInsertjack,you
canalsoaddthiseffectwhencreatingsounds.With
anexternaleffectconnectedviatheInsertjackwith
a connector cable (Roland PCS-31; optional), the
soundthatismixedbymeansoftheINPUTLEVEL
knobs is sent out through the Insert jack (SEND),
and the sound returned after effects have been
applied arrives back at the Insert jack (RETURN).
INSERT
TIP:SEND RING:RETURN
INPUTOUTPUT
(Red) (White)
Cord
(Roland PCS-31: Optional)
External Effects Device
* IfEFFECTS BYPASS isturned on whilean external effectis
plugged into the Insert jack, the sound obtained after the
external effect has been applied to it will be output from the
Output jacks.

13
REMOTE
With a footswitch (FS-5U; optional) connected to
the REMOTE jack, you can temporarily turn the
effect on or off.
* If the knobs are turned while either Chorus or Reverb is
temporarily turned on or off, or if the power is turned off and
then on again, original settings and status are recalled.
By connecting two footswitches to the REMOTE
jackbymeansofaconnectorcable(RolandPCS-31;
optional),youcan use the two footswitches to turn
on and off Chorus and Reverb.
REMOTE
TIP:CHORUS RING:REVERB
REVERB
ON / OFF CHORUS
ON / OFF
(Red)
Cord
(Roland PCS-31: Optional)
(White)
Witha monocableconnected to theREMOTEjack,
andusing onlyonefootswitch, youcanswitch on/
off only the Chorus effect.
REMOTE
TIP:CHORUS RING:REVERB
CHORUS
ON / OFF
* When a footswitch (FS-5U; optional) is connected to the
REMOTE jack, set the polarity switch in the following
manner:
Polarity Switch

14
Appendix
Troubleshooting
If there is no sound, or if you think that the AD-5
maybe malfunctioning,pleasefirst gothroughthe
following checkpoints. If the problem persists,
please contact your dealer or the nearest Roland
Service Station.
No Sound/Low Sound Level
•Make sure that other equipment is properly
connected.
•Check to see that volume levels of other con-
nected equipment, such as amplifiers, mixers,
andeffectsdevicesarenotturnedtoofardown.
•Confirm that volume control knobs (Preamp,
Input Level) are not turned all the way down.
Sound is Distorted
(The PEAK indicator lights frequentry.)
•Haveyou adjusted theInputLevel?Try adjust-
ing the Input Level (page 8).
•Is the preamp level turned up too high? Adjust
the preamp levels (page 9).
Block Diagram
(Phone type)
(Balanced type)
INPUT
PIEZO
MAGNETIC
INPUT
LEVEL
INPUT
LEVEL
INSERT
ANTI-
FEEDBACK
PREAMP
CHORUS
REVERB
L(MONO)
R
L
R
ACOUSTIC
OUTPUT
OUTPUT
EFFECTS
BYPASS

15
Setting Samples
<< Steel Strings / Flat Back >>
Fusion
Bossa Nova
Blues
Ballade

16
<< Steel Strings / Round Back >>
Fusion
Bossa Nova
Blues
Ballade

17
<< Nylon Strings >>
Fusion
Bossa Nova
Blues
Ballade

18
Specifications
AD-5: ACOUSTIC INSTRUMENT PROCESSOR
AD Conversion
21 bit AF Method
DA Conversion
20 bit Input,
4 Times Oversampling Digital Filter + ∆∑Method
Sampling Frequency
44.1 kHz
Nominal Input Level
INPUT: -10 dBu
INSERT RETURN: -10 dBu
Input Impedance
INPUT (PIEZO): 4.7 MΩ
INPUT (
MAGNETIC
): 1 MΩ
INSERT (RETURN): 100 kΩ
Nominal Output Level
OUTPUT: -10 dBu
OUTPUT (XLR): -10 dBu into 600 Ω
INSERT (SEND): -10 dBu
Output Impedance
OUTPUT: 2 kΩ
OUTPUT (XLR): 600 Ω
INSERT (SEND): 1 kΩ
Controls
[INPUT LEVEL]
Phase Switch
MAGNETIC Knob
PIEZO Knob
[PREAMP]
LEVEL Knob
BASS Knob
MIDDLE Knob
TREBLE Knob
PRESENCE Knob
[ANTI-FEEDBACK]
DEPTH Knob
FREQUENCY Knob
[ACOUSTIC]
BODY Knob
MIC DISTANCE Knob
2x2 CHORUS Knob
REVERB Knob
EFFECTS BYPASS Button
POWER Switch
BALANCED OUTPUT Switch
Indicators
POWER
PEAK
EFFECTS BYPASS
2x2 CHORUS
REVERB
Connectors
INPUT Jacks (PIEZO, MAGNETIC)
INSERT Jack (1/4 inch TRS Phone Type)
OUTPUT Jacks L(MONO), R
OUTPUT Connectors L, R (XLR-3-32 Type)
REMOTE Jack
AC Adaptor Jack
Power Supply
DC 9 V (Roland ACI or ACB-Series)
Current Draw
300 mA
Dimensions
150 (W) x 155 (D) x 65 (H) mm
5-15/16 (W) x 6-1/8 (D) x 2-9/16 (H) inches
Weight
1.0 kg (excluding the AC Adaptor)
2 lbs 4 oz
Accessories
Owner’s Manual
AC Adaptor (Roland ACI or ACB-Series)
Roland Service
Options
Foot Switch: FS-5U
Cord: Roland PCS-31 (1/4 inch TRS Phone Type
–1/4 inch Phone Type x2)
* 0 dBu = 0.775 Vrms
* In the interest of product improvement, the specifications
and/or appearance of this unit are subject to change without
prior notice.
About the AF (Adaptive Focus) Method
This newly developed AD conversion process virtu-
ally eliminates all quantization noise, and dramati-
cally improves overall dynamic range. It accom-
plishes this by using two types of AD converters
(with different input levels) to convert audio signals
into data in combination with a unique DSP method
for creating a composite of the separately obtained

19
This product complies with the requirements of European Directive 89/336/EEC.
For EU Countries
For Canada
This Class B digital apparatus meets all requirements of the Canadian Interference-Causing Equipment Regulations.
Cet appareil numérique de la classe B respecte toutes les exigences du Règlement sur le matériel brouilleur du Canada.
NOTICE
AVIS
For the USA
FEDERAL COMMUNICATIONS COMMISSION
RADIO FREQUENCY INTERFERENCE STATEMENT
This equipment has been tested and found to comply with the limits for a Class B digital device, pursuant to Part 15 of the
FCC Rules. These limits are designed to provide reasonable protection against harmful interference in a residential
installation. This equipment generates, uses, and can radiate radio frequency energy and, if not installed and used in
accordance with the instructions, may cause harmful interference to radio communications. However, there is no guarantee
that interference will not occur in a particular installation. If this equipment does cause harmful interference to radio or
television reception, which can be determined by turning the equipment off and on, the user is encouraged to try to correct the
interference by one or more of the following measures:
– Reorient or relocate the receiving antenna.
– Increase the separation between the equipment and receiver.
– Connect the equipment into an outlet on a circuit different from that to which the receiver is connected.
– Consult the dealer or an experienced radio/TV technician for help.
This device complies with Part 15 of the FCC Rules. Operation is subject to the following two conditions:
(1) This device may not cause harmful interference, and
(2) This device must accept any interference received, including interference that may cause undesired operation.
Unauthorized changes or modification to this system can void the users authority to operate this equipment.
This equipment requires shielded interface cables in order to meet FCC class B Limit.

Owner's Manual
01230389 '02-3-B2-32N
Other manuals for AD-5
1
Table of contents
Other BOSSCO Computer Hardware manuals

BOSSCO
BOSSCO GT-1B User manual

BOSSCO
BOSSCO AD-8 User manual

BOSSCO
BOSSCO RRV-10 User manual

BOSSCO
BOSSCO GX-700 User manual

BOSSCO
BOSSCO VE-5 Setup guide

BOSSCO
BOSSCO GT-1000 User manual

BOSSCO
BOSSCO AD-5 User manual

BOSSCO
BOSSCO GT-10B User manual

BOSSCO
BOSSCO Chorus Ensemble CE-20 User manual

BOSSCO
BOSSCO Vocal Performer VE-20 User manual
Popular Computer Hardware manuals by other brands

Alphacool
Alphacool Eisbecher All in One 250 mm instruction manual

Huananzhi
Huananzhi X79 DUAL-16D user manual

ekwb
ekwb EK-PRO GPU WB AMP-Trinity RTX 4090 Ni+Inox user guide

National Instruments Corporation
National Instruments Corporation SC-207 Series user manual

Apogee
Apogee X-HD user guide

ZALMAN
ZALMAN CNPS9900 Max user manual