BOSSCO OD-3 User manual
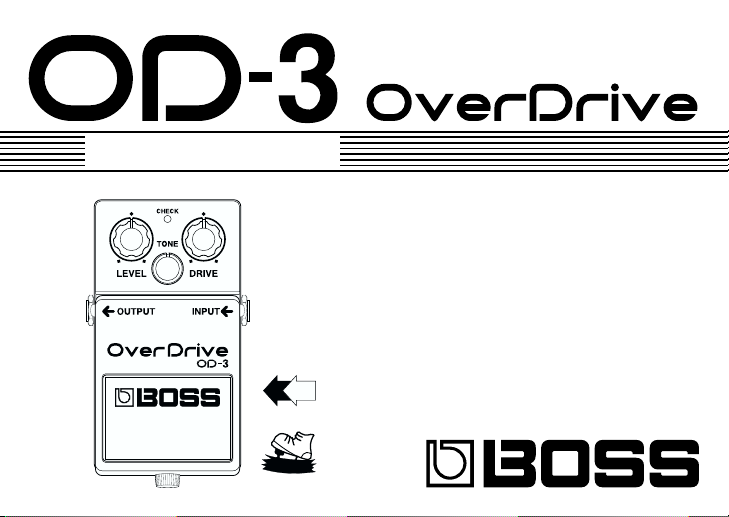
1
Owner's Manual
DCAC
AC & BATTERY
POWERED
FET

2
Thank you, and congratulations on your choice of BOSS OD-3 OverDrive.
Before using this unit, carefully read the sections entitled: “USING THE UNIT SAFELY”
and“IMPORTANTNOTES”(page16;page4).Thesesectionsprovideimportantinforma-
tionconcerningtheproperoperationoftheunit.Additionally,inordertofeelassuredthat
you have gained a good grasp of every feature provided by your new unit, this manual
should be read in its entirety. The manual should be saved and kept on hand as a
convenient reference.
Copyright © 1997 BOSS CORPORATION
Allrightsreserved.Nopartofthispublicationmaybereproducedinanyformwithoutthe
written permission of BOSS CORPORATION.

3
FEATURES
• Equipped with a newly developed "Dual-Stage overdrive circuit."
• Offers a long sustain that is even more powerful than previous overdrive units.
• Createsatrulynaturaloverdrivesoundthatoffersjusttherightamountofcompression.

4
IMPORTANT NOTES
Inaddition to theitemslisted under “USINGTHEUNIT SAFELY” onpage16, please read
and observe the following:
• Before connecting this unit to other devices,
turn off the power to all units. This will help
preventmalfunctionsand/ordamagetospeak-
ers or other devices.
Placement
• Using the unit near power amplifiers (or other
equipmentcontaininglargepower transform-
ers) may induce hum. To alleviate the prob-
lem, change the orientation of this unit; or
move it farther away from the source of inter-
ference.
• Donotexposetheunittodirectsunlight,place
itneardevicesthat radiateheat,leaveitinside
anenclosedvehicle,orotherwise subject it to
temperature extremes. Excessive heat can
deform or discolor the unit.
Power Supply
• Donotuse this unitonthesamepower circuit
with any device that will generate line noise
(such as an electric motor or variable lighting
system).
• The AC adaptor will begin to generate heat
after long hours of consecutive use. This is
normal, and is not a cause for concern.
• Batteries should always be installed or re-
placed before connecting any other devices.
Thisway,youcanpreventmalfunctionand/or
damage to speakers or other devices.
• Abattery was installed in theunit before it left
the factory. The life of this battery may be
limited, however, since its primary purpose
was to enable testing.

5
Maintenance
• For everyday cleaning wipe the unit with a
soft, dry cloth or one that has been slightly
dampened with water. To remove stubborn
dirt,useaclothimpregnatedwithamild,non-
abrasivedetergent.Afterwards,besuretowipe
the unit thoroughly with a soft, dry cloth.
• Never use benzene, thinners, alcohol or sol-
vents of any kind, to avoid the possibility of
discoloration and/or deformation.
Additional Precautions
• Use a reasonable amount of care when using
the unit's buttons, sliders, or other controls;
and when using its jacks and connectors.
Rough handling can lead to malfunctions.
• When connecting / disconnecting all cables,
grasp the connector itself—never pull on the
cable.Thisway you willavoidcausingshorts,
or damage to the cable's internal elements.
• Toavoiddisturbingyourneighbors,trytokeep
the unit's volume at reasonable levels. You
may prefer to use headphones, so you do not
needtobeconcernedaboutthosearoundyou
(especially when it is late at night).
• When you need to transport the unit, package
it in the box (including padding) that it came
in,ifpossible.Otherwise,youwillneedtouse
equivalent packaging materials.

6
PANEL DESCRIPTIONS 1. AC Adaptor Jack
Acceptsconnection of an AC Adaptor (op-
tionally available BOSS PSA-Series). By
usinganACAdaptor,youcanplaywithout
being concerned about how much battery
power you have left.
* If there are batteries in the unit while an AC
adaptor is being used, normal operation will
continue should the line voltage be inter-
rupted (power blackout or power cord dis-
connection).
* Ifyou are going touse an AC adaptor,be sure
to use the specified unit (BOSS PSA-Series).
Use of any other adaptor may result in dam-
age, malfunction or electric shock.
Also, if you are not going to be using it for an
extended period of time, disconnect the AC
adaptor from the AC outlet.

7
2. CHECK Indicator
This indicator shows whether an effect is
ON/OFF, and also doubles as the Battery
Check indicator.
The indicator lights when an effect is ON.
Ifthisindicatorgoesdimornolongerlights
while an effect is ON, the battery is near
exhaustion and should be replaced imme-
diately.
3. OUTPUT Jack
The output jack is used to connect the unit
to an amplifier or another device.
4. Pedal Switch
This switch turns the effects ON/OFF.
5. Thumbscrew
This thumbscrew is loosened to open the
pedal, allowing battery replacement. For
instructions on how to replace the battery,
please refer to “CHANGING THE BAT-
TERY (page 12).”
6. INPUT Jack
This jack accepts input signals (coming
from a guitar, some other musical instru-
ment, or another effects unit).
* The INPUT jack also serves as the power
switch.Poweristurnedonwheneveraplugis
insertedintotheINPUTjack,andisturnedoff
when the plug is disconnected. When not
using the unit, you should disconnect any
cord connected to the INPUT jack.

8
LEVEL Knob
This knob adjusts the level of the effect
sounds.
DRIVE Knob
This adjusts the amount of overdrive.
Rotating it clockwise increases the effect,
whereascounterclockwiserotationreduces
the effect.
TONE Knob
This controls the tone. Rotating the knob
counterclockwise will make the sound
milder, while rotating it clockwise will
make the sound sharper.
LEVEL Knob
TONE Knob
DRIVE Knob

9
MAKING THE CONNECTIONS
AC Adaptor
(PSA-Series; Optional)
Electric Guitar
Amplifier
OUT DC 9V / 200 mA
* InsertingaplugintotheInputJackwillautomati-
cally switch the unit on.
* Before connecting or disconnecting any patch
cords, be sure all the volume controls in your
system are set to minimum. This will help pre-
vent any damage to system components.
* Topreventmalfunctionand/ordamagetospeak-
ers or other devices, always turn down the
volume, and turn off the power on all devices
before making any connections.
* Always make sure to have the volume level
turned down before switching on power. Even
with the volume all the way down, you may still
hearsomesoundwhenthepowerisswitchedon,
but this is normal, and does not indicate a
malfunction.
* When operating on battery power only, the
unit's indicator will become dim when battery
power gets too low. Replace the battery as soon
as possible.

10
OPERATING THE UNIT
1 When you have made the necessary
connections, set the knobs as shown in
the illustration.
2 Depress the pedal switch to turn the
effecton.(MakesuretheCHECKindica-
tor lights.)
3 Adjustthe depth of the Overdrive effect
using the DRIVE knob.

11
5 Adjust the LEVEL knob so that the level
ofthesoundobtained whentheeffect is
on is equal to that obtained when it is
off.
4 Adjust the tone using the TONE knob.

12
CHANGING THE BATTERY
When the indicator goes dim or no longer
lightswhileaneffectison,itmeansthatthe
battery is nearly dead and must be re-
placed.
Replace the battery following the steps
below.
1 Loosen the thumbscrew at the front of
thepedal, thenlift thepedal upwards to
open the unit.
* The thumbscrew can be left in the pedal
while changing the battery.
2 Removetheold batteryfrom thebattery
housing,andremovethesnapcordcon-
nected to it.
3 Connect the snap cord to the new bat-
tery, and place the battery inside the
battery housing.
* Be sure to carefully observe the battery's
polarity (+ versus -).
4 Slip the coil spring onto the spring base
on the back of the pedal, then close the
pedal.
* Carefully avoid getting the snap cord
caught in the coil spring.
5 Finally, insert the thumbscrew into the
guide bush hole and fasten it securely.
Thumbscrew
Pedal
Spring Base
Coil Spring
Guide
Bush
Hole
Battery
Housing
Battery Snap Cord
Battery Snap
9V Battery

13
SETTING EXAMPLES
OD-3 Overdrive Sound Hard Overdrive Sound
Booster

14
SPECIFICATIONS
OD-3: OverDrive
Nominal Input Level .................... -20 dBu
Input Impedance .......................... 1 MΩ
Nominal Output Level ................. -20 dBu
Output Impedance ....................... 1 kΩ
Equivalent Input Noise Level........ -115 dBu (IHF-A Weighted, Typ.)
Controls ....................................... Pedal Switch, DRIVE Knob, LEVEL Knob, TONE Knob
Indicator ...................................... CHECK Indicator (Serves also as battery check indicator)
Connectors .................................. INPUT Jack, OUTPUT Jack, AC Adaptor Jack (DC 9 V)
Power Supply............................... DC 9 V: Dry Battery (6F22/ 9 V)
AC Adaptor (PSA Series: Optional)
Current Draw ............................... 9 mA (DC 9 V)
* Expected battery life under continuous use:
Carbon: 30 hours
These figures will vary depending on the actual conditions
of use.

15
Dimensions.................................. 73 (W) x 129 (D) x 59 (H) mm
2-7/8 (W) x 5-1/8 (D) x 2-3/8 (H) inches
Weight ......................................... 410 g/ 15 oz (including battery)
Accessories .................................. Owner’s Manual, Dry Battery; 6F22/ 9 V(Carbon),
Leaflet (“USING THE UNIT SAFELY,” “IMPORTANT
NOTES,” and “Information”)
Options........................................ AC Adaptor PSA-Series
* 0 dBu = 0.775 Vrms
* In the interest of product improvement, the specifications and/or appearance of this unit are
subject to change without prior notice.

16
USING THE UNIT SAFELY
ALWAYS OBSERVE THE FOLLOWING
Used for instructions intended to alert
the user to the risk of injury or material
damage should the unit be used
improperly.
* Material damage refers to damage or
other adverse effects caused with
respect to the home and all its
furnishings, as well to domestic
animals or pets.
Used for instructions intended to alert
the user to the risk of death or severe
injury should the unit be used
improperly.
The
●
symbol alerts the user to things that must be
carried out. The specific thing that must be done is
indicated by the design contained within the circle. In
the case of the symbol at left, it means that the power-
cord plug must be unplugged from the outlet.
WARNING
CAUTION
The symbol alerts the user to important instructions
or warnings.The specific meaning of the symbol is
determined by the design contained within the
triangle. In the case of the symbol at left, it is used for
general cautions, warnings, or alerts to danger.
The symbol alerts the user to items that must never
be carried out (are forbidden). The specific thing that
must not be done is indicated by the design contained
within the circle. In the case of the symbol at left, it
means that the unit must never be disassembled.

17
• Before using this unit, make sure to
read the instructions below, and the
Owner's Manual.
..........................................................................................
• Do not open (or modify in any way)
the unit or its AC adaptor.
..........................................................................................
• Do not attempt to repair the unit, or
replace parts within it (except when
this manual provides specific instruc-
tions directing you to do so). Refer all
servicing to your dealer, or qualified
Roland service personnel.
..........................................................................................
• Never use or store the unit in places
that are:
• Subject to temperature extremes
(e.g., direct sunlight in an enclosed
vehicle, near a heating duct, on top
of heat-generating equipment); or
are
• Damp (e.g., baths, washrooms, on
wet floors); or are
• Humid; or are
• Dusty; or are
• Subject to high levels of vibration.
..........................................................................................
• Make sure you always have the unit
placed so it is level and sure to
remain stable. Never place it on
stands that could wobble, or on
inclined surfaces.
..........................................................................................
WARNING

18
•Use only the specified AC adaptor
(PSA-Series), and make sure the line
voltage at the installation matches
the input voltage specified on the AC
adaptor's body. Other AC adaptors
may use a different polarity, or be
designed for a different voltage, so
their use could result in damage,
malfunction, or electric shock.
..........................................................................................
•Avoid damaging the power cord. Do
not bend it excessively, step on it,
place heavy objects on it, etc. A dam-
aged cord can easily become a shock
or fire hazard. Never use a power
cord after it has been damaged.
..........................................................................................
•This unit, either alone or in combina-
tion with an amplifier and head-
phones or speakers, may be capable
of producing sound levels that could
cause permanent hearing loss. Do
not operate for a long period of time
at a high volume level, or at a level
that is uncomfortable. If you experi-
ence any hearing loss or ringing in
the ears, you should immediately
stop using the unit, and consult an
audiologist.
..........................................................................................
•Do not allow any objects (e.g., flam-
mable material, coins, pins); or liq-
uids of any kind (water, soft drinks,
etc.) to penetrate the unit.
..........................................................................................

19
•Immediately turn the power off,
remove the AC adaptor from the out-
let, and request servicing by your
dealer or qualified Roland service
personnel when:
•The AC adaptor or the power-sup-
ply cord has been damaged; or
•Objects have fallen into, or liquid
has been spilled onto the unit; or
•The unit has been exposed to rain
(or otherwise has become wet); or
•The unit does not appear to operate
normally or exhibits a marked
change in performance.
..........................................................................................
•In households with small children, an
adult should provide supervision
until the child is capable of following
all the rules essential for the safe
operation of the unit.
..........................................................................................
•Protect the unit from strong impact.
(Do not drop it!)
..........................................................................................
•Do not force the unit's power-supply
cord to share an outlet with an unrea-
sonable number of other devices. Be
especially careful when using exten-
sion cords—the total power used by
all devices you have connected to the
extension cord's outlet must never
exceed the power rating (watts/
amperes) for the extension cord.
Excessive loads can cause the insula-
tion on the cord to heat up and even-
tually melt through.
..........................................................................................
•Before using the unit in a foreign
country, consult with your dealer, or
qualified Roland service personnel.
..........................................................................................

20
•Batteries must never be recharged,
heated, taken apart, or thrown into
fire or water.
..........................................................................................
•The unit and the AC adaptor should
be located so their location or posi-
tion does not interfere with their
proper ventilation.
..........................................................................................
•Always grasp only the plug or the
body of the AC adaptor when plug-
ging into, or unplugging from, an
outlet or this unit.
..........................................................................................
•Whenever the unit is to remain
unused for an extended period of
time, disconnect the AC adaptor.
..........................................................................................
CAUTION
Table of contents
Other BOSSCO Music Pedal manuals

BOSSCO
BOSSCO SYB-3 User manual

BOSSCO
BOSSCO Foot Volume FV-500H User manual

BOSSCO
BOSSCO ME-33 User manual

BOSSCO
BOSSCO PH-2 Operating and maintenance manual

BOSSCO
BOSSCO RC-500 User manual

BOSSCO
BOSSCO RC-10R User manual

BOSSCO
BOSSCO MD500 User manual

BOSSCO
BOSSCO BF-2 Flanger User manual

BOSSCO
BOSSCO BCB-60 User manual

BOSSCO
BOSSCO CE-5 User manual

BOSSCO
BOSSCO GT-10 Setup guide

BOSSCO
BOSSCO VE-2 User manual

BOSSCO
BOSSCO FDR-1 User manual

BOSSCO
BOSSCO OC-3 Super Octave User manual

BOSSCO
BOSSCO RC-300 Loop Station User manual

BOSSCO
BOSSCO RE-2 User manual

BOSSCO
BOSSCO LMB-3 User manual

BOSSCO
BOSSCO tremolo tr-2 User manual

BOSSCO
BOSSCO FZ-3 Fuzz User manual

BOSSCO
BOSSCO DD-2 User manual