manuals.online logo
Brands
  1. Home
  2. •
  3. Brands
  4. •
  5. Electro-Harmonix
  6. •
  7. Music Pedal
  8. •
  9. Electro-Harmonix NEXT STEP Series User manual

Electro-Harmonix NEXT STEP Series User manual

- WARRANTY INFORMATION -
Please register online at http://www.ehx.com/product-registration or complete and return the enclosed
warranty card within 10 days of purchase. Electro-Harmonix will repair or replace, at its discretion, a product
that fails to operate due to defects in materials or wor manship for a period of one year from date of
purchase. This applies only to original purchasers who have bought their product from an authorized Electro-
Harmonix retailer. Repaired or replaced units will then be warranted for the unexpired portion of the original
warranty term.
If you should need to return your unit for service within the warranty period, please contact the appropriate
office listed below. Customers outside the regions listed below, please contact EHX Customer Service for
information on warranty repairs at info@ehx.com or +1-718-937-8300. USA and Canadian customers: please
obtain a Return Authorization Number (RA#) from EHX Customer Service before returning your product.
Include with your returned unit: a written description of the problem as well as your name, address,
telephone number, e-mail address, and RA#; and a copy of your receipt clearly showing the purchase date.
United States & Canada
EHX CUSTOMER SERVICE
ELECTRO-HARMONIX
c/o NEW SENSOR CORP.
55-01 2ND STREET
LONG ISLAND CITY, NY 11101
Tel: 718-937-8300
Email: [email protected]
Euro e
JOHN WILLIAMS
ELECTRO-HARMONIX UK
13 CWMDONKIN TERRACE
SWANSEA SA2 0RQ
UNITED KINGDOM
Tel: +44 179 247 3258
Email: electroharmonixu @virginmedia.com
This warranty gives a purchaser specific legal rights. A purchaser may have even greater rights depending
upon the laws of the jurisdiction within which the product was purchased.
To hear demos on all EHX pedals visit us on the web at www.ehx.com
Email us at [email protected]
- FCC COMPLIANCE -
This device complies with part 15 of the FCC Rules. Operation is subject to the following two conditions: (1)
This device may not cause harmful interference, and (2) this device must accept any interference received,
including interference that may cause undesired operation. If the device is not installed and used in
accordance with the instructions, it may cause harmful interference to radio communications and void the
user's authority to guarantee the equipment.
Note:
This equipment has been tested and found to comply with the limits for a Class B digital device,
pursuant to part 15 of the FCC Rules. These limits are designed to provide reasonable protection against
harmful interference in a residential installation. This equipment generates, uses and can radiate radio
frequency energy and, if not installed and used in accordance with the instructions, may cause harmful
interference to radio communications. However, there is no guarantee that interference will not occur in a
particular installation. If this equipment does cause harmful interference to radio or television reception, which
can be determined by turning the equipment off and on, the user is encouraged to try to correct the
interference by one or more of the following measures:
•
Reorient or relocate the receiving antenna.
•
Increase the separation between the equipment and receiver.
•
Connect the equipment into an outlet on a circuit different from that to which the receiver is
connected.
•
Consult the dealer or an experienced radio/TV technician for help.
Modifications not expressly approved by the manufacturer could void the user's authority to operate the
equipment under FCC rules.
PAN
PAN / BLEND / STEREO VOLUME PEDAL
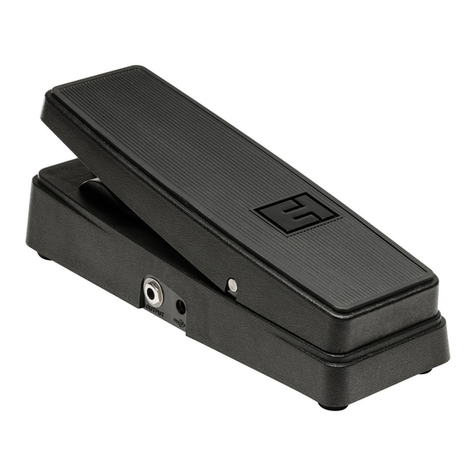
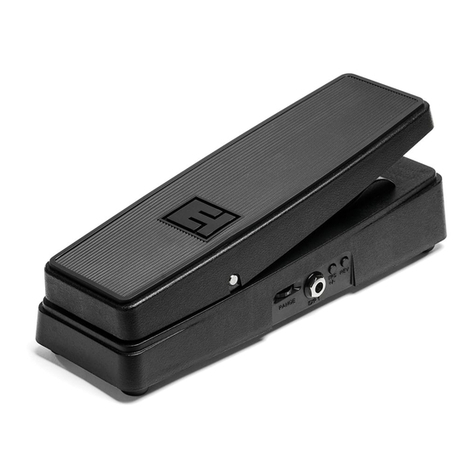
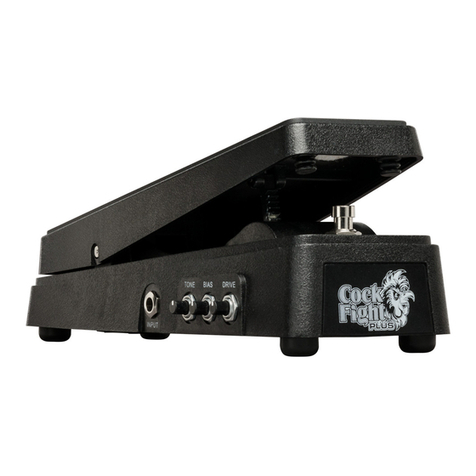
Congratulations on your purchase of the Electro-Harmonix PAN pedal from our
ground-brea ing NEXT STEP series! The PAN pedal has no moving parts: it does not
use a potentiometer, optics or magnetism to sweep the pan controls. The result is a
responsive pedal that allows precise control over the stereo imaging of your musical
instrument(s). The PAN pedal can be used to pan one input to two outputs, blend
two inputs to one output or as a mono or stereo volume pedal.
GETTING STARTED
Plug your instrument into the LEFT IN jac ; connect LEFT OUT to one amp and
RIGHT OUT to another amp. Within seconds the EHX logo in the center of the pedal
will light. Your PAN pedal is ready for use! As long as a plug is inserted into the LEFT
IN jac , a drain is placed on the 9V battery inside the PAN pedal. We recommend you
unplug the LEFT IN jac when the PAN pedal is not in use to extend battery life.
CALIBRATION
To ensure the PAN pedal responds to its full sweep range, it may be necessary to
calibrate the sweep of the PAN pedal when it is used on a different surface since its
last use. It is particularly important to calibrate if the PAN pedal is used on a slanted
surface. We recommend calibrating the PAN pedal during its first use.
CALIBRATION PROCEDURE
1. Place the pedal on the surface where it will be used.
2. Ensure the PAN pedal is sitting flat on the surface then press and release the
CALIBRATE button once; the EHX logo begins to blin indicating the toe
position has been saved.
3. While the EHX logo continues to blin , roc the pedal all the way bac to the
extreme heel position and hold it there.
4. Press and release the CALIBRATE button once more.
5. The EHX logo will stop blin ing to indicate that the heel position has been
saved. The calibration procedure is complete.
If you accidentally press the CALIBRATE button and the EHX logo blin s, do not press
CALIBRATE again. After approximately 7 seconds, the PAN pedal will stop blin ing
and ignore the button press.
ROUTING MODES – HOW TO CONNECT TO YOUR PAN PEDAL
The PAN pedal can be used in one of four routing modes. The routing mode changes
depending on which input and output jac s have plugs inserted.
1) MONO VOLUME PEDAL (mono in/mono out): Plug into LEFT IN and LEFT
OUT jac s only. The PAN pedal acts li e a straight-forward volume pedal in
this mode. As the pedal moves from the heel to toe position, the volume at
the LEFT OUT jac increases. Bypass Mode: LEFT IN connects to LEFT OUT.
2) BLEND PEDAL (stereo in/mono out): Plug into the LEFT and RIGHT IN
jac s and the LEFT OUT jac only. In Blend mode, the PAN pedal acts li e a
wet/dry control, mixing the two inputs together to one mono output. As you
move the pedal from the heel to toe position, the volume of the LEFT IN
signal increases while the volume of the RIGHT IN signal decreases. The
RIGHT IN signal is loudest in the heel position while the LEFT IN signal is
loudest in the toe position. In the middle of the pedal’s sweep range, each
input will be at equal volume at the LEFT OUT jac . Bypass Mode: LEFT IN
connects to LEFT OUT. RIGHT IN is muted.
3) PAN PEDAL (mono in/stereo out): Plug into the LEFT IN jac and both the
LEFT and RIGHT OUT jac s. In Pan mode, the LEFT input signal will sweep
between the LEFT and RIGHT OUT jac s. In the heel position, the LEFT IN
will come out the RIGHT OUT jac only. In the toe position, the LEFT IN
comes out the LEFT OUT jac only. When in the middle of the pedal’s sweep
range, each output will be at equal volume. Bypass Mode: LEFT IN connects
to both LEFT OUT and RIGHT OUT at an equal volume.
4) STEREO VOLUME PEDAL (stereo in/stereo out): Plug into all four audio
jac s. The LEFT IN will come out the LEFT OUT only. The RIGHT IN will
come out the RIGHT OUT only. As the pedal moves from the heel to toe
position, the volume of both outputs increases. Bypass Mode: LEFT IN
connects to LEFT OUT. RIGHT IN connects to RIGHT OUT.
ENTERING/EXITING BYPASS
Toggle between buffered by ass and effect mode by tipping the PAN pedal
forward, in the toe direction, past the flat position of the PAN pedal. You do not need
to tip the PAN pedal all the way forward; 25% of the total forward travel will do it.
The PAN pedal needs to return to its flat position before you can toggle between
bypass and effect mode again.
When the PAN pedal is in effect mode, the EHX logo in the center of the pedal will
light up. In bypass mode, the logo does not light.
POWER
Plugging into the LEFT IN jac activates power from the internal 9 Volt battery. The
LEFT IN plug should be removed when the unit is not in use to avoid running down
the battery. If an AC Adapter is used, the PAN pedal will be powered up as long as
the AC Adapter is correctly plugged in.
The PAN’s power jac is located on the same side as the OUT jac s. A 9 Volt AC
Adapter capable of delivering at least 50mA of current at 9VDC is required to power
the PAN pedal. The inner ring of the 9 Volt AC Adapter must be negative, the outer
ring positive. The optional 9V power supply from Electro-Harmonix is 9.6DC-200BI
(same as used by Boss® & Ibanez®) 9.6 Volts DC/200mA. The unit’s battery may be
left in or ta en out when the AC Adapter is in use. The actual current draw of the
PAN PEDAL is 24 mA.
CHANGING THE BATTERY
1. Locate the battery door at the front of the PAN, under the toe area of the
top plate.
2. Remove the large blac screw that holds the battery door to the case, most
coins or larger slotted screwdrivers can be used to remove this screw.
3. Connect your new 9V battery to the wired battery connector.
4. Insert the 9V battery into the battery holder clip on the battery door so that
the wired connector is on the same side of the hole in the battery door.
5. Place the battery door bac into its window in the case of the PAN pedal and
re-install the screw.
NOTES AND SPECIFICATIONS
•PAN pedal has buffered bypass.
•The input impedance presented at each IN Jac is 2MΩ.
•The output impedance at each OUTPUT Jac is 1 Ω.
•The current draw of the PAN PEDAL is 24 mA.

This manual suits for next models

1

Other Electro-Harmonix Music Pedal manuals

Electro-Harmonix MICRO Q-TRON User manual

Electro-Harmonix

Electro-Harmonix MICRO Q-TRON User manual

Electro-Harmonix TONE TATTOO User manual

Electro-Harmonix

Electro-Harmonix TONE TATTOO User manual

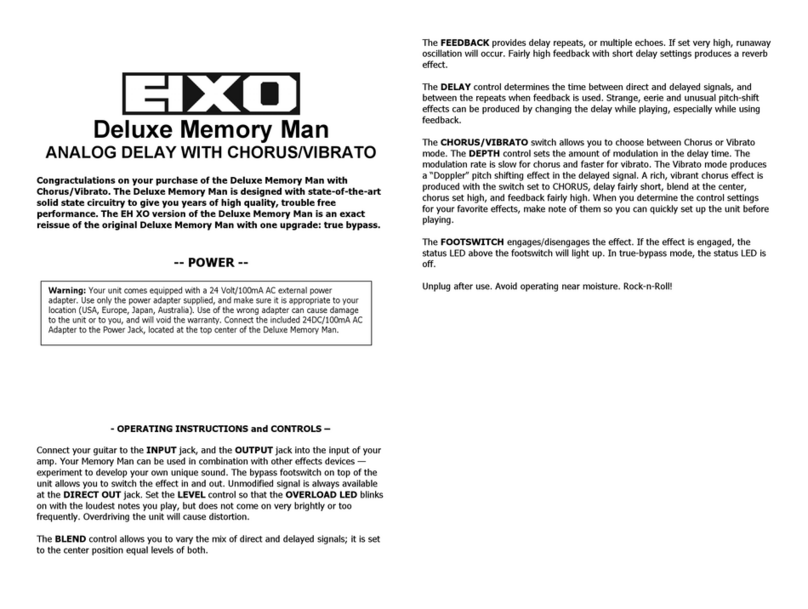
Electro-Harmonix DELUXE MEMORY MAN 550-TT User manual

Electro-Harmonix

Electro-Harmonix DELUXE MEMORY MAN 550-TT User manual

Electro-Harmonix DOCTOR Q User manual

Electro-Harmonix

Electro-Harmonix DOCTOR Q User manual

Electro-Harmonix BAD STONE User manual

Electro-Harmonix

Electro-Harmonix BAD STONE User manual

Electro-Harmonix Holier Grail User manual

Electro-Harmonix

Electro-Harmonix Holier Grail User manual

Electro-Harmonix XO HOLY GRAIL PLUS User manual

Electro-Harmonix

Electro-Harmonix XO HOLY GRAIL PLUS User manual

Electro-Harmonix HELL MELTER User manual

Electro-Harmonix

Electro-Harmonix HELL MELTER User manual

Electro-Harmonix NEXT STEP SERIES User manual

Electro-Harmonix

Electro-Harmonix NEXT STEP SERIES User manual

Electro-Harmonix NANO BIG MUFF PI User manual

Electro-Harmonix

Electro-Harmonix NANO BIG MUFF PI User manual

Electro-Harmonix OPERATION OVERLORD User manual

Electro-Harmonix

Electro-Harmonix OPERATION OVERLORD User manual

Electro-Harmonix Slap-Back Echo User manual

Electro-Harmonix

Electro-Harmonix Slap-Back Echo User manual

Electro-Harmonix Cathedral Stereo Reverb User manual

Electro-Harmonix

Electro-Harmonix Cathedral Stereo Reverb User manual

Electro-Harmonix 720 User manual

Electro-Harmonix

Electro-Harmonix 720 User manual

Electro-Harmonix SLAMMI PLUS User manual

Electro-Harmonix

Electro-Harmonix SLAMMI PLUS User manual

Electro-Harmonix DELUXE MEMORY MAN 1100-TT User manual

Electro-Harmonix

Electro-Harmonix DELUXE MEMORY MAN 1100-TT User manual

Electro-Harmonix Deluxe Electric Mistress User manual

Electro-Harmonix

Electro-Harmonix Deluxe Electric Mistress User manual

Electro-Harmonix Bassballs User manual

Electro-Harmonix

Electro-Harmonix Bassballs User manual

Electro-Harmonix Epitome User manual

Electro-Harmonix

Electro-Harmonix Epitome User manual

Electro-Harmonix Pitch Fork User manual

Electro-Harmonix

Electro-Harmonix Pitch Fork User manual

Electro-Harmonix EHX-2020 User manual

Electro-Harmonix

Electro-Harmonix EHX-2020 User manual

Electro-Harmonix Triangle Big Muff Pi User manual

Electro-Harmonix

Electro-Harmonix Triangle Big Muff Pi User manual

Electro-Harmonix DELUXE MEMORY MAN User manual

Electro-Harmonix

Electro-Harmonix DELUXE MEMORY MAN User manual

Electro-Harmonix Black Finger User manual

Electro-Harmonix

Electro-Harmonix Black Finger User manual

Popular Music Pedal manuals by other brands

Costalab ECHOLAB quick start guide

Costalab

Costalab ECHOLAB quick start guide

BOSSCO DS-1 instructions

BOSSCO

BOSSCO DS-1 instructions

FuzzDog Toxic Minx Distortion plus manual

FuzzDog

FuzzDog Toxic Minx Distortion plus manual

EarthQuaker Devices Hoof Repeater Operation manual

EarthQuaker Devices

EarthQuaker Devices Hoof Repeater Operation manual

Ashdown PRO FX user manual

Ashdown

Ashdown PRO FX user manual

Alexander leap Series user manual

Alexander

Alexander leap Series user manual

function f(x) The Third Rail user guide

function f(x)

function f(x) The Third Rail user guide

Becos CIQ-2 COMPIQ MINI PRO manual

Becos

Becos CIQ-2 COMPIQ MINI PRO manual

Aguilar AGRO Pedal owner's manual

Aguilar

Aguilar AGRO Pedal owner's manual

Behringer HELLBABE HB01 manual

Behringer

Behringer HELLBABE HB01 manual

EKO BOX ALL IN ONE user manual

EKO

EKO BOX ALL IN ONE user manual

Strymon brigadier user manual

Strymon

Strymon brigadier user manual

StewMac FAN TREMOLO Instruction guide

StewMac

StewMac FAN TREMOLO Instruction guide

MORLEY PEDALS VAI-1ES Wiring diagram

MORLEY PEDALS

MORLEY PEDALS VAI-1ES Wiring diagram

EarthQuaker Devices Ghost Echo Operation manual

EarthQuaker Devices

EarthQuaker Devices Ghost Echo Operation manual

ElectroSmash pedalSHIELD UNO How to Build

ElectroSmash

ElectroSmash pedalSHIELD UNO How to Build

Kinesis Savant Elite2 user manual

Kinesis

Kinesis Savant Elite2 user manual

Wildfire Sovereign Technical manual

Wildfire

Wildfire Sovereign Technical manual

manuals.online logo
manuals.online logoBrands
  • About & Mission
  • Contact us
  • Privacy Policy
  • Terms and Conditions

Copyright 2025 Manuals.Online. All Rights Reserved.