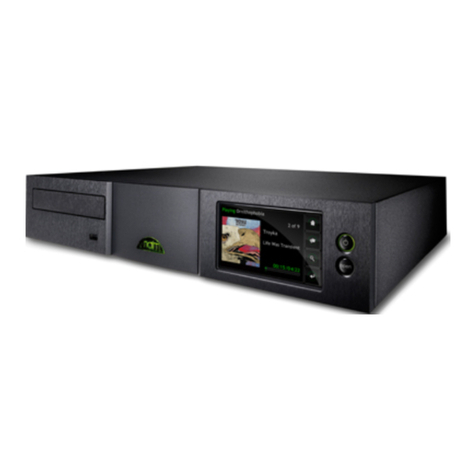
Boulder 1021 User manual

Thank You
We at Boulder Amplifiers would like to thank you for selecting the 1021
Network Disc Player for your audio system.
The 1021 represents the concerted efforts of numerous Boulder craftsmen,
designers, engineers and technicians working to bring you the very finest
audio playback components in the world. We are certain it will provide
years of enjoyment.
Please take a few minutes to read through this owner’s manual prior to
the installation and use of your 1021. This will help you to understand the
basic functions and abilities of the Player and allow you to maximize the
exceptional performance for which it was designed.
Jeffrey P. Nelson, President
Boulder Amplifiers
3235 Prairie Avenue, Boulder, CO 80301 USA
tel: 303-449-8220
e-mail: sales@boulderamp.com
web: www.boulderamp.com
Rev. 2.0


3
Using the 1021 with a Home Network
Overview
In addition to being used as a traditional disc player,
the 1021 can be used as the digital-to-analog converter
(“renderer”) portion of a networked computer audio
system adhering to DLNA and UPnP protocols. Digital
audio files can be streamed from a computer or NAS
(network-attached storage) media server over a home
computer network to the 1021 via the rear panel
Ethernet port with no loss of fidelity.
The 1021 network system consists of three basic parts: a server (a home
computer or media server), a renderer (the 1021) and a control point (a
remote user interface). The control point may be located either on-
screen in a computer-based system or as a downloadable application for
mobile devices.
AIFF, ALAC, FLAC, OGG Vorbis, MP3 and WAV file streaming are
supported at resolutions up to 32-bits or 192 kHz.
Possible System Configurations
There are five most likely system configurations:
1. Storing music on a networked, Windows-based personal computer.
The control point in this scenario can be either on-screen or on a
mobile device. Please see page 3.
2. Storing music on a networked NAS media server that is coupled to a
Windows-based personal computer. The control point can be
either on-screen or on a mobile device. Please see page 7.
3. Storing music on a networked, Apple/Mac-based personal
computer. At the time of this writing, the control point in this
scenario is only available on a mobile device. Please see page 12.
4. Storing music on a networked NAS media server that is coupled to
an Apple/Mac personal computer. At the time of this writing, the
control point in this scenario is only available on a mobile device.
Please see page 15.
5. Storing music on a networked NAS media server. In this scenario,
the control point must be on a mobile device. Please see page 19.

4
In all possible system configurations, the server, renderer and control point
must be connected to the same network via a network router or switcher.
For most solutions involving the use of a computer, server software will
have to be downloaded onto the computer.
Note: At the time of this writing, the DLNA and UPnP protocols were
relatively new and the number of software suites for managing, serving
and controlling media were limited. As time goes by, more and more
options will become available with better and greater capabilities. A list
of recommended software for both the control point and server is
included on page 24.
What You Will Need
The following items will be needed in addition to the 1021:
1. One (1) computer network router or switch
2. One (1) network ready computer
and/or
One (1) NAS Media Server
3. CAT-5 (or better) Ethernet cables to connect the system
4. Optional: a wireless network capable mobile device where control
point software can be downloaded.
Connecting the 1021 to Your Network
Because there are many different ways to operate the 1021 within a
networked audio system, you will need to discuss all options with your
dealer. Once you have settled on a system option, please locate the
portion of this manual that refers to the configuration you will use for basic
installation instructions.
Connecting the 1021 to a Networked, Windows-based Personal
Computer
1. All connections to all pieces of equipment should be made with
the power OFF.
2. The 1021 must be connected to your computer network via a
network router with CAT-5 (or better) data cable. With the 1021
rear panel Master AC Power switch in the OFF position, place the
1021 near the location where it will be permanently installed.
Connect one end of a CAT-5 data cable to the Ethernet port on

5
the rear panel of the 1021. The AC power cord and Left and
Right analog output cables should also be connected.
3. Install the 1021 where it will be permanently located.
4. Locate the position where the network router will be
permanently installed. It is recommended that the local network
you will use for the 1021 has Internet access, though it is not
required. In the event that the track list information for some CDs
is not available in the 1021’s internal database, a live Internet
connection will allow it to download this information and add it
to its internal memory.
Note: For a list of recommended router specifications please see
page 25. The set up and installation of different routers will vary
by manufacturer. Please refer to the instructions that came with
your router for the proper set up procedure.
5. The router location should have clear access to the Ethernet
cable for the 1021 and the network computer. Any additional
products you wish to connect to your network should also be
available at this location.
It is not possible to connect the 1021 to your network wirelessly. It
may be possible, however, to connect your computer to the
network via a wireless connection. Boulder strongly
recommends a wired connection to your computer whenever
possible, as there may be problems with interrupted data
delivery to the network in certain wireless installations. This
connection should be made via CAT-5 (or better) cable.
6. Your home Internet source should be connected at the router’s
“INTERNET” input connection. The Ethernet cable to the 1021
should be installed in one of the available data ports. The
Ethernet cable to the computer should be installed in one of the
remaining data ports.
7. If you will be using a mobile device as a control point, you must
now download and install the control point software on your
mobile device. For a list of recommended mobile devices and
software applications, please see page 24. If you will not be
using a mobile device as a control point, you will need to select
a server software suite for your computer that includes an on-

6
screen control point. For a list of recommended server software
suites, please see page 24.
8. Server software must now be loaded onto your computer. For a
list of recommended server software suites, please see page 24.
Please install the software on your computer as per the
instructions provided by the software manufacturer. Power
down the computer after the installation is complete. You
should now connect your computer to the 1021 network via a
CAT-5 Ethernet cable.
9. You must now choose the file format you wish to use to store any
music you rip to your computer from existing CDs. WAV and AIFF
files are uncompressed and will allow you to store your music
exactly as it is encoded on the disc, however your music will take
up larger portions of space on the computer’s hard drive. All
other file formats feature some form compression with varying
degrees of transparency, though they will take up much less
space on the computer’s hard drive.
If you are using iTunes to manage your music, select
“Preferences” under the iTunes Menu. In the “General” section
of the iTunes Preferences, click on the “Import Settings” button
and select the file type you would like to use on the “Import
Using” drop down list. On the “Setting” drop down list, select
“Custom.” In the Encoder Menu that appears, select “44.100
kHz” for the Sample Rate, “16 bit” for the Sample Size, and
“Auto” for the Channels.
If you are using Windows Media Player to manage your music,
go to the “Tools” menu and click on “Options.” In the Options
menu, click on the tab labeled “Rip Music” and uncheck the
box marked “Rip CD Automatically.”
In the “Format” drop down list, you will need to select “MP3” or
“WAV.” If you are going to use Windows Media Player as your
server software, “MP3” must be selected. If you will use other
server software, either “MP3” or “WAV” can be selected. If you
select “MP3,” the “Audio Quality” slider must be moved all the
way to the right for the best sound quality.
10.Once your media manager is configured, you are now ready to
play music through the system. Power ON the 1021 using the
rear panel Master AC Switch. If you are using a mobile device as

7
a control point, please wait until the 1021 has completed its
boot-up sequence prior to turning ON the control point. When
the 1021 is turned ON, it will automatically connect to the
Ethernet. This may take a minute or two. No manual I.P. address
assignment is necessary.
11.At this time you should check the I.P. address of the 1021. To
navigate to this page of the Network Menu, press the Options
button on the remote control or the front panel of the 1021. Use
the Navigate Up or Navigate Down button and then press Enter
once the Network Menu option is highlighted. The following
options are available in the Network Menu:
a. Link
The Link option indicates whether or not the 1021 has an
active Ethernet connection. If an active connection is
present, the Link option will read Up. If an active connection
is not present, the Link option will read Down.
b. Address
The Address option shows the network address that has been
automatically assigned to the 1021. The network address
cannot be adjusted or changed from the menu system.
12.Using the control point on your computer or mobile device you
should now be able to select individual tracks, complete genres,
artists, albums or any number of other playlists. For help with the
control point navigation, you will need to follow the instructions
for the software you have selected.
a. If you are using a mobile device-based control point
application, you will be able to use the mobile device as a
touch screen “remote control.” For iPhone or iPod Touch
mobile devices, Boulder recommends the use of
PlugPlayer as a control point.
i. To set up PlugPlayer as a control point, open the
application and touch the gear icon in the lower
right-hand corner labeled “Devices.”
In the section labeled “Select a Media Renderer…,”
the 1021 should appear as “Boulder 1021.” When

8
you touch the 1021, a check mark should appear to
the left of the Boulder 1021 icon to indicate you
have selected it. Scroll down the screen to the
section labeled “Select a Media Server….” The
computer server software should appear in the list.
When you touch the server, a check mark should
appear to the left of the server software icon to
indicate you have selected it.
Touch the list icon on the bottom of the screen
labeled “Browse.” You will then see the music you
have loaded onto the computer. It is possible to
select a particular artist, genre, album or track, etc.,
and it will be added to a cued playlist.
Touch the “Playlist” icon at the bottom of the
screen. You will see all of the music you have
selected. Touch the track you wish to hear first to
begin playing the system and music will start playing
immediately.
Touch the “Now Playing” icon at the bottom of the
screen to see cover art, a volume control slider and
a “scrub bar” where you can move to any point in
the track immediately.
ii. If you are using computer-based control point
software, you will be able to use your computer to
control the music you play through the system. You
will need to follow the instructions for the server
software to select your computer as a server, the
1021 as a renderer, select music and stream
selections. For a list of recommended server
software suites, please see page 24.
Connecting the 1021 to a Networked NAS Media Server that is Coupled
to a Windows-based Personal Computer.
For a list of recommended NAS servers, please see page 25.
1. All connections to all pieces of equipment should be made with
the power OFF.

9
2. The 1021 must be connected to your computer network via a
network router with CAT-5 (or better) data cable. With the 1021
rear panel Master AC Power switch in the OFF position, place the
1021 near the location where it will be permanently installed.
Connect one end of a CAT-5 data cable to the Ethernet port on
the rear panel of the 1021. The AC power cord and Left and
Right analog output cables should also be connected.
3. Install the 1021 where it will be permanently located.
4. Locate the position where the network router will be
permanently installed. It is recommended that the local network
you will use for the 1021 has internet access, though it is not
required. In the event that the track list information for some CDs
is not available in the 1021’s internal database, a live internet
connection will allow it to download this information and add it
to its internal memory.
Note: For a list of recommended router specifications please see
page 25. The set up and installation of different routers will vary
by manufacturer. Please refer to the instructions that came with
your router for the proper set up procedure.
5. The router location should have clear access to the Ethernet
cable for the 1021 as well as the network computer and NAS
server connections. Any additional products you wish to
connect to your network should also be available at this
location.
It is not possible to connect the 1021 to your network wirelessly. It
may be possible, however, to connect your computer and/or
NAS server to the network via a wireless connection. Boulder
strongly recommends a wired connection to your computer and
NAS server whenever possible, as there may be problems with
interrupted data delivery to the network in certain wireless
installations. This connection should be made via CAT-5 (or
better) cable.
6. Your home Internet source connection should be installed in the
router’s “INTERNET” input port. The Ethernet cable to the 1021
should be installed in one of the available data ports. The
Ethernet cable to the computer should be installed in one of the
available data ports. The Ethernet cable to the NAS server
should be installed in one of the remaining available data ports.

10
7. If you will be using a mobile device as a control point, you must
now download and install the control point software on your
mobile device. For a list of recommended mobile devices and
software applications, please see page 24. If you will not be
using a mobile device as a control point, you will need to select
a server software suite for your computer that includes an on-
screen control point. For a list of recommended server software
suites, please see page 24.
8. You should now connect your computer to the 1021 network via
a CAT-5 Ethernet cable.
9. The NAS sever must now be set up for your network according to
the manufacturer’s instructions. Your computer must be set up
so that all music downloaded and ripped from existing discs will
be organized by your media managing software and stored on
the NAS server.
If you are using iTunes to manage your music, the media folder
location is set up in the “Advanced” section of “Preferences” in
the iTunes menu. The file location address should be on the NAS
server.
If you are using Windows Media Player to manage your music,
the media folder location is set up in the “Tools” menu. Click on
“Options” in the Tools menu and then click on the tab labeled
“Rip Music.” In the section titled “Rip Music To This Location”
Windows Media Player should be pointed at your NAS music
server.
10.You must now choose the file format you wish to use to store any
music you rip to the server from existing CDs. WAV and AIFF files
are uncompressed and will allow you to store your music exactly
as it is encoded on the disc, however your music will take up
larger portions of space on the server’s hard drive. All other file
formats feature some form compression with varying degrees of
transparency, though they will take up much less space on the
server’s hard drive.
If you are using iTunes to manage your music, select
“Preferences” under the iTunes menu. In the “General” section
of the iTunes Preferences, click on the “Import Settings” button
and select the file type you would like to use on the “Import

11
Using” drop down list. On the “Setting” drop down list, select
“Custom.” In the Encoder Menu that appears, select “44.100
kHz” for the Sample Rate, “16 bit” for the sample size, and
“Auto” for the Channels.
If you are using Windows Media Player to manage your music,
go to the “Tools” menu and click on “Options.” In the Options
menu, click on the tab labeled “Rip Music” and uncheck the
box marked “Rip CD Automatically.”
In the “Format” drop down list, you will need to select “MP3” or
“WAV.” If you are going to use Windows Media Player as your
server software, “MP3” must be selected. If you will use other
server software, either “MP3” or “WAV” can be selected. If you
select “MP3,” the “Audio Quality” slider must be moved all the
way to the right for the best sound quality.
11.Once your media manager software is pointed at your server,
the file format is selected and music has been stored, you are
now ready to play music through the system. Power ON the 1021
using the rear panel Master AC Switch. If you are using a mobile
device as a control point, please wait until the 1021 has
completed its boot-up sequence prior to turning ON the control
point. When the 1021 is turned ON, it will automatically connect
to the Ethernet. No manual I.P. address assignment is necessary.
12.At this time you should check the I.P. address of the 1021. To
navigate to this page of the Network Menu, press the Options
button on the remote control or the front panel of the 1021. Use
the Navigate Up or Navigate Down button and then press Enter
once the Network Menu option is highlighted. The following
options are available in the Network Menu:
a. Link
The Link option indicates whether or not the 1021 has an
active Ethernet connection. If an active connection is
present, the Link option will read Up. If an active
connection is not present, the Link option will read Down.
b. Address
The Address option shows the network address that has
been automatically assigned to the 1021. The network

12
address cannot be adjusted or changed from the menu
system.
13.Using the control point on your computer or mobile device you
should now be able to select individual tracks, complete genres,
artists, albums or any number of other playlists. For help with the
control point navigation, you will need to follow the instructions
for the software you have selected.
a. If you are using a mobile device-based control point
application, you will be able to use the mobile device as a
touch screen “remote control.” Boulder recommends
PlugPlayer as a control point for the iPhone or iPod Touch.
i. To set up PlugPlayer as a control point, open the
application and touch the gear icon in the lower right-
hand corner labeled “Devices.”
In the section labeled “Select a Media Renderer…,” the
1021 should appear as “Boulder 1021.” When you touch
the 1021, a check mark should appear to the left of the
1021 icon to indicate you have selected it. Scroll down
the screen to the section labeled “Select a Media
Server….” The server should appear in the list. When you
touch the server, a check mark should appear to the left
of the server icon to indicate you have selected it.
Touch the list icon on the bottom of the screen labeled
“Browse.” You will see the music you have loaded onto
the server. When you touch a particular artist, genre,
album, track, etc., it will be added to a cued playlist.
Touch the “Playlist” icon at the bottom of the screen. You
will see all of the music you have selected. Touch the
track you wish to hear first to begin playing the system and
music will start playing immediately.
Touch the “Now Playing” icon at the bottom of the screen
to see cover art, a volume control slider and a “scrub bar”
where you can move to any point in the track
immediately.
ii. If you are using computer-based control point software,
you will be able to use your computer to control the music

13
you play from the system. You will need to follow the
instructions for using the server software to select the 1021
as a renderer, select music and stream selections. For a list
of recommended server software suites, please see page
24.
Connecting the 1021 to a Networked, Apple/Mac-based Personal
Computer
1. All connections to all pieces of equipment should be made with
the power OFF.
2. The 1021 must be connected to your computer network via a
network router with CAT-5 (or better) data cable. With the 1021
rear panel Master AC Power switch in the OFF position, place the
1021 near the location where it will be permanently installed.
Connect one end of a CAT-5 data cable to the Ethernet port on
the rear panel of the 1021. The AC power cord and Left and
Right analog output cables should also be connected.
3. Install the 1021 where it will be permanently located.
4. Locate the position where the network router will be
permanently installed. It is recommended that the local network
you will use for the 1021 has Internet access, though it is not
required. In the event that the track list information for some CDs
is not available in the 1021’s internal database, a live Internet
connection will allow it to download this information and add it
to its internal memory.
Note: For a list of recommended router specifications please see
page 25. The set up and installation of different routers will vary
by manufacturer. Please refer to the instructions that came with
your router for the proper set up procedure.
5. The router location should have clear access to the Ethernet
cable for the 1021 and the network computer. Any additional
products you wish to connect to your network should also be
available at this location.
It is not possible to connect the 1021 to your network wirelessly. It
may be possible, however, to connect your computer to the
network via a wireless connection. Boulder strongly
recommends a wired connection to your computer whenever

14
possible, as there may be problems with interrupted data
delivery to the network in certain wireless installations. This
connection should be made via CAT-5 (or better) cable.
6. Your home Internet source connection should be installed in the
router’s “INTERNET” input port. The Ethernet cable to the 1021
should be installed in one of the available data ports. The
Ethernet cable to the computer should be installed in one of the
remaining data ports.
7. When using an Apple/Mac computer to store your music, a
mobile device must be used as a control point. You must now
download and install the control point software on your mobile
device. For a list of recommended mobile devices and software
applications, please see page 24.
8. Server software must now be loaded onto your computer. For a
list of recommended server software suites, please see page 24.
Please install the software on your computer as per the
instructions provided by the software manufacturer. Power
down the computer after the installation is complete. You
should now connect your computer to the 1021 network via a
CAT-5 Ethernet cable.
9. You must now choose the file format you wish to use to store any
music you rip to your computer from existing CDs. WAV and AIFF
files are uncompressed and will allow you to store your music
exactly as it is encoded on the disc, however your music will take
up larger portions of space on the computer’s hard drive. All
other file formats feature some form compression with varying
degrees of transparency, though they will take up much less
space on the computer’s hard drive.
When using iTunes to manage your music library, select
“Preferences” under the iTunes Menu. In the “General” section
of iTunes Preferences, click on the “Import Settings” button and
select the file type you would like to use on the “Import Using”
drop down list. On the “Setting” drop down list, select “Custom.”
In the Encoder Menu that appears, select “44.100 kHz” for the
Sample Rate, “16 bit” for the Sample Size, and “Auto” for the
Channels.
10.Once your media manager is configured, you are now ready to
play music through the system. Power ON the 1021 using the

15
rear panel Master AC Switch. Please wait until the 1021 has
completed its boot-up sequence prior to turning ON the control
point. When the 1021 is turned ON, it will automatically connect
to the Ethernet. This may take a minute or two. No manual I.P.
address assignment is necessary.
11.At this time you should check the I.P. address of the 1021. To
navigate to this page of the Network Menu, press the Options
button on the remote control or the front panel of the 1021. Use
the Navigate Up or Navigate Down button and then press Enter
once the Network Menu option is highlighted. The following
options are available in the Network Menu:
a. Link
The Link option indicates whether or not the 1021 has an
active Ethernet connection. If an active connection is
present, the Link option will read Up. If an active connection
is not present, the Link option will read Down.
b. Address
The Address option shows the network address that has been
automatically assigned to the 1021. The network address
cannot be adjusted or changed from the menu system.
12.Using the control point, you should now be able to select
individual tracks, genres, artists, albums or any number of other
playlists. For help with the control point navigation, you will need
to follow the instructions for the software you have selected.
a. When using a mobile device-based control point
application, you will be able to use the mobile device as a
touch screen “remote control.” For iPhone or iPod Touch
mobile devices, Boulder recommends the use of
PlugPlayer as a control point.
i. To set up PlugPlayer as a control point, open the
application and touch the gear icon in the lower
right-hand corner labeled “Devices.”
In the section labeled “Select a Media Renderer…,”
the 1021 should appear as “Boulder 1021.” When
you touch the 1021, a check mark should appear to

16
the left of the Boulder 1021 icon to indicate you
have selected it. Scroll down the screen to the
section labeled “Select a Media Server….” The
computer server software should appear in the list.
When you touch the server, a check mark should
appear to the left of the server software icon to
indicate you have selected it.
Touch the list icon on the bottom of the screen
labeled “Browse.” You will then see the music you
have loaded onto the computer. It is possible to
select a particular artist, genre, album, track, etc.,
and it will be added to a cued playlist.
Touch the “Playlist” icon at the bottom of the
screen. You will see all of the music you have
selected. Touch the track you wish to hear first to
begin playing the system and music will start playing
immediately.
Touch the “Now Playing” icon at the bottom of the
screen to see cover art, a volume control slider and
a “scrub bar” where you can move to any point in
the track immediately.
ii. If you are using computer-based control point
software, you will be able to use your computer to
control the music you play through the system. You
will need to follow the instructions for the server
software to select your computer as a server, the
1021 as a renderer, select music and stream
selections. For a list of recommended server
software suites, please see page 24.
Connecting the 1021 to a Networked NAS Media Server that is Coupled
to an Apple/Mac-based Personal Computer.
For a list of recommended NAS servers, please see page 25.
1. All connections to all pieces of equipment should be made with
the power OFF.
2. The 1021 must be connected to your computer network via a
network router with CAT-5 (or better) data cable. With the 1021

17
rear panel Master AC Power switch in the OFF position, place the
1021 near the location where it will be permanently installed.
Connect one end of a CAT-5 data cable to the Ethernet port on
the rear panel of the 1021. The AC power cord and Left and
Right analog output cables should also be connected.
3. Install the 1021 where it will be permanently located.
4. Locate the position where the network router will be
permanently installed. It is recommended that the local network
you will use for the 1021 has Internet access, though it is not
required. In the event that the track list information for some CDs
is not available in the 1021’s internal database, a live Internet
connection will allow it to download this information and add it
to its internal memory.
Note: For a list of recommended router specifications please see
page 25. The set up and installation of different routers will vary
by manufacturer. Please refer to the instructions that came with
your router for the proper set up procedure.
5. The router location should have clear access to the Ethernet
cable for the 1021 as well as the network computer and NAS
server connections. Any additional products you wish to
connect to your network should also be available at this
location.
It is not possible to connect the 1021 to your network wirelessly. It
may be possible, however, to connect your computer and/or
NAS server to the network via a wireless connection. Boulder
strongly recommends a wired connection to your computer and
NAS server whenever possible, as there may be problems with
interrupted data delivery to the network in certain wireless
installations. This connection should be made via CAT-5 (or
better) cable.
6. Your home Internet source connection should be installed in the
router’s “INTERNET” input port. The Ethernet cable to the 1021
should be installed in one of the available data ports. The
Ethernet cable to the computer should be installed in one of the
available data ports. The Ethernet cable to the NAS server
should be installed in one of the remaining available data ports.

18
7. When using an Apple/Mac computer, a mobile device must be
used as a control point. You must now download and install the
control point software on your mobile device. For a list of
recommended mobile devices and software applications,
please see page 24.
8. You should now connect your computer to the 1021 network via
a CAT-5 Ethernet cable.
9. The NAS sever must now be set up for your network according to
the manufacturer’s instructions. Your computer must be set up
so that all music downloaded and ripped from existing discs will
be organized by your media manager software and stored on
the NAS server.
When using iTunes to manage your music, the media folder
location is set up in the “Advanced” section of “Preferences” in
the iTunes menu. The file location address should be on the NAS
server.
10.You must now choose the file format you wish to use to store any
music you rip to the server from existing CDs. WAV and AIFF files
are uncompressed and will allow you to store your music exactly
as it is encoded on the disc, however your music will take up
larger portions of space on the server’s hard drive. All other file
formats feature some form compression with varying degrees of
transparency, though they will take up much less space on the
server’s hard drive.
When using iTunes to manage your music, select “Preferences”
under the iTunes menu. In the “General” section of the iTunes
Preferences, click on the “Import Settings” button and select the
file type you would like to use on the “Import Using” drop down
list. On the “Setting” drop down list, select “Custom.” In the
Encoder Menu that appears, select “44.100 kHz” for the Sample
Rate, “16 bit” for the sample size, and “Auto” for the Channels.
11.Once your media manager software is pointed at your server,
the file format is selected and music has been stored, you are
now ready to play music through the system. Power ON the 1021
using the rear panel Master AC Switch. Please wait until the 1021
has completed its boot-up sequence prior to turning ON the
control point. When the 1021 is turned ON, it will automatically

19
connect to the Ethernet. No manual I.P. address assignment is
necessary.
12.At this time you should check the I.P. address of the 1021. To
navigate to this page of the Network Menu, press the Options
button on the remote control or the front panel of the 1021. Use
the Navigate Up or Navigate Down button and then press Enter
once the Network Menu option is highlighted. The following
options are available in the Network Menu:
a. Link
The Link option indicates whether or not the 1021 has an
active Ethernet connection. If an active connection is
present, the Link option will read Up. If an active
connection is not present, the Link option will read Down.
b. Address
The Address option shows the network address that has
been automatically assigned to the 1021. The network
address cannot be adjusted or changed from the menu
system.
13.Using the control point you should now be able to select
individual tracks, complete genres, artists, albums or any number
of other playlists. For help with the control point navigation, you
will need to follow the instructions for the software you have
selected.
a. When using a mobile device-based control point
application, you are able to use the mobile device as a
touch screen “remote control.” Boulder recommends the
PlugPlayer application for the iPhone or iPod Touch.
i. To set up PlugPlayer as a control point, open the
application and touch the gear icon in the lower
right-hand corner labeled “Devices.”
In the section labeled “Select a Media Renderer…,”
the 1021 should appear as “Boulder 1021.” When
you touch the 1021, a check mark should appear to
the left of the Boulder 1021 icon to indicate you
have selected it. Scroll down the screen to the

20
section labeled “Select a Media Server….” The
server should appear in the list. When you touch the
server, a check mark should appear to the left of
the server icon to indicate you have selected it.
Touch the list icon on the bottom of the screen
labeled “Browse.” You will see the music you have
loaded onto the server. When you touch a
particular artist, genre, album, track, etc., it will be
added to a cued playlist.
Touch the “Playlist” icon at the bottom of the
screen. You will see all of the music you have
selected. Touch the track you wish to hear first to
begin playing the system and music will start playing
immediately.
Touch the “Now Playing” icon at the bottom of the
screen to see cover art, a volume control slider and
a “scrub bar” where you can move to any point in
the track immediately.
Connecting the 1021 to a Networked NAS Media Server and Using a
Mobile Device as a Control Point.
For a list of recommended NAS servers, please see page 25.
1. All connections to all pieces of equipment should be made with
the power OFF.
2. The 1021 must be connected to your computer network via a
network router with CAT-5 (or better) data cable. With the 1021
rear panel Master AC Power switch in the OFF position, place the
1021 near the location where it will be permanently installed.
Connect one end of a CAT-5 data cable to the Ethernet port on
the rear panel of the 1021. The AC power cord and Left and
Right analog output cables should also be connected.
3. Install the 1021 where it will be permanently located.
4. Locate the position where the network router will be
permanently installed. It is recommended that the local network
you will use for the 1021 has Internet access, though it is not
required. In the event that the track list information for some CDs
Other manuals for 1021
2
Table of contents
