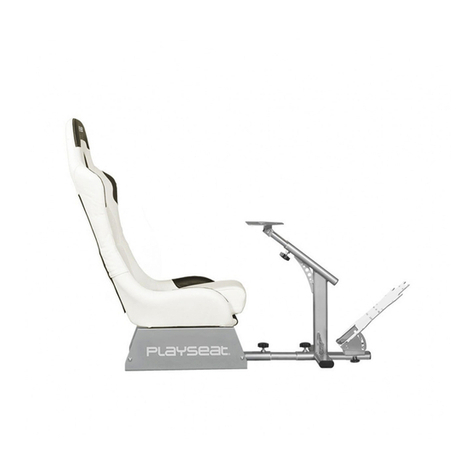
BoysStuff GameRacer Elite User manual

Need Help? Email: inf[email protected] Web: www.boysstuff.co.uk
Phone +44 01676) 535557
Thank you for purchasing the GameRacer Elite Racing
Simulator Gaming Chair! From
www.boysstuff.co.uk/
the largest range of gaming chairs anywhere in the UK
GameRacer Elite Assembly
Instructions
If you have any problems assembling the product, please E-mad us at [email protected] and
we will endeavour to help.
01
Check you have all the parts listed complete the easy-build system and get ready for SERIOUS PLAY
TIME!
Item List
Main Fixings Pack
1 set fitting instructions
1 Fluted adjusting knob
1 spanner 13mm-17mm
2 hexagonal keys, 5mm & 8mm
2 nylon support pillars
1 “T” head bolt
2 x fitting 1
2 x fitting 2
2 x fitting 3
2 x fitting 4
2 x fitting 5
2 x fitting 6
Adhesive-backed Velcro fastening
3 x cable tidy
FITTING 1
8mm socket bolt- 50mm
FITTING 2
8mm socket bolt- 30mm
FITTING
3
8mm machine screw
25mm
FITTING 4
Washer 16mm
FITTING 5
Washer 16mm
FITTING 6
Lock nut 8mm
Seat
Raiser Fixing Pack
4x fitting 1
4 x fitting 3
12 x fitting 4
4 x fitting 6

Need Help? Email: inf[email protected] Web: www.boysstuff.co.uk
Phone +44 01676) 535557
Assemble the individual components as shown here
before final assembly
02 03
Attach the Seat Raisers optional)
Attach the Base unit
The GameRacer offers you a choice of two driving positions:
1. Single Seater Cockpit Style do not fit Seat Raisers)
2. Rally Car Cockpit style fit Seat Raisers)
To fit the Seat Raisers, turn the seat over and assemble the Seat
Raisers as shown, using the machine screws fitting 3) and
washers fitting 4)
Offer up the Base Unit to the Seat Raisers or directly to the seat
depending on your choce in option 02).
Make sure the fluted adjusting knob faces the front. Affix using
the socket bolts fitting 1), nuts fitting 6) and washers fitting
4).
Assemble the steering column
Assemble the steering column
The Steering Wheel Plate is already mounted on the River
Extension, but it’s position can be adjusted to suit with the
tools suppli
ed.
The Pedal Plate is attached to the Brace Bar using the socket
bolts fitting 1) and nuts fitting 6) with washers fitting 5) as
shown. The nylon support pillars are held in place using the
socket bolts fitting 2).

Need Help? Email: inf[email protected] Web: www.boysstuff.co.uk
Phone +44 01676) 535557
inal rame Assembly
06
Choose a driving style
For normal use, assemble the steering column and wheel plate and slider as shown in position
A.
Position B will provide the driver with a straightener-arm driving position and also provide
greater space around the pedal box for more advanced techniques such as heel-and-toe.

Need Help? Email: inf[email protected] Web: www.boysstuff.co.uk
Phone +44 01676) 535557
Steering Wheel & oot Pedals Attachment
Cut a length approx 8cm) from the Velcro supplied and remove
one side of the protective paper. Attach the Velcro to the wheel
plate in the position shown in the diagram, remove the second
piece of protective paper before clamping your wheel to the
plate.
For attachment of the Microsoft wheel please see instruction 08.
The Microsoft clamp supplied with the wheel is not required when
this fitting method is used. Remove the wheel plate from the
GameRacer and cut the Velcro into the required lengths to suite
the wheel plate as shown in diagram).
Remove the protective cover from one side of the Velcro only and
position the Velcro on the wheel plate as shown in Diagram. Then
remove the remaining protective cover from the Velcro on the
wheel plate, position the Microsoft steering wheel upside down on
a soft item such as a pillow or cushion and carefully position the
GameRacer wheel plate onto the wheel ensuring it’s correct
position, central on both planes).
Apply pressure to ensure a firm bond, you can now mount the
wheel plate and wheel on the GameRacer steering column.
Remove the protective film from one
side of the 4 remaining pieces of Velcro an attach
all 4 to the under side of pedal box. Remove the remaining 4 pieces of protective film
from the Velcro.
When fixing the G25 Pedal box, pass the M6 x 20mm bolts provided through the slots in
the pedal plate and fasten into the threaded holes provided in the pedal box. The pedals
can be offset to allow for right foot braking. Place the pedal box squarely onto the
GameRacer pedal plate pushing firmly to ensure adhesion.
Your GameRacer is now ready for use. Attach the lead from the pedals to the steering
pod- the USB connector from the steering pod plugs into your console. The power lead
from your mains goes into the steering pod.
Make sure you keep the leads tidy, use the Velcro straps provided to fasten the cables so
you don’t trip on them.
The GameRacer should be located on a flat even floor before anyone sits in it. Only one person should sit in the GameRacer at
any one time. Never
allow a child, or anybody else for that matter, to put any part of the GameRacer in their mouth. The GameRacer is fitted with several small plastic
components that could be swallowed by a minor. If there is a minor in the household, we recommend that these small plastic parts are removed and
kept in a safe place.
Never use the GameRacer for anything other than the use for which it is intended, playing driving games. For instance, the GameRacer will not work as
a sledge.

Need Help? Email: inf[email protected] Web: www.boysstuff.co.uk
Phone +44 01676) 535557
The fitting of Support brackets when using seat raisers
1. Turn the seat upside down on the carpet or a blanket. 2. Remove the forward most seat bolt either left or right
depending on which side you intend mounting your support bracket. 3. Position the support bracket as shown
below and insert the 55mm bolt and washer supplied through the support bracket into the seat, for use with the
G25 gearbox mount it is best positioned in its forward most position. 4. Tighten the bolts until the mounting
bracket is held firmly.
1. Remove plastic plug from front of
sub frame tube.
2. Remove corresponding seat bolt.
3. Slide mounting brackets into sub
frame and replace bolt, tighten bolt
until mounting bracket is held
firmly.
Other BoysStuff Video Gaming Accessories manuals
Popular Video Gaming Accessories manuals by other brands

PBresults
PBresults Paintball user guide

ESCALADE
ESCALADE AMERICAN LEGEND AL4100 manual
Tippmann
Tippmann SIERRA ONE MARKER owner's manual
Next Level Racing
Next Level Racing WHEEL STAND 2.0 instruction manual

Fabrication Enterprises
Fabrication Enterprises Sensory Ball Pit Assembly guide
Pyramat
Pyramat S2500-W owner's manual

Your Rock Guitar
Your Rock Guitar 1000 quick guide
Monster
Monster MTS MONITOR TOP EXTENSION instruction manual
Exputt RG
Exputt RG EX500D user manual
Multi Touch Digital
Multi Touch Digital Touch Center owner's manual

Creative
Creative H7 user guide
Duo Collection
Duo Collection Game-Rocker GT-22 Assembly instructions
