B+B WLS-GEH230V User manual

OPERATION MANUAL
Technical changes reserved
0141 0316-112 20.04.2016
Level controller for conducting liquits
WLS-GEH230V
DescriptionDescription
Technical Data
General
Operating voltage 230 VAC / 5 VA max.
Relay
NO/NC contact for resistive load
Rating NO contact 230 V AC / 5 A
Rating NC contact 230 V AC /2 A
Surge suppression NC contact with Varistor VZ 05 / 390 V
Dimensions 100 x 100 x 60 mm Supplied in plastic housing
CE-conformance 2014/30/EU
EMV-noise emission EN 61000-6-3:2011
EMV-noise withstanding EN 61000-6-1:2007
Sensor side
Switching point impedance 15-80 kΩ, adjustable over a potentiometer
Measuring voltage max. 5 VSS
Measuring current < 250 µA
Sensor with connection lead
High grade threaded electrodes NIVFUE-ESCHR
Printed circuit board level probe NIVFUE-GEDR
Our sensor catalogue is constantly updated. Sensors for special applications are available on request !
Features
• Level controller for conducting liquids
• Simultaneous monitoring of 4 levels
• Two independent circuits for ll/empty
• Indication of ll condition and operating status through 8
LED
• Two high rating potential free relays with NO/NC contacts
• Operating voltage depending on model: 230 V AC
1 / 11

OPERATION MANUAL
Technical changes reserved
0141 0316-112 20.04.2016
Level controller for conducting liquits
WLS-GEH230V
Contents
1. General dangers and precautions 3
1.1 Instructions regarding documentation 3
1.2 Safety instructions 3
2. Description 4
2.1 Functional description 4
2.2 Operating sequence diagram 5
2.3 Model description 5
2.4 Scope of supply 6
3. Assembly, adjustment and conguration 6
3.1 Electrical connection 6
3.1.1 Safety instructions 6
3.1.2 Lines to the sensor set-up 6
3.1.3 Operating voltage 7
3.1.4 Load circuit 7
3.2 Switching point adjustment 8
3.3 Light emitting diodes (LEDs) 8
3.4 Conguration of operating mode 8
3.5 Connection of user‘s own sensors 9
3.5.1 Pin conguration of input socket (RJ12) 9
3.6 Construction of sensor 9
3.7 Connection of external LEDs and pushbuttons 10
4. Guarantee 11
4.1 Repair services 11
2 / 11

OPERATION MANUAL
Technical changes reserved
0141 0316-112 20.04.2016
Level controller for conducting liquits
WLS-GEH230V
1. General dangers and precautions
1.1 Instructions regarding documentation
Please carefully read the following instructions before putting into operation! The symbols used in the operating manual are to make you
careful, before hand, regarding safety considerations and dangers. But, in no way, these symbols can substitute the text of the associated
safety instructions. Therefore, the instructions should also be always read in full detail!
!This symbol indicates likely danger for persons, material or environment. The information provided in the associated text should be duly
followed to avoid any kind of risk.
!This symbol refers to important application notes and tips, which are necessary for successful working and should to be absolutely
followed to ensure good results.
1.2 Safety instructions
!
Please read these instructions, carefully and completely, before putting the device into operation. Please also comply and follow the
safety instructions, specially the safety regulations related to the devices to be operated on mains supply.
The product should be installed and used only for the intended applications as described in these instructions. Any other application is
not advised and shall lead to loss of guarantee and exclusion from liability. This also applies to any changes or other modications carried
out on the device by the user.
Defective safety devices should be replaced with same type of items in respect of trip current rating, tripping characteristics, and mecha-
nical tment dimensions. Bypassing protections lead to a considerable safety risk, and hence, is not allowed under any circumstances.
The connection terminals may be wired to mains voltage. Contact with live parts lead to fatal dangers. The mounting and maintenance
operations should be carried out by only trained personnel, who are authorised on the basis of technical training in this eld. The applicable
safety regulations should be followed. The switching device must be assembled in a switching cabinet or a fully closed plastic housing.
Mounting and servicing operation should be carried out only after switching off the voltage.
!
The product is not meant for controlling electrical systems which perform safety related functions. In normal operation also, there is
always a danger of malfunctioning due to failure of any component or any other disturbance. The user has to ensure that there are no
consequential damages due to malfunctioning or undened switching status of the relay. This is all the more possible, if heavy loads like
heaters or motors are triggered with the relays.
The device is not suitable for use in medical instruments or swimming pools. The user has to take suitable measures (e.g. grounding
the metallic container) to take care that there is no danger of electric shock in the medium. The safety regulations applicable for special
applications should be absolutely followed by the user ! The controller is only suitable for mounting in dry locations.
The liquids suitable for application of this device are all types of non-combustible, aqueous, non-corrosive and unpolluted liquids e.g. tap
water. The device is not suitable for combustible, non-conducting liquids!
3 / 11

OPERATION MANUAL
Technical changes reserved
0141 0316-112 20.04.2016
Level controller for conducting liquits
WLS-GEH230V
2. Description
2.1 Functional description
The control device is used for regulating level of conducting liquids like supply line water, rain water or condensate. The measurement
of level in the reservoir is done with the help of electrodes, for which either contact surface of the reservoir walls or self made rod type
electrodes can be used.
With two independent circuits, simultaneous monitoring of both minimum and maximum liquid levels and control of two different actuators
are possible, for example, an inlet valve and a pump.
In liquid reservoir, four electrodes (E1..E4) are mounted in the medium, at heights corresponding to the required switching point. A fth
electrode is placed at the bottom of the reservoir (not shown in sketch) which works as the reference electrode.
According to water contact, the ll level is indicated through 4 green LED´s L1 to L4. If the reservoir is completely empty, the red LED glows.
For example, the lower pair of electrodes (E1,E2) can be used to control a lling valve at the inlet. After release of the lowest electrode E1,
the lling valve is switched ON and switched OFF again on wetting of the second electrode E2 (Hysteresis).
For example, the upper pair of electrodes can be used to control a drain valve or a pump. During contact with the topmost electrode E4, the
drain valve is switched ON and again switched OFF after release of the lower electrode E3 (Hysteresis).
The switching behaviour of the system (Filling/Empty) is to be congured over two jumper plugs. The sensitivity of the electrodes can be
adjusted through potentiometers (approx. 15 kΩ... 80 kΩ).
4 / 11

OPERATION MANUAL
Technical changes reserved
0141 0316-112 20.04.2016
Level controller for conducting liquits
WLS-GEH230V
2.2 Operating sequence diagram
Initial condition : The reservoir is rst empty. The electrode E1 is not in water contact. Relay 1 is in closed position (because of this e.g.
the inlet valve is open). The water level rises in the reservoir. Water contact with the lower Electrode E1 (1) does not change the relay
status and only when Electrode E2 comes into water contact (2), Relay 1 switches OFF (as an effect e.g. the inlet valve closes).
Upper level: If the level in the reservoir continues to rise further and reaches Electrode E3, Relay 2 still remains in off state. After the
water level reaches Electrode E4 (4), Relay 2 is switched ON (and with that e.g. the outow pump). When the level falls and Electrode
E4 is released free (5), the relay remains closed until Electrode E3 is released free. (6). This means that between the upper switching
ON point E4 and the lower switching OFF point E3, there is a hysteresis gap.
Lower level: If the level continues to fall, the Electrode E2 becomes free (7). In the reducing level direction, Relay 1 is kept in off state,
till Electrode E1 is also out of water contact (8). Only then Relay 1 closes. If again the water level is in rising direction, Relay 1 remains
closed even after water contact with Electrode E1 (9). Only if Electrode E2 again comes under water contact, Relay 1 is switched OFF
(10). Hence, the lower level also has a provision of hysteresis margin.
The referred appliances “Inlet valve“ or “Pump“ are taken only as examples for illustration of the working principle. What appliances are
used nally depends on the application. The switching behaviour of both the relays can be reversed through two jumper connections.
The two relay circuits work as level regulators and are independent of each other. Hence, it is not necessary to use both the circuits, the
device is also suitable for controlling only one level. For this purpose, only two sensing electrodes and a reference electrode are required.
In such a case, the second channel (relay and electrode inputs) is not used.
2.3 Model description
There are two relays with NO/NC contacts for control of the appliances (valve/pump). The NO contact can be loaded up to 230 V / 5 A
AC and is provided with a varistor for surge suppression. The NC contact can be loaded up to 230 V / 2 A .
The model in housing is provided with a 230 V AC power supply and a control unit with LEDs for level indication and also pushbuttons
for manual switching of the relays.
Typical areas of application: Water harvesting/monitoring in rain water cisterns, monitoring of condensate tubs and compressor pressure
chamber, boiler, fountains and wells, cattle watering places, control of pumps.
5 / 11

OPERATION MANUAL
Technical changes reserved
0141 0316-112 20.04.2016
Level controller for conducting liquits
WLS-GEH230V
2.4 Scope of supply
Die Lieferung des Geräts erfolgt inklusive Messfühler-Anschlusskabel, 6-polig mit RJ12 Steckverbinder, jedoch ohne Elektroden. Stan-
dardfühler sind als Zubehör erhältlich oder können leicht selbst hergestellt werden. Die Lieferung der 12 V / 24 V Ausführung erfolgt
als Modul (Platine) 95 x 75 mm ohne Gehäuse und ohne Bedienteil. Die 230 V Ausführung wird komplett eingebaut im Gehäuse mit
integriertem Netzteil und mit Bedienteil geliefert. Die Außenabmessungen betragen 100 x 100 x 60 mm. Die Kabelverschraubungen
werden mitgeliefert.
3. Assembly, adjustment and conguration
3.1 Electrical connection
3.1.1 Safety instructions
!
Caution! Touching the high voltage parts may lead to fatal dangers. The mounting and maintenance operations should be carried out
by only trained personnel, who are authorised on the basis of technical training in this eld. The applicable safety regulations are to be
duly followed! The switching device must be assembled in a switching cabinet or in a fully closed plastic housing. Mounting and servicing
operations should be carried out only after switching off the voltage. The device should be mounted only at dry locations!
!
Due to wrong tightening of screws of the connection terminals or by use of inappropriate tool, the terminals can get damaged because of
which the insulation or the contact can get disturbed. Badly connected leads can come out during operation and cause a serious risk to
safety. Due to contact resistance at terminal connections, there can be increased heat generation which can cause re. Wrongly wired
connections can destroy electric components and cause other damages.
3.1.2 Lines to the sensor set-up
The RJ12-plug connector has been provided for direct connection of sensor lines to the unit. The connector is led through a cable gland
provided in the housing and properly mounted through M16 threads. The connection of the ready sensor is to be done as per enclosed
data sheet. The connection length of self made sensing set-up should not exceed 5 m. For short connection lengths up to approx. 3 m,
a simple unshielded cable (5-core) is quite suitable. For larger lengths or in EMV-critical environment, shielded cables should be used.
The shielding should be connected to COM (reference electrode). In long connection lines, the electrode input may change due to line
capacitance. This can be adjusted through potentiometers. If necessary, the adjustment should be checked again after any modication
in line length.
6 / 11

OPERATION MANUAL
Technical changes reserved
0141 0316-112 20.04.2016
Level controller for conducting liquits
WLS-GEH230V
3.1.3 Operating voltage
3.1.4 Load circuit
Pin Function Discription
1 L LIVE (only 230 V model)
2 N NEUTRAL (only 230 V model)
3 PE PE (only 230 V model)
4 REL1 COM Relay 1 common terminal
5 REL1 NO Relay 1 NO contact
6 REL1 NC Relay 1 NC contact
7 REL2 COM Relay 2 common terminal
8 REL2 NO Relay 2 NO contact
9 REL2 NC Relay 2 NC contact
L PHASE
N NULL
PE (OPT)
REL1 BOCKPOL
REL1 SCHLIESSER
REL1 ÖFFNER
REL2 BOCKPOL
REL2 SCHLIESSER
REL2 ÖFFNER
BETRIEBSART
RELAIS 1 RELAIS 2
LEDS
POT E4
POT E3
POT E2
POT E1
COM
E1
E2
E3
E4
UB
230V AC model: The connection with mains power supply should be done by only trained and authorised persons. The electrical connection is done
through the 9-pin plug connector as per pin conguration. The device can be operated only with 230V AC supply. The mains supply connection is
protected against over-voltage through a 390V varistor. The safety of the device against too high load current should be ensured through an external
protection arrangement.
The terminal PE is not connected to the device and is only used to x or clamp the PE wire. Its wiring is not necessary.
The container with the medium should be grounded by suitable means to protect against high voltages in case of malfunction.
The safety of load circuit, if required, should be taken care of through some external protection
arrangement. (max. 5A NO contact, 2A NC contact). To switch higher currents, corresponding
switching elements should be used.
The NO/NC contacts of both the relays are potential free and are terminated at the connection
socket. The connection of load is done as per connector conguration. The NO contact of the
relay is provided with a 390V varistor for surge suppression.
7 / 11

OPERATION MANUAL
Technical changes reserved
0141 0316-112 20.04.2016
Level controller for conducting liquits
WLS-GEH230V
3.2 Switching point adjustment
The switching point is adjusted as per conductivity of water with
the preset potentiometers. In normal practice, it is good enough
to leave the potentiometer in the most sensitive position (left side
limit). This corresponds to a switching point of approx. 12 µS. This
works for most of the applications with clean rain water or tap water.
If required, the sensitivity of each electrode can also be separately
adjusted. By turning the potentiometer in the anti-clockwise direc-
tion, the electronics become less sensitive and this gives better
results with contaminated water. In normal practice, all potentiome-
ters should be kept at the same position and only for very diverse
conditions of electrodes with respect to the reference electrode or
for different lengths of connection lines, it is practically required to
separately adjust the sensitivity. After any change in cable length
of the connection lines, the adjustment should be checked again.
3.3 Light emitting diodes (LEDs)
The device status is indicated by a set of 8 LEDs which are placed at the lower edge of the PCB:
LED Funktion
PPower, Operating voltage 5 V
EContainer empty, none of the electrodes are in contact
L1 Level 1 (rst electrode from the container bottom)
L2 Level 2 (second electrode from the container bottom)
L3 Level 3 (third electrode from the container bottom)
L4 Level 4 (fourth electrode from the container bottom)
R2 Status Relay 2, for upper electrode pair E3 and E4
R1 Status Relay 1, for lower electrode pair E1 and E2
The LEDs are also provided on the front side for display of device status. In addition, two pushbuttons are also provided by which the
relays can be manually switched ON.
3.4 Conguration of operating mode
The switching polarity of the relay (Fill/empty) can be adjusted by two jumper plugs. The jumper plug “MODE1“ is meant for Relay 1
(lower level) and jumper plug “MODE2“ is for Relay 2 (upper level).If connected in position 1-2, the relay switches ON with rising level
and in position 2-3, the relay switches ON with falling level.
8 / 11

OPERATION MANUAL
Technical changes reserved
0141 0316-112 20.04.2016
Level controller for conducting liquits
WLS-GEH230V
3.5 Connection of user‘s own sensors
!
The following details are useful for persons with adequate knowledge of the associated electronics. The applicable safety regulations
shall be duly followed! Connection and mounting operations shall be carried out only after switching off the voltage supply.
The following instructions help in connection of your own sensors at the input socket of electronics. However, this certainly needs neces-
sary attention as operating voltage is present at the socket also. Sometimes, wrong connection may lead to damage of the components
or result in failure of the module itself.
!Touching the electronic components in switched off condition should also be avoided. Electronic components can get damaged due to
electrostatic discharge process. ESD protection measures should be duly observed!
3.5.1 Pin conguration of input socket (RJ12)
Pin Function Colour
(6 core cable) Discription
1UB White 15 V
2 E 4 Brown Level 4 (E4), highest
3 E 3 Green Level 3 (E3)
4 E 2 Yellow Level 2 (E2)
5 E 1 Grey Level 1 (E1), lowest
6 COM Pink Reference electrode
3.6 Construction of sensor
The sensor can be constructed in various ways:
In plastic containers, the electrodes can be tted in pairs on the container wall. Each pair always consists of a reference electrode and
a sensing electrode, which are placed at a distance of approx. 5-15 cm from each other. For liquids of high conductivity, just one elect-
rode at the bottom of the container is also good enough. The reference electrodes are connected together to the terminal COM. Due to
contamination deposits on the container walls with time, such constructions are probably not maintenance free. The wall area between
the electrodes should be periodically cleaned.
9 / 11

OPERATION MANUAL
Technical changes reserved
0141 0316-112 20.04.2016
Level controller for conducting liquits
WLS-GEH230V
Electrodes of stainless steel rods, hanged from top into the medium, are ideally suited for this purpose. The reference electrode is in
the middle of the 4 diagonally arranged sensing electrodes which are placed in a span of approx. 1-5 cm. The spacing should be wide
enough so that no drop of liquid sticks back to the rods when the level falls down. These electrodes are practically maintenance free.
Cable probes are very simple to manufacture. For this purpose, multi-core silicon cable can be stripped at the end and joined to stainless
steel balls which act as weight and also contact surface. The individual weights are lowered in the container up to the desired switching
point and then the cable is tied up. For reference electrode, a bare stainless steel rope with weight can be used, which goes up to the
bottom of the container. Cable sensing elements are also very reliable and practically maintenance free.
For applications in condensate tubs and for low liquid levels, the sensing system can be constructed as a PCB which is mounted on the
tank wall. Such sensing elements should also be periodically cleaned if the medium is polluted.
3.7 Connection of external LEDs and pushbuttons
The connection of your own components shall be done at your own risk and is outside the guarantee coverage!
External LEDs or pushbuttons for switching the relays can be connected on the terminal strip at the lower edge of the PCB. A ready made
control unit for 12 / 24 V-model is available with us as accessories.
Pin Function Description
1, 2, 5, 6, 7, 8, 17, 18 NC unused
3 5V Stabilised operating voltage 5 V
4 15V Unstabilised operating voltage 15 V
9 LED SW R1 LED and Relay 2 switch, switching against GND, red LED against +15 V with Rv 4.7
k
10 LED SW R2 LED and Relay 2 switch, switching against GND, red LED to +15 V with Rv 4.7 k
11 LED 4 LED for level 4, LED green to +5 V with Rv 1 k
12 LED 3 LED for level 3, LED green to +5 V with Rv 1 k
13 LED 2 LED for level 2, LED green to +5 V with Rv 1 k
14 LED 1 LED for level 1, LED green to +5 V with Rv 1 k
15 LED EMPTY LED for level “Empty“, LED red to +5 V with Rv 1 k
16 GND Reference potential
10 / 11

OPERATION MANUAL
Technical changes reserved
0141 0316-112 20.04.2016
Level controller for conducting liquits
WLS-GEH230V
Attention
Please avoid extreme mechanical and inappropriate exposure.
The device/product is not suitable for potential explosive areas and
medical-technical applications.
11 / 11
Table of contents
Popular Controllers manuals by other brands
National Instruments
National Instruments 73 Series Getting started

AEM
AEM 30-0300 instruction manual
Savant
Savant SmartControl 3 Quick reference guide
RIFT Actuators
RIFT Actuators RIFT 400 Installation, operation & maintenance instructions
Crestron
Crestron ZUMMESH-JBOX-DALI quick start guide
Crestron
Crestron MC2W supplementary guide
SOMFY
SOMFY animeo IP 1822314 installation guide
Silicon Laboratories
Silicon Laboratories SiM3L1xx user guide

GSD
GSD GSDn-WEC Installation & user manual

MicroTouch
MicroTouch Micro Touch Capacitive Controller MT3000 reference guide
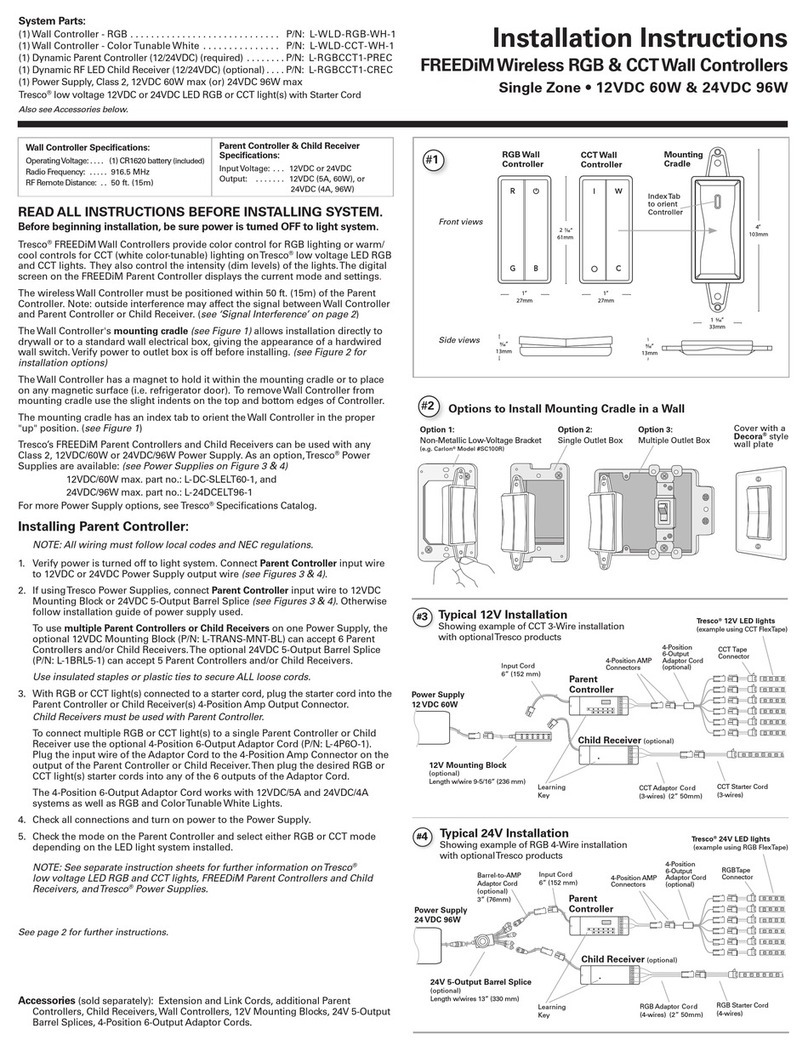
Tresco
Tresco FREEDiM installation instructions

Carel
Carel uPC Technical leaflet
