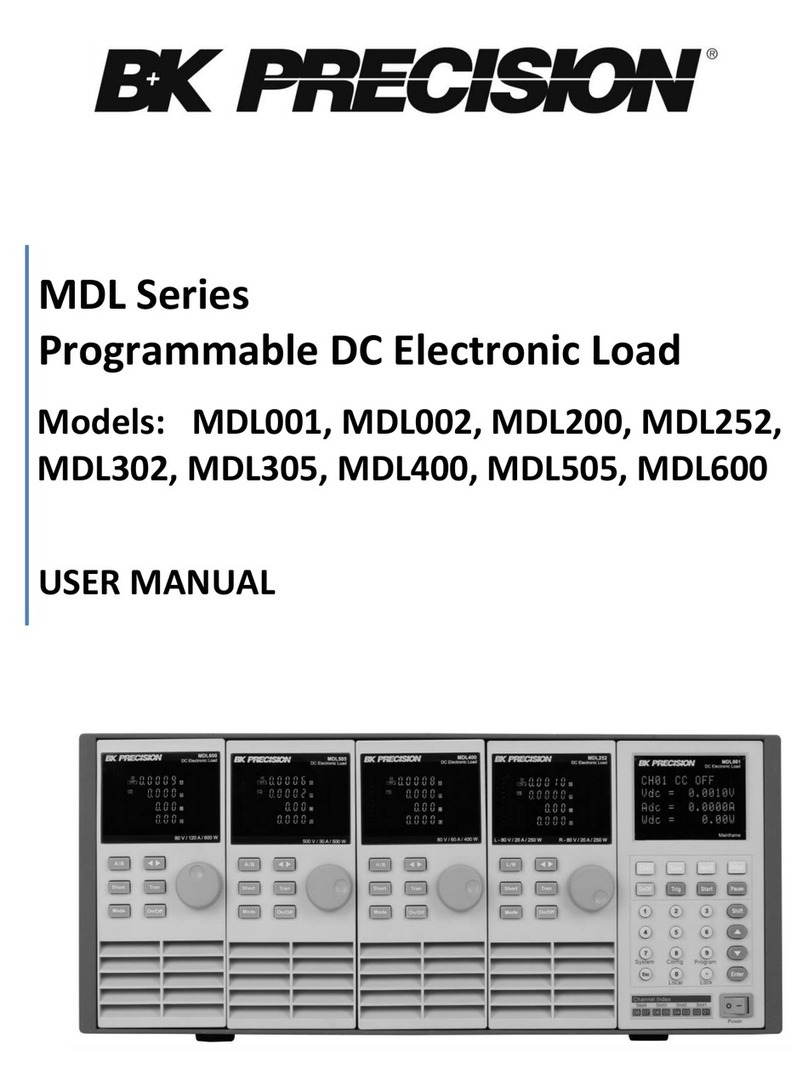
B+K precision MDL001 User manual

MDL Series
Programmable DC Electronic Load
Models: MDL001, MDL002, MDL200, MDL252,
MDL302, MDL305, MDL400, MDL505, MDL600
USER MANUAL

2
Safety Summary
The following general safety precautions must be observed during all phases of operation of this
instrument. Failure to comply with these precautions or with specific warnings elsewhere in this
manual violates safety standards of design, manufacture, and intended use of the instrument. We
assume no liability for the Customer’s failure to comply with these requirements.
ENVIRONMENTAL CONDITIONS
This instrument is intended for indoor use, pollution degree 2 environments. It is designed to
operate at a maximum relative humidity of 95% and at altitudes of up to 2000 meters. Refer to the
specifications tables for the AC mains voltage requirements and ambient operating temperature
range.
BEFORE APPLYING POWER
Verifythat allsafety precautions are taken. Note the instrument's externalmarkings described
under "Safety Symbols".
GROUND THE INSTRUMENT
This product isa Safety Class1 instrument (provided with a protective earth terminal). To minimize
shock hazard, the instrument chassis and covermust be connected to an electrical ground. The
instrument must be connected to the AC mains power through a grounded power cable, with the
ground wire firmly connected to an electrical ground (safety ground)at the power outlet. Note:
Any interruption of the protective (grounding) conductor or disconnection of the protective earth
terminal will causea potential shock hazard that could result in personal injury.
DO NOT OPERATE IN AN EXPLOSIVE ATMOSPHERE
Do not operate the instrument in the presence of fumes or flammable gases.
KEEP AWAY FROM LIVE CIRCUITS
Operating personnel must not remove instrument coversexcept as instructed in this guide for
installing or removing electronic load modules. Component replacementand internal adjustments
must be made only by qualified service personnel. Do not replace components with power cable
connected. Undercertain conditions dangerous voltages may exist even with the power cable
removed. To avoid injuries, always disconnect power, discharge circuits, and remove external
voltage sources before touching components.

3
DO NOT SERVICE OR ADJUST ALONE
Do not try to do some internal service or adjustment unless another person capable of rendering
first aid resuscitation is present.
Safety Symbols
Direct current
Alternating current
Both direct and alternating current
Protective earth (ground) terminal
Attention (refer to accompanying documents)
WARNING
The WARNING sign denotes a hazard. It calls attention to a procedure, practice, or the like, which,
if not correctly performed or adhered to, could result in personal injury. Do not proceed beyond a
WARNING sign untilthe indicated conditions are fully understood and met.
CAUTION
The CAUTION sign denotes a hazard. It calls attention to an operating procedure, or the like, which,
if not correctly performed or adhered to, could result in damage to or destruction of part or all of
the product. Do not proceed beyond a CAUTION sign until the indicated conditionsare fully
understood and met.

4
Compliance Statements
Disposal of Old Electrical & Electronic Equipment (Applicable in the European Union andother
European countries with separate collection systems)
This product is subject to Directive 2002/96/EC of the European Parliament and the Councilof the
European Union on waste electricaland electronicequipment (WEEE), and injurisdictions adopting
that Directive, is marked as being put on the market after August 13, 2005, and should not be
disposed of asunsorted municipal waste. Please utilize your local WEEEcollection facilities inthe
disposition of this product and otherwise observe all applicable requirements.
CE Declaration of Conformity
The DC electronic load meets the requirements of Low Voltage Directive 73/23/EEC and
Electromagnetic Compatibility Directive 89/336/EEC amended by 93/68/EEC.
Low Voltage Directive
-EN61010-1: 2001
EMC Directive
-EN50081-1
-EN50082-1

5
Table of Contents
Safety Summary....................................................................................2
Compliance Statements.........................................................................4
Product Overview .................................................................................8
Description..............................................................................................................................8
Features..................................................................................................................................9
Front Panel............................................................................................................................10
Rear Panel.............................................................................................................................11
Protection Functions..............................................................................................................12
Overvoltage Protection (OVP) ............................................................................................12
Overcurrent Protection (OCP).............................................................................................12
Overpower Protection (OPP)..............................................................................................14
Overtemperature Protection (OTP).....................................................................................15
Reverse Voltage Protection (LRV/RRV) ...............................................................................15
Menu List ..............................................................................................................................16
Setup Menu .......................................................................................................................16
Configuration Menu...........................................................................................................19
Automatic Test Menu.........................................................................................................20
Installation..........................................................................................21
Inspection .............................................................................................................................21
Cleaning................................................................................................................................21
Installing Modules.................................................................................................................22
Channel Number ...................................................................................................................24
Location ................................................................................................................................25
Input Voltage Selection..........................................................................................................27
Turn-On Checkout .................................................................................................................28
If the Electronic Load Does Not Turn On.................................................................................29
Load Connection .................................................................................30
Remote Sense Connection.....................................................................................................31
Parallel Connection................................................................................................................32
Mainframe 8-pin Control Connector.......................................................................................33
External Trigger Connections .................................................................................................34

6
External ON/OFF Control Connection.....................................................................................35
Mainframe Extension Connection..........................................................................................35
PC Control Connection...........................................................................................................36
Operation ...........................................................................................37
Operating Modes...................................................................................................................37
Constant Current (CC) mode...............................................................................................37
Constant Voltage (CV) Mode ..............................................................................................39
Constant Resistance (CR) Mode..........................................................................................40
Constant Power (CW) Mode...............................................................................................41
Constant Impedance (CZ) Mode..........................................................................................42
Setting CV, CC, CR, CW, CZ Mode........................................................................................44
Local Operation.....................................................................................................................45
Mainframe Panel................................................................................................................45
Module Panel.....................................................................................................................48
Module Panel Lock.............................................................................................................49
Switching Channels ............................................................................................................49
Channel Synchronization....................................................................................................49
VFD Indicator Function Description ....................................................................................50
Transient Operation ..............................................................................................................51
Continuous.........................................................................................................................51
Pulse..................................................................................................................................52
Toggle................................................................................................................................53
Setting Up A/B Transient Operation ...................................................................................53
List Operation........................................................................................................................56
Setting Up List Operation Mode..........................................................................................56
Triggered Operation ..............................................................................................................60
Trigger Function.................................................................................................................60
Trigger Source....................................................................................................................60
Short Operation.....................................................................................................................60
Input On/Off Operation.........................................................................................................61
Von Operation.......................................................................................................................61

7
Setting Up Von Function.....................................................................................................62
Save and Recall Operation.....................................................................................................63
Module Controlling Link.........................................................................................................64
Voltage Failure Indication...................................................................................................65
Current Monitoring............................................................................................................65
Digital I/O..........................................................................................................................65
Remote Sense Function......................................................................................................66
External Analog Control......................................................................................................66
Automatic Test......................................................................................................................66
Setting Up Test Files...........................................................................................................66
Recall Test Files..................................................................................................................72
Remote Operation.................................................................................................................72
USB Interface.....................................................................................................................73
Ethernet Interface..............................................................................................................73
GPIB Interface....................................................................................................................73
RS-232 Interface.................................................................................................................74
RS-232 Data Format.................................................................................................................74
Baud Rate.................................................................................................................................74
Parity........................................................................................................................................74
RS-232 Flow Control.................................................................................................................75
RS-232 Connections.................................................................................................................75
RS-232 Troubleshooting...........................................................................................................76
Communication Setting......................................................................................................76
Specifications......................................................................................77
Supplementary Characteristics...............................................................................................79
SERVICE INFORMATION.......................................................................80
LIMITED THREE-YEAR WARRANTY .......................................................81

8
Product Overview
This section describes the main features and menus of the MDL Series DC Electronic Load. The MDL
Series is comprised of two parts, mainframes and modules. The mainframes mentioned are the
MDL001 mainframe and the MDL002 mainframe extension. Modules in this series include the
MDL200, MDL252, MDL302, MDL305, MDL400, MDL505, and MDL600. Unless otherwise noted,
this document will refer to all of these instruments as “electronic load”. The range of each
module’s specific voltage, current, and power is listed in the Specifications section.
Description
The MDL Series is a multi-channel programmable DC electronic load system. With programming
and remote control capabilities, the MDL Series DC electronic load can provide multiple solutions
according to the requirements of your design and is suitable for testing a wide range of power
sources from multi-output DC power supplies to batteries, fuel cells, and photovoltaic arrays.
Up to four modules can be installed into the MDL001 mainframe to support up to a total of 8
channels. Adding the MDL002 mainframe extension will enable the system to support four
additional module slots for a maximumof 16 channels. The electronic load is configured by
installing user-selectable modules into the mainframe and operated usingthe front panel keypad
and rotary knob.It can also becontrolled remotely via USB, RS-232, LAN, or GPIB interface. The
electronic load modules all have similar functions, but may differ in range of input voltage, current,
and power. The high resolution voltageand currentmeasurement system provides both accuracy
and convenience.
The electronic load can be used in one of five different operation modes: constant voltage (CV),
constant current (CC), constant resistance (CR), constant power (CW), or constant impedance (CZ).
All panel operation and programming functions are carried out on the MDL001 mainframe panel. A
wide range of dynamic loading applications can be simulated through user-programmable slew
rates, load levels, duration, and conducting voltage.

9
Features
•CC/CV/CR/CW/CZ operating modes
•Removable modules for easy system flexibility
•Bright VFD displayfor both mainframe and modules
•Power range up to 2400 W (4800 W with mainframe extension)
•Supports up to 16 channels with mainframe extension
•Operate identical modules in parallel mode for high current applications
•Synchronous load on/off function
•16-bit voltage and current metering providing high resolution of 0.1 mV and 0.01 mA
•Transient mode up to 25 kHz
•List mode (sequence mode) – minimum 20 us step width with 84user programmable steps
•Adjustable slew rate in CC mode
•Automatic test function
•101 memory areas to save/recall setting parameters
•Analog current control and monitoring
•Remote sensing
•Standard LAN, GPIB, USBTMC compliant USB, and RS-232 interfaces with SCPI protocol
support
•OVP/OCP/OPP/OTP and reverse voltage protection

10
Front Panel
Figure 1 - MDL Series Front Panel
1) VFD DISPLAY
Displays electronic load information.
2) MODULE PANEL KEYS
Controls module functions. Refer to Module section for more details on the use of these
keys.
3) ADJUSTMENT KNOB
Used to change parameters.
4) MAINFRAME FUNCTION KEYS
Controls each channel’s operating status. Refer to Mainframe section for more details on
the use of these keys.
5) MAINFRAME NUMERIC ENTRY AND SHIFT KEYS
Refer to Mainframe section for more details on the use of these keys.
6) POWER SWITCH
Turns the system on or off.
7) MAINFRAME
8) MODULES

11
Rear Panel
Figure 2 - MDL Series Rear Panel
1) GPIB interface
2) Input terminal of module
3) Remote measurement and external input control terminal
4) Current monitoring output
5) Digital I/O and VF output terminal
6) Extended module interface
7) AC Power input socket
8) USB interface
9) Line voltage selection switch (110V/220V)
10)Trigger I/O and load on/off terminals
11)LAN interface
12)RS-232 interface
13)Not used – for factory use only

12
Protection Functions
The electronic load has the following protection functions: Overvoltage protection (OVP),
overcurrent protection (OCP), overpower protection (OPP), overtemperature protection (OTP), and
local and remote reverse voltage protection (LRV/RRV).
The mainframe will act appropriately once any of the above protections are active. You can press
any button on the front panel to restore the protection function. For example, if the electronic
load triggers the overtemperature protection, the buzzer will alarm, the input will automatically
turn off, and the mainframe VFD will display OTP.
Overvoltage Protection (OVP)
If the OVP circuit has triggered, input will turn off, buzzer alarm will gooff, and the status register’s
OV and VF bit will be set. The mainframe will display OVP and the condition will remain untilthey
are reset. Once overvoltage protection occurs, the 8-pin connector’s VF pin on the rear panel will
output TTL high voltage level. You can control the output state of the power supplyundertest via
this pin (see Figure 31).
Operations to Clear the OVP State
Check whether the input voltage is within the electronic load’s rated voltage or the programmed
protection voltage ranges. If it is outside the range, please disconnect the device under test. Then
press any key on the front panel or remotely send SCPI command PROTection:CLEar. The OVP
displayed on the front panel will turn off and the electronic load exits OVP protection state.
Overcurrent Protection (OCP)
The electronic load includes both hardware and software overcurrent protection features.
Hardware OCP - The electronic load’s maximum input current will be limited to approximately
110% of the current range. Once thehardware OCP is triggered, the statusregister’s OC bit willbe
set. When the hardware OCP is removed, the status register’s OC bit will be reset. Hardware
overcurrent protection will not affect the electronic load’s on/off state.
Software OCP - Users can set the electronic load’s software OCP value with the following steps.

13
Panel Operations
VFD Display
1. Power on the electronic load.
Self-test
2. Press Shift + ⑧to enter Configuration menu.
Sync On Set
Von
Meter
Protect
List
Ext. Ctrl Set
About
Exit
3. Press key to select <Protect>and press Enter to go into protection
menu.
Max Power Set
Alimit State
Alimit Point
Alimit Delay
Plimit Point
Plimit Delay
OnTimer State
OnTimer Set
Exit
4. Press key to select <Alimit State> and press Enter. Select <On>
and press Enter to confirm.
On
Off (Default)
5. Press key to select <Alimit Point> and press Enter. Input OCP
current value and press Enter to confirm.
Current Limit
Set= 40.000A
6. Press key to select <Alimit Delay> and press Enter. Input delay
time before alarm and press Enter to confirm.
Current Limit
Delay= 3S
7. Press Esc key to exit menus.
If the electronic load’s current value is above the set overcurrent protection value, the electronic
load will automaticallyturn off and the VFD willdisplay OCP. At the sametime, the OC and PS bits
in the status register will be set and remain until they arereset.
Operations to Clear the OCP State
Check whether the input current is within the electronic load’s rated current or the programmed
protection current ranges. If it is outside the range, disconnect the device under test. Then press
any key on the front panel or remotely send SCPI command PROTection:CLEar. The OCP displayed
on the front panel will turn off and theload exitsOCP protection state.

14
Overpower Protection (OPP)
The electronic load includes both hardware and software OPP features.
Hardware OPP – In the event that the electronic load’s input power exceeds the set power
protection limit, the hardware OPP will limit the power. Once the hardware OPP is triggered, the
status register’s OP bit will be set. When the hardware OPP is removed, the status register’s OP bit
will be reset. Hardware overpower protection will not turn the electronic load’s input off.
Software OPP - Users can set the electronic load’s software OPP value with the following steps.
Panel Operations
VFD Display
1. Power on the electronic load.
Self-test
2. Press Shift + ⑧to enter Configuration menu.
Sync On Set
Von
Meter
Protect
List
Ext. Ctrl Set
About
Exit
3. Press key to select <Protect>and press Enter to go into
protection menu.
Max Power Set
Alimit State
Alimit Point
Alimit Delay
Plimit Point
Plimit Delay
OnTimer State
OnTimer Set
Exit
4. Press key to select <Plimit Point> and press Enter. Input OPP
power value and press Enter to confirm.
Power Limit
Set= 210.00W
5. Press key to select <Plimit Delay> and press Enter. Input delay
time before alarm and press Enter to confirm.
Power Limit
Delay= 3S
6. Press Esc key to exit menus.
If the electronic load’s power value is above the set overpower protection value, the electronic
load will automatically turn off and the VFD will display OPP. At the same time, the OP and PS bits
in the status register will be set and remain until they arereset.

15
Operations to Clear the OPP State
Check whether the input power iswithin the rated power range or the programmed protection
ranges. If it is outside the range, disconnect the device under test. Then press any key on the front
panel or remotely send command PROTection:CLEar. The OPP displayedon the frontpanel will
turn off and the electronic load exits OPP protection state.
Overtemperature Protection (OTP)
Each module has an overtemperature protection circuit, which will turn off the input if the internal
temperature exceeds safe limits. When the electronic load’s internal circuit temperature is over
85°C, the load will enable OTP. Input will automatically be turned off and the VFD will display OTP.
At the same time the OT and PS bits in the status register will be set and remain until they are
reset.
Operations to Clear the OTP State
When the electronic load temperature hasdropped below the protection point, press any key on
the front panel or remotely send command PROTection:CLEar. The OTP displayed on the front
panel will turn off and the electronic load exits OTP protection state.
Reverse Voltage Protection (LRV/RRV)
Thisfunction protects the electronic load in case theinput DC voltage lines areconnected with the
wrong polarity. When a reverse voltage (LRV – local reverse voltage, RRV – remote reverse voltage)
connection condition is detected, the input will immediately turn off, the buzzer will alarm the
user, and the status register’s reverse voltage (LRV/RRV) and VF bits will be set. The mainframe will
display LRV/RRV until they are reset.
In this condition, the 8-pin connector’sVF pin willoutput ahigh level.You can disconnect the
power supply via this signal (see Figure 31).
Operations to Clear the Reverse Voltage State
Check whether the connection is reversed. If so, disconnect the deviceto be measured and the
reverse voltage statewill be cleared.

16
Menu List
The following menus can be viewed on the VFD display. Use keys to scroll through the menu
list and press Enter key to enter the selected menu function. Use keys to scroll through the
VFD screen and press Enter keyto enter its submenu. Press Esc to go back to theprevious menu
selection. Pressing number keys can directly select a channel.
Setup Menu
Press Setup key to enter the setup menu.
SETUP
MODE
Select working mode
CONST CURRENT
Load works in CC mode
CONST VOLTAGE
Load works in CV mode
CONST RESISTANCE
Load works in CR mode
CONST POWER
Load works in CW mode
CONST IMPEDANCE
Load works in CZ mode
CC/CV RANGE
Switch the range
HIGH RANGE
Set high range
LOW RANGE
Set low range
I / V / R / W SET
Set the working current/voltage/resistance/power value
Vmax/Amax
Set up the maximum voltage/current limit for Automatic test mode
Vmin/Amin
Set up the minimum voltage/current limit for Automatic test mode
∫=2.500A/us
Set the rising slew rate (only in CC mode)
∫=2.500A/us
Set the falling slew rate (only in CC mode)
TRAN A=0.00A
Set up level A value
Ta=0.0005S
Set up level A width
TRAN B=0.00A
Set up level B value
Tb=0.0005S
Set up level B width
T MODE
Set up the transient mode
CONTINUOUS
Continuous mode
PULSE
Pulse mode
TOGGLE
Toggle mode
RLC R=7500.0Ω
Set up the resistance value
RLC L=0uH
Set up the inductance value
RLC C=10uF
Set up the capacitance value
EXIT
Exit the setup menu

17
System Menu
Press Shift + ⑦key to enter the System menu.
MENU
INITIALIZE
INITIALIZE DEFAULT SET
Resume all configuration to default settings
POWER ON SET
RST (DEFAULT)
Set the load’s input state to default at power on
SAV0
Set the load’s input state to SAV0 at power on
BUZZER SET
Set up the buzzer state
ON
Enable the function
OFF (DEFAULT)
Disable the function
LOAD ON KNOB
Module knob mode setting
UPDATE (DEF)
Real-time update
OLD
No update (when turning load ON/OFF, original
value before use of rotary knob will be set)
TRIGGER SOUR.
Set up the trigger mode
MANUAL (DEF)
Manual trigger
EXTERNAL
External signal trigger mode
HOLD
Hold trigger mode
BUS
Bus trigger mode
TIMER
Timer trigger
TRIGGER TIMER
Trigger timer setting
TRIGGER TIMER SET
Set the time of the trigger timer
COMMUNICATION
Select the interface for remote communication
RS232 (DEF)
USBTMC-USB488
GPIB
ETHERNET
RS232 SET
BAUDRATE SET
Set up the communication baud rate
4800 (DEFAULT)
9600
19200
38400
57600
115200

18
RS232 SET
PARITY SET
Set up the communication parity
NONE (DEFAULT)
ODD
EVEN
HANDSHAKE SET
Select the handshake protocol
NONE (DEFAULT)
CTS/RTS
XON/XOFF
GPIB ADDRESS
GPIB address setting
GPIB ADDRESS SET
Set up communication address
ETHERNET SET
Ethernet settings
GATEWAY SET
Gateway setting
IP SET
IP setting
MASK SET
Mask setting
PORT SET
Port setting
EXIT
EXPAND MODULE
Module expansion
ON
Enable the function
OFF (DEFAULT)
Disable the function
LANGUAGE SET
Communication protocol
SCPI (DEFAULT)
SCPI protocol
EXTEND TABLE
Expand SCPI protocol, compatible with others
ABOUT
Mainframe production information
MDL###
Mainframe production model number
SN:
################## Mainframe production serial number
VER: 1.43
Mainframe software version
EXIT

19
Configuration Menu
Press Shift + ⑧key to enter the channel Configuration menu.
MENU
SYNC ON SET
Setup Synchronization ON / OFF function
ON (DEFAULT)
Turn on synchronization function
OFF Turn off synchronization function
VON
VON POINT
Set the load’s Von point
VON LATCH
Von latch state
ON (DEFAULT)
Turn on Von latch
OFF
Turn off Von latch
EXIT
Exit the menu
AVERAGE
COUNT Average count setting 2^X (adjustable from 2^2 to 2^16)
V AUTORANGE
Auto switching voltage range
ON (DEFAULT)
Enable this function
OFF
Disable this function
PROTECT
Load protecting function
MAX POWER SET
Set up hardware power protection state
ALIMIT STATE
Set up software current protection state
ON
Turn on software current
protection state
OFF (DEFAULT)
Turn off software current
protection state
ALIMIT POINT
Set up software current protection value
ALIMIT DELAY
Set up software current protection delay
PLIMIT POINT
Set up software power protection value
PLIMIT DELAY
Set up software power protection delay
ON TIMER STATE
Set up LOAD ON timer state
ON TIMER SET
Set up LOAD ONtimertime
EXIT
Exit the menu
LIST
FUNCTION MODE
Select mode
FIXED
Choosefixed operation mode
LIST
Chooselist operation mode
RECALL LIST
Recall list operation file

20
EDIT LIST
Edit list operation file
HIGH RANGE
Edit high range of list operation
LOW RANGE
Edit low range of list operation
EXT. CTRL SET
External analog control function
ON
Turn on external analog control function
OFF (DEFAULT)
Turn off external analog control function
REM SENSE SET
Remote sense function
ON
Enable remote sense function
OFF (DEFAULT)
Disable remote sense function
ABOUT
Module production information
MDL###
Channel production model
SN:
################## Channel production serial number
VER: 1.35
Channel software version
EXIT
Exit the menu
Automatic Test Menu
Press Shift + ⑨key to enter the program menu.
PROGRAM
RUN PROGRAM
Run the testing file
RECALL PROG
Recall the testing file
EDIT PROGRAM
Edit the testing file
EXIT
This manual suits for next models
13
Table of contents
Other B+K precision Control Unit manuals
Popular Control Unit manuals by other brands

Quanser
Quanser SRV02 Series user manual
ABB
ABB SACE PR212/D-L instruction manual
INOXPA
INOXPA INNOVA S Installation, service and maintenance instructions
Trinamic
Trinamic PD28-1-1021 Hardware manual

Grundfos
Grundfos CIM 500 instructions
Guntermann & Drunck
Guntermann & Drunck G&D UCON-Audio-s Installation and operation

Stanley
Stanley STW0101N Applications manual
turck
turck excom I/O System Integration manual
Seco
Seco Smarc SM-C93 user manual

Larson Electronics
Larson Electronics LM-SYM-XX-CTRL-R1 instruction manual

Stenner Pumps
Stenner Pumps PCM series Installation and maintenance manual
Moxa Technologies
Moxa Technologies ABC-01 Quick installation guide
