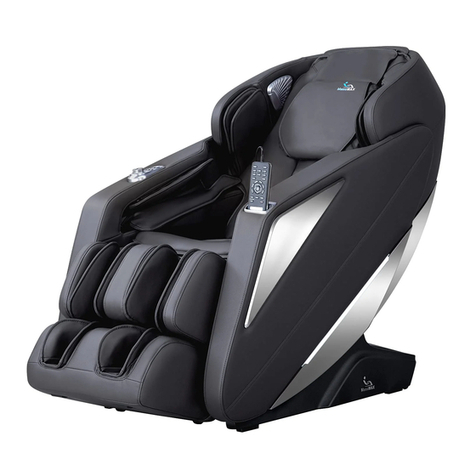
BrainLight SPHERE User manual

brainLight®-4D-Shiatsu-Massage-Chair
USER MANUAL
✦✦ ✦ Since 1988 ✦✦ ✦

brainLight®-4D-Shiatsu-Massage-Chair SPHERE
Thank you very much for choosing the brainLight-4D-
Shiatsu-Massage-Chair SPHERE.
Your Wellness-Sphere: The brainLight-4D-Shiatsu-
Massage-Chair SPHERE, wrapped in OEKO-
Tex 100 certied leatherette! It allows massages from
neck to buttocks, from the tip of your ngers to the tip
of your toes. Individually adjusted, when using the
Health Check function or manually chosen, according
to your needs in any moment: This feels good right
now, in just this intensity. Add to this the Negative-
Ions-Function, which can heighten your sense of well-
being. Combined with the light and sound of the
brainLight-Systems, SPHERE offers you a
perfect experience of well-being.
Let our SPHERE take you to new spheres!!
NOTE:
In order to get the best experience out of the various
functions of your massage chair right from the start,
please read this manual carefully, in particular the
safety instructions.
WARRANTY AND GUARANTEE
The warranty and guarantee periods adhered to by
brainLight GmbH are as follows:
Private customers:
24 months warranty for new goods.
12 months warranty for used goods.
24 months guarantee for new goods.
6 months guarantee for used goods.
Commercial customers:
12 months warranty for new goods.
6 months warranty for used goods.
6 months guarantee for new and used goods.
If you have any questions regarding your brainLight-
System or if a repair is necessary, please contact the
brainLight-Customer Service:
By phone: Service-Hotline +49 (0)6021 5907-10
(Monday to Friday, 9 am to 5 pm – CET)
By e-mail: kundenservice@brainlight.de
We will get back to you promptly.
2

brainLight®-4D-Shiatsu-Massage-Chair SPHERE
Safety Instructions
Contraindications ................................................. 4
Installation and Operation ................................... 4
Before Using the Chair .......................................... 5
During Use of the Chair ........................................ 5
After Using the Chair............................................. 5
No Unqualied Dismantling or Repairs .............. 5
Heating Function .................................................. 6
The Chair Components ............................................. 7
Moving the Chair ........................................................ 8
Placing the Chair ........................................................ 9
General Instructions before Use ............................... 10
Control Panel – Overview .......................................... 12
Symbols on Control Panel – Display ........................ 13
Content
The Chair Functions
Quick Guide .......................................................... 14
Using the Menu to Navigate ................................ 15
Manual Massage Settings..................................... 23
Shortcut Buttons on top of right side panel ........... 24
Control Panel – Symbols on Shortcut Buttons ........ 25
Negative-Ions-Function ............................................ 26
Troubleshooting, Maintenance, & Care
Troubleshooting: No Power ................................. 27
Cleaning and Care ................................................ 27
Product- and Packaging Measurements .................. 30
Technical Specications ............................................. 31
3

In order to avoid damage, accidents and injuries, the
following safety instructions should be adhered to:
1. Contraindications – People with any of the following
conditions are advised to consult their physician or
therapist before using the 4D-Shiatsu massage chair
SPHERE:
• People with heart diseases
• People with severe tumors
• Women during pregnancy or menstruation
• People with back pains, abnormalities or curvature
of the spine
• People undergoing medical treatment and medi-
cinal therapy
• People with osteoporosis, diabetes, and / or sensory
impairments.
Not allowed to use
• the calf- and foot-sole massage function: People
suffering from thrombosis or similar vein conditions
• any massage functions: Children under the age of 14
• the massage chair: People weighing more than
120 kg / 19 stone / 265 lbs.
Children, people who are ill and people with rele-
vant disabilities should only use the chair under the
supervision of an adult or carer.
Safety Instructions
2. Installation and Operation:
• Use the chair only indoors. It is not designed to be
used in any outside area.
• If the room that the chair is usually in, is kept rather
cool, please turn the room temperature up gradually
a few degrees at at time and not right away to a high
setting.
• If transporting the chair from a cold environment or
room into a warm room remember to wait for about
an hour before using it, like you do with any other
electrical device. Condensation may occur on the
mechanical parts of the chair through the fast tem-
perature change and might cause a malfunction.
• Do not place the chair in rooms where aerosols are
used or devices for oxygen therapies (e.g. an
oxygen-inhaling-apparatus).
• Place the chair only on a at, level surface.
• Do not set up the chair in a dirty, oily, humid or
damp environment.
• Do not expose the chair to direct sunlight and do
not place it too close to other electrical appliances.
• Please do not use the chair when the surrounding
temperature is above 40° C / 104° F.
4

Safety Instructions Safety Instructions
5. After Using the Chair:
• After every use of the chair we recommend to drink
plenty of water – as after any type of massage – in
order to help with the removal of toxins and waste
from the now activated limbic system.
• Please unplug the power cord from the wall socket
when the chair is not in use.
6. No Unqualied Dismantling or Repairs!
• Do not attempt to dismantle, repair, or modify the
chair without the qualied technical guidance of the
brainLight GmbH. If repairs are carried out without
the appropriate expertise and skill, you might loose
the eligibility for claims based on statutory warranty.
• Do not clean the chair with alcoholic or steam
producing solutions (See -Cleaning and Care- on
page 27 ff.).
• Unplug the power cord when cleaning the chair or
during maintenance.
3. Before Using the Chair:
Please read the safety instructions carefully before
using the massage chair.
4. During Use of the Chair:
• Do not allow children to play on the chair.
• Children under the age of 14 can use the heating
function of the chair BUT ONLY while under the
supervision of an adult.
• Keep hands and feet away from the mechanics of
the chair.
• Please do not put your weight on the calf massage
part in order to prevent injuries and / or damage to
the chair.
• Do not use the chair in a wet condition (right after a
bath or a shower) and do not operate the chair with
damp hands.
• Sit in the chair in an upright position.
• Do not insert any objects into the mechanics, seat
cushion or footrest of the chair.
• The massage chair should not be used by more than
one person at a time.
• Do not eat or drink while using the massage chair.
5

Safety Instructions The Chair Components
CAUTION:
• If you feel unwell or ill when using the chair, please
pause your application immediately by pushing the
On / Off button (see p. 12).
• If the cover material of the chair is outworn or dama-
ged anywhere, unplug the power cord from the wall
socket and contact brainLight GmbH.
• Put a towel underneath your head when using hair
gel or oil- or wax-based hair products to protect the
cover material of the chair.
• Please handle the control panel with care and press
the buttons only with dry hands. A light touch with
your fingertips is enough to operate the chair.
Please do not use any sharp objects to operate the
control panel (pens, ngernails, etc.).
HEATING FUNCTION
To avoid getting too hot when using a massage
program with the HEAT function, we recommend
that you wear appropriate clothing.
• People with relevant disabilities and people with
limited sensory perception should not use the HEAT
function to avoid feeling uncomfortably hot.
• Do not use the HEATING function for more than 30
minutes at a time and let it cool down before turning
it on again. Continuously using the HEAT function
may result in overheating.
• For optimum comfort we recommend to use the
HEATING function in combination with the massage
functions.
6

Headrest with pillow
Holder for control panel
Main switch box at the
back of the chair base
Chair base with casters
Safety Instructions
Negative-Ions-Outlet
Airbags for shoulder massage
Foldable backrest pad
Shortcut buttons
Airbags for arm- and hand massage
Airbags for calf massage
Airbags and massage rolls
for foot-sole massage
The Chair Components
Accessory (1): Accessory bag for the brainLight-Visualization-Glasses
or your own glasses during a session
Accessory (2): Foam pads to insert in the foot area
to soften the intensity of the massage there if so desired
Accessory (3): Connection cable to
the brainLight-Deep-Relaxation-System
7

Moving the Chair
• First turn the power off at the main switch at the
back of the chair base and then pull the power cord
out of the wall socket.
• Remember to cover the oor with suitable material
before moving the chair to avoid any damage to the
surface.
• Tilt the chair -as shown in the picture below – and
roll it to the desired position on its casters
8

(approx. 1.15 feet)
(approx.
2 inches)
Sessel-Stand-BereichSessel-Stand-Bereich
Fußteil-Aufsetz-BereichFußteil-Aufsetz-Bereich
Moving the Chair Placing the Chair
Please make sure to have at least 35 cm (approx. 1.15
feet) space in front of the chair. Keep a space of at least
5 cm (approx. 2 inches) behind the chair, so that the
backrest can move backwards during the massage
program without any obstruction.
Chair baseArea needed for footrest
9

General Instructions before Use
NOTE:You can remove the control panel totally, if
your brainLight-4D-Shiatsu-Massagesessel
SPHERE is connected to a brainLight-
Synchro or relaxTower and you exclusively want to
use its fully automatic and synchronized brainLight -
Light and Sound Massage Programs.
CONNECTING THE brainLight-DEEP-
RELAXATION-SYSTEM WITH THE
MASSAGE CHAIR:
1. Connect your brainLight-Synchro or the brain-
Light relaxTower with the provided adapter cable
(part of the delivery contents).
2. Connect the main power plug to the massage chair
and plug the other end into a wall socket.
3. Turn on the main ON / OFF switch at the base of the
chair.
Plug in the cable to the
brainLight-Deep-Relaxation-
System here.
Main ON / OFF switch
Main power plug
1010

velcro
General Instructions before Use General Instructions before initial Use
ATTACHING THE COVER PAD
AND PILLOW:
• Zip up the cover pad on
the right and left side
of the back rest and
the seating area of the
massage chair.
• Attach the pillow to the back padding with velcro.
• Zip up the foldable backrest pad at the top of the
back pad.
• The backrest pad can be folded up and serve as a
second pillow or it can be fully removed if you desire
a more intense back massage (see picture p. 23).
1111

2
3
5
4
1
7
8
9
11
10
Control panel display
Play / Pause
4-Way-Direction
Moving footrest UP Recline Angle UP
Menu
On / Off
OK (Conrmation Button)
Moving footrest DOWN
Control Panel – Overview
THE SHORTCUT BUTTONS:
Recline Angle DOWN
Changing reclining
angle of the chair
6
NOTE:
The Control Panel is NOT a touch
panel! Navigating within the availa-
ble menu functions is done via the
4-Way-Direction button (3).
12

9 OK Button: Press this button to conrm your
selection within the menu.
10 Recline Angle UP / DOWN Button:
Press these buttons to manually adjust the
11 angle for your reclining position.
NOTE:
When using the automatic programs not all Shortcut
Buttons can be used (details see p. 15).
2 Play / Pause Button: Press this button to
pause the massage. The massage continues
when you press the button again.
3 4-Way-Direction-Button: This
button allows you to navigate within
the menu in four directions. Conrm
your selection by pressing the OK-
Button (9).
4 Moving footrest UP / DOWN: Press these
buttons to manually adjust the angle for your
lower legs.
6 Zero Button: Press this button to choose
one of the three available reclining positions.
7 Menu Button: Press this button to select
any available functions within the menu.
8 On / Off Button: Press this button to start
your massage chair or to stop it.
Control Panel – Overview Symbols on Control Panel-Display
13

The Massage Functions: Quick Guide
1. Press the On / Off Button (8) drücken.
2. Use the 4-Way-Direction-Button (3) to select an
automatic program and start it by pressing the
OK Button (9).
3. The body scan starts. Once the body scan is com-
pleted you can adjust the massage rolls manually to
your personal liking by using the UP / DOWN keys
and of the 4-Way-Direction-Button (3). Once
they are in an optimal position, you conrm this by
pressing the OK Button (9).
4. Now modifications are possible like selecting
another automatic program or changing the dura-
tion of the program etc.; This can be done in two
ways: use the Shortcut-Control Panel (p. 24) or use
the Menu of the Control Panel (p. 15ff.) to select
the desired function.
You can pause the selected program at any time by
pressing the Play / Pause Button and continue by
pressing the button again. Please turn your massage
chair off after use.
Body scan to adapt to
different body types
Scan for height Extendable
foot rest
Shoulder scan Backbone scan
Height
185 cm
165 cm
155 cm
(approx. in feet)
6‘
5.4’
5‘
14

Auto Manual
Airbag General
Health Settings
Classic
Special
Focus
Classic
Special
Focus
Limber Up
Wellbeeing
Fit
Classic
Special
Focus
Neck Focus
Lumbar Focus
Thigh Focus
Relax
Refresh
Stretch
Sleep Aid
Relief
Wake Up
Direction keys to select, OK key
to conrm. Menu key to return.
Direction keys to select, OK key
to conrm. Menu key to return.
Direction keys to select, OK key
to conrm. Menu key to return.
Direction keys to select, OK key
to conrm. Menu key to return.
The Massage Functions: Quick Guide The Massage Functions: Using the Menu to Navigate
GENERAL:
By using the 4-Way-Direction button (3) you can
move around on your menu display. With the OK
Button (9) you conrm your choice and the next screen
appears, giving you new options. With this method
you can navigate through the different screens and
choose your individual settings.
Going to the Menu Button AUTO on your Control
Panel you have the choice of 12 pre-programmed
automatic programs and a selection of 3 categories.
Use the 4-Way-Direction-Button (3) to navigate to the
selected functions and conrm your choice by pres-
sing the OK Button (9).
NOTE:
While using the automatic programs "Stretch" and
"Sleep Aid" the seating angle cannot be changed
manually. In addition: the 3D-intensity cannot be
changed while using "Stretch".
15

Auto Manual
Airbag General
Health Settings
Mode
Region
Width
Mode
Region
Width
Whole
Part
Point
Kneading
Tapping
Knocking
Clapping
Interval
Shiatsu
Speed Speed
Direction keys to select, OK key
to conrm. Menu key to return.
Direction keys to select, OK key
to conrm. Menu key to return.
Direction keys to select, OK key
to conrm. Menu key to return.
Manual Manual
The Massage Functions: Using the Menu to Navigate
The brainLight-4D-Shiatsu-Massage Chair
SPHERE lets you choose from 6 different
types of massages: Kneading, Tapping, Knocking
(Pounding), Clapping, Interval and Shiatsu for back-
and buttocks area with up to 6 speed settings.
Those different types of massages can be chosen in
your menu by going to MANUAL and then to MODE
for your selection.
By going to REGION you can choose the body area
that you would like to have massaged. This can be a
complete body massage or only a certain area or even
only a certain point. (Whole / Part / Point). To direct the
massage rolls to a certain point, you go rst to „Whole“
and wait till the massage rolls reach the point of your
choice. Then press „Point“.
16

Mode
Region
Width
Wide
Medium
Narrow
Speed
Mode
Region
Width
1
2
3
4
5
6
Speed
Manual Manual
Direction keys to select, OK key
to conrm. Menu key to return.
Direction keys to select, OK key
to conrm. Menu key to return.
The Massage Functions: Using the Menu to NavigateThe Massage Functions: Using the Menu to Navigate
The distance between the massage rolls can be chosen
by going to WIDTH and set in 3 different intervals:
Width = 18 cm
Medium = 10 cm
Marrow = 5 cm
This selection is not possible when using the mode
“Kneading“ or “Knocking“ (Pounding).
By pressing SPEED you can choose between 6 diffe-
rent settings within any of the massage types.
17

Airbag Airbag
Direction keys to select, OK key
to conrm. Menu key to return.
Direction keys to select, OK key
to conrm. Menu key to return.
Direction keys to select, OK key
to conrm. Menu key to return.
Auto Manual
Airbag General
Health Settings
Region
Intensity
Whole
Shoulders
Arms
Legs
Region
Intensity
1
2
3
OFF
The Massage Functions: Using the Menu to Navigate
The brainLight-4D-Shiatsu-Massage Chair
SPHERE uses airbags to massage the more
sensitive body parts like shoulders, arms, hands, legs,
and feet with air pressure.
To get to this setting, choose AIRBAG on the menu.
Then go to REGION to choose the area you want
massaged. With the setting AUTO all areas of the
body are being massaged.
By going to INTENSITY you can choose between three
different intensities or turn this function totally OFF.
When no setting for INTENSITY is chosen, the system
automatically uses level 2.
18

Health
Health
Auto Manual
Airbag General
Health Settings
Health Check
Put your nger (red light
must turn on) on the sensor
until the check is complete
Cancel OK
Check Completed
Would you like the chair to
generate a customized massage?
HR (Bpm) 66
SpO2 (%) 98
Fatigue Level 39
Direction keys to select. OK key
to conrm. Menu key to return.
Health
Check Failed
Restart the check?
Direction keys to select. OK key
to conrm. Menu key to return.
Direction keys to select. OK key
to conrm. Menu key to return.
Direction keys to select. OK key
to conrm. Menu key to return.
Cancel OK
HR (Bpm) 0
SpO2 (%) 0
Fatigue Level 7
The HEALTH CHECK can be used
to determine your current level of
exhaustion. To do this, select the
HEALTH menu item on the control
panel. To activate the HEALTH
CHECK on the menu you use the
4-Way-Direction-Button (3) to navi-
gate to the desired function and
conrm your choice by pressing the
OK-Button (9).
A HEALTH CHECK is done by plac-
ing your nger lightly on the sensor
(Detection Module). While the red
light is glowing, your heart rate and
the oxygen saturation in your blood
is measured. After this check you
can choose the offered, individual-
ized massage that is based on those
measurements.
If the check failed, you can re-start
the process by pressing the OK
button.
The Massage Functions: Using the Menu to NavigateThe Massage Functions: Using the Menu to Navigate
The EXHAUSTION LEVEL is calcu-
lated on the basis of an algorithm
that assumes that a healthy pulse is
between 60 and 100 bpm (beats per
minute) and that a healthy oxygen
saturation in the blood is between
95% and 99%.
This means that an exhaustion level
of:
< 20: means severe exhaustion
20-25: means medium exhaustion
25-30: means slight exhaustion
30–100: means not exhausted
The higher the value, the better
your general condition.
The greater the fatigue, the stronger/
more intense the "individualized
massage" that can be selected fol-
lowing the health check.
19

Auto Manual
Airbag General
Health Settings
Chair Position
Foot Rolls
Heating
1
2
3
3D Intensity
Direction keys to select, OK key
to conrm. Menu key to return.
Direction keys to select, OK key
to conrm. Menu key to return.
General
The Massage Functions: Using the Menu to Navigate
Go to GENERAL to choose one of the three reclining
positions available. The ZERO-POSITION (8) (Zero
Gravity) is the lowest position possible. It imitates the
reclining position that astronauts are in during lift-off.
That way, the strong and sudden rise in gravity is safely
distributed throughout the body. The brainLight-
4D-Massage Chair SPHERE is using the same
effect to distribute your weight optimally within the
chair. This relieves your body and allows for a more
intense massage experience. The stress reduction
on your body is so effective, that you almost feel
weightless. Another advantage of this Zero position
is that it supports the blood circulation in your legs
and reduces swelling. This might even help to prevent
varicose veins among other things, since your legs are
higher than your heart in this position.
20
Table of contents
Other BrainLight Massager manuals
