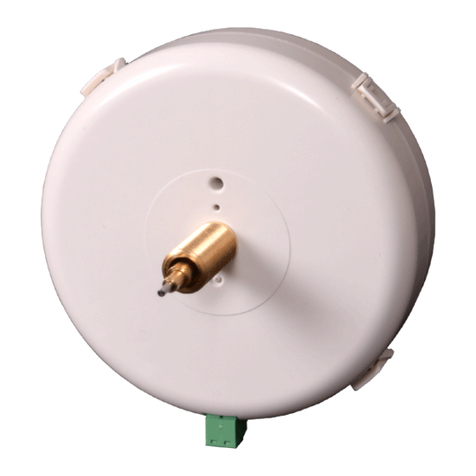
Bramwell Brown Tide Clocks User manual


Ahoy there!
We would dearly like to thank you for purchasing your
Mechanimated Tide Clock. We hope that it will be a really useful
guide to your local tide movements, and help you plan many a
happy trip to the beach or out on the water! We provide this booklet
not just as an instruction manual but to tell a little of our story to
date and the ethos of our budding business. As always, we’d love to
hear any comments or feedback you might have, so please get in
touch!
All the best,
(Founders of Bramwell Brown)
1

Contents
Extend your warranty page 3
Taking care of your clock page 3
Getting started page 4
Setting your Tide Clock using the demonstration button page 6
Bringing the harbour scene to life
with the demonstration function page 7
Tedious but important formalities page 8
What if my Tide Clock readings don’t match the actual tide page 8
Hanging the clock page 10
Changing the batteries page 10
About Bramwell Brown page 11
Contact us page 12
2

Extend Your Warranty
All Bramwell Brown clocks come with an automatic one year
warranty provided you retain proof of purchase. We also oer the
opportunity to extend this to two years by registering your clock
number with us. To register go to
www.bramwellbrown.com then click on the link to “Register My
Clock” and enter the number on the back of the clock, your rst
name and email address.
By registering your clock you can nd out information on the artist
responsible for the harbour artwork on your clock and the seaside
town that it was inspired by. We are constantly developing artwork
depicting new seaside locations. Please do check our website and
blog for the latest editions to range.
Our website also provides information on the charitable causes that
Bramwell Brown supports. By registering your clock you can hear
what we’ve been donating to of late.
Taking Care of Your Clock
We have taken every care to ensure your clock is of the highest build
quality, and as such to last and be enjoyed for many years to come.
However, being a complex mechanism, there is a certain degree
of unavoidable fragility that will obviously not withstand being
subjected to extreme forces or temperatures. As with any clock,
please bear this in mind when handling it and when choosing where
to position it in your home. For example, we would advise against
hanging it above a hot radiator or next to a South facing window.
Please also note that your clock is for indoor use only!
3

The layers of mechanical harbour scenery in your clock have been
carefully optimised to work with the clock in an upright position, as
hung on a wall. Therefore, to avoid putting unnecessary strain on
the mechanism, do not allow the clock to move mechanically when laid
horizontal. This is important to remember when rst switching the
clock on.
If storage is required, please store in an upright position and
switched o to avoid risk of damage to the clock’s mechanics. We
also recommend removing the batteries if it is not going to be used
for some time.
Getting Started
4

Setting the Time:
1. To activate the clock mechanism (which runs independently
to the harbour scenery and tide dials), locate one of the AA
batteries which are included with your clock and insert it into
the central quartz clock movement on the back.
2. Adjust the time by rotating the green knob found next to where
you inserted the battery.
Activating the Harbour and Tide Dials:
If you’ve purchased the clock in the UK then all the other batteries
required to get the clock set up are already installed.
5

1. Ensure the on/o switch on the back is rst in its “o”
position
2. Remove the 2 pull tabs from the back of the clock.
3. Turn the switch to “on” only when the clock is in an upright
position. (Remember to turn the switch to “o” any time the
clock is to be laid at.)
4. Once the switch is on the clock will commence its semi-
diurnal (24 hours, 50 minutes and 30 seconds) timer. The
dials and harbour scene will then move in synchronisation
every thirty minutes, updating the tide level and forecast.
Setting Your Tide Clock
Put simply, you can set your clock to the local tide by holding down
the demonstration button and releasing it when the tide shown on
the clock has moved to the right position.
Preparation:
You will need to start by consulting a tide timetable for accurate
timings. Timetables are usually available in local shops.
Alternatively, go to www.tide-forecast.com and search for
your nearest section of coastline. Once you have accurate tidal
information you can set about aligning the clock dials with the local
tide.
6

For most precise results the clock should be set when your local tide
is at its highest point.
Once you’re ready:
1. Press and hold the demonstration button
2. Release the button when it reaches ‘High Tide’
3. Both the clock and the actual tide will now be at their highest
point and will be in sync.
4. That’s it! From then on the half-hourly movements of your
clock should match that of your local coastline and should
not need further adjustment.
For maximum accuracy the above process can be done at a Full
Moon!
Bringing the Harbour Scene to life with
the Demonstration Function
Your Tide Clock will move on its own every thirty minutes,
however, pressing the demonstration button allows you to show a
full loop of the tide scene and dials, as would be normally be shown
over the course of an entire lunar day.
1. Locate, press and hold momentarily the demonstration
button on the base of the clock
2. Take care not to hold the button for too long to avoid
accidentally adjusting the tide setting as described above.
Please note, if the demonstration button ceases to work while the
half hourly movements continue it will be because the batteries have
reached a low level and the clever system is conserving power.
7

Tedious but Important Formalities
At every childhood trip to the beach, like many of us, we were
told that we mustn’t swim too soon after munching our sandy
sandwiches. Whether there was any good reason behind this alleged
extreme danger or whether it was simple parental swim-avoidance
tactics we’re still unsure! However, what we can and must advise are
the following vital rules to follow for your own beach trips and for
general use of your Tide Clock:
1. Do not use your Tide Clocks as a replacement for publically
available tide timetables in situations where you or others
depend on such information for personal safety or security.
Tides and sea currents can be very powerful and our Tide
Clock must be used as a guide only.
2. Your tide clock is not be used as a navigational tool, for
example, for sailing purposes.
3. Remember your Tide Clock is primarily for visual enjoyment
rather than a serious indicator of the tide’s exact movements.
What if my Tide Clock readings don’t
match the actual tides?
As mentioned above, your tide clock works on a semi-diurnal
mechanism. This means that it works by timing the moon’s (nearly)
25 hour orbit around the Earth, and therefore the gravitational
force behind the twice daily rise and fall of a standard diurnal tide.
The precision quartz movement measures the average 6 hours, 12 ½
minutes between high and low tides to an accuracy of 10 seconds per
year.
8

To fully enjoy your tide clock you need to appreciate that the
gravitational pull of the moon is not completely consistent over the
lunar month. As a result of this, there are slight uctuations in the
time between daily high and low tides and, as mentioned already,
the 6 hours and 12 ½ minutes is an average. Variations either side of
this may be up to an hour but are normal and to be expected of any
tide clock.
Throughout the month your Tide Clock should remain a useful,
practical guide to the condition of your local tide. If however,
you are having diculties with getting it to synchronise with
local tide timings it is not useful to keep changing the settings.
Try setting the clock to high tide at a full or new moon to ensure
maximum accuracy. It’s also worth noting that pressing the demo
button excessively could result in your clock eventually becoming
noticeably out of sync.
Finally, please remember that not every coastal location has a
standard semi-diurnal tide. The classic example on the British
coast is the Solent area where the eect of the water moving around
the Isle of Wight causes dramatically dierent tide patterns on the
nearby coast. In such locations, other factors such as the shape of
the coastline are coming into play and no semi-diurnal tide clock
will be accurate.
9

10
Hanging the Clock
Dependent on the size of your clock it will have either one or two
screw holes on which to hang it on the wall. Included with the clock
is a clock hanging template which provides further instructions and
allows you to easily locate exactly where to drill and position the
screws.
Start by working out where and at what height you want to hang
your clock then position the drilling guide to match the desired
clock outline. (If you have some masking tape to hold the guide to
the wall this would make things easier!) Do also take care to ensure
the horizontal line on the drill guide is actually horizontal!
You can then mark the wall through the paper (perhaps with the
tip of a nail) and remove the template prior to drilling on the newly
marked locations.
Please take care to ensure you use a drill bit, wall plugs and screws
that are appropriate to your wall type as well as taking appropriate
safety precautions when using a drill. This includes ensuring thet
the wall is suitable to drill into and free of electrical wires. Take
advice if necessary or ask a professional for help!
Changing the batteries
The batteries included with your Tide Clock will, of course, not
last forever. When the remaining battery life reaches a lower level
a clever mechanism switches o the demonstration function to
conserve power. This helps maximise the amount of time your
clock will continue its day to day function – which in normal
circumstances should be over a year.

11
When the batteries need replacing you can choose to either replace
all 8 or just 4, with either the left or right hand battery chamber
completely empty. The clock will run as normal with just 4 batteries
but the demonstration function will not work.
When the batteries are expired please dispose of them responsibly
and recycle them if local facilities allow. If you are in the UK you
can nd out where your nearest recycling service is at
www.recycle-more.co.uk/banklocator.aspx
Bramwell Brown has also gone to great lengths in making sure
that your clock has been designed in a way that has minimal
environmental impact. All clocks in the Bramwell Brown range
have been designed to be ‘cradle to cradle’. This means that if you
ever feel that your clock has reached the end of its life then its
parts can be spared from landll and recycled or re-used. For more
information on Bramwell Brown’s current recycling scheme for
About Bramwell Brown Ltd
Bramwell Brown was founded with the single simple principle of
using imaginative design to reinvent classic clocks and barometers
for the 21st century.
We are a London-based brother and sister team, originally from
Lancashire in the North of England, and are proud to design and
build all of our clocks in the UK.

12
Our inspiration came from the analogue displays and mechanics of
traditional time pieces we grew up with, plus a desire create clocks
that were simply a bit more exciting! It was our aim that through
modern innovation we would give our time-pieces functionality to
match any digital device. By incorporating intriguing mechanics
and inventive design they would also be more visually engaging and
bring a smile to your face!
Our range of ‘Mechanimated’ clocks, including our Weather
Clocks, is always developing. To see the currently available range
of limited edition versions please visit our website. You can also
subscribe to our newsletter to hear about upcoming designs and
special oers. Alternatively, if you have any feedback on our current
products or any suggestions for future designs do please get in touch
via the suggestions tab on our website!
Contact us
If you have any comments or queries we would love to hear from
you! Drop us a line at any of the following:
Website: www.bramwellbrown.com
Email: [email protected]
Telephone: 0207 183 3651
Twitter: @bram_brown
Instagram: bramwellbrown


Table of contents
Other Bramwell Brown Clock manuals


