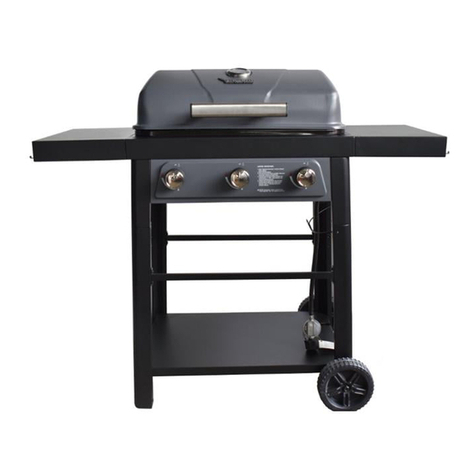
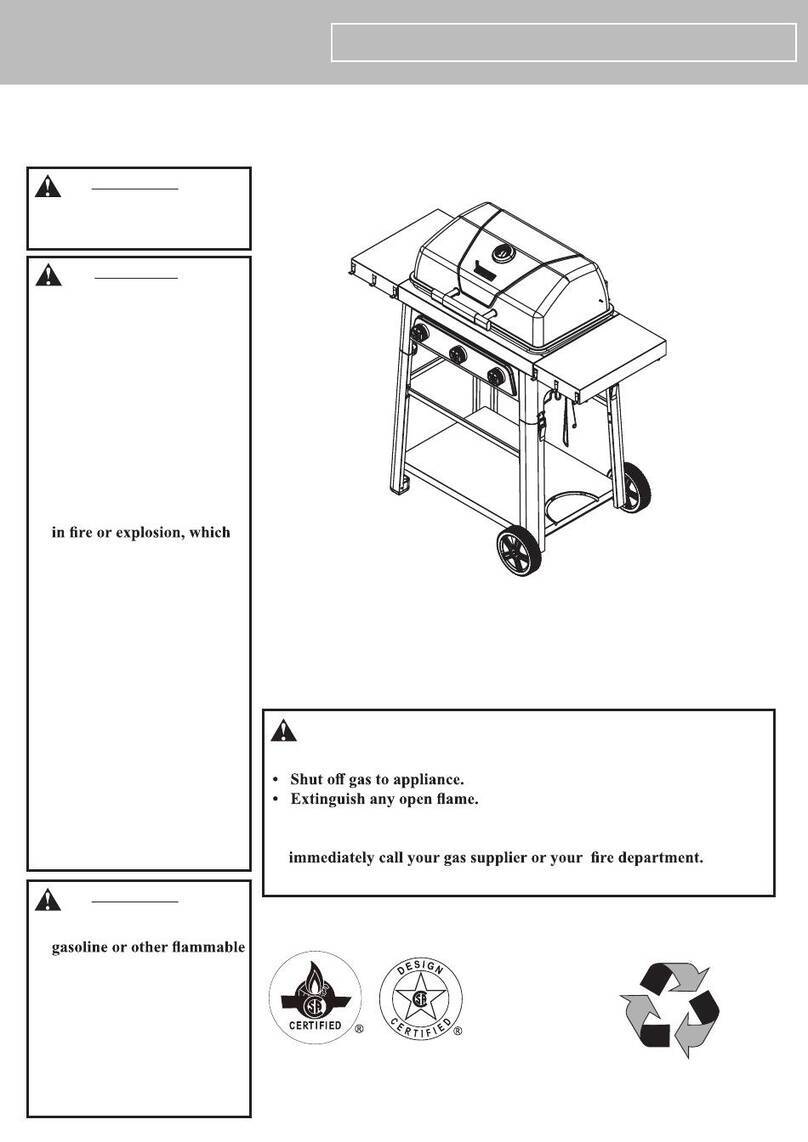
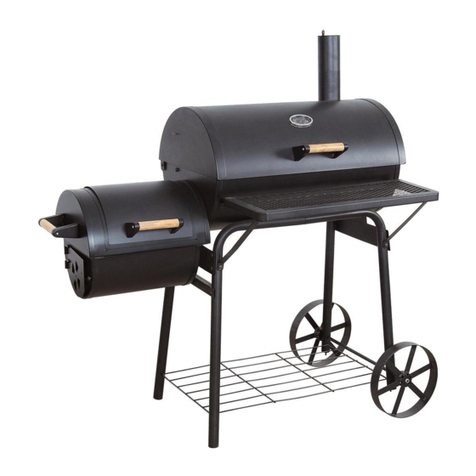
BRAND-MAN Rodeo Deluxe with cart User manual

Rodeo Deluxe
with cart
Model: BG2250A0
Product Code: BMRDODLX
Read this Owner’s manual carefully and be sure
yourgas grill is properly assembled, installed and
maintained. Failure to follow these instructions
could result in serious injury and/or property
damage.
For Outdoor Use Only
Important: Keep this Owner’s Manual for
convenient reference and for part replacement.
If you have any questions or problems, you can
contact our customer service at
855-200-8445 ext 102
from 9AM to 5PM Monday to Friday (Pacic).
All emails and voice-mail calls
will be answered within 24 hours.
THIS PRODUCT AND THE FUELS USED TO OPERATE THIS PRODUCT (CHARCOAL OR WOOD),
AND THE PRODUCTS OF COMBUSTION OF SUCH FUELS, CAN EXPOSE
YOU TO CHEMICALS INCLUDING CARBON BLACK, WHICH IS KNOWN TO THE STATE OF CALI-
FORNIA TO CAUSE CANCER, AND CARBON MONOXIDE, WHICH IS KNOWN TO THE STATE OF
CALIFORNIA TO CAUSE BIRTH DEFECTS OR OTHER
REPRODUCTIVE HARM.
For more information go to: www.P65Warnings.ca.gov
WARNING
CALIFORNIA PROPOSITION 65 WARNING:

2
IMPORTANT HEALTH & SAFETY INFORMATION
1. WARNING
FOR OUTDOOR USE ONLY! DO NOT USE INDOORS
• Please read these instructions carefully prior to assembly and use.
•
property.
• Do not start the barbeque if there is any doubt over the correct assembly, ignition, gas control or
cooking of the unit.
• These instructions should be retained for future reference.
• The barbeque must have a minimum side clearance and back clearance from any combustible
material of at least 1000mm. Additionally there must be a clearance of at least 2000mm above the
cooking surface of the barbeque.
• Flammable materials and liquids must be stored well away from the barbeque.
• Aerosols must not be used near the barbeque.
• The barbeque should not be moved when lit or hot.
• A lit barbeque should be attended at all times.
• Avoid dousing the barbeque with water.
• Always allow the barbeque to completely cool down before covering.
•
•
• Please dispose of all polythene packing and plastic bags carefully and keep out of the reach of
children.

3
EXAMPLE 1
EXAMPLE 4
30% or more in total
of the remaining wall
area in open is unrestricted
Open side at least 25% of
total wall area
EXAMPLE 5
Open side at least 25% of
total wall area
30% or more in total
of the remaining wall
area in open is unrestricted
EXAMPLE 3
EXAMPLE 2
THIS APPLIANCE SHALL ONLY BE USED IN AN ABOVE GROUND OPEN AIR SITUATION WITH
NATURAL VENTILATION, WITHOUT STAGNANT AREAS, WHERE GAS LEAKAGE AND PRODUCTS
OF COMBUSTION ARE RAPIDLY DISPERSED BY WIND AND NATURAL CONVECTION
1. POSITIONING
• Please make sure that the barbeque is NOT positioned underneath any combustible material
or surface.
• There MUST be a clearance of at least 250mm from the sides of the barbeque to any
combustible materials or surfaces. There must also be a clearance of at least 1500mm above
the cooking surfaces to any combustible surface, and 500mm clearance at the back.
• Flammable materials of any description MUST be kept well away from the barbeque.
• The barbeque must be positioned such that the gas cylinder is kept away from direct sunlight.
• The barbeque must be positioned to avoid walkways, gangways and general pedestrian
access.
• The nature of a barbeque is such that many of the surfaces are hot to touch, the positioning
of the barbeque should take into consideration the possibility of accidental hand or body
contact.
Any enclosure in which the appliance is used shall comply with one of the following:
•An enclosure with walls on all sides, but at least one permanent opening at ground level and
no overhead cover.
SEE EXAMPLE 1
• Within a partial enclosure that includes an overhead cover and no more than two walls.
SEE EXAMPLE 2 & 3
• Within a partial enclosure that includes an overhead cover and more than two walls, the
following shall apply-
• at least 25% of the total wall area is completely open; and
• at least 30% of the remaining wall area is open and unrestricted
SEE EXAMPLE 4 & 5
• In the case of balconies, at least 20% of the total of the side, back and front wall areas shall be
and remain open and unrestricted
SETTING UP THE BARBECUE

4
Table of Contents
Important Health & Safety Information------------- 2
Setting Up The Barbecue------------------------------- 3
Table of Contents----------------------------------------- 4
Parts Diagram---------------------------------------------- 5
Parts List----------------------------------------------------- 5
Hardware --------------------------------------------------- 6
Tools Required for Assembly--------------------------- 6
Assembly Steps ------------------------------------------- 7-14
Operating Instructions ---------------------------------- 15-17
Cleaning and Care ---------------------------------------- 18

5
Parts Diagram
Parts List
Part QTY Part QTY Part QTY
1 Body Assembly 1PC 11 Cooking Grid - Inner 1PC 21 Right Front Leg 1PC
2 Furnace Body Support 2PCS 12 Charcoal Grid 1PC 22 Right Back Leg 1PC
3 Damper 1PC 13 Ash Pan 1PC 23 Top Rail 1PC
4 Damper O-ring Seal 1PC 14 Fire Bowl 1PC 24 Handle 1PC
51PC 15 1PC 25 Front Rail 1PC
6 Hood Handle 1PC 16 1PC 26 Panel 1PC
7 Handle Bracket - Right 1PC 17 Wheel 2PCS 27 Back Rail 1PC
8 Ash Pan Support 1PC 18 Axle 1PC 28 Ash Pan Support 1PC
9 Warming Rack 1PC 19 1PC
10 Cooking Grid - Outer 1PC 20 1PC
1
2
2
3
4
56
7
89
10
11
12
13
14
15
16
18
17
17
19
20
21
22 23
24
25
26
27
28

6
Hardware
Tools Required for Assembly
Philips Head Screwdriver (not included)
Part # Description Number
A44PCS
B6PCS
C
2PCS
D
1PCS
E
F
QTY
Bolt(M6*15)
Bolt(M6*50)
Wheel pad(18* 12*10)
Split Pin
38PCS
38PCS
G3PCS
Bolt(M6*24)
H
Bolt(M4*15)
3PCS

7
Assembly Steps
• Attach Bottom Rail (19) between Left Back Leg (15) and Left Front
Leg (16) with two bolts (A), two Flat Washers (C) and two Spring
Washer (D) onto each side as shown below.
• Fit in Axle (18) onto the prepared left leg assembly prepared in Step 1.
Wheel (17) on each side.
• Secure the Wheels with Split Pin (F) each side as shown below.
Step 1
Step 2
CDA
15
16
19
(M6*15) X 4
( ) X 4
() X 4
A
C
D
17
17
18
E
E
F
F
(Wheel pad) X 2
(Split Pin) X 1
E
F

8
Assembly Steps
Step 3 • Attach Top Rail (23) between Right Back Leg (22) and Right Front
Leg (21) with one Bolt (A), one Bolt (B), one Flat Washer (C) and one
Spring Washer (D) on each side.
Step 4 • Attach the Bottom Shelf (20) between the left leg assembly and right leg
assembly prepared in step 2 and 3 with one Bolt (A), one Spring Washer (D)
and one Flat Washer (C) on each corner as shown below.
0.2in
A
①
②
B
C
D
21
22 23
(M6*15) X 2
(M6*50) X 2
( ) X 2
() X 2
A
B
C
D
3
A
D
C
ADC
20
(M6*15) X 6
( ) X 6
() X 6
A
C
D

9
Assembly Steps
Step 5 • Screw three screws (A) on both Front Rail (25) and Back Rail (27). Don’t
fully tighten the screws and leaving a 0.2in of space as shown below.
• Hook on the Panel (26) between both Front Rail (25) and Back Rail (27)
and tighten all screws accordingly.
Step 6 • Screw on one Bolt (A) on each corner of the prepared cart assembly in
• Attach on the Top Panel assembly prepared in Step 5 onto the cart
• Secure the Top Panel further with one Bolt (B), one Spring Washer (D) and
one Flat Washer (C) on each side.
• Go back and tighten all bolts properly.
0.2in
①
②
A
25
27
26
(M6*15) X 6
A
A0.2in
①
②
③
(M6*15) X 4
( ) X 4
() X 4
A
C
D
(M6*50) X 4
B

10
Assembly Steps
Step 7 • Install on the Handle (24) onto the side of the cart with two Bolts (A),
two Spring Washers (D) and two Flat Washers (C) as shown below.
Step 8 • Install Furnace Body Support (2) on the front of the Body Assembly (1)
with four Bolts (A), four Spring Washers (D) and four Flat Washers (C) as
shown below.
• Repeat the same step at the back of the Body Assembly with another
Furnace Body Support (2).
AD
C
24
(M6*15) X 4
( ) X 4
() X 4
A
C
D
1
A
D
C
2
Front
Back
(M6*15) X 8
( ) X 8
() X 8
A
C
D

11
Assembly Steps
Step 9 • With the help of another person, put on the body assembly prepared in Step 8
onto the prepared cart in Step 7.
• Secure the Body Assembly (1) front and back with two Bolts (A), two Spring
Washers (D) and two Flat Washers (C) each as shown below.
Step 10 • Install on the Handle Bracket - Left (5), Hood Handle (6) and Handle
Bracket - Right (7) together onto the front of the hood with four
Bolts (A), four Spring Washers (D) and four Flat Washers (C) as shown below.
AD
C
①
②
(M6*15) X 4
( ) X 4
() X 4
A
C
D
②
③
A
D
C
①
567
(M6*15) X 4
( ) X 4
() X 4
A
C
D

12
Assembly Steps
Step 11 • With the hood open, install on the Damper (3) with Damper O-ring
Seal (4), two Bolts (A), two Spring Washers (D) and two Flat Washers (C)
as shown below.
Step 12 • With the hood open, insert Charcoal Grid (12), Cooking Grid Outer (10),
Cooking Grid Inner (11) and Warming Rack (9) in the order as shown
below.
3
4
A
D
C
(M6*15) X 2
( ) X 2
() X 2
A
C
D
9
10
11
12
14

13
Assembly Steps
Step 13 • Insert Ash Pan Support (28) into Ash Pan (13) and secure it with three
Bolts (H) as shown below.
Step 14 • Attach on the Ash Pan prepared in Step 13 onto the bottom part of
below.
28
13
H
(M4*15) X 3
H

14
Assembly Steps
Step 15 • Screw on Bolts (G) on the front side of the cart as shown below for
hanging.
Step 16 • Hang on Ash Pan Support (8) onto one of the hanging bolt installed
in Step 15.
• The assembly is completed.
G
(M6*24) X 3G
8

15
Operating Your Barbecue
First Use
for at least 15 minutes. This will “heat clean” the internal parts and dissipate odors.
Lighting Instructions
CAUTION: Set the BBQ up on a hard non-combustible level surface.
CAUTION: Keep the outdoor cooking appliance area clear and free from combustible materials,
CAUTION: Check to make sure the air vents are free of debris and ash before using the grill.
CAUTION:
to food.
CAUTION: DO NOT use “Instant Light” briquettes. This will cause the same undesirable taste.
1. Remove the cooking grids.
2. Place about 1 to 2kgs of charcoal on the charcoal grid. Pile charcoal in a pyramid shape.
3. Open bottom vent fully and leave the hood open.
4. Ignite charcoal as instructed on charcoal packaging.
5. When the charcoal is fully lit, arrange coals with long handled tongs per “Direct Cooking”or
“Indirect Cooking” section.
6. Fit the cooking grids in place.
8. Pre-heat for 10 to15 minutes prior to cooking. Do not cook before the fuel has a coating of ash.
Note: A charcoal starter chimney is a helpful alternative for lighting.
Controlling the Temperature
1. With the Charcoal fully lit and hood closed,
make sure the bottom vent is fully open.
2. Open the top damper vent fully and monitor
the temperature until it reaches your desired
temperature.
3. Close the top damper vent half way, wait 5
minutres and check the temperature.
4. Adjusting the top damper vent by either
closing it more (lower temperature) or
opening it more (higher temperture).
5. Monitor the temperature during cooking and
if you notice that the temperature has moved
outside your desired range, adjust the top
damper vent in very small increments and
wait 1 - 2 minutes.

16
Direct Cooking / Fast Cooking
It is usually easier to achieve the higher desired temperatures by keeping the lower vent fully open and
only adjusting the top damper vent.
1. Remove the cooking grids.
2. Load and Light charcoal per “Lighting Instructions”section.
3. While wearing protective gloves, carefully spread hot coals evenly across charcoal grid with long
handle tongs.
(Please refer to the picture ‘Direct Cooking’ for how to set the coals)
4. While wearing protective gloves, replace cooking grid and allow grill to preheat.
5. Make sure the bottom vent is fully open. Open the top damper vent and monitor the temperature
until it reaches your desired temperature.
6. Close the top damper vent half way, wait 5 minutes and check the temperature.
7. Adjust the top damper vent by either closing it more (lower temperature) or opening it more (higher
temperature).
8. Once the desired temperature is achieved, set your food in place on the cooking grill. You can grill
extra food on the warming rack. Close the hood and start cooking.
9. Monitor the temperature during cooking and if you notice that the temperature has moved outside
your desired range, adjust the top damper vent in very small increments, wait 1-2 minutes and re-adjust
if necessary.
10. Use a meat probe thermometer to take the guesswork out of knowing when your food is done.
OPERATING INSTRUCTIONS (CONTINUE)
Coals Coals Drip Pan
Direct Cooking Indirect Cooking

17
OPERATING INSTRUCTIONS (CONTINUE)
Indirect Cooking / Slow Cooking
The best way to achieve the lower required temperatures is by almost closing the lower vent.
1. Remove the cooking grids.
2. Load and light charcoal per “Lighting Instructions”section.
Note: Take care not to use too much charcoal.
3. While wearing protective gloves, carefully spread hot coals at the periphery or half of charcoal
grid with long handle tongs and set a drip pan into place on the charcoal grid.
(Please refer to the picture ‘Indirect Cooking’for how to set the coals)
4. While wearing protective gloves, replace cooking grid and allow grill to preheat.
5. Close the hood, set the lower vent to 1 or 2 marks away from fully closed.
6. Close the top damper vent half way, wait 5 minutes and check the temperature.
7. Adjust the top damper vent by either closing it more (lower temperature) or opening it more
(higher temperature).
8. Once the desired temperature is achieved, set your food in place on the cooking grill. You can
grill extra food on the warming rack. Close the hood and start cooking.
9. Monitor the temperature during cooking and if you notice that the temperature has moved
outside your desired range, adjust the top damper vent in very small increments, wait 1-2
minutes and re-adjust if necessary.
10. Use a meat probe thermometer to take the guesswork out of knowing when your food is done.
Food Cooking Information
- ALWAYS wash your hands before or after handling uncooked meat and before eating.
- NEVER place cooked meat on the same plate that raw meat was on.
- DO NOT use the same utensils to handle cooked and uncooked foods.
- Before cooking ensure barbeque grill surfaces and tools are clean and free of old food residue.
After Use Instructions
- Make sure all coals are fully extinguished and the BBQ is cool.
- Remove ashes.
- Wash BBQ with a mild detergent and rinse with water.
- Wipe dry with cloth or paper towel.
- Clean cooking grids and warming rack with a wire brush.
- Store in dry area.
DANGER!
DO NOT use charcoal briquettes for indoor cooking or heating. TOXIC carbon monoxide fumes
can accumulate and cause asphyxiation and death!
DANGER!
This BBQ is not intended to be installed in or on recreational vehicles and / or boats.

18
Care & Maintenance
CAUTION: BEFORE ANY CARE AND MAINTENANCE IS ATTEMPTED PLEASE ENSURE THAT THE BAR-
BEQUE ARE NOT IN USE AND THAT ALL SURFACES HAVE BEEN GIVEN SUFFICIENT TIME TO COOL
DOWN.
Please note the following when maintaining and caring for your barbeque:
• Cleaning your barbeque regularly will help to keep a pristine appearance.
• Throwing cold water over any hot surface of the barbeque is NOT recommended and is
potentially dangerous.
• Avoid handling and touching hot parts of the barbeque.
CARE OF THE BARBEQUE BODY
term appearance.
• Excess grease and fat can be removed using grease remover and warm water with a soft scraper
(not metal edged).
• The barbeque body should be fully cleaned by using hot soapy water and a sponge to avoid
corrosion starting on dirty surfaces.
• Regularly spray screws and fasteners with an appropriate lubricant or rust preventer.
• If external paint is scratched or chipped it must be immediately covered with paint or a rust
preventer.
• Keep the barbeque covered when it not in use.
This manual suits for next models
2
Table of contents
Other BRAND-MAN Grill manuals
