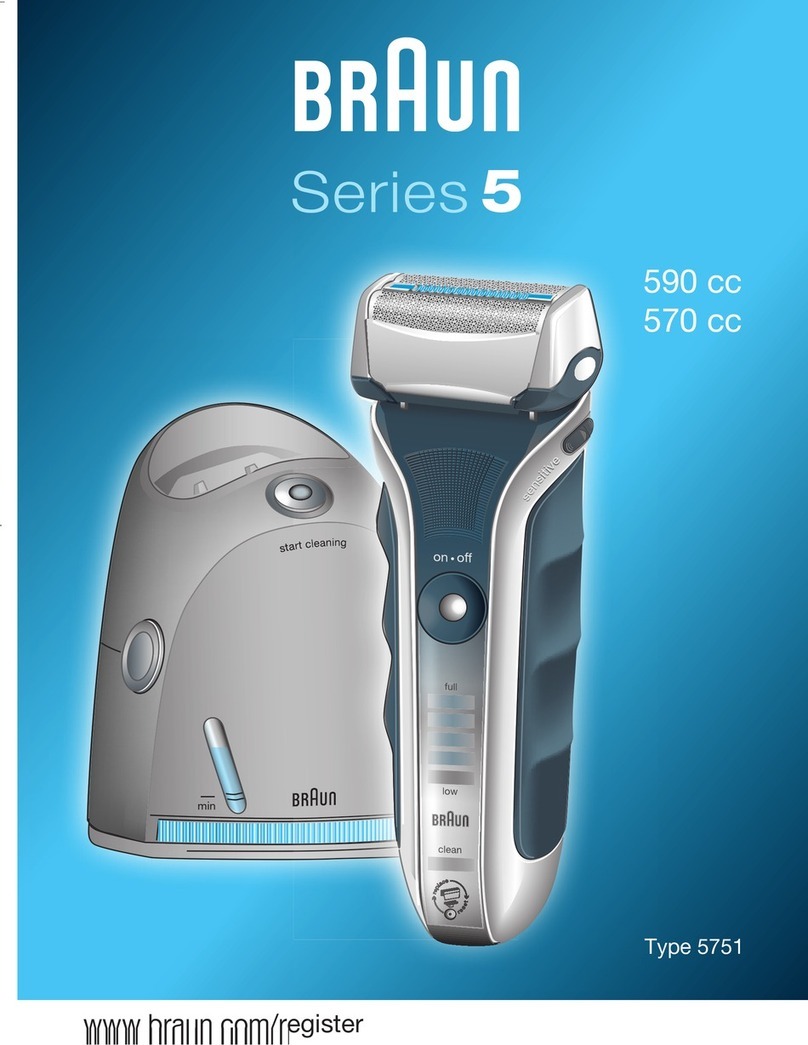
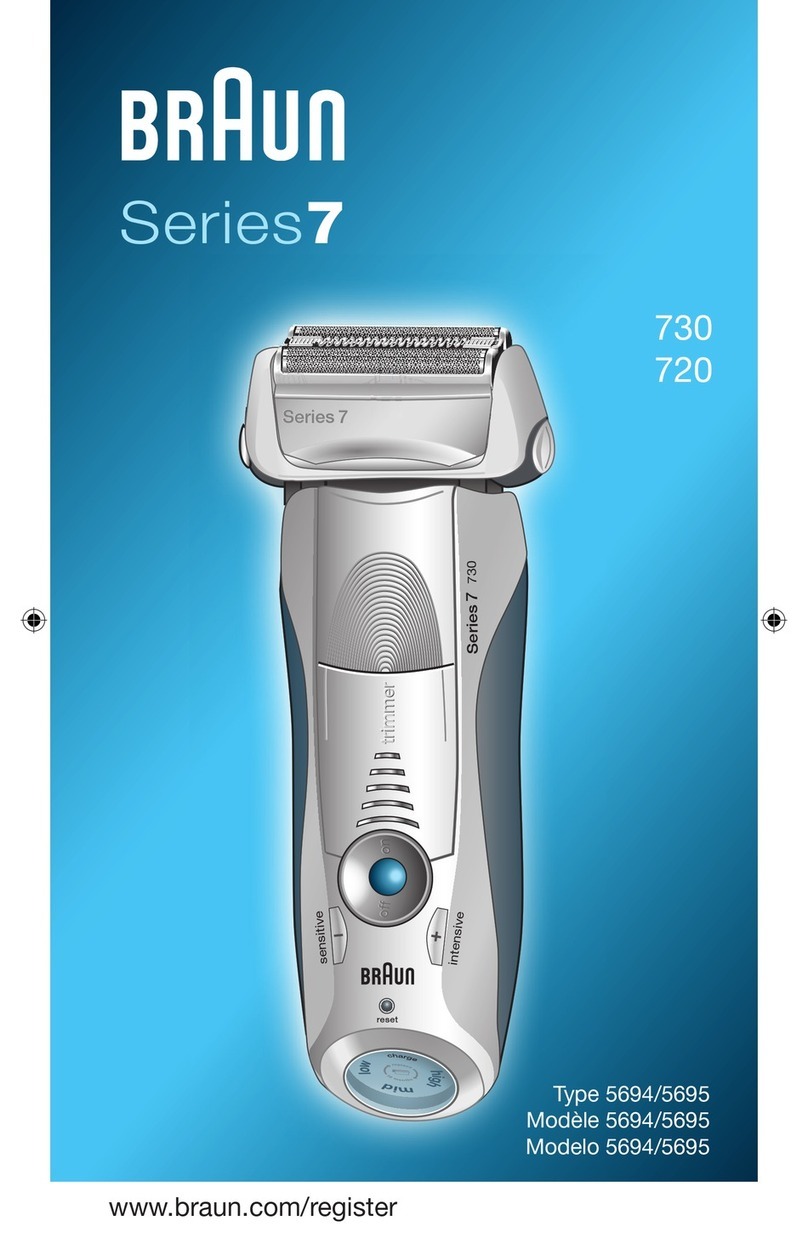
Braun 580 CC User manual

full
cartridge
empty
clean
eco
normal
intensive
auto select
s
t
a
r
t
c
l
e
a
n
i
n
g
580cc 570cc was Activator 8990-85 NA KURTZ DESIGN 29.01.08
off
trim fix on
0...20
40 60 80 100
Type 5647, 5649
Modèle 5647, 5649
Modelo 5647, 5649
580cc
570cc
www.braun.com/register
Series 5
5649320_580cc_NA_S1 Seite 1 Dienstag, 29. Januar 2008 2:08 14
All manuals and user guides at all-guides.com
all-guides.com

English 4
Français 15
Español 25
5-649-320/00/I-08
USA/CDN/MEX
Thank you for purchasing a Braun product.
We hope you are completely satisfied with
your new Braun shaver.
If you have any questions, please call:
US residents 1-800-BRAUN-11
1-800-272-8611
Canadian residents 1-800-387-6657
Merci d’avoir fait l’achat d’un produit Braun.
Nous espérons que vous serez pleinement
satisfait de votre nouveau rasoir Braun.
Si vous avez des questions, veuillez appeler
Braun Canada : 1-800-387-6657
Gracias por haber comprado un producto
Braun.
Esperamos que quede completamente
satisfecho con su nueva afeitadora Braun.
Si tiene alguna duda, por favor llame al:
01(800) 508-5800
5649320_580cc_NA_S2 Seite 1 Dienstag, 29. Januar 2008 2:09 14
All manuals and user guides at all-guides.com

off
trim fix on
empty charge
570
16
17
12
18
19
20
start
clea
ning
clean
eco
normal
intensive
full
cartridge
auto select
empty
off
trim fix on
34
7
6
5
1
580cc 570cc was Activator 8990-85 NA Explo KURTZ DESIGN 29.01.08
580
2
8
9
10
13
14
15
16
17
18
19
20
21
12
0 20 40 60 80 100
11
11
10
51S
5649320_580cc_NA_S3 Seite 1 Dienstag, 29. Januar 2008 2:10 14
All manuals and user guides at all-guides.com

4
IMPORTANT SAFETY
INSTRUCTIONS
When using an electrical appliance, basic precautions should always be
followed, including the following:
Read all instructions before using this appliance.
DANGER
To reduce the risk of electric shock:
1. Do not reach for an appliance that has fallen into water.
Unplug immediately.
2. Do not use while bathing or in a shower when the appliance is connected to an
electrical outlet.
3. Do not place, store or charge the appliance where it can fall or be pulled
into a tub or sink. Do not place in or drop into water or other liquid.
4. When not using for an extended period of time, unplug this appliance from the
electrical outlet.
5. Unplug this appliance before cleaning.
6. This appliance comes provided with a special cord set with integrated Safety
Extra Low Voltage power supply. Do not exchange or manipulate any part of it.
FOR HOUSEHOLD USE
SAVE THESE INSTRUCTIONS
English
5649320_580cc_NA_S4-34 Seite 4 Dienstag, 29. Januar 2008 2:05 14
All manuals and user guides at all-guides.com

5
WARNING
To reduce the risk of burns, fire, electric shock, or injury to persons:
1. Close supervision is necessary when this appliance is used by, on, or near
children or invalids.
2. Use this appliance only for its intended use as described in this manual.
Do not use attachments not recommended by the manufacturer.
3. Never operate this appliance if it has a damaged cord or plug, if it is not
working properly, if it has been dropped or damaged, or if the power supply
has been dropped into water. Return the appliance to a service center for
examination and repair.
4. Keep the cord away from heated surfaces.
5. Never drop or insert any object into any opening.
6. Do not use outdoors or operate where aerosol (spray) products are being used
or where oxygen is being administered.
7. Do not use this appliance with a damaged or broken foil, as serious skin
injuries may occur.
8. Always attach plug to appliance first, then to outlet. To disconnect, turn all
controls to «off», then remove plug from outlet.
9. When plugging to an electrical outlet outside the USA, use a plug adapter to
match the outlet’s pin configuration.
SAVE THESE INSTRUCTIONS
5649320_580cc_NA_S4-34 Seite 5 Dienstag, 29. Januar 2008 2:05 14
All manuals and user guides at all-guides.com

6
Your Braun shaver with Clean&Renew™ station
is a system equipped with highly advanced electronic
processors. It ensures great closeness and comfort for
you and optimum care for your shaver:
• The system automatically adapts to any voltage
worldwide.
• The system recognizes when cleaning of your shaver is
required, and automatically recognizes which of the
three cleaning programs is appropriate.
• While the shaver is connected to an electrical outlet,
the system automatically takes care of charging and
discharging in a way that is optimized for the shaver’s
battery capacity and life span.
• The system takes care of lubrication of the shaver’s
cutting parts.
• The system tells you when to replace the shaving foil
and cutter block.
Important
In order to avoid any leakage of the cleaning fluid,
place the Clean&Renew™ station on a flat, stable
surface.
Do not tip, move suddenly or transport the station in
any way if a cleaning cartridge is installed.
Do not place the station in a mirror cabinet, store it
over radiators, or place it on polished or laquered
surfaces. Do not expose to direct sunlight.
The station contains highly flammable liquid. Keep it
away from sources of ignition.
No smoking.
Keep out of reach of children.
Do not refill cartridge.
Use only original Braun refill cartridge.
5649320_580cc_NA_S4-34 Seite 6 Dienstag, 29. Januar 2008 2:05 14
All manuals and user guides at all-guides.com
all-guides.com

7
Description
1 Special cord set
2 «start cleaning» button
3 Station-to-shaver connecting contacts
4 Station lift button for cartridge exchange
5 Display for cleaning programs
6 Display for cleaning fluid status
7 Station mains socket
8 Cleaning cartridge
9 Shaver foil protection cap
10 Shaver foil
11 Cutter block
12 Foil release buttons
13 Long hair trimmer
14 Shaver-to-station connecting contacts
(shaver backside)
15 Switch
16 Shaver charging lights (green)
17 Shaver low-charge light (red)
18 Replacement light for shaving parts
19 Reset button
20 Pilot light
21 Shaver mains socket
Before shaving
If you wish, you may start shaving right away (if the shaver
is charged, see section «The shaver indicator lights»).
However, we recommend to follow the procedure
described here:
• Using the special cord set (1), connect the socket of the
Clean&Renew™ station (7) to an electrical outlet.
• Press the station lift button (4) to open the housing.
• Hold the cleaning cartridge (8) down on a flat, stable
surface (e.g. table).
• Carefully remove the lid from the cartridge.
• Slide the cartridge into the base of the station as far as
it will go.
• Slowly close the housing by pushing it down until it
locks.
eco
normal
intensive
auto s
el
full
cartridge
empty
2
clean
eco
normal
intensive
full
cartridge
auto select
empty
1
clean
eco
normal
intensive
full
cartridge
auto select
empty
clean
eco
normal
intensive
full
cartridge
auto select
empty
5649320_580cc_NA_S4-34 Seite 7 Dienstag, 29. Januar 2008 2:05 14
All manuals and user guides at all-guides.com

8
The display for cleaning fluid (6) will show how much
cleaning fluid is in the cartridge:
a) cleaning solution sufficiently available
b) up to 7 cleanings left
c) new cartridge required
Make sure the foil protection cap (9) is removed from the
shaver. Insert the shaver head down into the station (the
contacts (14) on the back of the shaver will correspond to
the contacts (3) in the station). If necessary, the system
will now charge the shaver.
Also, the cleaning status will be automatically analyzed
and one of the four diodes of the cleaning program display
(5) will light up:
a) the shaver is clean
b) eco(nomic), i.e. short cleaning required
c) normal cleaning required
d) intensive cleaning required
If the system has selected one of the three cleaning
programs, it will not start until you push down the «start
cleaning» button (2). This locks the shaver into the station
and starts the cleaning process.
We recommend cleaning after each shave.
While the cleaning is in progress, the respective cleaning
program light will flash. Each cleaning consists of several
cycles (where the cleaning fluid is flushed through the
shaver head) and a heat drying period. The total cleaning
time is 33 to 50 minutes.
Cleaning processes in the Clean&Renew™ should not
be interrupted. While the shaver is drying, the metal
parts of the shaver may be hot. Also, if the shaver is
taken out prematurely and is not dry, its electronics
could be harmed.
When the program is finished, the blue «clean» light will
shine. You can release the shaver by pushing the «start
cleaning» button.
Your shaver is now clean and ready for use.
cartridge
full
empty
cartridge
full
empty
cartridge
full
empty
abc
full
cartridge
auto select
empty
s
t
a
r
t
c
l
e
a
n
i
n
g
eco
normal
intensive
clean
trim fix on
off
auto select
eco
normal
intensive
clean
a
b
c
d
auto select
eco
normal
intensive
clean
full
cartridge
auto select
empty
s
t
a
r
t
c
l
e
a
n
i
n
g
eco
normal
intensive
clean
trim fix on
off
0..20 40 60 80 100
auto select
eco
normal
intensive
clean
5649320_580cc_NA_S4-34 Seite 8 Dienstag, 29. Januar 2008 2:05 14
All manuals and user guides at all-guides.com

9
Shaving
If the shaver is locked into the Clean&Renew™ station,
push the «start cleaning» button (2) to release the shaver
and take it out.
Switch positions
off = (switch is locked)
Press and push up the switch to operate the shaver
on = Shaving with the pivoting head
(the pivoting cutting system automatically adjusts to
every contour of your face).
fix = Shaving with the pivoting head locked at an angle
(to permit shaving in difficult areas, e.g. under the
nose).
trim=The long hair trimmer is activated
(for trimming sideburns, moustache and beard).
Shaving with the cord
If the shaver is completely discharged and you do not
have the time to recharge in the Clean&Renew™ station,
you may also shave with the shaver connected to an
electrical outlet.
After shaving
Automatic cleaning
After each shave, return the shaver to the Clean&Renew™
station and proceed as described above in the section
«Before shaving». All charging and cleaning needs are
then taken care of. With daily use, a cleaning cartridge
should be sufficient for about 30 cleaning cycles.
The hygienic cleaning solution cartridge contains alcohol
which, once opened, will naturally evaporate slowly into
the surrounding air. Each cartridge, if not used daily,
should be replaced after approximately 8 weeks.
Tips for the perfect shave
• It can take up to 14-21 days for your beard to adjust
to the new shaving system.
• Shave before washing your face or taking a shower,
as skin tends to swell after washing.
• The drier the skin, the closer the shaving results will
be.
• Hold the shaver at right angles (90°) to the skin.
Stretch the skin and shave against the direction of
beard growth.
• To maintain 100% shaving performance, replace
your foil and cutter block at least every 18 months or
when worn.
fix on
fix on
trim fix on
full
cartridge
auto select
empty
s
t
a
r
t
c
l
e
a
n
i
n
g
eco
normal
intensive
clean
trim fix on
off
0..20 60
40 80 100
5649320_580cc_NA_S4-34 Seite 9 Dienstag, 29. Januar 2008 2:05 14
All manuals and user guides at all-guides.com

10
Quick cleaning
Press the foil release buttons (12) to lift the shaver foil
(do not remove the foil completely). Switch on the shaver
for approx. 5–10 seconds so that the shaved stubbles can
fall out.
Thorough manual cleaning
Manual cleaning is recommended only when the
Clean&Renew™ station is not available, e.g. when travel-
ling.
Never use water to clean the shaver.
Remove the shaver foil and tap it out on a flat surface.
Using the brush, clean the inner area of the pivoting head.
However, do not clean the shaver foil nor the cutter block
with the brush as this may damage them.
If you do not use the Clean&Renew™ station for a longer
period of time, you should apply a drop of light machine
oil onto the shaver foil.
Cleaning the housing
Clean the housing of shaver and station from time to time
with a damp cloth, especially inside the opening of the
station where the shaver rests.
Replacing the cartridge
After having pressed the lift button (4) to open the
housing, wait for a few seconds before removing the used
cartridge.
Before discarding the used cartridge, make sure to close
the openings using the lid of the new cartridge, since the
used cartridge will contain contaminated cleaning
solution.
The shaver indicator lights
Pilot light (20): the shaver is connected to an electrical
outlet.
The red low-charge light (17) flashes when the battery
capacity has dropped below 20%, provided the shaver is
switched on. The remaining capacity will then be sufficient
for 2 to 3 shaves.
fix on off
on off
new
nouveau
old
ancien
0..20 40 60
0...20 40 60 80
100
empty charge
5649320_580cc_NA_S4-34 Seite 10 Dienstag, 29. Januar 2008 2:05 14
All manuals and user guides at all-guides.com

11
Model 580: When the shaver is fully charged, all five
charging lights (16) will light up (20% per light), provided
the shaver is plugged in or switched on.
Model 570: The green single charging light (16) shows that
the shaver is being charged. When fully charged, the
charging light flashes or turns off. If later on, the charging
light turns on again, this indicates that the shaver is being
recharged to maintain its full capacity.
Charging information
A full charge will give up to 50 minutes of cordless shaving
time, depending on your beard growth.
Best environmental temperature range for charging is
60°F to 75°F/15 °C to 35 °C.
For battery maintenance, the system will automatically
initiate full discharging and then recharging of the
batteries. This will take place every six months at the
most, and only if necessary.
Replacement light for shaving parts/Reset
To maintain 100% shaving performance, replace your foil
and cutter block, when the replacement light for shaving
parts (18) comes on (after about 18 months) or when worn.
Change both parts at the same time for a closer shave with
less skin irritation.
(Shaver foil (10) and cutter block (11): 51S)
The replacement light will remind you during the next
7 shaves to replace the shaving parts. Then the shaver
will automatically reset the display.
After you have replaced the shaving parts (foil and cutter
block), use a ball-pen to push the «reset» button (19) for at
least 3 seconds to reset the counter.
While doing so, the replacement light blinks and goes off
when the reset is complete. The manual reset can be done
at any time.
Accessories
Available at your dealer or Braun Service Centers:
•
Shaver foil and cutter block
No. 51S
•
Cleaning cartridge Clean&Renew™
CCR
0...20 40 60 80
100
empty charge
51S
0...20 40 60 80
5649320_580cc_NA_S4-34 Seite 11 Dienstag, 29. Januar 2008 2:05 14
All manuals and user guides at all-guides.com
all-guides.com

12
Environmental notice
This appliance contains rechargeable batteries.
To protect the environment, do not dispose of the
appliance in the household waste at the end of its useful
life. Disposal can take place at a Braun Service Center or
appropriate collection sites.
The cartridge can be disposed with regular garbage.
Subject to change without notice.
For electric specifications, see printing on the special
cord set.
5649320_580cc_NA_S4-34 Seite 12 Dienstag, 29. Januar 2008 2:05 14
All manuals and user guides at all-guides.com

13
FOR USA ONLY
2 year limited warranty (foil and cutter block excluded)
Braun warrants this Braun shaver (except foil and cutter block) to be free of
defects in material and workmanship for a period of two years from the date of
original purchase.
If the shaver exhibits such a defect, Braun will, at its option, either repair or replace
it for the consumer free of charge.
Please call 1-800-Braun 11 (800-272-8611) to be referred to the authorized Braun
Service Center closest to you.
This warranty does not cover foils, cutter blocks or damage resulting from accident,
misuse, abuse, dirt, water, tampering, unreasonable use, normal wear, servicing
performed or attempted by unauthorized service agencies or failure to provide
reasonable and necessary maintenance, including recharging.
ALL IMPLIED WARRANTIES, INCLUDING ANY IMPLIED WARRANTY OF
MERCHANTABILITY OR FITNESS FOR ANY PARTICULAR PURPOSE, ARE LIMITED
IN DURATION TO 2 YEARS FROM DATE OF ORIGINAL PURCHASE.
IN NO EVENT WILL BRAUN BE RESPONSIBLE FOR CONSEQUENTIAL DAMAGES
RESULTING FROM THE USE OF THIS PRODUCT.
Some states do not allow the exclusion or limitation of incidental or consequential
damages, so the above limitation or exclusion may not apply to you.
This warranty gives you specific legal rights, and you may also have other legal
rights which vary from state to state.
5649320_580cc_NA_S4-34 Seite 13 Dienstag, 29. Januar 2008 2:05 14
All manuals and user guides at all-guides.com

14
FOR CANADA ONLY
2 year limited warranty (foil and cutter block excluded)
In the event a Braun Shaver fails to function within 2 years from date of purchase,
because of defects in material or workmanship, and the consumer returns the unit
to an authorized service center, Braun Canada, will, at its option, either repair or
replace the unit without additional charge to the consumer.
This guarantee does not cover any product, which has been damaged by drop-
ping, tampering, wrong current, servicing performed or attempted by unauthor-
ized service agencies, misuse or abuse,
kinks in the shaver foil as well as the
normal wear of the shearing parts.
Exclusion of Warranties:
The foregoing warranty is the sole warranty offered
by Braun Canada. Braun Canada hereby disclaims any implied warranty or mer-
chantability or fitness for any particular purpose. In no event will Braun Canada be
responsible for consequential damages resulting from the use of this product.
5649320_580cc_NA_S4-34 Seite 14 Dienstag, 29. Januar 2008 2:05 14
All manuals and user guides at all-guides.com

15
PRÉCAUTIONS IMPORTANTES
Lors de l’utilisation d’appareils électriques, toujours prendre les mesures de
sécurité de base suivantes :
Lire toutes les directives avant d’utiliser cet appareil.
DANGER
Pour réduire les risques de choc électrique :
1. Ne pas toucher l’appareil s’il est entré en contact avec de l’eau. Le débrancher
immédiatement.
2. Ne pas utiliser pendant le bain ou la douche lorsque l’appareil est branché sur
une prise de courant.
3. Ne pas placer ni ranger ni recharger l’appareil à un endroit d’où il peut tomber
or glisser dans une baignoire ou un lavabo. Ne pas immerger dans l’eau ni
aucun autre liquide.
4. Débrancher l’appareil de la prise de courant s’il n’est pas utilisé pendant une
période prolongée.
5. Débrancher l’appareil avant le nettoyage.
6. Cet appareil comprend un cordon spécial muni d’un dispositif de sécurité inté-
gré assurant une alimentation très basse tension. Ne manipuler ni échanger
aucune des pièces.
POUR USAGE DOMESTIQUE
CONSERVER CES DIRECTIVES
Français
5649320_580cc_NA_S4-34 Seite 15 Dienstag, 29. Januar 2008 2:05 14
All manuals and user guides at all-guides.com

16
AVERTISSEMENT
Pour réduire les risques de brûlure, d’incendie, de choc électrique ou de
blessure, suivre les directives suivantes :
1. Exercer une surveillance attentive lorsque l’appareil est utilisé par ou pour des
enfants ou des personnes handicapées, ou près de ceux-ci.
2. Ne pas utiliser cet appareil à des fins autres que celles indiquées dans ce
manuel. Ne pas employer d’accessoires non recommandés par le fabricant.
3. Ne jamais faire fonctionner un appareil dont la fiche ou le cordon est abîmé,
qui n’est pas en bon état de fonctionnement, est tombé, a été endommagé ou
mis en contact avec de l’eau. Retourner l’appareil à un centre de service
après-vente pour inspection et réparation.
4. Ne pas laisser le cordon entrer en contact avec des surfaces chaudes.
5. Ne jamais laisser tomber l‘appareil ni insérer d’objets dans les orifices.
6. Ne pas utiliser à l’extérieur, dans un endroit où des produits en aérosol
(vaporisateurs) sont utilisés ni là où l’on administre de l’oxygène.
7. Ne pas utiliser un appareil dont la grille est endommagée ou brisée; cela
pourrait entraîner des blessures graves au visage.
8. Toujours relier la fiche à l’appareil avant de brancher sur la prise de courant.
Pour débrancher, placer tous les interrupteurs à « off » (arrêt), puis retirer la
fiche de la prise.
9. Pour brancher sur une prise de courant à l’extérieur des É.-U., utiliser une fiche
d’adaptation conforme à la configuration des broches de la prise.
CONSERVER CES DIRECTIVES
5649320_580cc_NA_S4-34 Seite 16 Dienstag, 29. Januar 2008 2:05 14
All manuals and user guides at all-guides.com
all-guides.com

17
Votre Braun rasoir et poste Clean&Renew™ est un
système doté de processeurs électroniques à la fine
pointe de la technologie. Il assure une précision et un
confort sans précédent, ainsi que l’entretien optimal du
rasoir :
• Le système s’adapte automatiquement à toute tension
dans le monde entier.
• Le système détecte le moment où un nettoyage du
rasoir est requis, et identifie automatiquement lequel
des trois programmes de nettoyage est approprié.
• Lorsque le rasoir est branché sur une prise de courant,
le système assure automatiquement la recharge et la
décharge de façon à optimiser la capacité des piles et
la durée de vie utile du rasoir.
• Le système assure la lubrification des pièces de coupe
du rasoir.
• Le système indique le moment où il faut remplacer la
grille et le bloc de coupe du rasoir.
Important :
Afin d’éviter toute fuite de liquide nettoyant, placer le
poste Clean&Renew™ sur une surface plate et stable.
Ne pas incliner, déplacer brusquement ni transporter
le poste de quelque façon que ce soit si une cartouche
de nettoyage est installée.
Ne pas ranger le poste dans une armoire à miroir ou
sur un radiateur, ni le placer sur une surface polie ou
laquée. Ne pas exposer à la lumière directe du soleil.
Le poste contient un liquide hautement inflammable.
Tenir loin des sources d’inflammation.
Ne pas fumer.
Garder hors de la portée des enfants.
Ne pas recharger la cartouche.
N’utiliser qu’une cartouche de rechange fabriquée
par Braun.
5649320_580cc_NA_S4-34 Seite 17 Dienstag, 29. Januar 2008 2:05 14
All manuals and user guides at all-guides.com

18
Description
1 Cordon d’alimentation spécial
2 Bouton « start cleaning » (début du nettoyage)
3 Broches de connexion poste-rasoir
4 Bouton d’ouverture du poste pour changer la
cartouche
5 Afficheur des programmes de nettoyage
6 Indicateur d’état du liquide nettoyant
7 Prise d’alimentation secteur du poste
8 Cartouche de nettoyage
9 Capot de protection de la grille du rasoir
10 Grille du rasoir
11 Bloc de coupe
12 Boutons de déclenchement de la grille
13 Tondeuse pour poils longs
14 Broches de connexion rasoir-poste (au dos du rasoir)
15 Interrupteur
16 Témoins de charge du rasoir (verts)
17 Témoins de charge faible du rasoir (rouges)
18 Témoin de remplacement des pièces de rasage
19 Bouton de réinitialisation
20 Témoin
21 Prise d’alimentation secteur du rasoir
Avant le rasage
Il est possible de commencer immédiatement le rasage (si
le rasoir est chargé, voir la section « Témoins du rasoir »).
Toutefois, nous recommandons de suivre les directives
suivantes :
• À l’aide du cordon d’alimentation spécial (1), brancher
le poste Clean&Renew™ (7) sur une prise de courant.
• Appuyer sur le bouton d’ouverture du poste (4) pour
ouvrir le boîtier.
• Tenir la cartouche de nettoyage (8) à plat sur une
surface plane et stable (par exemple une table).
• Retirer délicatement le couvercle de la cartouche.
• Glisser la cartouche le plus loin possible dans la base
du poste.
• Fermer lentement le boîtier en appuyant jusqu’à ce qu’il
s’enclenche.
eco
normal
intensive
auto s
el
full
cartridge
empty
2
clean
eco
normal
intensive
full
cartridge
auto select
empty
1
clean
eco
normal
intensive
full
cartridge
auto select
empty
clean
eco
normal
intensive
full
cartridge
auto select
empty
5649320_580cc_NA_S4-34 Seite 18 Dienstag, 29. Januar 2008 2:05 14
All manuals and user guides at all-guides.com

19
L’indicateur d’état du liquide nettoyant (6) indique la
quantité de liquide nettoyant dans la cartouche :
a) quantité de solution de nettoyage suffisante
b) jusqu’à sept nettoyages restants
c) nouvelle cartouche requise
S’assurer de retirer le capot de protection de la grille du
rasoir (9). Enfoncer la tête du rasoir dans le poste (les
broches au dos du rasoir [14] correspondent à celles du
poste [3]). S’il y a lieu, le système rechargera le rasoir.
De plus, l’état de nettoyage sera automatiquement
analysé et l’une des quatre diodes de l’afficheur des
programmes de nettoyage (5) s’allumera :
a) Le rasoir est propre
b) Eco(nomique), c.-à-d. un bref nettoyage est requis
c) Nettoyage normal requis
d) Nettoyage intensif requis
Si le système sélectionne l’un des trois programmes de
nettoyage, il faut enfoncer le bouton « start cleaning »
(début du nettoyage) (2) pour le faire fonctionner. Ce
mécanisme fixe le rasoir au poste et active le processus
de nettoyage.
Nous recommandons un nettoyage après chaque
rasage.
Au cours du processus de nettoyage, le témoin du
programme de nettoyage sélectionné clignote. Chaque
nettoyage comprend plusieurs cycles (au cours desquels
le liquide nettoyant s’écoule dans la tête du rasoir) et une
période de séchage à la chaleur. Le nettoyage complet
dure de 33 à 50 minutes.
Le processus de nettoyage du poste Clean&Renew™
ne doit pas être interrompu.
Durant le séchage du rasoir, les pièces métalliques
peuvent être chaudes. De plus, le retrait prématuré du
rasoir, particulièrement s’il n’est pas encore sec,
risque d’altérer le système électronique.
Au terme du programme, le témoin bleu « clean » (propre)
s’allume. Dégager le rasoir en appuyant sur le bouton
« start cleaning » (début du nettoyage).
Le rasoir est désormais propre et prêt à l’utilisation.
cartridge
full
empty
cartridge
full
empty
cartridge
full
empty
abc
full
cartridge
auto select
empty
s
t
a
r
t
c
l
e
a
n
i
n
g
eco
normal
intensive
clean
trim fix on
off
auto select
eco
normal
intensive
clean
a
b
c
d
auto select
eco
normal
intensive
clean
full
cartridge
auto select
empty
s
t
a
r
t
c
l
e
a
n
i
n
g
eco
normal
intensive
clean
trim fix on
off
0..20 40 60 80 100
auto select
eco
normal
intensive
clean
5649320_580cc_NA_S4-34 Seite 19 Dienstag, 29. Januar 2008 2:05 14
All manuals and user guides at all-guides.com

20
Rasage
Si le rasoir est fixé au poste Clean&Renew™, appuyer sur
le bouton « start cleaning » (début du nettoyage) (2) pour
le dégager et le retirer.
Positions de l’interrupteur
off = (l’interrupteur est verrouillé)
Appuyer et pousser l’interrupteur vers le haut pour
mettre le rasoir en marche
on = rasage à l’aide de la tête pivotante
(le système de coupe pivotant s’adapte automa-
tiquement aux contours du visage)
fix = rasage à l’aide de la tête pivotante maintenue à un
angle
(pour permettre de raser les endroits difficiles
d’accès, par exemple sous le nez)
trim= activation de la tondeuse pour poils longs
(pour tailler les favoris, la moustache et la barbe)
Rasage avec cordon
Si le rasoir est entièrement déchargé et que le temps
manque pour le recharger dans le poste Clean&Renew™,
se raser en branchant le rasoir sur une prise de courant.
Après le rasage
Nettoyage automatique
Après chaque rasage, remettre le rasoir sur le poste
Clean&Renew™ et suivre les directives décrites dans la
section « Avant le rasage » ci-dessus. Le système répond
alors à tous les besoins en matière de charge et de
nettoyage. Utilisée tous les jours, la cartouche de
Conseils pour un rasage parfait
• Prévoir une période de transition pouvant aller de 14
à 21 jours pour permettre à la barbe de s’adapter au
nouveau système de rasage.
• Se raser avant de se laver le visage ou de prendre
une douche, car la peau tend à enfler après la
toilette.
• Plus la peau est sèche, plus le rasage est précis.
• Tenir le rasoir à angle droit (90°) par rapport à la
peau. Étirer la peau et raser dans le sens opposé à
la repousse.
• Pour un rasage optimal, remplacer la grille et le bloc
de coupe tous les 18 mois, ou lorsque les pièces
sont usées.
fix on
fix on
trim fix on
full
cartridge
auto select
empty
s
t
a
r
t
c
l
e
a
n
i
n
g
eco
normal
intensive
clean
trim fix on
off
0..20 60
40 80 100
5649320_580cc_NA_S4-34 Seite 20 Dienstag, 29. Januar 2008 2:05 14
All manuals and user guides at all-guides.com
This manual suits for next models
4
Table of contents
Languages:
Other Braun Electric Shaver manuals

Braun
Braun 750 cc User manual

Braun
Braun 9310cc User manual

Braun
Braun 5614 User manual

Braun
Braun 340 User manual

Braun
Braun SmartControl Special Edition Series User manual

Braun
Braun 7 series User manual

Braun
Braun 720s-7 User manual

Braun
Braun 7 User manual

Braun
Braun 345s-4 User manual

Braun
Braun SERIES 5 550 CC-4 User manual

Braun
Braun Silk epil EverSoft 2170 User manual

Braun
Braun BG5030 User manual

Braun
Braun Series 3 User manual

Braun
Braun CruZer2 2776 User manual

Braun
Braun MG5090 User manual

Braun
Braun 6 Series User manual

Braun
Braun CT6cc User manual

Braun
Braun BGK 7090 User manual

Braun
Braun 5090cc User manual

Braun
Braun 835 User manual