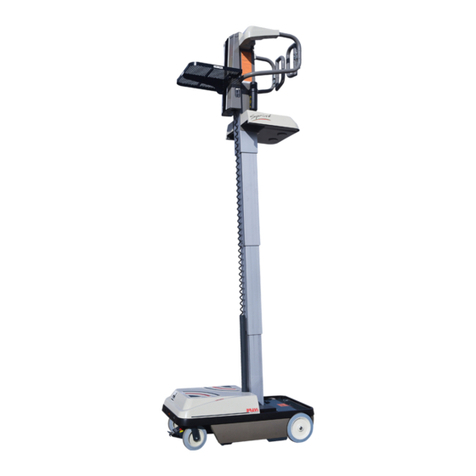
Bravi Platforms SPRINT LUI MINI T.L. User manual

Braviisol Divisione Meccanica s.r.l.
S.S. 16 Adriatica km. 314,600
60022 Castelfidardo (AN)- Italy
Tel. 0039.071.7819090
Fax 0039.071.7819355
www.bravi-platforms.com
www.bravi-parts.com
Industrial Truck Stock-picker
Model Model
LUI MINI T.L. LUI MINI TLP
(SPRINT Tire Lift) (SPRINT Tire Lift)
Always keep this manual in the machine manual box
English Rev01_21 _Australian
Use and Safety Manual
Original instruction

INTRODUCTION
This manual is an extremely important element. Always keep it stored on the
machine.
The purpose of this manual is to illustrate, for the owner, users, operators,
firms offering leasing and those subjects receiving leasing of the machine, the
essential precautions and operational procedures for the safe and correct op-
eration of the machine based upon the utilisation anticipated.
Due to the continuous improvements brought about on the products, the firm,
BRAVIISOL DIVISIONE MECCANICA S.R.L, reserves the right to modify the
technical specifications of this machine without any notice.
For updated information, contact
Braviisol Divisione Meccanica s.r.l.
S.S. 16 Adriatica km. 314,600
60022 Castelfidardo (AN) Italy
Tel. 0039071.7819090 Fax 0039071.7819355
.
HAZARD AND TERMINOLOGY SYMBOLS
This hazard symbol is necessary to call attention to potential
dangers that could cause injuries. To avoid possible serious
injuries or fatal accidents, comply with all of the safety instruc-
tions that follow this symbol
INDICATES AN IMMINENTLY HAZARDOUS SITUATION,
WHICH IF NOT AVOIDED COULD CAUSE SERIOUS INJU-
RIES OR EVEN FATAL ACCIDENTS. THIS ADHESIVE HAS
A RED BACKGROUND.
INDICATES A POTENTIALLY HAZARDOUS SITUATION,
WHICH IF NOT AVOIDED COULD CAUSE INJURIES OF A
MODERATE ENTITY. IN ADDITION, IT MAY BE USED TO
SIGNAL UNSAFE PROCEDURES. THIS ADHESIVE HAS A
YELLOW BACKGROUND.
INDICATES A POTENTIALLY HAZARDOUS SITUATION,
WHICH IF NOT AVOIDED COULD CAUSE SERIOUS INJU-
RIES OR EVEN FATAL ACCIDENTS. THIS ADHESIVE HAS
A BLUE , WHITE OR ORANGE BACKGROUND.
THIS PRODUCT MUST CONFORM TO
ALL OF THE PROCEDURES REGARDING
SAFETY INDICATED IN THE TECHNICAL
BULLETINS.
FOR INFORMATION ON EVENTUAL
TECHNICAL BULLETINS REGARDING
THE SAFETY OF BRAVIISOL DIVISIONE
MECCANICA S.R.L. PRODUCTS BEING
USED, CONTACT BRAVIISOL DIVISIONE
MECCANICA S.R.L., OR ELSE YOUR LO-
CAL AUTHORISED BRAVIISOL DIVI-
SIONE MECCANICA S.R.L. REPRE-
SENTATIVE.
BRAVIISOL DIVISIONE MECCANICA
S.R.L. SENDS TECHNICAL BULLETINS
REGARDING SAFETY TO THE REGIS-
TERED OWNER OF THE MACHINE.
CONTACT BRAVIISOL DIVISIONE MEC-
CANICA S.R.L TO MAKE SURE THAT
THE INFORMATION RELATIVE TO THE
CURRENT OWNER HAS BEEN UPDATED
AND IS EXACT.
EVENTUAL ACCIDENTS OCCURING
DURING THE USE OF BRAVIISOL DIVI-
SIONE MECCANICA S.R.L. PRODUCTS,
WHICH MAY HAVE CAUSED INJURIES
OR DEATH TO PERSONNEL OR ELSE
SIGNIFICANT DAMAGE TO PROPERTY
OR TO THE SAME BRAVIISOL DIVISIONE
MECCANICA S.R.L. PRODUCTS, ARE TO
BE IMMEDIATELY REPORTED TO
BRAVIISOL DIVISIONE MECCANICA
S.R.L.
For:
• Accident notification
• Publications relating to the safety of
the product
• Updating of the information relative
to the current proprietor
• Questions relating to the safety of
the product
• Information regarding compliance
with standards and regulations
• Questions relating to the special
applications of the product
• Questions relating to the modifica-
tions of the product
CONTACT:
BRAVIISOL
Divisione Meccanica s.r.l.
S.S. 16 Adriatica km. 314,600
60022 Castelfidardo (AN)
Tel. +39071.7819090
Fax +39071.7819355
Reference Regulations:
2006/42/EC
2014/30/CE
Dynamic and static tests performed by:
TUV ITALIA (0948)
Gruppo TUV SUD
Via Carducci 125, Pal.23
20099 Sesto San Giovanni (MI)
Italy
Document:
TUV IT 0948 19 MAC 0155 B
TŰV IT 0948 20 MAC 0185 B
Date:
05/07/2019
25/05/2020
DANGER
ATTENTION
WARNING
WARNING
IMPORTANT
IMPORTANT
23

SECTION 1.
SAFETY PRECAUTIONS
1.1 GENERAL INFORMATION
This section illustrates the precautions necessary for the correct and safe use and
maintenance of the machine. To guarantee the correct use of the machine, it is
indispensable to establish a daily routine procedure based on the directions fur-
nished in this manual.
In addition, to guarantee the safe operation of the machine, it is necessary that a
qualified person establish a maintenance program based on the information pro-
vided in this manual and in those for repair procedures and maintenance. Said
program is to be followed scrupulously.
The owner, users, operators, firms offering leasing and those subjects receiving
leasing of the machine must not accept the responsibility for its function before
having read this manual and completed training in the operational procedures,
under the supervision of a qualified, expert operator.
For further information in regard to safety, training, inspection, maintenance, appli-
cation and operation, contact Braviisol Divisione Meccanica s.r.l.
LACK OF OBSERVATION OF THE SAFETY PRECAUTIONS LISTED IN THIS
MANUAL COULD CAUSE DAMAGE TO THE MACHINE , TO PROPERTY AND
SERIOUS OR FATAL INJURIES TO PERSONS
1.2 PRELIMINARY PROCEDURES
Operator Training and Comprehension
• Before using the machine, read the manu-
al thoroughly.
• Use the machine only after having completed training by authorised per-
sonnel.
• Use of the machine is permitted only for authorised and qualified person-
nel, who have carefully read and fully understood the indications of HAZ-
ARD, WARNING and ATTENTION as well as the operating instructions
of the machine found in the manual.
• Use the machine for applications among those anticipated by
BRAVIISOL DIVISIONE MECCANICA S.R.L..
• All operational personnel must become familiar with the commands, con-
trols and emergency functions of the machine specified in the manual.
• Carefully read and obey all of the company rules and local and govern-
mental regulations in force relative to the operation of the machine.
Machine inspection
• Use the machine only after having carried out the functional
inspection checks and verifications. For further indications,
consult Section 2 of this manual.
• Activate the machine only after having carried out all of the
service and maintenance procedures indicated by the re-
quirements specified in the procedure and maintenance
manual.
• Make sure that all of the safety devices function correctly.
Eventual modifications of these devices constitute a violation
of safety regulations.
EVENTUAL MODIFICATIONS OR ALTERATIONS OF THE MA-
CHINE MAY BE CARRIED OUT EXCLUSIVELY SUBJECT TO
WRITTEN AUTHORISATION OF THE MANUFACTURER.
• Do not run machine on which the signs or adhesive stickers
indicating safety regulations or instructions are illegible or
missing.
• Avoid accumulations of debris on the floor of the platform.
Avoid that mud, oil, grease or other similar slippery sub-
stances from coming into contact with footwear or the floor of
the platform.
Inspection of the Workplace
• Before using the machine, the operator must take all neces-
sary precautions so as to avoid any hazard in the workplace.
• Do not activate the platform on trucks, semi trailer truck
beds, railroad cars, boats on the water, scaffolds or similar
structures or vehicles, on which BRAVIISOL D.M. SRL has
not approved operation in writing.
• The machine may be operated at temperatures between -20
e 40° C (between 0 e 104° F). Consult BRAVIISOL D.M.
SRL for values relative to operation of the machine at tem-
peratures not included in the range indicated.
WARNING
45
WARNING

1.3 OPERATION
General information
• Use the machine exclusively for transport of personnel for
the manual handling of tires.
• Do not operate a broken machine. If a malfunction occurs,
turn off the machine.
• Do not suddenly shift the switches or command levers from
one position to the next passing through the neutral position.
Always bring the switch to the neutral position before shifting
it to the position corresponding to the next function. Actuate
the commands using a slow and uniform pressure.
• If there are persons on the platform, allow personnel to re-
lease or activate the machine from the ground only in case
of emergency.
• Make sure that electrical tools are put away properly avoid-
ing their being left hanging by their power cords in the plat-
form work area.
• Before leaving the machine unattended, completely lower
the basket and switch off the machine. Remove the key to
prevent unauthorised use of the machine.
• Transport of passengers on the machine is forbidden.
• During operation, only the operator is permitted to be pre-
sent on the machine.
• The battery fluid is extremely corrosive. Make sure that it
does not come into contact with the skin or clothing.
• Charge the batteries in a well ventilated area.
SECTION 1.
SAFETY PRECAUTIONS
1.4 RISK OF FALLING
• Before using the machine, make sure that all of the safety
railings and gates are attached in their correct positions.
• Keep both feet firmly planted on the floor of the platform.
• Do not set ladders, boxes, steps, boards or other similar
articles on the platform floor in order to increase the range
of action of the same.
• Do not use the lifting group to climb up onto the platform
nor for climbing down from it.
• Pay very close attention when getting onto the platform or
when getting off of it. Make sure that the lifting group is
completely lowered. When getting onto the platform or
when getting off of it, do so facing the machine.
• The operation of the commands, controls and safety sen-
sors have been designed in such a manner that the opera-
tor may always keep "four points of contact" with the ma-
chine: both hands and both feet MUST BE continuously in
contact with the machine when it is in operation.
• Always keep “three points of contact ” with the machine,
doing so in such a manner that both hands and one foot or
else both feet and one hand are continuously in contact
with the machine when getting on or getting off of it.
• if Lanyard Attachment Anchorage is required by site au-
thorities or other regulations, the anchorage point on this
machine is recommended to be used as an attachment
point for safety belt . Do not use this point to lift, anchor,
secure or support the platform or any other apparatus or
material. The lanyard attachment anchorage is used for
travel restraint, within the limits of the platform only. It
is not a fall arresting device. Use as such could result
in death or serious injury.
67

1.5 ELECTROCUTION HAZARD
SECTION 1.
SAFETY PRECAUTIONS
The machine is not electrically insulated.
Maintain a distance of at least 3 metres (10 feet) between any part of the ma-
chine and its occupant and an electrical power line or piece of equipment with an
electrical charge rated at least 50,000 Volts.
It is necessary to add 0.3 metres (1 foot) for each additional increase equal to or
less than 30,000 Volts.
It is possible to reduce the minimum safe operational distance in presence of
insulating barriers for the prevention of contacts, if those barriers have been ad-
justed to the voltage of the electrical lines they are set to protect.
The barriers must not be a part of the machine nor may they be connected to it.
The minimum operational safety distance may be reduced within the operational
dimensions indicated by the insulating barriers. This distance is to be deter-
mined by a qualified person subject to the company, local and governmental
regulations regarding the undertaking of work operations in the proximity of high
voltage equipment.
1.6 TOPPLING HAZARD
• Before driving the machine, the user must become familiar
with the surface area of the workplace. While driving the
vehicle, do not exceed the slopes or the transversal slopes
permitted.
• Do not raise the platform or drive the machine with the plat-
form raised on a slope or on an irregular or soft surface.
• Before driving onto floors, bridges, trucks or other surfaces,
verify the maximum load bearing values of those.
• Do not exceed the maximum load of the elevated platform
• Distribute tires only on the lift compartment doing this without
loading and unloading suddenly them
• Keep the chassis of the machine at a minimum distance of
0.6 metres (2 feet) from holes, rough areas, descents, obsta-
cles, debris, hidden holes and other potential hazards that
may be found on ground level.
• Do not attempt to use the machine as a crane. Do not tie or
bind the machine to any other adjacent structure.
• Do not rise the platform in windy or gusty condition
• Do not increase the size of the platform with extensions of
the landing or unauthorised additions. If the area of the ma-
chine exposed to the wind is increased, its stability is de-
creased.
• If the lifting group or the platform become stuck in such a
manner that one or more wheels come off of the ground, it is
necessary to have the operator climb down off of the plat-
form before attempting to free the machine. To stabilise the
machine and have personnel descend from the platform, use
a crane, a fork lift truck or other suitable equipment.
• It is strictly forbidden to go in and out the platform when
raised
VOLTAGE RANGE
(FROM PHASE TO PHASE)
MINIMUM OPERATIONAL
SAFETY DISTANCES m (ft)
From 0 to 50 kV 3 (10)
From over 50 kV to 200 kV 5 (15)
From over 200 kV to 350 kV 6 (20)
From over 350 kV to 500 kV 8 (25)
From over 500 kV to 750 kV 11 (35)
From over 750 kV to 1000 kV 14 (45)
NOTE: These minimum operational safety distances are to be applied
except in cases in which company, local or governmental regulations are
more stringent.
89

1.7 CRUSHING AND IMPACT HAZARDS
• All personnel, whether operational or on the ground, must wear the
personal safety equipment required by the regulations in force or by
the risk analysis performed in the workplace.
• When the machine is being used or the platform is being raised or
lowered, make sure to observe the distances above, below and on
both sides of the platform itself.
• When the machine is in operation, do not lean out from the platform
railings.
• When driving the machine in areas of limited visibility, have an as-
signed person proceed ahead so as to indicate any eventual hazard.
• When driving, always keep non operational personnel at a distance of
at least 1.8 metres (6 feet) from the machine.
• Adjust the driving speed based upon the following conditions: ground
or floor surface conditions, traffic, visibility, slope, location of other
personnel and any other factors that could constitute a hazard of colli-
sion or personal injuries.
• Keep the braking distances in mind independently of the speed of the
machine.
• Do not drive at high speed in restricted, tight or narrow areas or in
reverse gear.
• Always pay maximum attention so as to avoid that eventual obstacles
collide with the operational commands or the person on the platform
or that they interfere with the same.
• Make sure that the operators of other machines that are elevated or
on ground level are informed regarding the presence of the machine.
Disconnect the electrical power to elevated cranes.
• Advise other personnel not to work, stand, or transit under the elevat-
ed platform. Delineate the floor or ground with appropriate barriers,
as needed.
SECTION 1.
SAFETY PRECAUTIONS
1.8 LIFTING AND TRANSPORT
General information
• During lifting and transport, personnel are prohibited from standing
on the platform.
• Push or tow the machine exclusively in the event of an emergency,
malfunction, power interruption or to load or unload it and ALWAYS
after having unlocked the motor-brake, according to the instructions
found in this manual.
• Before lifting or transport, make sure that the platform has been
completely lowered and is empty.
• During lifting of the machine by way of a fork lift, arrange the forks
exclusively in correspondence to the appropriate areas of the ma-
chine itself. Carry out the lift by way of a fork lift with an adequate
load capacity. For the weights of the machine consult the technical
specifications table in Section 5 - Technical Specifications of the
Machine.
• For lifting information, consult, section 3 - Machine Operation, in this
manual.
10 11

SECTION 2.
PREPARATION AND INSPECTION
2.1 PERSONNEL TRAINING
The machine is a personnel transport device for manual tire picking
operation.
Therefore, it is to be used and maintained exclusively by trained and
qualified personnel.
Use of the machine is not permitted by persons under the influence of
alcohol or drugs or those subject to attacks of epilepsy, vertigo or loss
of physical control.
Operator training must include what follows:
1. Use and limits of the commands from the platform, from the
ground and emergency commands as well as safety systems.
2. Command and control signage, instructions and warnings at-
tached to the machine.
3. Regulations defined by the employer and by government regu-
lation.
4. Use of the approved anti-fall protection device, when needed.
5. Sufficient knowledge of the mechanical function of the ma-
chine to recognise a true or potential malfunction or break-
down.
6. Safe methods for the use of the machine when encountering
super-elevated obstacles, other equipment or obstacles in
movement, dips, holes and inclined descents.
7. Methods for the avoidance of hazards from unprotected elec-
trical conductors.
8. Requirements for a particular job or a particular application of
the machine.
Training supervision
Training must be given under the supervision of a qualified person, in
an open area, free of obstacles. It must continue until the trainee is
capable of using the machine safely.
Operator responsibility
The operator must be instructed regarding the responsibility and the
authority to turn off the machine in case of malfunction or breakdown or
in the presence of other unsafe conditions, relative to both the machine
and the workplace.
NOTE: The manufacturer or the distributor must make qualified person-
nel available for training both at the time of delivery of
the first units and afterwards, if requested by the end user
or the by assigned personnel.
2.2 PREPARATION INSPECTION AND MAINTENANCE
BRAVIISOL provides information relative to machine inspection, indicated in
the following table 2.3 on page 14.
For further information regarding the machine, consult local regulations. The
frequency of inspections and maintenance procedures must increase ac-
cording to necessity: when the machine is used under adverse environmen-
tal conditions, with greater frequency or for difficult or particularly demand-
ing jobs.
2.3 PRELIMINARY INSPECTIONS BEFORE START UP
The inspection prior to use includes the following operations:
1. Cleaning – Verify and check for any eventual leaks (oil, hydraulic fluid or
battery acid) or for foreign objects on any of the surfaces. Warn mainte-
nance personnel of any apparent leaks.
2. Signs and adhesive stickers – Check and verify that these are all clean
and legible.
Check that no sign or adhesive sticker is missing.
Make sure that any sign or adhesive sticker that is not legible is cleaned
or substituted. (See "Application of the adhesive stickers" in Section 3).
3. Use and safety manuals – make sure that the following manuals are
present in the weather resistant compartment (PIC. 2.A):
4. Outline of complete daily inspection – (See Section 2.4).
5. Battery – Charge as needed (See Section 3.5).
6. Hydraulic oil – The level of the hydraulic oil in the reservoir can vary
according to the temperature of the oil. That is, in a cold machine, it is pos-
sible that the oil level will not reach the FULL mark from the oil level sight
glass
Lift and lower the platform several times to obtain a more precise reading of
the level from the oil level sight glass
When the hydraulic oil is heated up, verify the level, which should indicate a
level equal or near the FULL mark.
• DO NOT FILL BEYOND THE FULL MARK.
• ALWAYS TOP UP the oil if its level is below the mark - ADD.
12 13
2.A

NOTE:
Check the level of the hydraulic oil with the ma-
chine having the basket lowered, from the sight
glass found under the cover. If necessary, top up
with a mineral oil with a viscosity index of 22 (for
climactic conditions with very cold temperatures,
that is, below -20°C, the use of mineral oil with a
lower freezing point , about –45°C, is recommend-
ed.
Attention Pollution Hazard
Do not dispose of the oil into the environ-
ment.
TABLE 2.3
2.4 COMPLETE DAILY INSPECTION
TO AVOID POSSIBLE INJURIES, MAKE SURE THAT THE ELECTRICAL
POWER SUPPLY OF THE MACHINE IS TURNED OFF DURING THE IN-
SPECTION. DO NOT USE THE MACHINE BEFORE ANY AND ALL MAL-
FUNCTIONS HAVE BEEN REPAIRED.
DO NOT NEGLECT THE VISUAL INSPECTION OF THE LOWER PART OF
THE BASE FRAME.
CHECK AND VERIFY THAT THERE ARE NO FOREIGN OBJECTS OR DE-
BRIS THAT COULD CAUSE SERIOUS DAMAGE TO THE MACHINE.
The operator must not accept the responsibility of operating the machine until
this manual has been read and understood in each of its parts and a first test-
drive of the vehicle has been taken under the supervision of a qualified expert
operator.
Only authorised personnel and qualified operators may operate this machine.
This manual and its attachments must be considered an integral part of this ma-
chine and must remain with the machine at all times.
The manufacturer, BRAVIISOL D.M. SRL, has no direct control over the utilisa-
tion of the machine. Utilisation of the machine according to safety regulations is
the responsibility of the end user.
It is the responsibility of the operator to make a thorough inspection of the ma-
chine before each use.
The purpose of the complete daily inspection is to check and verify that the ma-
chine is in order, to ascertain the absence of anomalies, faults or malfunctions
and to determine if routine maintenance is required. If any damage or unauthor-
ised changes to the machine, with respect to how it was delivered, are found,
immediately tag it as such and DO NOT USE IT.
TYPE FREQUENCY MAIN RESPON-
SABILITY
QUALIFICA-
TION FOR SER-
VICE
REFERENCE
PRELIMINARY
INSPECTION
FOR START UP
Before each day of
work, or else at
each change of
operator.
User or operator User or operator Use and Safety Man-
ual
FREQUENT
INSPECTION
At an interval of 6
months or 500
hours, according to
the circumstances,
or else if the ma-
chine has not been
used for over 3
months or else if it
has been pur-
chased used.
Owner, conces-
sionary or user.
BRAVI Qualified
Mechanic
Service and Mainte-
nance Manual and
relative Inspection
Forms
ANNUAL
INSPECTION
Annual, within 13
months from the
last inspection
Owner, conces-
sionary or user.
BRAVI Qualified
Mechanic
Service and Mainte-
nance Manual and
relative Inspection
Forms
WARNING
WARNING
WARNING
14 15
SECTION 2.
PREPARATION AND INSPECTION

2.5 BEFORE EVERY USE
• Make sure that all of the manuals are in their weather resistant
manual box on board the machine.
• Make sure that the tag with the serial number of the platform as
well as all of the adhesive safety stickers are in their place, and
that they are all perfectly integral and legible.
• Inspect the machine in order to ascertain the absence of anoma-
lies, welding cracks, faults or malfunctions or any damage or
unauthorised changes to the machine, with respect to how it was
delivered by the manufacturer.
• Check and verify the basket, the platform railings, check that the
entry gate functions properly and that it closes completely and
automatically.
• Check the water level in the batteries and make sure that there
are no leaks. The battery cables must be correctly connected to
the terminals. There must not be any corrosion on them.
• Check and verify by testing that all of the safety and personal
protection devices function properly.
• Check and verify that both traction and caster wheels show no
damage, abrasions or deep cuts. Check and verify that there is
no debris attached to the wheels, or around them.
• Visually inspect the hydraulic, electrical and mechanical compo-
nents. For each component make sure that all of its parts are
present, not loosened and fixed solidly in their respective posi-
tions and that there are no visible leaks, signs of excessive wear
or damaged areas.
• Check and verify that there are no wires or cables that have
come loose and that hang from the underside of the vehicle.
• Check and verify the correct operation of the key switch in the
basket.
• Check and verify the operation of the emergency stop buttons:
those that are found on the command panel in the basket and
the one on the chassis control panel.
• Check and verify, by testing, the proper operation of the manual
descending emergency lever.
2.6 FUNCTIONAL VERIFICATIONS
At the end of the “complete inspection”, carry out a functional verification of all
of the systems in an area that is free of super-elevated or ground level obsta-
cles.
For further indications on operation, consult Section 3 of this manual.
IF THE MACHINE DOES NOT FUNCTION PROPERLY, TURN IT OFF IM-
MEDIATELY. NOTIFY THE PERSONNEL ASSIGNED TO MAINTENANCE
OF THE PROBLEM. DO NOT USE THE MACHINE UNTIL IT HAS BEEN
DECLARED SUITABLE FOR SAFE OPERATION.
Functional verification elements
1. From the ground command panel, without a load on the platform, per-
form the following operations:
a. Actuate the ground commands: the raising and the lowering of the plat-
form.
b. Make sure that all of the machine functions have been disabled when
the emergency stop button is activated (pressed).
c. Check and verify the proper function of the manual descending emer-
gency lever.
2. From the platform command panel, perform the following operations:
a. Raise and lower the platform from 0.61 to 0.92 metres (from 2 to 3 ft)
several times. Check and verify that the raising and the lowering of the
platform come about in a regular manner. Check and verify that with
the raising of the basket the driving is activated in automatic slow safe-
ty speed.
b. Actuate all of the functions and check and verify the correct operation
of all of the limit switches, the general emergency switches and the
actuation switches.
c. Vehicle brakes - Drive the vehicle on an slope (not exceeding its nomi-
nal operational capacity on the grade) then stop it, so as to make sure
that the brakes will hold on an incline.
WARNING
16 17
SECTION 2.
PREPARATION AND INSPECTION

SECTION 3.
OPERATION OF THE MACHINE
3.1
THE MANUFACTURER HAS NO DIRECT CONTROL WHATSOEVER ON
THE APPLICATION OR THE OPERATION OF THE MACHINE.
THE USER AND THE OPERATOR ARE HELD TO FOLLOW THE COR-
RECT SAFETY PROCEDURES.
This section provides information necessary for the comprehension of the
operational command functions.
3.2 DESCRIPTION OF THE MACHINE
This machine is an electrical, self-propelled vehicle and it is equipped with a
platform, mounted on a strut elevation mechanism, actuated by a special
single hydraulic cylinder with a synchronised effect.
The purpose of the machine is to allow access to areas above ground level,
for the manual picking of tires, which will be placed on the lift compartment .
The main command panel is located on the platform.
From the platform command panel, the operator may drive the vehicle, lift
up or lower the platform . The machine is equipped with an electrically actu-
ated lift compartment controlled by two easily accessed buttons located on
the side of the machine, which allow the operator to raise and lower the lift
compartment, which is reserved only for tires, without leaving his or her
position.
The machine has two drive wheels in the rear and two castor wheel in front.
It is necessary to use the ground programmable command station panel
when the machine is being serviced or functional verifications are per-
formed or in case of emergency, if the operator on the platform is not capa-
ble of lowering it.
3. Slope alarm limit: with the platform completely lowered, drive the
vehicle on a slope greater than 1.5° in any direction (not exceeding
its nominal operational capacity on a grade). The alarm of the vehi-
cle will indicate a sloped condition in the event of an attempt to raise
the platform.
4. Transmission speed reduction limit: If the platform is raised for
more than 0.4 m (1.5 - 2 ft), the transmission velocity is reduced by 1/4
compared to the transmission speed for the lowering of the platform
5. Platform gate opening limit: The entry gate is equipped with springs
on both of its wings that automatically close the entry gate as soon as
they are released. The entry gate is also equipped with microswitches
on both wings that prevent travelling, elevating or lowering movements
when entry gate is not correctly closed.
6. Left/right handle and footswitch sensor - The machine operates (it
moves and it is raised) exclusively if the operator keeps his or her
hand resting on the left and right side handle (pic.A) and with both
heels pressing on the footswitches positioned on the platform (pic.B).
This safety position is to be maintained throughout all operations of the
machine.
7. Make sure that all the machine functions have been
disabled when the emergency stop button is activated (pressed).
18 19
pic.A pic.B
SECTION 2.
PREPARATION AND INSPECTION

3.3 FUNCTION OF THE MACHINE
Preliminary Operations
Before activating the machine using the commands on the ground station
panel or those on the platform, it is necessary to satisfy the following com-
mand conditions.
• Battery voltage must be sufficient for operation. The battery dis-
charged alarm does not necessarily have to be present either on
the ground command panel, or on the battery status indicator
found on the side of the vehicle.
• The key switch on the basket command station panel must be set
either on the ground command mode or on the platform command
mode.
• The emergency stop buttons, on the command panel of the plat-
form and on the ground command panel must be in RESET posi-
tion (extended outward).
• The LCD screen on which the status of the machine may be visu-
alised on the ground command panel must indicate normal opera-
tional conditions upon turn-on of the machine.
• The machine operates, (it moves and lifts) only if the operator has
his or her hand on the left and right sensor handle and both heels
pressing down on the foot switches on the platform. This safety
position is to be maintained at all times during operation. (PICs. A
and B section 2.6)
1. Ground Command Panel (Section 3.7)
2. Manual Descending Emergency Lever (Section 3.8)
3. AC power supply for battery charger and charge status LED (Section
3.6)
4. Platform foot switch (2 switches, one for each foot) - (Section 3.6)
5. Platform Entry Gate
6. Platform Command Panel (Section 3.6)
7. Tire Lift Compartment
20 21
SECTION 3.
OPERATION OF THE MACHINE
1 - 2 - 3
4
56
7

3.4 FRONT CANOPY
Removal
1. Lift the canopy in correspondence to the back part (column) so as to
free bumper on the base frame. Therefore have the canopy slide for-
ward while lifting it to completely detach the canopy from the vehicle.
Installation
1. Position the canopy on its relative bumper on the upper part of the
frame and have it slide backwards.
PREVENT TRANSIT OF PERSONNEL ON THE FRONT CANOPY
OR IN THE TIRE LIFT COMPARTMENT.
3.5 BATTERY CHARGING
Battery low voltage alarm warning light
In the command panels on the platform and the ground station have indica-
tors of low battery voltage.
Battery charging procedure
This machine is equipped with a battery charger with an AC electrical power
input/DC electrical power output. The battery charger stops charging the
batteries automatically when they have reached full charge.
NOTE: When the battery charger is connected to an AC electrical outlet, the
platform vehicle transmission is disabled.
THE LEAD ACID BATTERIES MAY GENERATE EXPLOSIVE HYDROGEN
GAS DURING NORMAL OPERATION. KEEP SPARKS, OPEN FLAMES
OR LIT TOBACCO AT A SAFE DISTANCE FROM THE BATTERIES.
DURING BATTERY CHARGING PROVIDE FOR ADEQUATE VENTILA-
TION IN THE AREA. DO NOT CHARGE A FROZEN BATTERY. CARE-
FULLY STUDY THE PRECAUTIONS SPECIFIED BY THE BATTERY
MANUFACTURER RELATIVE TO THE SPEED OF CHARGING RECOM-
MENDED AS WELL AS THE POSSIBILITY OF REMOVAL OF THE CELL
CAPS DURING CHARGING.
1. Park the vehicle in a well ventilated area near an AC wall socket.
2. Always use a grounded (earthed) AC socket. Connect the battery
charger to a correctly installed AC socket with ground connection
according to all of the local regulations in force. The grounded socket
is necessary so as to reduce the risk of electrical shocks - do not use
grounded adapters and do not modify the plug. If an extension is
used, avoid excessive drops in voltage by using the 3 wire 12 AWG
type.
ATTENTION
22 23
SECTION 3.
OPERATION OF THE MACHINE
Canopy
1a 1b

The LED’s battery charge status for the batteries are located near
the AC power input on the chassis.
1. Upon the first connection, automatically, the battery charger
LED start to blink for few seconds and performs a brief LED
test, then the charging begins.
2. When the last GREEN LED lights up, the batteries are charged.
At this point, it is possible to disconnect the battery charger from its
AC mains power supply. (grasp the plug and pull it out from the wall
outlet. Do not pull on the cord so as to not damage it.)
NOTE: When the last green LED is on the battery charger is
switched off automatically
A - A.C. POWER INPUT FOR THE BATTERY CHARGER
B - CHARGE STATUS FOR THE BATTERY CHARGER
B
A
24 25
3.6 PLATFORM COMMAND CONSOLE OPERATION
3.6.1 LUI MINI T.L. - TLP
1. Emergency Stop Button
2. Throttle Handle
3. Battery Gauge
4. Raise Platform Button
5. Lower Platform Button
6. Horn Button
7. Right hand Dead Man sensor
8. Tire Lift compartment Raising Button
9. Tire Lift compartment Lowering Button
10. Tire Lift Roll In Button
11. Tire Lift Roll Out Button
12. Left hand Dead Man sensor
13. Steering Rocker Switch
14. Key Switch Selector
15. Foot switches
15
12
7
6
10
4
5
2
1
14
13
8
9
11
3
SECTION 3.
OPERATION OF THE MACHINE

General Information
Before activating the machine by way of the commands on the ground or
those on the platform, it is necessary to satisfy the following command condi-
tions:
• Platform Command Panel: the key switch must be set to the
Platform Command Mode or Ground Command Mode.
• Ground Command Station - Platform Command Station: the emergen-
cy stop buttons must be in RESET position (POWER SUPPLY CON-
NECTED).
Key switch platform/switch off/ground
• Central Position "0":
Rotate into this position to turn the machine off after use.
• Position “1”: platform battery gauge will light up
In this position, the machine can be actuated from the
Platform Command Station.
• Position “2”: platform battery gauge will show Gnd
In this position, the machine can be actuated from the
Ground Com mand Station.
Platform Emergency Stop Button
Pushed immediately stop all the operational phases of the machine.
Reset DOES NOT actuate the machine, but enable the command devices
NOTE:
For manoeuvring the machine it is necessary that the emergency stop but-
tons on the ground command station and on the platform need to be turned to
the RESET position.
Left and Right Hand Dead Man Sensor
Left and Right hand must be placed on the handles, in front of the sensor to
allow the activation of the driving/raise/lower functions of the machine.
NOTE: Remember to activate, besides the left and right hand sensors, also
both the foot switches, so as to enable all the machine functions: driving/
raising /lowering.
Throttle Handle
Grasp the handle in the right hand and
ROTATE the handle FORWARD (back of the
hand in the direction opposite to the operator)
to activate the movement of the vehicle in
FORWARD direction.
The release of the han-
dle AUTOMATICALLY
stop the machine.
.
ROTATE the handle BACKWARD (back of the
hand in the direction of the operator) to activate
the movement of the vehicle in REVERSE
direction. The release of the handle AUTOMATI-
CALLY stop the machine.
.
Operation of the platform is exclusively limited to personnel who have been pre-
viously trained and authorised and who have thoroughly read and understand
the safety indications of this manual.
DRIVE ONLY ON A SMOOTH, SOLID AND HORIZONTAL SURFACE that is clean,
free of holes and of a suitable consistency, able to support the weight of the
machine and the weight of what the vehicle can transport. (See Section 5 Ma-
chine Technical Specifications)
ATTENTION
26 27
SECTION 3.
OPERATION OF THE MACHINE
FORWARD
BACKWARD

Steering Rocker Switch
The Steering has been designed to be easily activated with the left
hand.
Push the Steering switch left toward the right or the left or the right and
hold it in this position as long as one desires that the direction chosen
be maintained.
Remember to activate both of the foot switches and the left and right
hand sensors to actuate the raising/lowering/driving functions.
The steering of the machine on its axis is allowed only using the Steer-
ing Rocker Switch to the left or to the right .
Use both Rocker Switch and Throttle handle to actuate the driving of
the machine in the direction desired.
1. Push and hold the selector toward the Right, to activate the
direction to the right. Release the selector if only backwards and
forwards movement is desired.
a. Activating the throttle handle in FORWARD GEAR, the
machine will move forward, turning to the right (the front
of the vehicle toward the right of the operator)
b. Activating the throttle handle in REVERSE GEAR , the
machine will move backward, turning to the right (the
front of the vehicle toward the right of the operator)
2. Push and hold the selector toward the Left, to activate the di-
rection to the left. Release the selector if only backwards and
forwards movement is desired.
a. Activating the throttle handle in FORWARD GEAR , the
machine will move forward, turning to the left (the front of
the vehicle toward the left of the operator)
b. Activating the throttle handle in REVERSE GEAR , the
machine will move backward, turning to the left (the front
of the vehicle toward the left of the operator)
Acoustic Signal Device Button
When the machine is turned on, the pressure on this button determines the
activation of the horn.
Platform Raising and Lowering Buttons
The operator must not for any reason climb up on top of the basket railings,
nor place ladders or other things there, in order to achieve greater heights
at which to work. In addition, he or she must never lean out or extend him/
herself outside of the railing of the platform basket.
Before activating the machine, verify that:
• the platform is positioned on a clean floor, free of holes, levelled and
with an adequate consistency,
• where there are no aerial obstacles in the zone where work is to be
done
Push and hold down the lift button ( Button 4 ) to activate the electrical rais-
ing of the basket platform. Release of the button automatically stop its
movement.
Push and hold down the lowering button ( Button 5 ) to activate the lowering
of the basket platform. Release of the button automatically stop its move-
ment.
ATTENTION
28 29
4
5
4
5
SECTION 3.
OPERATION OF THE MACHINE

Basket Control Station
At power-up and during operation the battery gauge display shows
the current machine operating status. The following information is
communicated:
1) BCI represent the battery charge express in percentage
2) RED dot when the platform is elevated
If fault occurs an error code of the fault is showed in the display
Slope Alarm
LUI MINI T.L. - TLP INCLUDES A SLOPE ALARM .
IF THIS ALARM IS ACTIVATED AN ACOUSTIC SIGNAL IS EMIT-
TED AND IT IS NOT POSSIBLE TO RISE AND OR DRIVE THE
PLATFORM. THE TILT CONDITION REMAIN UNTIL THE PLAT-
FORM IS NOT COMPLETELY LOWERED AND THE SLOPE
CONDITION HAS BEEN ELIMINATED.
Footswitches
DO NOT PLACE THE FOOT ON THE FOOT SWITCHES BEFORE
TURNING THE KEY SELECTOR FROM “0” TO “1” OR “2”
ACTIVATION OF COMMANDS DIFFERENT FROM THE KEY SWITCH
TURN ON / TURN OFF OR THE RESET OF THE EMERGENCY STOP
SWITCHES DURING THE START UP OF THE VEHICLE WILL CAUSE
THE DISPLAY OF AN ERROR.
In the cage there are two foot switches, activated with the heels, which
guarantee the stable positioning of the operator without limiting his or her
comfort.
Removing one foot from one of the two switches, all of the functions of
the machine, raising, lowering and running, are disabled immediately.
NOTE: Remember to activate, besides both of the footswitches also the
left and right hand sensors, (Section 3.6), so as to enable all of the ma-
chine functions: driving/raising /lowering.
30 31
SECTION 3.
OPERATION OF THE MACHINE

Tire Lift compartment Raising/Lowering Buttons
Distribute tires only on the lift compartment doing this without loading and unload-
ing suddenly . Place the first tire in touch with both the loading shelf and the roller
side guides. Place the other tires, if necessary, one on the other taking care to
place them in touch with the roller side guides.
The max allowable number of tires that can be loaded depends on the size and
on the weight of the tire. DO NOT LOAD OR UNLOAD ANY OTHER ITEM DIF-
FERENT FROM TIRES. THE SIZE TIRES THAT CAN BE LOADED HAVE A
MINIMUM DIAMETER OF 55 cm AND A MAXIMUM OF 76 cm.
The functionality of these buttons is available only if the operator has his or her
hells on the footswitches in the platform .
Push and hold down the Tire Lift compartment Raising Button ( Button 8 ) to acti-
vate the electrical raising of the Tire Lift compartment that from a vertical position
will turn in an horizontal position. Release of the button automatically stop its
movement.
8
ATTENTION
32 33
SECTION 3.
OPERATION OF THE MACHINE
ATTENTION

Tire Lift compartment Rolling Buttons
The functionality of these buttons is available only if the operator has his or her
hells on the footswitches in the platform .
Push and hold down the Tire Lift Roll In Button ( Button 10 ) to activate the elec-
trical roll in of the tire toward the operator in order to pick up tires from the com-
partment. Release of the button automatically stop its movement.
10
Push and hold down the Tire Lift compartment Lowering Button ( Button 9 ) to
activate the electrical lowering of the Tire Lift compartment that from an horizon-
tal position will turn in a vertical position. Release of the button automatically stop
its movement.
9
34 35
SECTION 3.
OPERATION OF THE MACHINE

Tire Lift compartment Microswitches
The Tire Lift compartment is equipped with two limit switches one in the bottom
part and one in the upper part of the device that stop the roll in and roll out of the
loading shelf as soon as they are closed.
The operator must take all necessary precautions so as to avoid any hazard dur-
ing loading and or unloading of the tires.
ATTENTION
Push and hold down the Tire Lift Roll Out Button ( Button 10 ) to activate the
electrical roll out of the tire away from the operator in order to pick down tires to
the compartment. Release of the button automatically stop its movement.
11
36 37
SECTION 3.
OPERATION OF THE MACHINE

3.7 GROUND COMMAND PANEL
The panel is found under the cover, in an extractable fold-away drawer, and
is made up of the following components;
1. Emergency Stop Button
2. Rising basket button
3. Lowering basket button
4. Multifunction Button Group
5. LCD display
6. Battery gauge
4
2
3
1
5-6
Emergency stop button
Pushed immediately stops all the operational phases of the machine.
Reset DOES NOT actuate the machine, but enable the command devices.
Display
This is the principle control display system on the machine:
• It visualises useful information on the status of the system
• It gives diagnostic information on eventual anomalies or faults in the
system.
Multifunction Button Group:
All of the arrow buttons are enabled only when the keyed selector switch is
turned to the Ground Command mode.
• The ESC button is used for the programming of the electronic hard-
ware and MUST BE used only by a specialised BRAVI technician.
• Pushing and holding down the up arrow button, the raising of the bas-
ket is actuated. RELEASE TO INTERRUPT THE ELEVATION OF
THE BASKET.
• Pushing and holding down the low arrow button, the lowering of the
basket is actuated.
RELEASE TO STOP THE DESCENT OF THE BASKET.
38 39
SECTION 3.
OPERATION OF THE MACHINE
This manual suits for next models
1
Table of contents
Other Bravi Platforms Lifting System manuals
