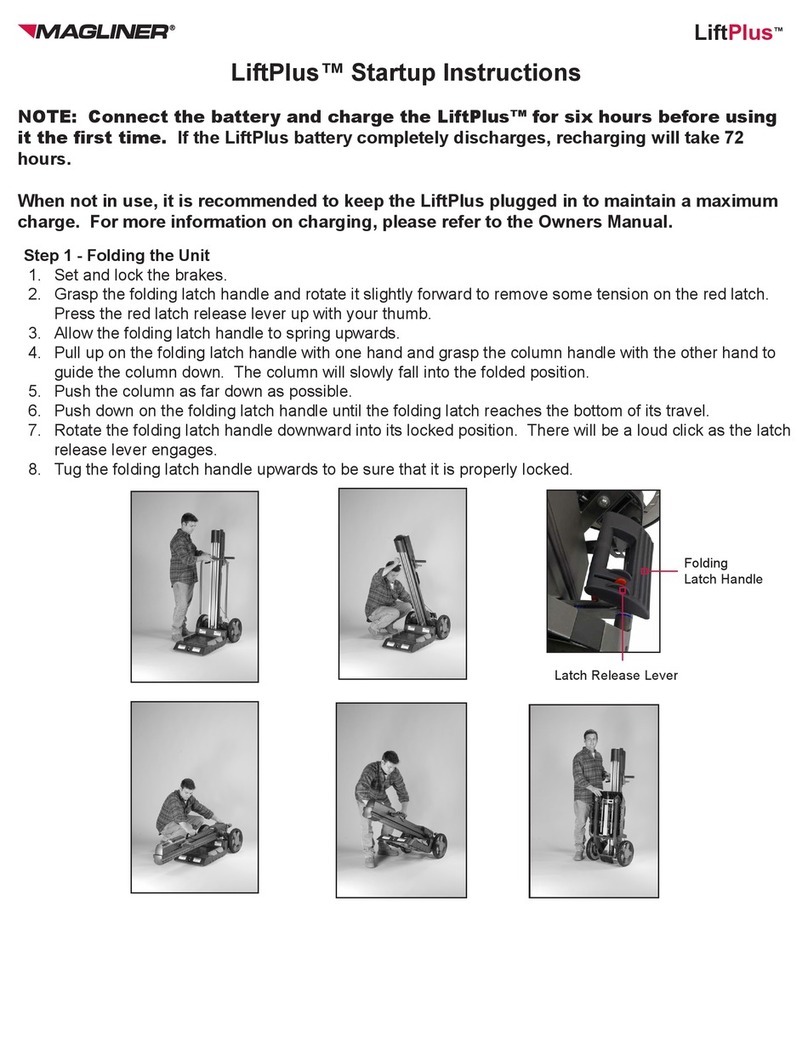
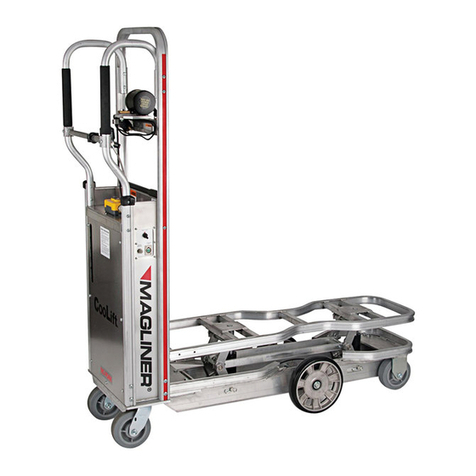
Magliner CooLift CPA48 User manual

1-800-MAGLINE (624-5463) Page 1 www.magliner.com
CooLift®
Serial #: _________________________________
Date of Purchase: ________________________
Owner’s Manual
IMPORTANT: Read entire manual before operating
For CooLift models with electric hydraulic lift AND propulsion
(CPA-- models)

1-800-MAGLINE (624-5463) Page 2 www.magliner.com
CooLift®
Warranty
Magliner products have a one (1) year warranty (unless otherwise specied) from the date of
purchase against defects in workmanship or material. Any part or component, except items covered
by warranties of other manufacturers, returned to the factory or service center freight prepaid
by the owner, found upon examination by Magline, Inc. to be defective or the result of improper
workmanship by the factory will be repaired or replaced without charge and returned to the owner
freight prepaid by Magline, Inc.
Alterations of Magliner products void any warranty or liability on the part of Magline, Inc. Magline,
Inc. does not guarantee product capacity if alterations are made.

1-800-MAGLINE (624-5463) Page 3 www.magliner.com
CooLift®
Table of Contents
Introduction, Safety Instructions ...........................................................................................................4
Operating Labels...................................................................................................................................5
General Specications ..........................................................................................................................6
CooLift Pallets .......................................................................................................................................7
Controls -- General Operation......................................................................................................... 8-12
Battery Instructions........................................................................................................................ 13-15
Troubleshooting............................................................................................................................. 16-17
Maintenance / Inspection Checklist................................................................................................18-23

1-800-MAGLINE (624-5463) Page 4 www.magliner.com
CooLift®
Thank you for purchasing the Magliner CooLift! If you have any questions regarding your new
Magliner product please call our customer service department at 1-800-MAGLINE (624-5463) or
(989) 512-1000. Please read this manual thoroughly to become familiar with the safe operation and
maintenance of your new Magliner CooLift.
General Safety Instructions
• Carefully read this entire manual before using your Magliner CooLift.
• Keep hands and feet away from all moving parts.
• Always stand clear of lifting platform area when operating.
• Do not attempt to use the Magliner CooLift on a truck ramp.
• Engage the holding brake whenever in a stopped position.
• Keep the Magliner CooLift in an upright position at all times.
• Do not utilize Magliner CooLift as a lifting device for anything other than a CooLift pallet.
• Do not use the Magliner CooLift to lift or to transport people.
• A routine check of the CooLift should be performed daily that includes, but not limited to:
checking for any leaks in the brake system; making sure the containment strap functions
correctly; making sure the lift deck raises and lowers smoothly without excessive noise,
slowing or shuddering; checking the brake system to ensure proper slowing, stopping, and
holding functions.
• Always use the containment strap when moving loads with the Magliner CooLift.
• When transporting a load, always use the handles provided at the user end of the CooLift
in order to provide quick access to the braking system should immediate stopping be
required.
• Operator should be positioned uphill from CooLift when descending on natural grades,
sloping or uneven surfaces.
• Use hand brake to control speed.
• Avoid making sharp turns.
• Always use a Magliner battery charger to charge your battery.
• Do not exceed the pallet capacity limit.
• Brake uid is a slip hazard on any ooring surface; if a leak occurs it should be cleaned up
immediately and completely.
• Do not operate without all guards and safety features securely in place and/or functioning
properly.

1-800-MAGLINE (624-5463) Page 5 www.magliner.com
CooLift®
Please follow the reminder labels found on your CooLift unit.
Always stand clear
of lifting platform
area
when operating
WARNING
Safety Instructions
• Read and understand operating instructions
before using
• Always inspect CooLift and pallets for damage
before using. Do not use if there are signs of
damage, improper maintenance or load shift
• Do not exceed capacity limit
• NO RIDING — Riding on the CooLift could
cause serious injury
• DO NOT USE ON TRUCK RAMPS
• Use caution on natural grades; operator
should be positioned uphill from cart when
descending, use brake to control speed, no
sharp turns
• Always apply holding brake and lower lift
before unloading pallet or leaving CooLift
unattended

1-800-MAGLINE (624-5463) Page 6 www.magliner.com
CooLift®
General Specications CPA43 CPA48 CPA53
Corresponding pallet size 43 inch 48 inch 53 inch
Capacity 1,200 lbs 1,350 lbs 1,500 lbs
Weight without battery 280 lbs 280 lbs 272 lbs
Weight with battery 346 lbs 346 lbs 338 lbs
Overall height 60 inches 60 inches 60 inches
Overall width 19 inches 19 inches 19 inches
Overall length 60 inches 60 inches 60 inches
Operating temperature* -20 to 120°F -20 to 120°F -20 to 120°F
Propulsion assist speed 0 - 2.5 mph FWD
0 - 2.5 mph REV 0 - 2.5 mph FWD
0 - 2.5 mph REV
*NOTE: When the outside temperature is below 30°F the CooLift should not be left inside the truck
overnight and should never be left inside a freezer or a cooler for extended periods of time. Extended
exposure to subfreezing temperatures will adversely affect CooLift battery life.
The CooLift should be stored above 48°F when possible. If the unit is stored in cooler temperatures,
the throttle should be exercised to ensure it will return to neutral position when throttle is released.
Battery Specications
Weight 33 lbs each (66 lbs total)
Voltage 24v (two 12v battery cells)
Battery cells Sealed lead acid - maintenance free
Fluid Specications
Brake uid DOT 3 or DOT 4
CPA43
CooLift with
bulk head
CPA48
CooLift with
bulk head
CPA53
CooLift without
bulk head

1-800-MAGLINE (624-5463) Page 7 www.magliner.com
CooLift®
Pallets
Buttons for attaching beginning of
stretch wrap
General Pallet Information:
• Always load within capacity limit.
• Always load within pallet footprint; do not allow load to hang over pallet.
• CAUTION: When using any multiple load handling system (such as a triple-double) to move
the CooLift pallets, do not spread the forks while underneath pallet as it may result in pallet
failure.
• Store in upright position in cool, dry location.
• Do not drop.
• Do not stand upon.
• Wash with mild soap and water.
• Do not use if damaged.
• Make sure to interlock empty pallets when stacking.
• Only stack pallets when empty.
• Do not make modications to pallet.
• Secure load before transporting.
• Use for intended purpose only.
Ergonomically placed hand
holes for easy carrying
Sizes Capacity Part Number
43” pallet 1,200 309344
48” pallet 1,350 309345
53” pallet 1,500 309346
Pallet design allows
for any size CooLift
pallet to stack on
top of any other size
CooLift pallet.
Anti-slip tape
reduces product
from shifting

1-800-MAGLINE (624-5463) Page 8 www.magliner.com
CooLift®
D
User Controls
A) Main Power Switch – provides power to the unit for raising and lowering the deck.
B) Circuit Breaker – helps to protect the components should an electrical short or overload occur.
C) Propulsion Power Switch - provides power to the unit for using the propulsion assist feature.
D) Battery Meter – indicates level of charge in batteries.
E) Deck Positioning Switch (up/down) – used to raise and lower the lift deck.
F) Directional Switch (forward/reverse) - used to set direction for propulsion assist feature.
G) Brake Lever – used for slowing and stopping the momentum of the CooLift.
H) Holding Brake Latch – used to keep the CooLift from rolling inadvertently – Always engage
holding brake whenever CooLift is unattended.
I) Cord Storage Brackets – holds the AC built-in battery charger input cord when not in use.
J) Containment Strap – should be used to secure loads during transport.
K) Throttle - used to control speed for propulsion assist feature.
L) Throttle Interlock Button - used to activate propulsion assist feature.
M) Folding Lift Assist Handles (optional) - provides ergonomic lifting solution when leverage is
needed for removing CooLift from under pallet/overcoming thresholds.
A
B
C
H
I
EF
G

1-800-MAGLINE (624-5463) Page 9 www.magliner.com
CooLift®
J
K
L

1-800-MAGLINE (624-5463) Page 10 www.magliner.com
CooLift®
General Operation of the Magliner CooLift
A) Storage and Limited Use of Holding Brake
1) Engage the holding brake whenever leaving the CooLift unattended.
2) Pallets on the Magliner CooLift should always be in the down position when not moving.
3) Keep hands, feet and all items clear of the moving parts of the CooLift.
4) Never place hands or feet under a loaded elevated pallet.
5) The holding brake is intended to be used for limited periods of time only.
6) Store the CooLift on a hard level surface.
CooLift with product strapped to deck
Front Underside View
B) Loading a pallet on the Magliner CooLift
1) Make sure CooLift deck is in down position.
2) Push the CooLift under the pallet until fully inserted and the back of the pallet is touching
the enclosure (CPA53), bulk head (CPA48) or pallet stops (CPA43).
3) Press and hold the up switch until the lift deck is fully raised (this is noticeable by the sound
changed of the running hydraulic pump and the stop of upward motion of the pallet).
4) Engage the holding brake by depressing the brake lever back toward the horizontal handle
with one hand and ipping the holding brake latch into one of the provided notches to hold
it in place.
Note: Make sure the deck is in the up position prior to fastening the containment strap.
5) Fasten the containment strap to secure the load by: a) rmly grasping the end of the
strap; b) pulling it out from the roll directly over the center of the load taking care not to twist
the strap; c) extending strap far enough to snap into position; and d) hooking strap to the
containment lock located at the lower front end of the cart (see Front Underside View).
6) The maximum stacking height for all models (CPA43, CPA48 and CPA53) models is 50”
from the oor. However, never stack a load that is higher than your line of vision.

1-800-MAGLINE (624-5463) Page 11 www.magliner.com
CooLift®
Figure 1: CooLift secured under a loaded
pallet with the holding brake engaged
Figure 2: CooLift strapped into truck for transport
D) Unloading a pallet from the Magliner CooLift
1) Position the cart in place on a level surface and engage the holding brake.
2) Lower the deck completely.
3) Unlock the containment strap from the lock by lifting the tab and sliding the latch out.
4) Walk the strap back into position on the roll.
5) Disengage the holding brake by pulling the brake lever back until the latch releases.
6) Pull CooLift out from under pallet
E) Transporting the Magliner CooLift inside the truck
Note: It is important to keep the CooLift upright at all times.
1) If you are transporting the CooLift on a truck that has loaded pallets, insert the CooLift
completely under a fully loaded pallet and toggle the up switch until the lift deck makes
contact with the bottom of the pallet but does not lift and engage the holding brake
(Figure 1).
2) If there are no loaded pallets on the truck, the CooLift should be parked next to the wall
and strapped in with the holding brake engaged (Figure 2).
C) Transporting a pallet with the Magliner CooLift
1) When transporting a pallet with the CooLift the operator should always use caution on
natural grades. Be positioned uphill from cart when descending, use brake to control speed
and make no sharp turns.
2) Care should be taken to address any sidewalk ramps or door thresholds to help maintain
stability in the load.
3) Use caution at all sloping or uneven surface areas and make any nal positioning changes.
4) Depress the down switch and hold it until the CooLift deck has lowered completely. Note: it
is possible to have the pallet sitting on the oor and the deck still engaged to the bottom of
the pallet if the deck has not been completely lowered.
5) Remove the CooLift from under the pallet.

1-800-MAGLINE (624-5463) Page 12 www.magliner.com
CooLift®
F) Using the Variable Speed Propulsion Assist Feature
1) Turn both the Main and Propulsion power switches to the “On” position.
2) Use the directional switch to indicate either forward or reverse movement. The unit can
be driven forward when the switch is pushed upward or in the middle position. The switch
must pushed backward for reverse.
3) Press and hold the dead-man’s switch button so that propulsion can be fully activated.
4) Slowly press the throttle forward while the dead-man’s switch button is held to begin
motion.
Note: Once the throttle is engaged, the dead-man’s switch button cannot be released without
inactivating propulsion. If the dead-man’s switch button is released, you will need to fully return the
throttle to its home position and then repeat steps 3-4 above in order to reactivate propulsion assist
feature.
General Propulsion Assist Warnings:
• Do not use propulsion assist when in conned spaces.
• Be sure there are no obstacles or people in front of the CooLift before activating propulsion.
• Check to be sure the path is clear.
• Check behind you for obstacles or people before using the propulsion assist in reverse mode.
• Keep both hands on the CooLift handles while using the propulsion assist feature.
Dead-Man’s Switch
(Throttle Interlock) Button Throttle

1-800-MAGLINE (624-5463) Page 13 www.magliner.com
CooLift®
Battery
General Battery Warnings:
• Do not connect accessories to the battery; this will cause
premature battery failure or possible damage to the
batteries.
• Unauthorized modication could create a hazardous
condition and result in serious injury.
• Batteries contain acid, which can burn eyes, skin,
clothes, etc. Use caution! Always wear gloves when
working with batteries. If contact occurs, ush
immediately with water and get medical attention.
Protect surfaces from battery damage by placing
batteries on rubber or plastic surfaces.
• To prevent electrical shock, do not touch non-insulated
parts of the charger output connectors, battery
connectors or battery terminals. Do not use connectors
that are cracked, corroded, or do not make adequate
electrical contact. Use of damaged or defective
connectors could result in re or electrical shock.
• Keep sparks, ame and smoking materials away from
batteries.
• Batteries can supply a large amount of current. Do not wear jewelry or watches when working on
the batteries as an accidental shorting could occur and cause severe burning.
• Only qualied technicians should service your Magliner CooLift power supply system.
• Disconnect the batteries by unplugging the main wiring harness at the control board before
attempting to replace any electrical components.
• Only use authorized Magliner CooLift replacement parts.
Battery Life
The Magliner CooLift is powered by two 12-volt storage batteries. The lift and propulsion motors
draw current from the batteries based on the amount of effort required to meet load being lifted.
Testing and research has been done to ensure a fully-charged battery will allow the user to go
through two days of single-shift operation without recharging the system. This amounts to a total of
over 500 lift cycles and traveling 3 miles with propulsions. However, extreme temperature ranges
and extreme loads can have an effect on the amount of power available during one charging cycle.
NOTE: The battery must be charged within 6 months of storage to prevent self-discharge. If the
battery is not charged within 6 months of storage, permanent loss of capacity may occur.
Battery Charging
*Battery has a warranty of six (6) months.

1-800-MAGLINE (624-5463) Page 14 www.magliner.com
CooLift®
A built-in Magliner AC charger (part #63004 when using a common 120v domestic or 230v
international outlet) is capable of safely charging your CooLift battery.
This charger uses standard household power.
Battery Charging Warnings:
Use only Magliner chargers designated for use with CooLift.
Do not expose charger to rain or snow.
To prevent risk of re, use the charger only in a dry, well ventilated
room without ammable uids or explosive gases.
Do not allow clothing, blankets or other material to cover battery charger during charging process.
Ensure there is proper ventilation in area used for battery charger and batteries.
Use of an attachment not recommended or delivered by the battery charger manufacturer may
result in a risk of re, electric shock or injury to persons.
Avoid using an extension cord as it can present risk of re and electrical shock. Never use a
household extension cord if the charger plug does not reach outlet. If an extension cord must
be used, use a three conductor No. 14AWG (or heavier) cord with proper ground, in good
electrical condition and kept as short as possible.
Make sure the cord is located such that it will not be a trip hazard or otherwise subject to
damage or stress.
Do not operate a charger with a damaged cord or plug – replace immediately.
Do not operate a charger if it has received a sharp blow, been dropped, or otherwise
subjected to damage or stress.
Do not disassemble the charging unit.
To reduce risk of electrical shock, unplug the charging unit from the AC power supply source
before attempting any maintenance or cleaning.
Always unplug the charging unit before operating the Magliner CooLift.
Always use battery chargers supplied by Magline, Inc. Other battery charging units could
cause damage to your batteries or personal injury.
Batteries generate gases that can be explosive. To prevent arcing or burning near batteries,
do not disconnect the charger output connector from the charging port when the battery
charger is in operation. If an interruption of the charging cycle is desired, move the battery
charger switch to OFF, disconnect it from the power supply source and then disconnect the
charging connector from the charging port.
To avoid damage to battery charger connectors and cords, disconnect by grasping the plug
body and pulling it straight out of the outlet or receptacle. DO NOT pull on the cord. DO NOT
twist, rock, or pull the connector sideways.
The metal tip on the end of the plug may be hot when it is rst unplugged.

1-800-MAGLINE (624-5463) Page 15 www.magliner.com
CooLift®
Using the AC Charging Unit
Note: A completely drained battery needs 5 hours to fully charge.
1) Connect the AC charger plug to an AC outlet (120v domestic or 230v international
2) Disconnect the charging unit from the charging port.
The LED will illuminate to indicate one of the following conditions:
Solid Yellow – Battery is charging
Solid Green – Battery has fully charged and is ready for use
Flashing Green – The output is not connected; check all connectors and fuses
NOTE: There are two operational fuses on the charging unit located at each end.A spare fuse is
located adjacent to the main power connection.
Note: Battery may be charged as often as desired. Magline recommends charging at least
once after each delivery route is complete.
Battery Meter Operating Instructions
• Battery meter will show the charged state of the battery whenever the main power switch is
turned ON
• During normal operation, the charged state of the battery is indicated by the number of bars
displayed on the meter
• Full charge is 10 steady bars
• A partial charge is two to nine steady bars
• A low battery is two alternately ashing bars
• While the battery charger is plugged in and charging the battery, the display will repeatedly
scroll across the bars up to the level of charge in the battery
• Full charge is indicated by scrolling across 10 bars
• A partially charged battery is indicated by scrolling across two to nine bars
• When the main power switch is OFF, the battery meter will not display

1-800-MAGLINE (624-5463) Page 16 www.magliner.com
CooLift®
Troubleshooting
The unit does not turn on.
Is the main switch turned on?
Have the batteries been charged?
Has the circuit breaker been tripped?
Is the battery box fully plugged in?
Check electrical connections for tightness, including battery terminals within the enclosure.
Contact Magline if problem persists.
The CooLift is not charging up.
Is the charger working correctly?
Is the battery box connected correctly?
Have all electrical connections been checked?
Is there any damage to the plug or cord?
Is the internal charger switch in the ON position?
Is the charger working correctly?
Is the power plug plugged in the charger socket?
Is the charger output cord plugged into the battery pack charger port?
The pump is running but the deck is not lifting.
Is the uid level correct in the reservoir?
Do you see any leaks in the hydraulic system?
Is the manual pump release valve open?
Is the breather cap for the pump reservoir plugged?
The deck lifts to the top position but then gradually lowers.
Is the manual release valve fully closed?
Do you see any leaks in the hydraulic system?
The deck lifts OK but lowers slowly.
Does it go down quicker when opening the manual release valve?
Do you see any uid leaking out of the gas springs?
The deck lifts slower than usual.
Is the manual release valve closed all the way?
Is the uid level correct in the reservoir?
Do you see any leaks in the hydraulic system?
The deck is in the up position and will not go down.
Is there any foreign matter in the linkage system?
Check for loose wire connections.
Use the manual pump handle to lower the deck (the manual pump handle is stored inside the
enclosure).

1-800-MAGLINE (624-5463) Page 17 www.magliner.com
CooLift®
Troubleshooting
The brakes are not working or braking unevenly side to side.
Do you see any leaks in the brake system?
Is the brake uid level correct in the reservoir?
Are both of the calipers mounted tightly to the rail?
If you pump the brake lever several times, does it start working?
Check to see that the discs are running true and mounted properly.
Check to see if disc mounting screws have not backed out.
Contact Magline if problem persists.
The pump runs and will not shut off.
Turn off main power switch.
Check the continuity of the starter solenoid.
Check the continuity of the operator on/off switch.
Hydraulic or brake uid has dripped into the drip pan underneath the CooLift deck.
Wipe up any uid that may have leaked into the drip pan using shop towels.
Brake uid has dripped into the drip pan underneath the CooLift deck.
Check for leaks in the brake system and tighten loose components, or repair any damaged
components.
Wipe up any uid that may have leaked into the drip pan using shop towels.
Contact Magline if problem persists.
The propulsion assist feature is not operating.
Have the batteries been charged?
Are both the lift system and propulsion system switches turned to the ON position?
Fully lower the deck and turn both the lift system and propulsion system switches to the OFF
position. Wait 2-3 minutes and turn the lift system and propulsion system switches to the ON
position.
Have you pressed the throttle interlock button before using the throttle?
Are the wires to the interlock and throttle connected? Both in the enclosure and on the
handle?
Check the chains in the propulsion system to see if they are in place and tensioned properly.
Has the parking brake been released?
Check for loose wire connections from the controller or battery.
Is there any debris in the chains or in other parts of the propulsion system?
Contact Magline if problem persists.

1-800-MAGLINE (624-5463) Page 18 www.magliner.com
CooLift®
NotesFrequency
Every 2
Weeks
Monthly
Monthly
Monthly
Monthly
Maintenance Instructions
• Lift deck to its fully raised position
• Remove cover protecting the propulsion system.
• Turn off CooLIft
• Check for and remove all debris including on
screws and around the lift chain assembly
• Lift deck to its fully raised position
• Check the lower limit switch by pressing the metal
tab gently toward its black box; it should respond
by snapping quickly back into place
• Now lower the deck to its fully lowered position.
• Check the upper limit switch by pressing the metal
tab gently toward its black box; it should respond
by snapping quickly back into place
• Lift deck to its fully raised position
• Turn off CooLift
• Apply a lithium-based grease to the lead screws
• Brush the grease evenly across the threads
• Turn on the CooLift; run deck up and down a few
times to distribute grease
• Lift deck to its fully raised position
• Turn off CooLift
• Oil chains lightly with a 40 weight (or greater) oil.
Moly chain lubricant may be used as a substitute.
• Lift deck to its fully raised position
• Turn off CooLift
• Chain should have 1/8” side-to-side play between
sprockets when you push on it
• To adjust, loosen or tighten the 3-1/4” long socket
head cap screws in the mount plate until 1/8” play
in chain is reached
Related
Components
Entire system
Limit Switch
Acme lead screws
Lift chain (front of
deck) lubrication
Lift chain (front of
deck) tension
Area
Lift System
Lift System
Lift System
Lift System
Lift System
Cart Serial No: _________________________ Maintenance Date: ____________
Customer: ____________________________ Completed By (name): ____________
Required Maintenance Procedures and Inspection Log

1-800-MAGLINE (624-5463) Page 19 www.magliner.com
CooLift®
NotesFrequency
Monthly
Monthly
Maintenance Instructions
• Lift deck to its fully raised position
• Remove cover protecting the propulsion system
• Turn off CooLift
• Oil chains lightly with a 40 weight (or greater) oil.
Moly chain lubricant may be used as a substitute.
• Lift deck to its fully raised position
• Turn off CooLift
• Chain should have 1/4” side-to-side play between
sprockets when you push on it
• To adjust, loosen or tighten the 5/16”-18 x 2” long
socket head cap screws in the mount plate until
1/4” play in chain is reached
Related
Components
Drive chain
lubrication
Drive chain tension
Area
Propulsion
System
Propulsion
System

1-800-MAGLINE (624-5463) Page 20 www.magliner.com
CooLift®
NotesTiming
Daily
Daily
Daily
Daily
Daily
Daily
Findings
Pass or Fail
Normal Condition
• Frame is not twisted or bent
• User enclosure is
perpendicular to the frame
• Deck is angled slightly
toward enclosure when
retracted
• Handles are not bent or
damaged
• Straight sections
• Smooth curves
• Flat surfaces
Cart should travel in nearly a
straight line for several feet
• Brakes should feel
responsive and not “soft”
• Brake lever should not
contact handle
Brake should remain engaged
• No excessive noise or
extraneous sounds from lift
motors
• No rattles
• Deck lifts and lowers within
3-4 seconds (each way)
Method of
Inspection
Visual inspection
Visual inspection
Push cart and let
roll
Roll cart at walking
speed and apply
brakes
Lock brakes for 10
minutes then push
on cart with brake
still locked
Operate lift system
up and down
several times
electrically
Description
Cart is straight and
properly aligned
No damage or
excessive wear
Cart rolls smoothly
Brakes are responsive
when applied
Holding brake remains
active over time
Electrical operation
Area
General
Inspection
General
Inspection
General
Inspection
General
Inspection
General
Inspection
Lift System
Cart Serial No: _________________________ Inspection Date: ____________
Customer: ____________________________ Inspector’s Name: ____________
Estimated Usage: ______________________
This manual suits for next models
2
Table of contents
Other Magliner Lifting System manuals
Popular Lifting System manuals by other brands

morse
morse 520M-124 Operator's manual

haacon
haacon S/DK INSTRUCTIONS MANUAL AND SERVICE INSTRUCTIONS

Granberg
Granberg Verti 830 user manual

WOOD'S POWR-GRIP
WOOD'S POWR-GRIP MRT4-DC Procedure

ALFRA
ALFRA TMH 50 Operation manual

Harbor Freight Tools
Harbor Freight Tools Haulmaster Owner's manual & safety instructions

Hallins
Hallins NEWTON 50 manual

REID LIFTING
REID LIFTING PORTA GANTRY Series Assembly & Operation guide

HESHBON
HESHBON HL-26K Installation, operation and maintenance manual

ABACO MACHINES
ABACO MACHINES ALG50A Operation manual

WMB
WMB TE-076 Operating instructions & user manual

Dhollandia
Dhollandia DH100 Series User's Manual Maintenance And Repair