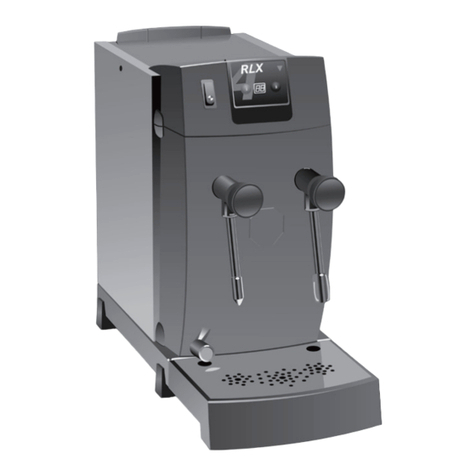
Bremer VIVA XXL-T User manual

Operating Instructions
bremer VIVA XXL-T
Automatic coffee brewing
and dispensing machine
with grounds container

Dear customers, ladies,
and gentlemen,
Please read the operating manual thoroughly before using the VIVA XXL-T
automatic coffee dispensing machine bremer VIVA XXL-T for the first time.
The operating manual contains important instructions for proper operation
and provides you with the requisite safety while handling the automatic
coffee dispensing machine.
Always keep the operating manual within reach!
bremer VIVA XXL-T
- Commercial coffee maker for filter coffee, with automatic ejection of
used coffee powder after the brewing process
- four differently sized, selectable brewing quantities (see page 3)
- four differently dosed coffee output quantities (see page 3)
- Hot water outlet for cup (for small pot additional equipment)
Function
After selection of a brewing stage, the automatic coffee machine doses hot
water and coffee powder into its brewing container. After expiry of the
soaking time, it filters the freshly brewed coffee in its storage bowl. You can
take out the desired quantity by pressing the item key-button.
Explanation of symbols:
Steps/Activities to be carried out
Instructions, Sequence of functions
Reference to further instructions

1
Table of Contents Page
1. Instructions for operational safety 2. . . . . . . . . . . . . . . . . . . . . . . . . . . .
2. Get familiar with the coffee dispensing machine 3. . . . . . . . . . . . . . .
2.1 Set the language for the menue 4. . . . . . . . . . . . . . . . . . . . . . . . . . . . . . . . . . . . .
3. Start-up 5. . . . . . . . . . . . . . . . . . . . . . . . . . . . . . . . . . . . . . . . . . . . . . . . . . . . .
3.1 Refill coffee powder 6. . . . . . . . . . . . . . . . . . . . . . . . . . . . . . . . . . . . . . . . . . . . . . .
3.2 Insert container or grounds drawer (optional) 6. . . . . . . . . . . . . . . . . . . . . . . . . .
3.3 Start brewing process 7. . . . . . . . . . . . . . . . . . . . . . . . . . . . . . . . . . . . . . . . . . . . .
3.4 Selectionof brewing stage, disable and enable 8. . . . . . . . . . . . . . . . . . . . . . . .
3.5 Take out coffee 9. . . . . . . . . . . . . . . . . . . . . . . . . . . . . . . . . . . . . . . . . . . . . . . . . . .
3.6 Dispensinghot water 10. . . . . . . . . . . . . . . . . . . . . . . . . . . . . . . . . . . . . . . . . . . . . .
4. Stopping / End of operation 11. . . . . . . . . . . . . . . . . . . . . . . . . . . . . . . . . .
5. Cleaning and care 11. . . . . . . . . . . . . . . . . . . . . . . . . . . . . . . . . . . . . . . . . . .
5.1 The cleaning programme 12. . . . . . . . . . . . . . . . . . . . . . . . . . . . . . . . . . . . . . . . . . .
5.2 Empty grounds container and confirm 13. . . . . . . . . . . . . . . . . . . . . . . . . . . . . . . .
5.3 Cleanhousing 14. . . . . . . . . . . . . . . . . . . . . . . . . . . . . . . . . . . . . . . . . . . . . . . . . . . .
5.4 Clean coffee powder container 14. . . . . . . . . . . . . . . . . . . . . . . . . . . . . . . . . . . . . .
5.5 Emptyingand cleaning the grounds drawer (optional) 14. . . . . . . . . . . . . . . . . . .
6. Setting/Adjusting the coffee dispensing machine 15. . . . . . . . . . . . . .
6.1 Overview of possible settings 15. . . . . . . . . . . . . . . . . . . . . . . . . . . . . . . . . . . . . . .
6.2 Display or delete/reset counter 16. . . . . . . . . . . . . . . . . . . . . . . . . . . . . . . . . . . . . .
6.3 Setting the brewing parameters 17. . . . . . . . . . . . . . . . . . . . . . . . . . . . . . . . . . . . .
6.4 Setting of the beverage volumes for items 18. . . . . . . . . . . . . . . . . . . . . . . . . . . .
6.5 Beverageselection 19. . . . . . . . . . . . . . . . . . . . . . . . . . . . . . . . . . . . . . . . . . . . . . .
6.6 Select beverage prices 20. . . . . . . . . . . . . . . . . . . . . . . . . . . . . . . . . . . . . . . . . . . .
6.7 Set dispensing control (external accounting) 21. . . . . . . . . . . . . . . . . . . . . . . . . .
6.8 Setting of cleaning parameters 22. . . . . . . . . . . . . . . . . . . . . . . . . . . . . . . . . . . . . .
6.9 Enteringa PIN code to change settings 23. . . . . . . . . . . . . . . . . . . . . . . . . . . . . .
7. Faults and remedies 24. . . . . . . . . . . . . . . . . . . . . . . . . . . . . . . . . . . . . . . . .
8. Technical data 26. . . . . . . . . . . . . . . . . . . . . . . . . . . . . . . . . . . . . . . . . . . . . . .
9. Set up and connection 27. . . . . . . . . . . . . . . . . . . . . . . . . . . . . . . . . . . . . . .
9.1 Set up 27. . . . . . . . . . . . . . . . . . . . . . . . . . . . . . . . . . . . . . . . . . . . . . . . . . . . . . . . . .
9.2 Water connection 27. . . . . . . . . . . . . . . . . . . . . . . . . . . . . . . . . . . . . . . . . . . . . . . . .
9.3 Waste connection 28. . . . . . . . . . . . . . . . . . . . . . . . . . . . . . . . . . . . . . . . . . . . . . . . .
9.4 Electrical connections 28. . . . . . . . . . . . . . . . . . . . . . . . . . . . . . . . . . . . . . . . . . . . .
10. Servicing / customer service / data plate 29. . . . . . . . . . . . . . . . . . . . . .

2
1. Instructions for operational safety
Operation
DThe bremer VIVA XXL-T may be operated only
- by assigned personnel,
- with inserted container or grounds drawer
- when the automatic coffee dispensing machine is supervised,
- for the purpose envisaged in the operating manual.
DCAUTION! Danger of scalding! During operation and cleaning, do not reach
under the coffee or hot water outlet.
DDo not remove the grounds container during a brewing process. If you have the
optional please ensure that the mobile grounds container is fixed.
DCAUTION! Do not reach into the coffee powder container during operation.
DDo not cover the ventilation vents.
DDo not allow any liquids to flow into the ventilation slits and filling openings!
DCAUTION! Do not spray the automatic coffee dispensing machine with a water
hose-pipe or high-pressure cleaner.
DThe bremer VIVA XXL-T
- should be protected against dampness and the direct rays of the sun,
- may be operated in the open only with ceiling cover and sufficient
wind-protection!
DThe ambient temperature at the installation site must not sink below freezing
point. The water could freeze and damage the components or the machine.
Dbremer recommends to avoid water-damage: Get an electronic water-stop
installed between the water tap and the automatic coffee dispensing machine.
Your authorised bremer customer service would be glad to advise you.
Dbremer VIVA XXL-T COOL: The machine must not be switched on and used if
the glass housing has broken. A new housing must be fitted by a bremer
customer service technician.
DIn case of faults, pay attention to the instructions in chapter 7. ”Faults and
remedies”.
Pressure Chamber and Steam Boiler maintenance
Dbremer recommends: According to the Pressure Chamber and Steam Boiler
maintenance, the operator must take care for the thorough servicing and testing
of the safety facilities.
DTherefore, at least once a year, get your automatic coffee dispensing machine
inspected and serviced by the authorized bremer customer service.
Servicing work includes, e.g. tests of the pressure chamber and its safety
facilities, functional, tightness tests.
Disposal, disassembly
DThe housing parts are made of reusable plastic and are marked accordingly.

3
2. Get familiar with the coffee dispensing machine
Key-board and display
Standard model
Cover of the coffee
powder container
(lockable)
Key-button for
cup of hot water
Hot water output
Cup
Key-board
cover (lockable)
Coffee output
Drip pan
Drip tray
Key-button for Mug /
Pot hot water (option)
Hot water output,
Mug / Pot (option)
Optional grounds
drawer
Machine switch
On / Off (STANDBY)
Move backwards through the menu
Start cleaning pro-
gramme
Confirm insertion of the
cleaning tablets
Coffee-Item key-buttons:
Cup
Mug
Pot
Flask
Carry out adjustments / undosed
taking of coffee
Deletion/Resetting of quantity counters
Brewing stages of filter coffee:
Stage 1.0 litre
Stage 2.0 litres
Stage 2.0 litres
Stage 2.5 litres, for continuous
brewing
Move forwards the menu
Open and close menus
display
screen
Carry out adjustments / Disable
brewing stages
CUP OF COFFEE
MUG OF COFFEE
POT OF COFFEE
FLASK OF COFFEE
Controllamps

4
2.1 Set the language for the menue
Example: set the language to
German
DYou can set the language of the texts or
country code at the machine
-before switching on
- in STANDBY Mode.
.Press the upper article key on the left
hand side continuously, press at the
same time key or till the
requested country code apears in the
display
Country code Language
031 Netherlands
033 French
044 English
049 German
081 Japanese (since 2002-11)
095 Russian
.Confirm the setted contry code with key
DSubsequently the setted language is
shown (Summing counter) in the display.
.Go to “Menü verlassen”(Exit menu)
with key
.Confirm the setting with key
DThe machine goes into the STANBY
Mode and stores the new setting.
DWith deviating proceeding the setting
may be lost after wetting running.
STANDBY
START
START
049 STANDBY
Ländercode
Summenzähler
Menü
verlassen
STANDBY

5
3. Start-up
.Open water tap.
.Switch on electrical switch at the front of
the bremer VIVA XXL-T.
.Ensure that grounds drawer or grounds
container is in the correct position.
.Unlock keyboard cover with key and
open.
.Press to switch on the coffee
machine.
.Close keyboard cover and withdraw key.
DDisplay ”Start filling, heating
up”appears when power supply to the
automatic coffee dispensing machine
has been cut off. The automatic coffee
dispensing machine carries out the
switch-on programme and checks right
up to the readiness of all functions.
Thereby, a rinsing process runs and the
boiler is heated up (duration approx. 5 to
8 minutes).
D”Machine heating, please wait”
appears, if you switch on the machine
from the display ”STANDBY”(Machine
was not cut off from the power supply).
D”Machine test, please wait”is
carried out by the bremer VIVA XXL-T
with adjustment switch-off after cleaning,
in order to clean its brewing system of
cleaning agent remains (duration approx.
8 to 10 minutes).
D“Select”appears, if the machine is
ready for selecting a brewing stage to
start a brewing process.
Closed
Open
Lock
Keyboard
cover
Start filling
heating up
Machine heating
please wait
Machine test
please wait
Select

6
3.1 Refill coffee powder
DDo not use instant coffee or coffee powder with additional substances. The
coffee filter may block up and a machine fault may occur !
DRefill when the coffeepowder loses aroma or on long periods of storage.
DMake sure that no foreign bodies get into the coffee powder container.
DIf the coffee powder container becomes
empty during operation, the following is
displayed ”2 brewings,
Res.operation”.
DAfter the second brewing, the display
appears ”Cof.powder empt”and the
automatic coffee dispensing machine
disables all brewing stages.
.Unlock cover of the coffee powder
container with key and remove.
.Fill the empty coffee powder container
- up to 3 kg with the desired coffee
powder type, e.g. grinding for
fresh brew automatic dispensing
machine
- Close after filling, so that the
aroma is retained longer.
3.2 Insert container or grounds drawer (optional)
.Insert container underneath the
machine or the grounds drawer before
starting a brewing process.
DThe machine is only brewing with a
removed grounds drawer.
2 brewings
Res.operation
Cof.powder empt
Grounds drawer

7
3.3 Start brewing process
.Start brewing process, by pressing the
key-button for the desired item, e.g.
for 1 litre of filter coffee.
DThe control lamp of the brewing stage
blinks for about 5 seconds.
DIn the meantime, you may choose
another brewing stage.
DAfter that the brewing stage is switched
on and the automatic coffee dispensing
machine starts a brewing process with
the display ”Brew.stage 1”.
DThe control lamp lights up when the
brewing stage is activated.
Soaking time see page 17. The contact
time for water with coffee (1 litre) takes
about 3 minutes.
DDuring a brewing process the grounds container (add. feature) is locked.
DAfter the brewing,
- the machine throws out the used coffee into the mobile 76 litre container
- the automatic coffee dispensing machine enables the item key-buttons,
provided their output quantity is available (control lamp of the item key-button
lights up).
DSwitch on the desired brewing stage by pressing - then to switch off press again.
A brewing process that has already started cannot be interrupted.
DAdditional automatic brewing for filter coffee
- by reaching the min. content of filter coffee in the storage vessel,
- if a brewing stage is elected.
DYou may always select another brewing stage. The new selected brewing stage
deletes the brewing stage you have selected previously.
DBrewing stages 1 to 3 litres: the bremer VIVA XXL-T re-brews fresh filter coffee if
the value falls below the minimum storage. Brewing stage 4 litres: continuous
brewing of filter coffee. Switch on this brewing stage only in case of increased
demand.
DThe amount of ready available brewing coffee is shown on the display screen.
For modification of the brewing stage settings see page 17.
Brewingstages:
1.0 litre
2.0 litres
2.0 litres
2.5 litres, only for
increased demand
Control lamp
Brew.stage 1

8
3.4 Selection of brewing stage, disable and enable
You can disable or enable selection of the brewing stage
- during a brewing process
- with a selected brewing stage
- so that a third person for example cannot switch on any other brewing stage.
In case of a deselected and disabled brewing stage, the automatic coffee
dispensing machine does not re-brew any longer and you can remove or use up the
coffee stock. A brewing stage switched on earlier cannot be switched off.
.Unlock keyboard cover with key and and
open.
Disabling of the selection of the
brewing stage
.Disable the selection of the brewing
stage by pressing the key-button .
DThe brewing stages are disabled for
selection. As confirmation the key symbol
appears below on the right of the
display screen.
Enabling the selection of the
brewing stage
.Enable the selection of the brewing stage
by pressing the key-button again .
DThe selection of the brewing stage is
enabled.
DThe key symbol on the display screen
has disappeared.
Keyboard
cover
Brew 0.0L
stage 1

9
3.5 Take out coffee
CAUTION! Danger of scalding! During operation and cleaning, do not reach under
the coffee or hot water outlet. (The coffee that is output during operation is hot! It is
therefore important fit the correct extension to the coffee dispensing spout.
Do not touch the spout extension during dispensing of coffee!)
Cup dispensing
.Fit the small extension to the coffee
dispensing spout, turning it clockwise
until it clicks into place (bayonet catch).
.Place vessel under the coffee outlet.
.e.g. press item key-button for a cup of
coffee.
DThe adjusted quantity of coffee is poured
out and the item appears: e.g.
Dispensing
Cup of coffee
CUP OF COFFEE
MUG OF COFFEE
POT OF COFFEE
FLASK OF COF-
FEE
Coffee-Itemkey-but-
tons:
140 ml
280 ml
250 ml
800 ml
Output quantities
preset:
For changing the output quantity, see
page 18, Chapter 6.4
Taking of Flasks
.Dismantle the small spout extension from
the coffee outlet.
.Insert Flask drain on the coffee output -
put up from the left and turn/rotate to the
right (bayonet catch).
.Place Flask with sufficient capacity
(because of danger of scalding as a
result of overflowing!) under the coffee
outlet.
.Take out coffee by pressing the
key-button (see page 10).
Smallspout extension
Small spout
extension
Flask
drain

10
Undosed output of coffee
.Press and hold untill the desired
quantity of coffee has been poured.
DIn this way, you can empty the storage
vessel before close of working hours.
DThe accounting system does not record
undosed quantities of coffee.
To switch on / off the undosed output
of coffee / add coffee, see page 21.
3.6 Dispensing hot water
The dosed taking out of hot water is set at the factory.
DCAUTION! Danger of scalding! During operation and cleaning, do not reach
under the coffee or hot water outlet.
Dispensing hot water
.Place the cup on the drip tray under the
hot water output.
.Press key-button for cup of hot water
.
DA cup of hot water is dosed out and
stopped automatically.
DKey-button and output of a Pot of hot
water are optional.
For the adjustment of the dosing
quantity for dosed taking of hot water,
see Page 18, Chapter 6.4.
To change the setting to ”removal of
undosed quantity of hot water” see
page 18.
DPress key-button, the output starts -
press key-button again, the output
stops.
Á
Output of
a cup of
hot water
Output of Pot
of hot water
(option)

11
4. Stopping / End of operation
.For daily cleaning of your automatic coffee dispensing machine, see the
following chapter 5. This is a prerequisite for a consistently good quality coffee.
.Switch off the bremer VIVA XXL-T with the machine switch .
DThe display shows the following: ”STANDBY”.
.Close water tap.
In case of longer break / business holiday
.switch off the location’s power supply switch powering the bremer VIVA XXL-T.
5. Cleaning and care
DClean the automatic coffee dispensing machine daily after working hours.
Likewise, carry out a cleaning process after business gaps and longer breaks, at
the latest as soon as “please clean!”appears in the display. Start the
cleaning after 50 operation hours, so that further brewings are possible.
DCAUTION! Do not touch anything under the coffee output during the cleaning
process!
DCAUTION! Do not spray the machine with a water hosepipe or a high-pressure
cleaner!
DPlease follow the cleaning manufacturers guidelines!
DDo not use any scouring or caustic cleaning agents!
Cleaning and care agents
Name Use
Bremalux for the care of stainless steel
Bremaut for the removal of coffee residues
Bremex for the removal of limescale
Brematron Liquid clean-
ing agent for cleaning the brewing system of automatic coffee
dispensing machines
DUse the cleaning agents from your bremer customer service.

12
5.1 The cleaning programme
DBy starting the cleaning programme, the automatic coffee dispensing machine
automatically cleans its brewing system with the components in which coffee
flows (duration about 30 minutes).
DDo not touch during cleaning process!
DEnsure that there is still enough cleaning agent in the canister. If required,
connect a new canister (see illus. below).
Connect canister with liquid
cleaning agent
- after the message ”Ready, lack of
cleaner!”
.Insert hose with the fill-status detector in
the canister and screw tight.
DKeep a stock of an extra Brematron liquid
cleaning agent canister
- under the machine
- at a place protected from heat,
light and direct rays of the sun
DStore Brematron liquid cleaning agent in
a cool place.
DDo not remove from packaging! The
radiation reduces the cleaning effect.
Before starting the cleaning
programme
DAlways fit the large extension to the
coffee dispensing spout for the cleaning
programme, turning it clockwise until it
clicks into place (bayonet catch)
DDuring the brewing process the cleaning
programm may be started by pressing
the brewing stage button which was
last operated.
DEnsure that all brewed coffee is removed.
Before cleaning press and hold to
empty storage vessel.
Suction hose
Fill-status detector
Largespout
extension

13
Start the cleaning process with
automatic dosing of cleaning agent
CAUTION! Danger of scalding! Do not
touch anything under the coffee output
during the cleaning process!
.Unlock keyboard cover with key and
open.
.Start cleaning programme - Press
key-button .
DThe cleaning programme is running. The
automatic coffee dispensing machine lets
the coffee reserves flow into the drain.
The number of cleaning programmes that
can be run with liquid cleaning agents
appear in the second line of the display.
DConnect a new canister after the display
”Reserve:1”at the latest. In case of the
display ”Reserve:0”the automatic
coffee dispensing machine executes a
cleaning cycle without cleaning agent.
5.2 Empty grounds container and confirm
DThe machine controls the volume of the coffee set in the grounds container over
the proportioned coffee quantities (up to 60,0 kg adjustable). The machine will
advise when the grounds are required to be removed.
DWhen the machine displays ”Empty container”, brewing coffee is no longer
possible.
.Roll away, empty and clean the large container.
.Position the empty container underneath the machine and secure it against
rolling away.
.To confirm you have emptied the container press
DBrewing coffee is possible again.
DThe authorized customer service adjusts the count for the large container or
grounds drawer (chap.5.5) with the first brewing of the machine.
Cleaning machine
Reserve:7

14
5.3 Clean housing
.Wipe down plastic parts, painted linings and stainless steel surfaces with a wet
cloth.
.Remove coffee residue with a fat-dissolving cleaning agent and a soft cloth.
.Dry all cleaned surfaces.
.Rub in stainless steel surfaces with a stainless steel care agent.
.Remove drip tray and clean the drip pan.
.Replace the drip tray after cleaning.
5.4 Clean coffee powder container
.Please ensure that the machine is switched off. Before cleaning press
DIf the machine remains switched on, there is the danger that the dosing motor
turns may crush your fingers!
.Remove cover from the container and clean with a lint-free cloth.
.Occassionally remove any residues on the inside of the empty coffee powder
container with a dry fluff-free cloth.
DDuring cleaning, make sure that no foreign bodies get into the coffee powder
container. Remove foreign bodies that may have fallen in, otherwise, they may
give rise to problems.
5.5 Emptying and cleaning the grounds drawer (optional)
DThe machine controls the volume of the coffee set in the grounds drawer over
the proportioned coffee quantities (up to 2,0 kg adjustable). The machine will
advise when the grounds are required to be removed.
DYou can remove the grounds drawer only with announcement ”ready”.
Empty grounds drawer after
message is shown in the display
screen
- brewing coffee is not possible
.Remove, empty and clean the grounds
drawer.
.Insert the empty grounds drawer.
DThe message “Push in”grounds
drawer expires. Brewing coffee is
possible again.
DThe grounds drawer must be removed
for at least 5 seconds.
Grounds drawer

Access to the main menu, if a secret code (PIN) is not entered,
→see page 23 !
Set brewing
parameters
vending control
Set beverage
volume
Select beverage
prices
Select beverage
name
Exit
menu
Select
Access to the sub menu
Ground coffee
Brew.stage 1:
Cup of coffee
free vend: ON_
Cup of coffee
total:0000000013
Cup of coffee
Beverage vol0140
Cup of coffee
price1:000000.00
Key-button: 1
Cup of coffee
Display or delete/reset quantity
counter (page 16).
Quantity of coffee powder, Re-
brewing mark, enable brewing
stages (page 17).
Setting of dosing quantities per
item (page 18).
Allocation of item names to
item key-button or disable key-
button (page 19).
Set/Adjust item prices Price 1
and 2 possible (page 20).
Switch on or off external ac-
counting systems- (page 21).
Cleaning-
parameters Auto. off after
cleaning: Yes Setting the cleaning pro-
gramme (page 22).
Summing counter
Exit sub-menu
If the machine is switched off before
the function “Exit menu” adjustments
which have been made get lost!
PIN Entering PIN (secret access
code, page 23).
0 0 0 0 0
15
6. Setting/Adjusting the coffee dispensing machine
6.1 Overview of possible settings
Settingsare possible only when the brewing process has been finished and the brewing stage
has been switched off !

16
6.2 Display or delete/reset counter
Settings are possible only when the brewing process has been finished and the
brewing stage has been switched off. All output items are counted in the summing
counter. The total can be displayed or deleted/reset by yourself.
Summing counter Cup of coffee
total:0000000012
Cup of coffee
Reset counter?
Requestdele-
tion/resetting
Confirm dele-
tion/resetting
and execute
To interrupt the
deletion/resetting
process
Cup of coffee
total:0000000023
e.g. press item key-button
for cup of coffee
Cup of coffee
total:0000000000
Exit
menu
Select
Display of next
quantity counter
CUP OF COFFEE
MUG OF COFFEE
POT OF COFFEE
FLASK OF COFFEE
Display of next
quantity counter
Select

17
6.3 Setting the brewing parameters
Press and hold
button
or
button for more
than 3 seconds
Select
Set brewing
parameters
Exit
menu
Ground coffee
Brew.stage1:0050
Ground coffee
Brew.stage1:0050 Quantity of coffee powder in
grams
Quantity of brewing water in
ml
The brewing water and quantity
of re-brewing water are ex-
amined. Both quantities cannot
exceed 4500 ml (contents of
storage vessel).
Extraction time
Brew.stage1:0180 Extractiontime
Contact time of coffee powder
in the brewing water in sec-
onds.
Brewing water
Brew.stage1:1000
e.g. press brew-
ing stage key-
button 1
Re-brewing mark
Brew.stage1:0500
Re-brewingmark in ml
A new brewing process starts af-
ter the reserve quantity falls be-
low the set quantity. Not in case
of stage 4.
Enable
Brew.stage1: On
Disablebrewing stage
On: Selection of the brewing
stage is enabled. Off: the
brewing stage is disabled.
Brewing stage 1
Brewing stage 2
Brewing stage 3
Brewing stage 4
Basic setting:
Stage Coffee powder Brewing water Soaking time Re-brewing mark
1 0050 g 1000 ml 0150 sec. 0500 ml
2 0090 g 2000 ml 0120 sec. 1000 ml
3 0090 g 2000 ml 0120 sec. 2500 ml
4 0110 g 2500 ml 0060 sec. - / -
Brewing water
Brew.stage1:1000
Select

18
6.4 Setting of the beverage volumes for items
Select
Set beverage
volume
Exit
menu
Cup of coffee
Beverage vol0140
Cup of coffee
Beverage vol0140 Output quantity
Setting range: 0 to 999
Output quantity
Setting range: 0 to 999
Dosed or undosed taking
out for item key-button
Cup of coffee
dosed
Cup of water
dosed
Cup of water
Beverage vol0140
e.g. press item key-but-
ton Cup of coffee.
You can switch over to
another item by press-
ing the desired item
key-button.
e.g. press item key-but-
ton water cup.
in ml:
0140
0280
0250
0800
Dosed or undosed taking
out for item key-button
CUP OF COFFEE
MUG OF COFFEE
POT OF COFFEE
FLASK OF COFFEE
Select
Table of contents
Other Bremer Coffee Maker manuals


