Villaware BVVLDCSL01 User manual

™
model • modèle • modelo
modell • модель • modell
BVVLDCSL01
Instruction Manual
coffee maker
Read All Instructions Before Use
Mode d’Emploi
cafetière filtre
LireToutes les Instructions Avant Utilisation
FR
Manual de Instrucciones
cafetera
¡Lea las instrucciones antes de usarlo!
ES
Инструкция для пользователя
кофеварка
Перед использованием прочитайте
всю инструкцию
RU
Instruktion Bok
kaffebryggare
Läs igenom alla instruktioner
innan användning
SV
Bedienungsanleitung
kaffeemaschine
Bitte lesen Sie vor dem Gebrauch
erst alle Anleitungen sorgfältig durch
DE

1
important safeguards
When using electrical appliances, basic safety precautions should always be followed
including the following:
•Readallinstructionsbeforeusingyourcoffeemaker“”.
•Donotuseapplianceforotherthanintendeduse.
•Ifunitisoperatedinanymannerotherthanindicatedinthismanual,itmaycausematerial
damages or personal injuries.
•Donotuseoutdoors.
•Thisapplianceisnotintendedforusebypersons(includingchildren)withreduced
physical, sensory or mental capabilities, or lack of experience and knowledge, unless they
have been given supervision or instruction concerning use of the appliance by a person
responsible for their safety.
•Closesupervisionisnecessarywhenanyapplianceisusedbyornearchildrentoensure
they do not play with the appliance.
•Alwaysusethecoffeemakeronadry,levelsurfacetoavoidinterruptionofairow
underneath the coffee maker.
•Alwaysmakesurethecoffeemakeriscompletelyassembledbeforeoperating.Theunit
will not turn on unless properly assembled.
•Becertaintheremovablewatertankissecurelyplacedintheunitwhileoperating
appliance.
•Donotuseyourcoffeemakerifanypartisbroken.
•Donottouchthecoffeemaker’shotsurfaces.Usehandlesorknobs.
•Donotremovethelidduringbrewingasscaldingmayoccur.
•Besuretoturntheunitoff“
+
” after each use of your coffee maker.
•Alwaysturnthecoffeemakeroff“
+
” first before unplugging it from the outlet.
•Turnthecoffeemakeroff“
+
” and unplug the power cord from outlet when not in use
and before cleaning.Allow the coffee maker parts to cool before putting on or taking off
parts and before cleaning the appliance.
•Theuseofattachmentsnotrecommendedorsoldbythemanufacturermaycausere,
electric shock or injury.
•Toprotectagainstriskofelectricalshock,donotimmersepowercord,plugorunitin
water or other liquid.
•Donotplacethisapplianceonornearahotgasorelectricburner,orwhereitcould
touch a heated oven.
•Donotletcordhangoveredgeoftableorcounter,ortouchhotsurfaces,includingthe
stove.
•Donotoperateanyappliancewithadamagedcordorplugoraftertheappliance
malfunctions, or is dropped or damaged in any manner. Return appliance to the nearest
Authorised Service Centre for examination, repair or electrical or mechanical adjustment.
THIS APPLIANCE IS FOR HOUSEHOLD USE ONLY.
SAVETHESE INSTRUCTIONS

2
power cord instructions
Please follow the instructions below to ensure the safe use of the power cord.
•Donotuseanextensioncordwiththisproduct.
•Donotpull,twistorotherwiseabusethepowercord.
If power cord is damaged, the manufacturer, an Authorised Service Centre or Service Agent
must replace it in order to avoid a hazard.
important product markings
“Read Instructions” located on the lid of the thermal carafe
+
“On/Off”
+
“Decaf Brew Mode”
+
“Brew Mode”
+
“Cleaning Mode”
+
“Pouring Mode”

3
13 amp
for u.k. and ireland only
If the plug is not suitable for the socket outlets in your home, it can be removed and
replaced by a plug of the correct type. Please refer to “Installation of a plug” below.
Installation of a plug applicable to U.K. and Ireland.
WARNING -THIS APPLIANCE MUST BE EARTHED
NOTE: If the terminals in the plug are not marked or if you are unsure or in doubt about
the installation of the plug, please contact a qualified electrician. If a
1
3A 3-pin plug is fitted,
it must be an ASTA approved plug, conforming to BS
1
363 standard.
Replacement 5A fuses must be BS
1
or ASTA BS
1
362 approved.
The wires in the mains lead are coloured as such:
GREEN AND YELLOW - EARTH
BROWN - LIVE
BLUE - NEUTRAL
Please note that the colour of these mains wires may not correspond with the colour
markings that identify the terminals in your plug.
Please proceed as follows:
The wire which is coloured GREEN AND YELLOW must be connected to the terminal
which is marked with the letter “E” or by the earth symbol “ ” or coloured GREEN AND
YELLOW.
The BROWN coloured wire must be connected to the terminal, which is marked with the
letter “L” or is coloured RED.
The BLUE coloured wire must be connected to the terminal, which is marked with the
letter “N” or is coloured BLACK.
13 amp

4
description of the appliance
1
. Water Tank Lid
2. Maximum Fill Indicator Basket
3. Water Level Markings
4. Decaf Brew Now Mode “
+
”
5. On/Off “
+
” Switch
6. Removable WaterTank
7. Brew Now Mode “
+
”
8. OnIndicatorLight(Amber)
9. Cleaning Mode with LED + Indicator
Light(Red)“
+
”
1
0. Shower Head
11
. Removable Permanent Cone Filter
1
2. Removable Brew Basket
1
3. Coffee maker Lid
1
4. Carafe Lid with Non-Drip Feature
1
5. Carafe Pouring Mode Button “
+
“
1
6. Large Capacity Brushed Stainless
SteelThermalCarafe(
1
,5Litres)
1
7. Cord Storage Compartment
1
2
4
5
13
8
7
12
9
3
6
10
11
14
15
16
17

5
instructions for use
CleanYour Coffeemaker Before Using ForThe FirstTime
Make sure your first cup of coffee is as good as can be by cleaning your VillaWareTM Coffee
Maker before its first use. Just follow these simple steps:
1. Wash the water tank, carafe, carafe lid, brew basket and permanent cone filter in warm,
soapy water. Rinse each thoroughly.
2. Replace all the parts and close the lid. Run a brew cycle with water only. Do not use
coffee.
3. When brewing is complete, turn off your coffee maker, discard the water in the carafe.
Rinse the carafe, carafe lid, permanent filter and brew basket.
Your coffee maker is now ready for use.
preparing for use
Selecting and Measuring Ground Coffee
For best results, use a level tablespoon for ground coffee measurement. Make sure you use
medium grind coffee for a perfect brew.
Suggested Coffee Measurement Chart
Use more or less coffee to suit your taste.
AddingWater and Ground Coffee
1
. Usingthetab,pulluptoopenthelid(Figure
1
).
To Brew Ground Coffee
1
0 Cups 7.5 tbsp.
8 Cups 6.5 tbsp.
6 Cups 4.5 tbsp.
4 Cups 3 tbsp.
1
leveltablespoon(tbsp)=5gr./0,
1
7 oz.
1
cup=
1
48ml/5.oz.ofbrewedcoffee
Figure 1

6
2
. Place the permanent filter or a
1
0-cup
cone-style paper filter into the removable brew
basket(Figure2).
NOTE: Ifusingpaperlters,itisimportantthatthesidesoftheltertushagainst
the sides of the brew basket. If filter collapses, dampen the filter before placing it into
the brew basket.
3. Add the desired amount of coffee and gently shake to level the coffee. See the
Suggested Coffee Measurement Chart.
4. Besuretheremovablebrewbasketisproperlycentredandushwiththetopofthe
brew chamber before closing the lid.
5. Fill the water tank with cold, fresh water to the desired capacity. For easy and accurate
filling, the water markings on the water tank show the amount of water needed to
makethecorrespondingdesirednumberofcups(1cup equals 148ml/5ounces).Do
not fill past the bottom of the maximum fill indicator basket.
For your convenience, the water tank can be used in place or removed for easy filling
(Figure3).Makesurethewatertankissecurelyinplacebeforestartingthecoffee
maker.
6. Place the empty carafe onto the unit.
NOTE: Make sure the carafe is placed fully on the plate or the water and the
groundswilloverowfromthebrewbasket.Anoverowmaycausepersonalinjury
or damage to property.
Figure 2
Figure 3
preparing for use (continued)

7
operating instructions
1. After completing the steps in the “Adding Water and Ground Coffee” section, plug your
coffee maker into the appropriate electrical outlet.
2. YourVillaWareTM coffee maker includes a convenient system that optimizes the brewing
accordingtothetypeofcoffeeyouwillprepare.Thissystemensuresbetteravourand
taste when preparing regular or decaffeinated coffee. To prepare your coffee using this
system, select the brewing mode according to the type of coffee you will prepare, as follows:
a. If you are brewing REGULAR COFFEE, turn the selector dial to the Brew Now Mode
“
+
”(Figure4).
b. If you are brewing DECAFFEINATED COFFEE, turn the selector dial to the Decaf Brew
Mode “
+
”(Figure5).
3. Push the on/off button “
+
”once(Figure6).Theamberonindicatorlightwillilluminate
and light will pulse for the duration of the brew cycle.
4. Once the brew cycle is completed, an audible signal will chime and the light ring will turn off.
The amount of coffee brewed will always be slightly less than the amount of water due to
some water absorption by the coffee grounds.
5. You can use the Pause ‘n Serve function while coffee is brewing. Remove the carafe and
the coffee maker will automatically pause in filling the carafe, allowing you to pour a cup
of coffee. Replace the carafe on the coffee maker to continue filling it. Be sure that the
carafe is not left off of the coffee maker for more than 1/2 minute, otherwise the brew
areamayoverow.
6. To serve coffee, press the Pouring Mode “
+
”while tipping the carafe to open the self
closing lid. The self closing lid keeps your coffee hot and fresh.
7. After the used coffee grounds have cooled, open the lid and carefully remove the filter
and the brew basket to discard the grounds.
NOTE: The shower head cover is hot after brewing.Always allow the coffee maker to
cool down a few minutes before opening.
8. Make sure the filter is clean and in place and the carafe is empty before starting to brew
coffee again.
9. Unplug your coffee maker when not in use.
Figure 4
Figure 5
Figure 6

8
cleaning
DAILY CLEANING
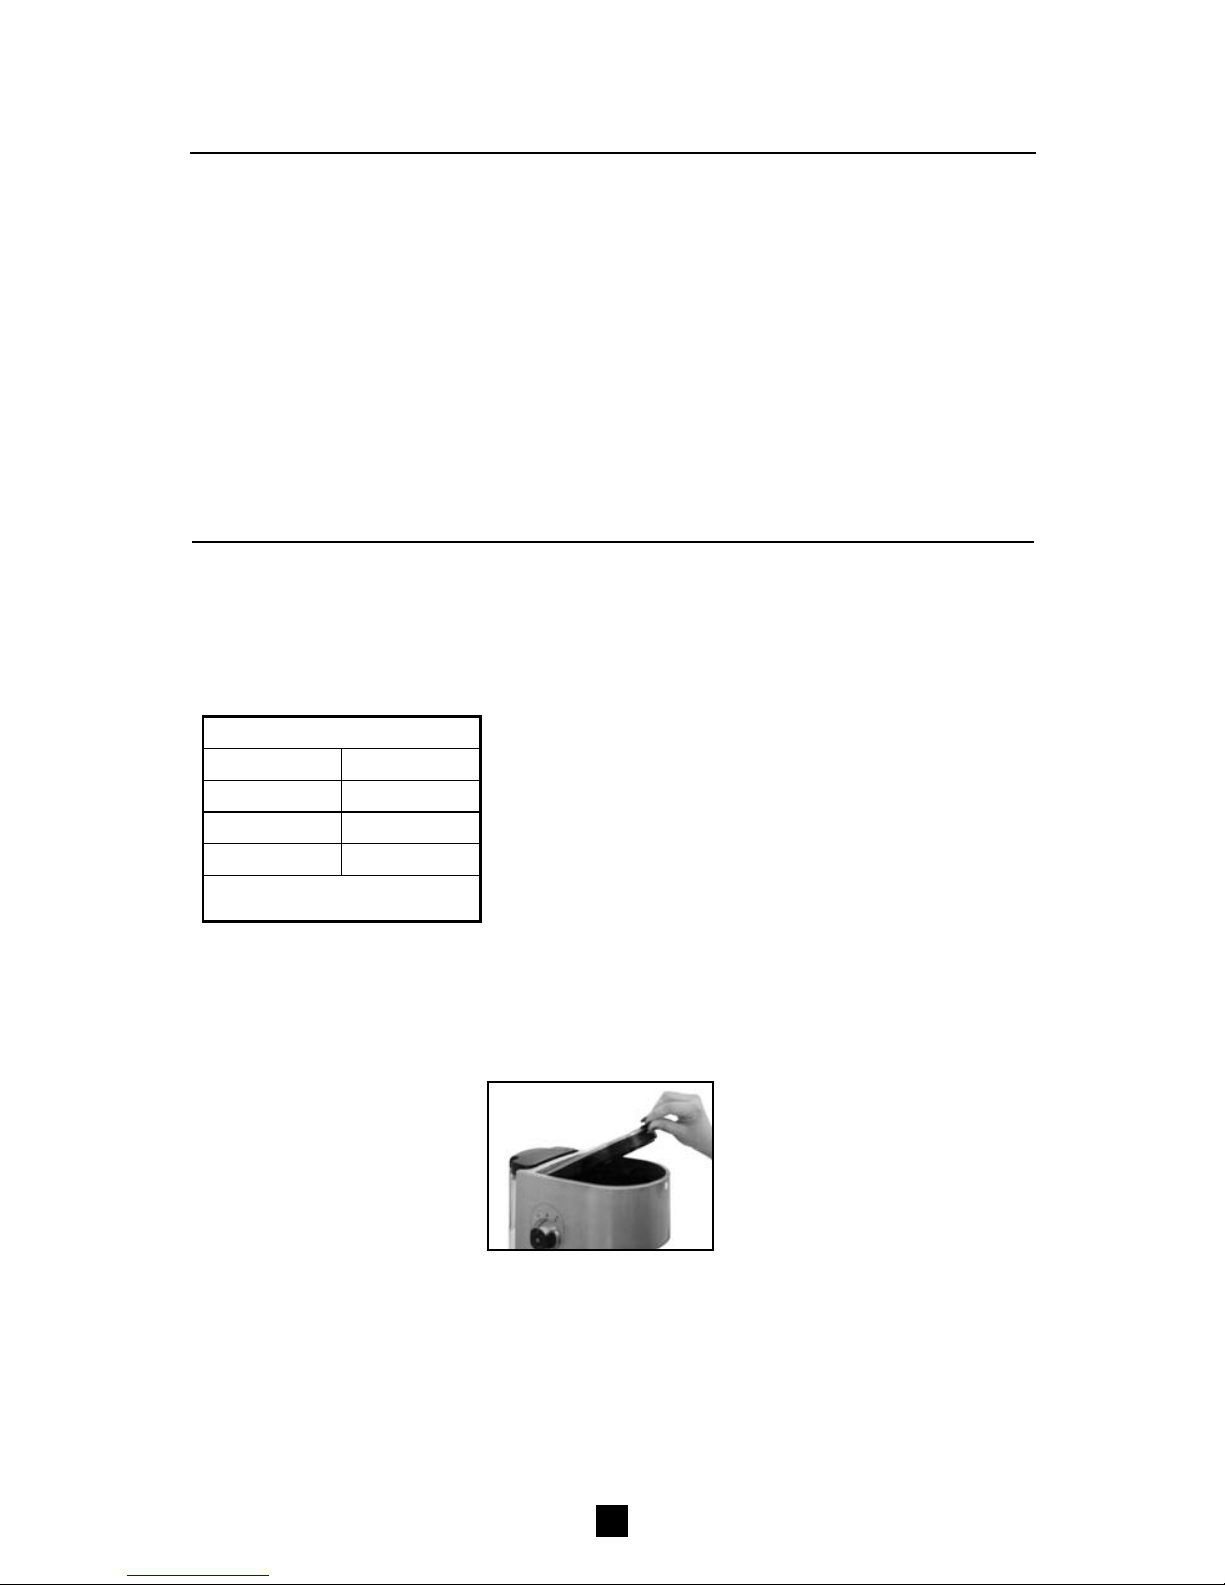
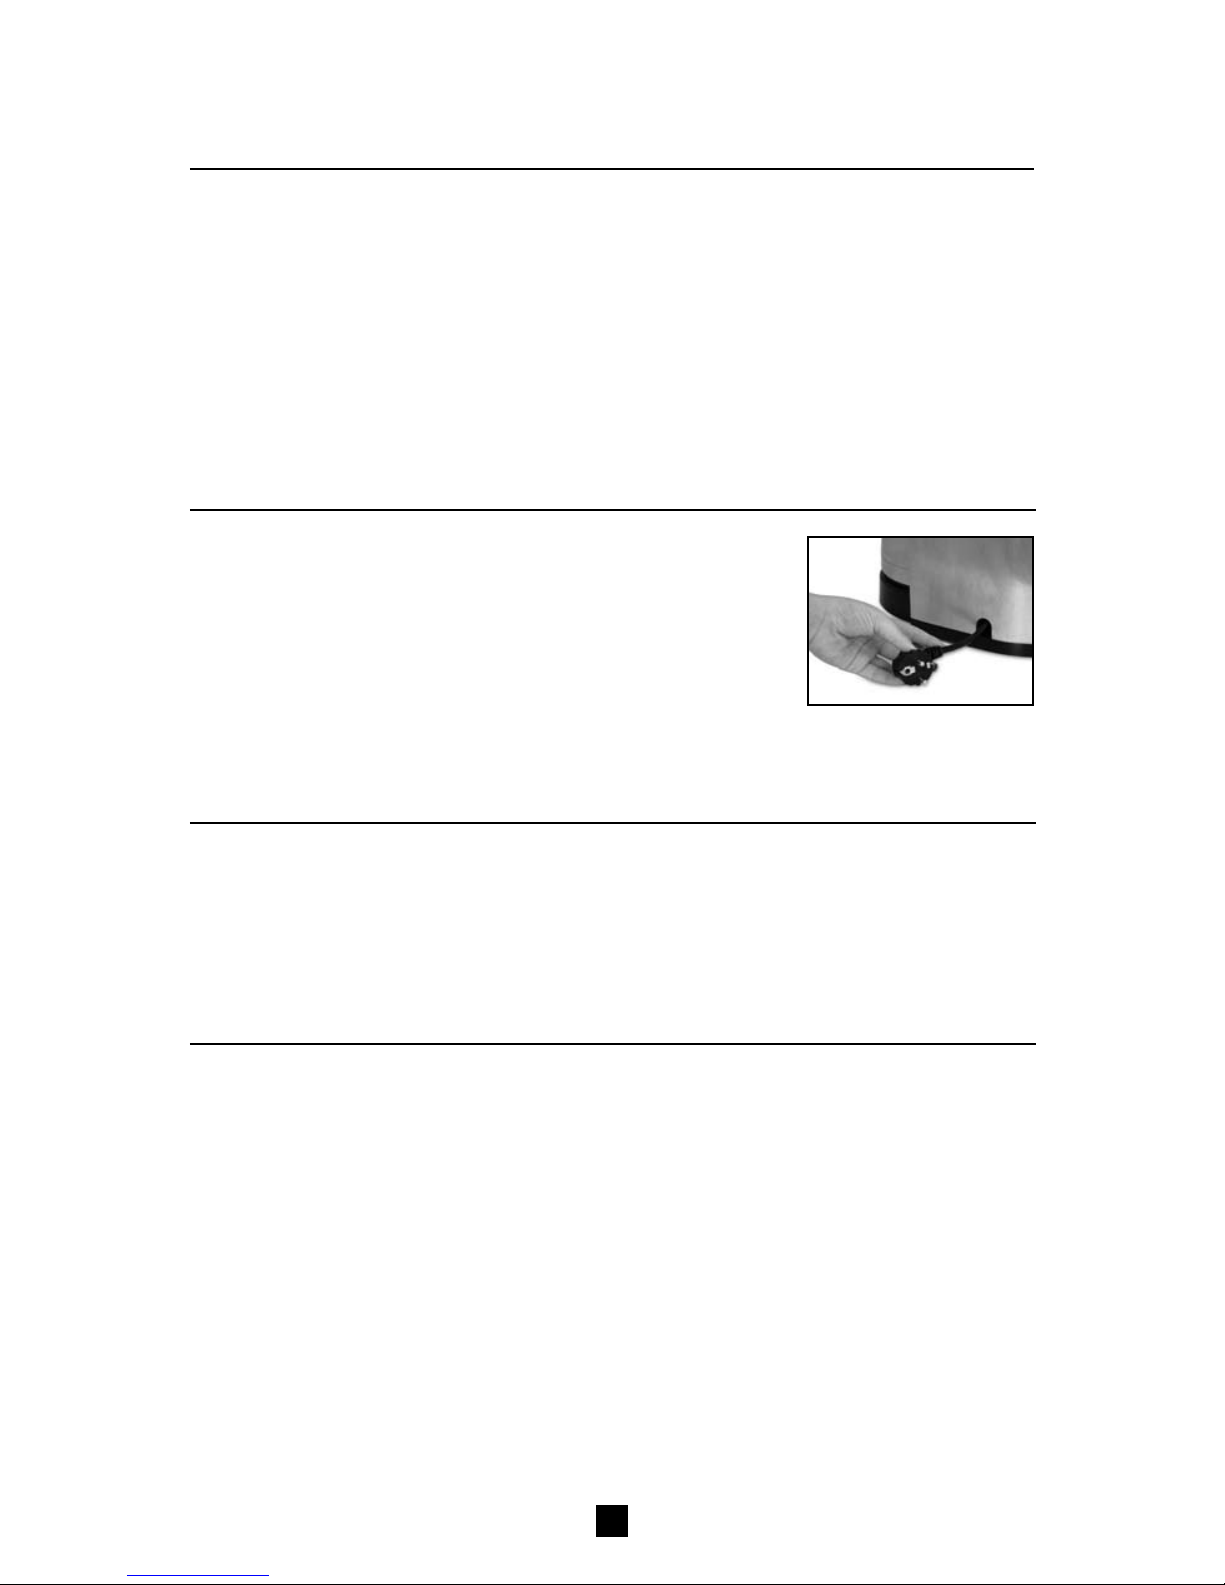
Unplug the coffee maker and allow it to cool before cleaning. Open the lid and remove the
permanent filter or disposable paper filter. Remove the brew basket, water tank, carafe and
carafe lid and wash them in warm, soapy water. Never use abrasive cleansers, steel wool
pads or other abrasive materials. Use a damp cloth to wipe off the outer covering of the
coffee maker and the shower heads.
CAUTION! Neverimmersethecoffeemaker’sbaseunitinwater,anyotherliquidor
placeinthedishwasher.Noneofthecoffeemaker’spartsaredishwashersafe.
CLEANINGTHE CARAFE
To remove the lid of the carafe, turn it counter clockwise to loosen before pulling up. Wash
the carafe and the carafe lid in warm, soapy water.
Hard water can leave a whitish stain on the carafe, and coffee may then turn this stain brown.
To remove carafe stains:
1. Fill the carafe with a solution of equal parts water and vinegar and let the solution stand in
the carafe for approximately 20 minutes. Commercially available products may also be
used,followingthemanufacturer’sinstructions.
2. Discard the solution, then wash and rinse the carafe. Do not use harsh abrasive cleaners
that may scratch the carafe.
DESCALINGYOUR VILLAWARE
TM
COFFEE MAKER
Minerals found in water, such as calcium or limestone, will leave deposits in your coffee maker
and affect its performance. It is recommended that you regularly remove these deposits. The
Cleaning Mode “
+
” on yourVillaWareTM coffee maker lets you know when it is time to clean
your coffee maker. To use this feature, follow these simple steps:
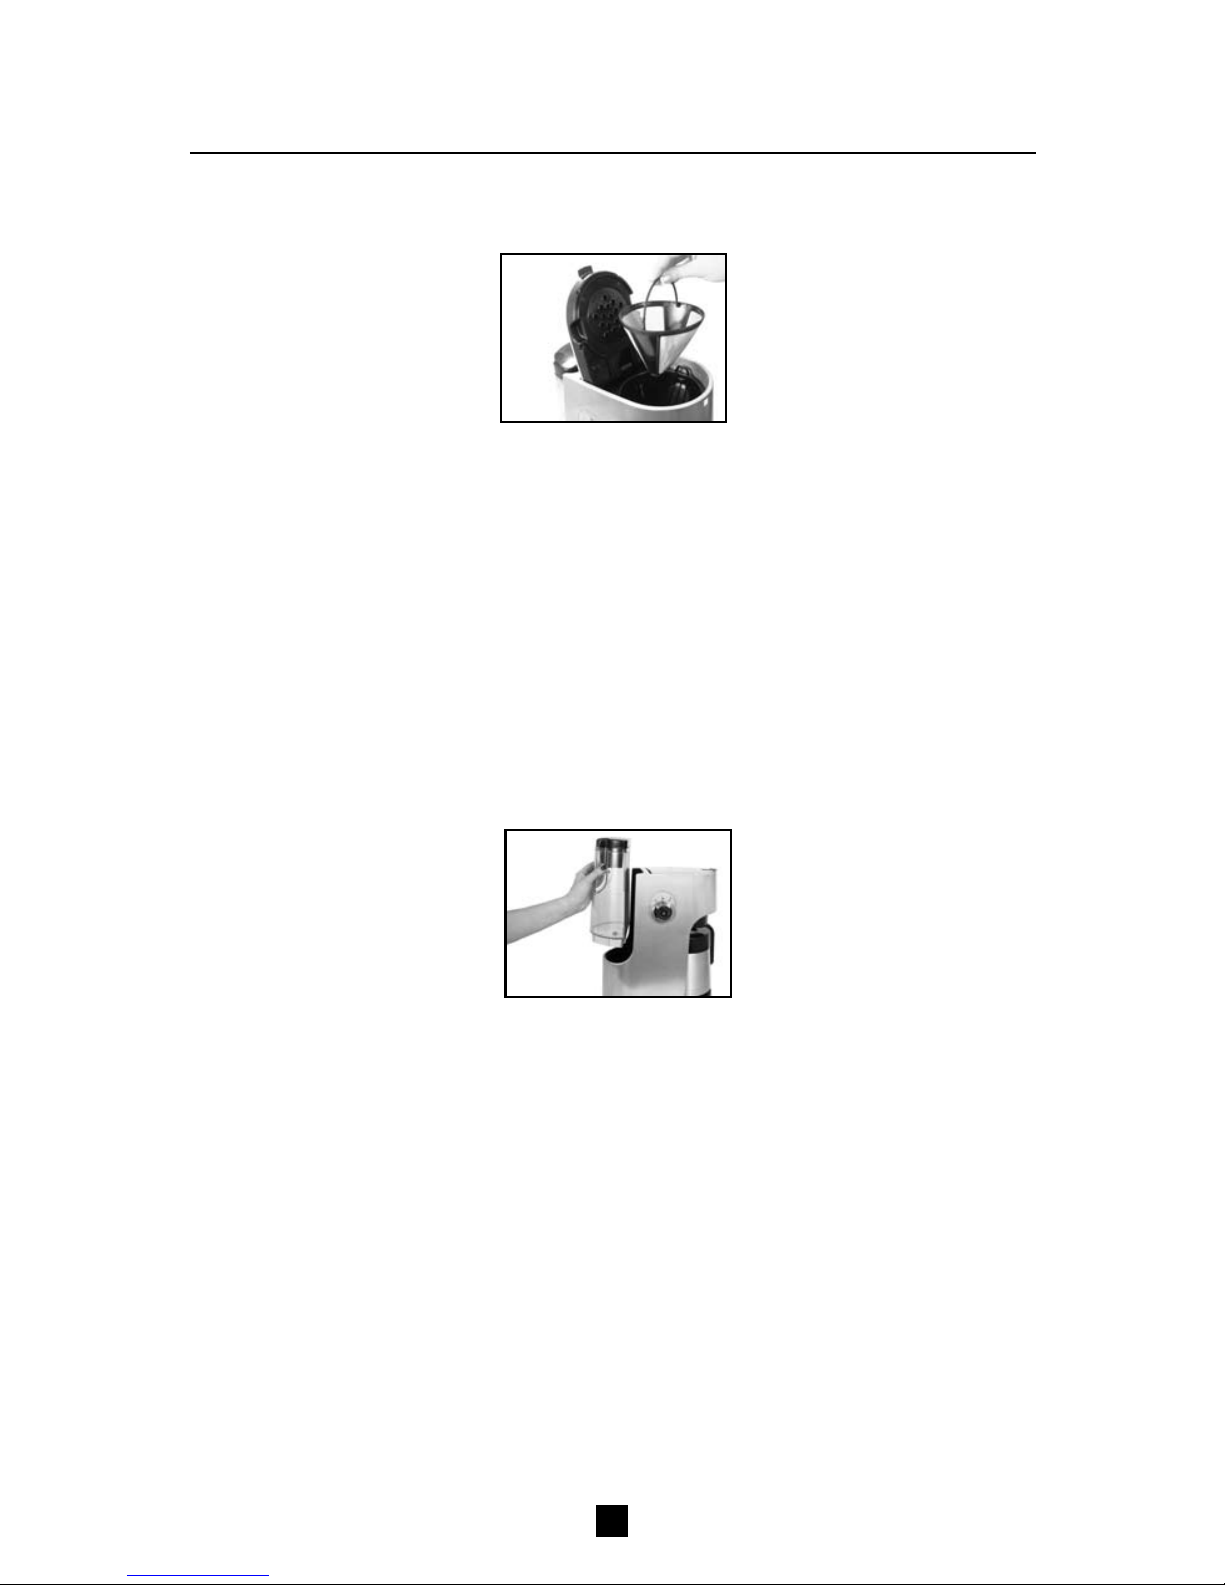
1. Clean the unit when the red LED indicator illuminates, blinking every 15 seconds.
2. Pour4cups(592ml/20uidounces)ofundilutedwhitehouseholdvinegarintothe
watertank.Commerciallyavailableproductsmayalsobeused,followingthemanufacturer’s
instructions.
3. Place the permanent filter or an empty 10-cup cone-style paper filter into the brew basket
and close the lid.
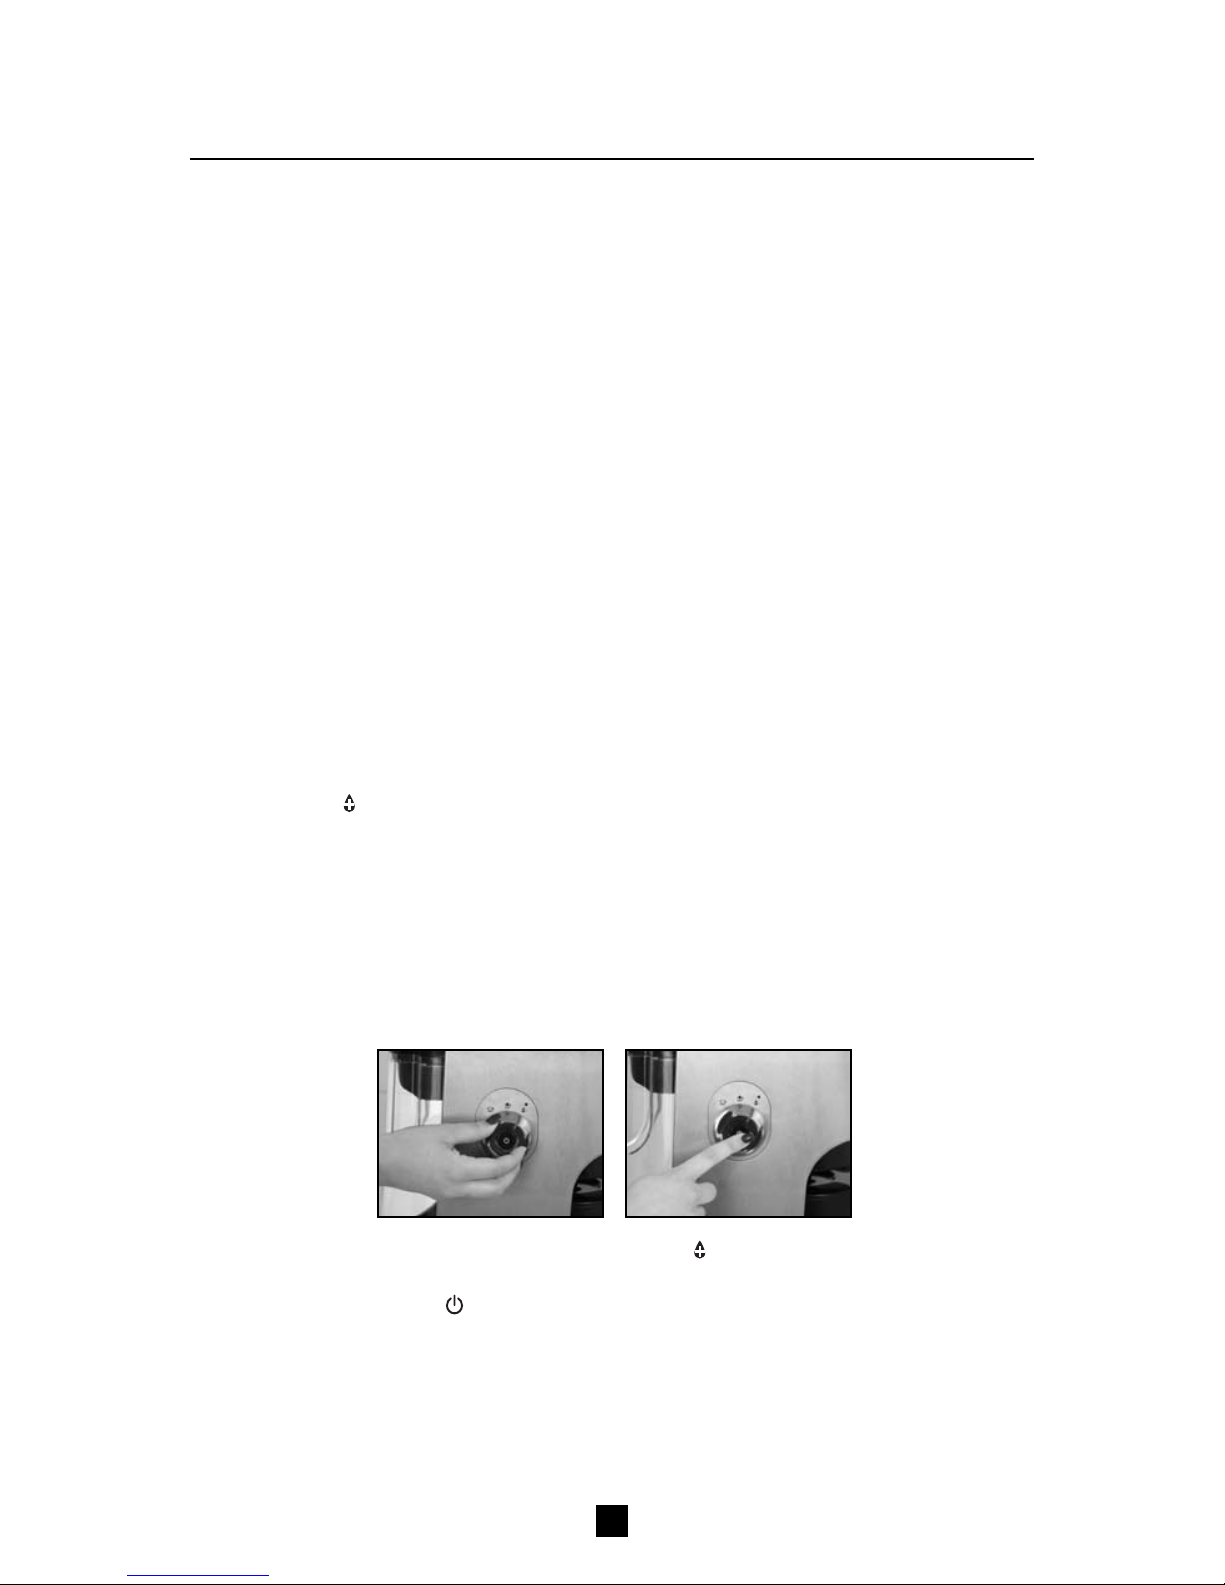
4. Place the empty carafe back on the unit, centred on the plate.
5. Turn the selector dial to the Cleaning Mode position “
+
” (Figure7).Theredindicatorlight
will go from blinking to steady.
6. Push the on/off button “
+
”oncetostartthecleaningprocess(Figure8).Thered
indicator light will pulse during the cleaning process.
7. Once the cleaning cycle is completed, the amber power light and the red LED light will
shut off and an audible signal will chime. The unit will automatically shut off.
NOTE: Unit will still function normally if cleaning LED red light is blinking, but it is
strongly recommended that you run the cleaning cycle once it starts.
Figure 7Figure 8

9
storing
Reassemble the coffee maker before storage and ensure it
is unplugged. Your VillaWareTM coffee maker includes a cord
storagecompartmentfortheextracable(Figure9).
tips and suggestions
We recommend using warm or hot water to rinse the carafe as this will help maintain
coffee temperature during the brewing cycle.
consumer affairs
HolmesProducts(Europe)Ltd.
1Francis Grove
London SW19 4DT
England
Fax:+44(0)2089478272
Email: enquir[email protected]
UK - Free phone Customer Service Helpline – 0800 052 3615
Figure 9
cleaning (continued)
8. Discard the vinegar and thoroughly wash the carafe and water tank in warm, soapy water.
9. Fill the water tank with clean, fresh water.
10. Place the empty carafe back on the coffee maker, centred on the plate.
11. Remove and discard any paper filters used during the cleaning cycle.
12. Begin brewing with water only and allow the full brew cycle to complete.
13. Repeat steps 9 through 12. Your coffee maker is now clean and ready to brew the next
pot of delicious, hot coffee.

10
problems and solutions
PROBLEM SOLUTION
The coffee is not brewing. •Plugunitin.
•Waitforpowertoberestored.
•Checkthewatertank.
•Placebrewbasketcorrectlyinthebrewchamber.
•Placecarafecorrectlyonplate.
The coffee maker only
brews water. •Addthedesiredamountofcoffeetothelter.
The coffee maker brews
slowly. •IfredLEDlightisblinking,itistimetocleanthe
coffee maker as described in the “cleaning” section.
Thelterbasketoverows. •Placebrewbasketcorrectlyin the brew chamber.
•Place carafe correctly on the plate.
•Place lid on the carafe.
•Remove the filter and discard grounds. Replace
a paper filter or rinse the permanent filter. Begin
brewing cycle again.
•Turn off and unplug the unit. Allow to cool. Wipe
off the unit.
The coffee tastes bad. •Usecoffeegroundsrecommendedforautomatic
drip coffee makers.
•Usethecorrectgroundcoffee-to-waterratio.
•If red LED light is blinking, it is time to clean coffee
maker as described in the “cleaning” section.
Grounds are in the
coffee. •Seatlterproperlywithinthebrewbasket.
•Replaceanypaperlters.

11
europe guarantee
Please keep your receipt, as this will be required for any claims under this guarantee.
This appliance is guaranteed for 3 years after your purchase as described in this document.
During this guaranteed period, if in the unlikely event the appliance no longer functions due
to a design or manufacturing fault, please take it back to the place of purchase, with your till
receipt and a copy of this guarantee.
The rights and benefits under this guarantee are additional to your statutory rights, which
arenotaffectedbythisguarantee.OnlyHolmesProducts(Europe)Ltd.(“Holmes”)hasthe
right to change these terms.
Holmes undertakes within the guarantee period to repair or replace the appliance, or any
part of appliance found to be not working properly free of charge provided that:
• youpromptlynotifytheplaceofpurchaseorHolmesoftheproblem;and
• theappliancehasnotbeenalteredinanywayorsubjectedtodamage,misuse,abuse,
repair or alteration by a person other than a person authorised by Holmes.
Faults that occur through, improper use, damage, abuse, use with incorrect voltage, acts of
nature, events beyond the control of Holmes, repair or alteration by a person other than
a person authorised by Holmes or failure to follow instructions for use are not covered
by this guarantee. Additionally, normal wear and tear, including, but not limited to, minor
discoloration and scratches are not covered by this guarantee.
The rights under this guarantee shall only apply to the original purchaser and shall not
extend to commercial or communal use.
If your appliance includes a country-specific guarantee or warranty insert please refer to the
terms and conditions of such guarantee or warranty in place of this guarantee or contact
your local authorised dealer for more information.
Waste electrical products should not be disposed of with Household waste. Please recycle
WEEE information.
HolmesProducts(Europe)Limited
1Francis Grove
London
SW19 4DT
UK

12
importants conseils de sécurité
Aumomentd’utiliserdesappareilsélectriques,ilestrecommandédeprendrecertaines
précautionsd’emploi,enparticulier:
•Liretoutelesinstructionsavantd’utiliservotreCafetière“ ”.
•Nepasutiliserl’appareilpourtoutautreusagequeceluipourlequelilaétéconçu.
•Sil’appareilestutiliséd’unefaçondifférenteàcelleindiquéedanscemoded’emploi,cela
pourrait entrainer des dommages et blessures.
•Nepasutiliseràl’extérieur.
•Cetappareiln’estpasdestinéàêtreutilisépardespersonnes(ycomprisdesenfants)
dont les capacités physiques, sensorielles ou mentales sont diminuées, ou qui ne disposent
pasdesconnaissancesoudel’expériencenécessaire,àmoinsqu’ellesn’aientétéformées
etencadréespourl’utilisationdecetappareilparunepersonneresponsabledeleur
sécurité.
•Lesenfantsdoiventêtresurveilléslorsqu’ilsutilisentl’appareilouquel’appareilestutiliséà
côtéd’euxandes’assurerqu’ilsn’utilisentpasl’appareilcommeunjouet.
•Toujoursutiliserlacafetièresurunesurfacesècheetplaneand’éviterl’interruptiondela
circulationd’airendessousdel’appareil.
•Toujoursvousassurerquelacafetièreestcomplètementassembléeavantdel’utiliser.
L’appareilnesemettraenmarcheques’ilestcorrectementassemblé.
•S’assurerqueleréservoird’eauamovibleestbienenplacesurl’appareilpendant
l’utilisation.
•Nepasutiliserlacafetièresicertainsdesesélémentssontcassés.
•Nepastoucherlessurfaceschaudesdelacafetière.Utiliserpoignéesouboutons.
•Nepasretirerlecouverclependantquelecafépasse.Celapourraitprovoquerdes
brûlures.
•Assurez-vousdebienéteindrelacafetièreaprèschaqueutilisation“
+
”.
•Toujourséteindrelacafetièreenpremier“
+
” avant de la débrancher de la prise murale.
•Eteindrelacafetière“
+
”etdébrancherleld’alimentationdelapriselorsquevousne
l’utilisezpasouavantdelanettoyer.Laisserlesélémentsdelacafetièrerefroidiravantde
les retirer ou de les ajouter et avant de nettoyer la cafetière.
•L’utilisationd’accessoiresnonrecommandésouvendusparlefabricantpeutentraîner
électrocution ou blessure.
•And’évitertoutrisqued’électrocution,nepasplongerlelélectrique,lacheou
l’appareildansdel’eauoutoutautreliquide.
•Nepasplacercetappareilsurouàcotéd’uneplaqueàgazouélectriquechaudeou
toute surface en contact avec un four en marche.
•Nepaslaisserlelélectriquedépasserdubordd’unetable,d’unplandetravailouêtre
en contact avec des surfaces chaudes, four y compris.
•Nepasutiliserl’appareilsilel,lapriseoul’appareilestendommagéouaprèsunmauvais
fonctionnement,ous’ilesttombéetendommagédequelconquefaçon.Faites-levérier,
ajuster ou réparer au centre agréé de Service Après-vente le plus proche de chez vous.
CET APPAREIL EST CONCU UNIQUEMENT POUR UN USAGE DOMESTIQUE.
SAUVEGARDER CES INSTRUCTIONS

13
instructions concernant le fil électrique
Veuillez suivre les instructions suivantes pour assurer un usage en toute sécurité du fil
électrique.
•Nepasutiliserderallongeaveccetappareil.
•Nepastirersur,entortillerouabuserlelélectrique.
Silelélectriqueestendommagé,ildoitêtreremplacéparlefabricant,leCentreAgrééde
Service Après-vente ou toute personne qualifiée pour éviter tout risque.
symboles importants
“Lire les Instructions”, situé sur le couvercle du pot
+
“Marche/Arrêt”
+
Fonction “Préparation Immédiate du Café Décaféiné”
+
Fonction “Préparation Immédiate”
+
Fonction “Nettoyer”
+
Fonction “Verser”

14
descriptiondel’appareil
1
.CouvercleduRéservoird’Eau
2. Panier Indicateur de Remplissage
Maximum
3. IndicationdeNiveaud’Eau
4. Fonction Préparation Immédiate du
Café Décaféiné “
+
”
5. BoutondeMarche/Arrêt“
+
”
6. Réservoird’EauAmovible
7. Fonction Préparation Immédiate “
+
”
8. Voyantd’Alimentation(Ambre)
9. Fonction Nettoyer avecVoyant
LED Rouge “
+
”
1
0. JetdePassagedel’Eau
11
. Filtre en forme de Cône Permanent
et Amovible
1
2. Porte-Filtre Amovible
1
3. Couvercle de la Cafetière
1
4. Couvercle de laVerseuse avec
Anti-Goutte
1
5. Bouton Fonction Verser “
+
“
1
6. Verseuseisotherme(1,5Litres)d’une
large capacité et en acier inoxydable
brossé
1
7. Compartiment de Rangement du Fil
Electrique
1
2
4
5
13
8
7
12
9
3
6
10
11
14
15
16
17

15
moded’emploi
Nettoyer votre Cafetière avant de l’Utiliser pour la Première Fois
Pourvousassurerquevouscommencerezàdégusterunboncafédèslapremièretasse,
nettoyer votre cafetièreVillaWare™ avant la première utilisation. Suivre tout simplement les
instructions suivantes:
1.Nettoyerleréservoird’eau,laverseuse,lecouvercledelaverseuse,leporte-ltreetle
ltreàl’eauchaudesavonneuse.Rincerchacundesesélémentssoigneusement.
2. Remettre en place tous les éléments et fermer le couvercle. Faire fonctionner la cafetière
unepremièrefoisavecseulementdel’eau.Nepasmettredecafé.
3.Unefoisl’eaupassée,éteindrelacafetièreetjeterl’eaudelaverseuse.Rincerlaverseuse,
le couvercle de la verseuse, le filtre permanent et le porte-filtre.
Votrecafetièreestmaintenantprêteàl’usage.
préparation
Choisir et Mesurer le Café Moulu
Pourdemeilleursrésultats,utiliserunecuillèreàsoupearaséecommeunitédemesure.
Assurez-vousd’utiliseruncafémoulumoyenpourfaireuncaféparfait.
Table de Mesure du Café
Utiliserplusoumoinsdecafépourfaireuncaféàvotregout.
Ajouter de l‘Eau et du Café Moulu
1
. Ouvrirlecouvercleenutilisantlalanguette(Schéma1).
Pour faire du Café
1
0Tasses 7.5 cuillères
8Tasses 6.5 cuillères
6Tasses 4.5 cuillères
4Tasses 3 cuillères
1
cuillèrerase=5gr./0,17 onces
1
tasse=148ml/5.once.decafépassé
Schéma 1

16
2
. Placerleltrepermanentouunltreenpapierenformedecôned’unecapacitéde10
tassesdansleporte-ltreamovible(Schéma2).
REMARQUE: Si vous utilisez des filtres en papier, il est important que les bords du
ltres’appuientsurlesbordsduporte-ltre.Sileltrenesemaintientpasenplace,
l’humidieravantdelemettredansleporte-ltre.
3. Ajouter la quantité de café moulu désiré et secouer doucement pour niveler le café.
VousreporteràlaTabledeMesureduCafé.
4. Assurez-vousqueleporte-ltreamovibleestbienaucentreets’appuiebiensurle
dessus du panier avant de fermer le couvercle.
5. Remplirleréservoiravecdel’eaufroidejusqu’auniveaudésiré.Lesniveauxindiqués
sur le réservoir vous permet de le remplir facilement et précisément, ils vous indiquent
combiendetassesdecafévousallerpouvoirfaire(1tasseestégaleà148ml/5onces).
Nepasrempliraudelàdudernierniveau.
Pratiqueetfacile,leréservoirpeutêtreutilisélàoùilsetrouveoupeutaussiêtre
retiréaumomentdeleremplir(Schéma3).Assurez-vousqueleréservoird’eauest
bien en place avant de mettre en marche la cafetière.
6. Mettrelaverseusevideenplacesurl’appareil.
REMARQUE: Assurez-vous que la verseuse est bien en place sur le plateau
sinonl’eauetlecafémouludéborderontduporte-ltre.Undébordementpourrait
provoquerdesblessuresouendommagerl’appareil.
Schema 2
Schema 3
préparation (suite)

17
moded’emploi
1.Aprèsavoirsuivilesinstructionsduparagrapheintitulé“Ajouterdel’EauetduCafé
Moulu”, brancher la cafetière sur la prise murale qui convient.
2.VotrecafetièreVillaWare™estconçuavecunsystèmetrèspratiquequioptimalisela
préparation du café en fonction du type de café. Ce système garantie le meilleur des
goûts et saveurs aussi bien pour un café normal que pour un café décaféiné. Pour faire un
café en utilisant ce système, sectionner le mode de préparation en fonction du type de
café que vous allez utiliser, et ceci de la manière suivante:
a. Si vous allez faire un CAFÉ NORMAL, tourner le bouton de sélection sur Préparation
Immédiate “
+
”(Schéma4).
b. Si vous allez faire un CAFÉ DECAFEINÉ, tourner le bouton de sélection sur Préparation
Immédiate du Café Décaféiné “
+
”(
Schéma
5).
3.Appuyersurleboutondemarche/arrêt“
+
”uneseulefois(Schéma6).Levoyant
d’alimentationdecouleurambreclignoterapendanttouteladuréedelapréparationdu
café.
4.Unefoislecafépassé,unsignalsonoresedéclencheraetlevoyants’éteindra.Laquantitéde
caféseratoujoursmoindrequelaquantitéd’eauenraisondel’absorptiond’eauparlecafé
moulu.
5. Vous pouvez utiliser la fonction Interrompre et Servir pendant que le café passe. Retirer
laverseuseetlacafetières’interrompraautomatiquementpourvouspermettredevous
verser une tasse de café. Remettre la verseuse en place sur la cafetière pour continuer
àfairepasserlecafé.Assurez-vousquelaverseusen’estpasretiréedelacafetièrepour
plus de 1/2minute,sinonilestpossiblequel’eaudébordedupanier.
6. Pour servir le café, appuyer sur la fonctionVerser “
+
” tout en faisant basculer la verseuse
pour ouvrir le couvercle. Le couvercle se ferme automatiquement et maintient votre café
chaud et frais.
7. Une fois que le café moulu a refroidi, ouvrir le couvercle et retirer avec soin le filtre et le
porte-filtre pour jeter le reste du café moulu.
REMARQUE: Lejetdepassagedel’eauesttrèschaudunefoislecaféfait.Toujours
laisserlacafetièrerefroidirquelquesminutesavantd’ouvrir.
8. Assurez-vous que le filtre est propre et bien en place, et que la verseuse est vide avant
derecommenceràfairepasserlecafé.
9.Débranchervotrecafetièresivousnel’utilisezpas.
Schéma 4
Schéma 5
Schéma 6

18
nettoyage
NETTOYAGE QUOTIDIEN
Débrancher la cafetière et laisser refroidir avant de la nettoyer. Ouvrir le couvercle et
retirer le porte-filtre ou jeter le filtre en papier. Retirer le panier de préparation, le réservoir
d’eau,laverseuseetlecouvercledelaverseuseetlesnettoyeràl’eauchaudesavonneuse.
Nejamaisutiliserdeproduitsnettoyantsabrasifstelsquedestamponsenlained’acierou
autres matériaux abrasifs. Utiliser un chiffon humide pour nettoyer la partie extérieure de la
cafetière et les jets.
ATTENTION! Nejamaisplongerlesoclemoteurdelacafetièredansdel’eauoutout
autre liquide, ne pas le mettre au lave-vaisselle. Aucun des éléments de la cafetière peuvent
aller au lave-vaisselle.
NETTOYAGE DE LA VERSEUSE
Pourretirerlecouvercledelaverseuse,latournerdanslesensinversedesaiguillesd’une
montrepuissoulever.Nettoyerlaverseuseetlecouvercledelaverseuseàl’eauchaude
savonneuse.
Ilpeutarriverquel’eaucalcairelaissedestachesblanchessurlaverseuseetquelecaférende
ces taches marrons. Pour enlever les taches de la verseuse:
1. Remplirlaverseused’unesolutionmoitiéeauetmoitiévinaigreetlaissercettesolution
danslaverseusependantenviron20minutes.Vouspouvezaussiutiliserd’autresproduits
quel’ontrouvedanslecommerce,suivrelesinstructionsdufabricant.
2. Jeter la solution, puis laver et rincer la verseuse. Ne pas utiliser de produits nettoyants
abrasifs qui pourraient rayer la verseuse.
DETARTRERVOTRE CAFETIEREVILLAWARE™
Lesminérauxquel’ontrouvedansl’eau,commeparexemplelecalciumoulecalcairelaissent
des dépôts dans votre cafetière ce qui affecte les résultats de la cafetière. Il est recommandé
de les éliminer. La fonction Nettoyer “
+
”devotrecafetièreVillaWare™vousindiqueàquel
moment il devient nécessaire de nettoyer votre cafetière. Pour utiliser cette fonction, suivre les
simples instructions suivantes:
1.Nettoyerl’appareillorsquelevoyantLEDlumineuxrougeestallumé,etqu’ilclignotetoutes
les 15 secondes.
2.Verser4tasses(592ml/20oncesdeliquide)devinaigreblancnon-diluédansleréservoir
d’eau.Vouspouvezaussiutiliserd’autresproduitsquel’ontrouvedanslecommerce,suivreles
instructions du fabricant.
3. Mettreleporte-ltreouunltreenpapierenformedecôned’unecapacitéde10 tasses
dans le panier et fermer le couvercle.
4. Mettrelaverseusevideànouveausurl’appareil,biencentrésurlaplaque.
5. Tourner le cadran de sélection sur la position Nettoyer “
+
”(Schéma7).Levoyantlumineux
rouges’arrêteradeclignoteretresteraallumé.
6. Pousserleboutondemarche/arrêt“
+
” une fois pour commencer le processus de
nettoyage(Schéma8).Levoyantlumineuxrougeclignoterapendantlenettoyage.
Schéma 7Schéma 8

19
rangement
Assemblerdenouveaulacafetièreavantdelarangeretassurez-vousqu’elleestbien
débranchée.VotrecafetièreVillaWare™inclutuncompartimentpourrangerl’excèsdel
électrique(Schéma9).
conseils et suggestions
Nousrecommandonsd’utiliserdel’eauchaudeoutrèschaudepourrincerlaverseuse,cela
aideàmaintenirlatempératureducafépendantlecycledepréparation.
service aux consommateurs
Holmes Products France
1015, Rue du Maréchal Juin
Z.IVaux - Le - Pénil
77000 Melun – France
Phone: +33 164 10 45 80
Fax: +33 164 10 02 32
FRANCE - SERVICE CONSOMMATEURS
0 825 85 85 82
Schéma 9
nettoyage
(suite)
7. Unefoislecycledenettoyageterminé,levoyantd’alimentationdecouleurambreetle
voyantLEDrouges’éteindrontetlacafetièreémettraunsignalsonore.L’appareils’éteindra
automatiquement.
REMARQUE:L’appareilfonctionnenormalementmêmesilevoyantrougeLED
clignote, mais il est fortement recommandé de faire passer un cycle de nettoyage une fois
quecevoyantacommencéàclignoter.
8. Jeterlevinaigreetsoigneusementnettoyerlaverseuseetleréservoird’eauàl’eau
chaude savonneuse.
9. Remplirleréservoiravecdel’eaupropreetfraiche.
10. Remettre la verseuse vide sur la cafetière, bien centré sur la plaque.
11. Retirer et jeter tous les filtres en papier que vous avez pendant le cycle de nettoyage.
12.Commenceràfairepasserdel’eauseulementetattendrequelecycledepréparation
soit complètement terminé.
13. Répéter les instructions du no 9 au no 12. Votre cafetière est maintenant propre et
prêteàfairepasserducafébienchaudetdélicieux.
Table of contents
Languages:
Other Villaware Coffee Maker manuals