manuals.online logo
Brands
  1. Home
  2. •
  3. Brands
  4. •
  5. Bridge Technologies
  6. •
  7. Measuring Instrument
  8. •
  9. Bridge Technologies Nomad User manual

Bridge Technologies Nomad User manual

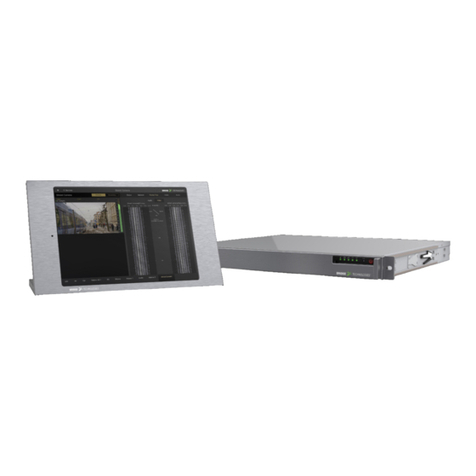
In the box: NOMAD In the box: Power cord & supply USBA-A Cable
This guide provides details for quick installaon of your NOMAD. For further
informaon download the User Manual and refer to secon 4.1.
www.bridgetech.tv - click Login
user name: customer
password: xmas4u
Health and safety
(refer to User Manual)
- NOMAD is intended for installaon in restricted access areas.
- Disposal should be handled according to all naonal laws and regulaons.
- Prevent the system from overheang, do not operate it in an area that exceeds
the maximum ambient temperature of 45 degrees Celsius.
- Do not place other objects on top of the NOMAD.
- Air needs to ow freely underneath the unit. Check that the feet of the unit
are aached.
- NOMAD requires short-circuit (overcurrent) protecon. Ensure that the
protecve device is rated no greater than 120 VAC, 15 A; 240 VAC, 16 A.
- Observe occupaonal health and safety rules when handling.
Serial number
The serial number can be found at the boom of the unit and on the shipping
box. It is also available via the web GUI under About License.
Register the NOMAD online at: hp://nomadportable.com/NOMAD-register.html
Technical support
Contact your Bridge Technologies Partner/Reseller or refer to your support
agreement.
Warranty/Soware Upgrades/Training
Contact your Bridge Technologies Partner/Reseller.
General enquiries
For other general enquiries please contact: support@bridgetech.tv
InitialConguration
There are 3 alternave ways of performing an inial conguraon of NOMAD:
1. Via the built-in NOMAD wireless management network (Go to 1.)
2. Precongured IP address of the probe management port (Go to 2.)
3. Via serial console emulated over USB (Go to 3.)
NOTE:
Sengs take eect immediately aer applying. For this reason, it is
recommended to check sengs carefully before applying, as you may lose
wireless connecon to your NOMAD due to incorrect sengs. If this happens
you have a wired network interface and a USB serial port as backup.
Powering up the unit
Connect the power supply to the main source and the power supply to the probe.
Only use the included power supply and do not use if damaged. The diodes
should then light up and the unit will boot. From power-up unl access
via the management interface it will take approx. 2 minutes.
QUICK START GUIDE
CIRCO 13pt tracking 318
POWER ON
NOMAD Portable Quick Start Guide v1.1
1
DVBCommunity - cообщество профессионалов ЦТВ
https://dvbcommunity.ru/
1. Built-In Wireless Network
A brand new NOMAD is accessible as a password-less Access Point and requires
inial conguraon to secure access to it. For that reason the rst me you boot
up the device and open WebUI, it will suggest to change the Access Point sengs
before proceeding.
Aer connecng to the NOMAD’s Access Point, a pop up window with WiFi inial
conguraon appears.
If not, open a browser manually and go to hp://192.168.1.1/
This will open the inial conguraon page.
If you do not want to use wireless access, disable the Access Point (see Access
Point sengs below) and apply sengs.
It is strongly recommended to change the default sengs and set at least
security method and password.
Also recommended, is to store a bookmark in the browser poinng to the
NOMAD in case of need to connect using an alternave method (e.g. wired
network interface).
2. Conguration Using the Pre-Set IP-Address
NOMAD factory sengs for the
wired management interface
Management (eth1) IP address: 10.0.20.101
Management (eth1) subnet mask: 255.255.0.0
In order to connect to the eth1 management port, the PC used for set-up should
have corresponding network sengs. Connect directly to the device’s eth2
management port using an Ethernet cable.
For Windows, the network parameters are set in the Control Panel - Network
and Internet - Network and Sharing Center - Local Area Connecon - Properes
- Internet Protocol Version 4 Properes. Select the user dened address.
Set the PC’s IP address to 10.0.20.100 and the subnet mask to 255.255.0.0.
When the IP address of the PC has been set to match the NOMAD factory seng,
the permanent network sengs can be congured through the NOMAD web
browser interface.
CIRCO 13pt tracking 318
NOMAD Portable Quick Start Guide v1.1
2
DVBCommunity - cообщество профессионалов ЦТВ
https://dvbcommunity.ru/
Start a terminal program.
- Windows XP users can use Hyperterm
- Linux users can use Minicom
For later versions of Windows, that do not ship with a terminal program, the free
applicaon PuTTY may be downloaded from:
hp://www.chiark.greenend.org.uk/~sgtatham/puy/
3. Connecting to the serial console over USB
For the inial set-up, do the following:
1. Install a driver for the USB communicaon
(if not already supported by the operang system)
2. Set the management IP address
Most operang systems will have nave support for the FT232 driver needed.
When a USB cable is connected between a PC and the NOMAD, the operang
system will detect a new USB device. For Windows, the new device will appear as
a COM port in the Device Manager shown below.
If the operang system does not detect the probe, download and install a driver
for it from the chip manufacturer at hp://www.dichip.com/. Select rst Drivers,
then VCP followed by the operang system (VCP is short for Virtual COM Port).
If it is not already connected, connect the USB cable between the USB port on
the probe and a USB port on the PC.
Select the new COM port that should appear as the USB cable is plugged in (Linux
users should check /var/log/messages to see what device to use) and establish a
serial connecon to NOMAD using these communicaon parameters:
• Baud rate: 9600
• Data bits: 8
• Parity: None
• Stop bits: 1
• Flow control: None
Press ENTER a few mes to bring up the login prompt.
Log in using the user name admin and the password elvis.
CIRCO 13pt tracking 318
NOMAD Portable Quick Start Guide v1.1
23
DVBCommunity - cообщество профессионалов ЦТВ
https://dvbcommunity.ru/
A simple text based menu system should now be displayed. To change a seng,
press the appropriate character from the le-most column, enter the new value
and conrm by pressing ENTER. If DHCP is enabled, you can nd the currently
assigned IP address by selecng the ethStatusDoc opon.
NOMAD is equipped with two network interfaces called management (or eth1)
and data/video (or eth0).
Congure at least one of the interfaces from the terminal and
then do the rest of the setup from a web browser.
Depending on the installed license, an addional data interface, labelled data2
(eth2), may also be available.
NOMAD supports both in-band management (i.e. using eth0 for both data/video
and management) and separate management (i.e. using eth1 for management).
In any case make sure that the subnets congured for eth0 and eth1 do not
overlap – otherwise the probe will not work properly.
Note that if IP addresses for eth0 and eth1 are congured so that the
subnets overlap, the IP address of one of the ports will be automacally
set to 1.1.1.1 by NOMAD.
Conguring the management interface:
Edit values for IP address, netmask and mm_gateway or enable dhcp instead.
Make sure Management is enabled (set to true) – otherwise management via
web will not be possible.
Conguring the data/video interface:
Enter values for data_ipa, data_mask, data_gateway or al- ternavely enable
data_dhcp. Set data_management to true to enable web access via the data
interface. When all the listed parameters have been congured, the probe must
be rebooted to let the parameters take eect. This is achieved by selecng the
reboot opon and conrming by selecng ‘t’ for TRUE.
Next Steps:
Check Licensing, Set Network Parameters, Connect Media Signals and Dene
Input Signals. For more informaon refer to user manual, secon 5 & 6.
Verifying Correct Initial Setup of the NOMAD
Once the probe management network interface has been congured, all further
conguraon takes place using a web browser over HTTP. Launch a web browser
applicaon on the management PC. The following web browsers are supported:
• Microso Edge
• Microso Internet Explorer 11 or higher
• Mozilla Firefox 29 or higher
• Google Chrome
• Apple Safari
Type the IP address of the probe, as set in the inial set-up procedure, in the
browser URL eld and press ENTER.
The default management view should be displayed inside the browser. The
NOMAD interface is shown below. Some funconality may require addional
licenses to be installed.
CIRCO 13pt tracking 318
NOMAD Portable Quick Start Guide v1.1
4
DVBCommunity - cообщество профессионалов ЦТВ
https://dvbcommunity.ru/

Other Bridge Technologies Measuring Instrument manuals

Bridge Technologies VB60 QAM Manual

Bridge Technologies

Bridge Technologies VB60 QAM Manual

Bridge Technologies VB50 COFDM Manual

Bridge Technologies

Bridge Technologies VB50 COFDM Manual

Bridge Technologies VB440 User manual

Bridge Technologies

Bridge Technologies VB440 User manual

Popular Measuring Instrument manuals by other brands

JDS Uniphase JD7105B manual

JDS Uniphase

JDS Uniphase JD7105B manual

Geevon W208708 user manual

Geevon

Geevon W208708 user manual

GE Wiring Devices & Specialty Products GE5805WS6 user manual

GE Wiring Devices & Specialty Products

GE Wiring Devices & Specialty Products GE5805WS6 user manual

Vega VEGAPULS 61 operating instructions

Vega

Vega VEGAPULS 61 operating instructions

Dorrough 40-A instruction manual

Dorrough

Dorrough 40-A instruction manual

Vynco VMC51 quick start guide

Vynco

Vynco VMC51 quick start guide

GE CheckPoint Quick setup guide

GE

GE CheckPoint Quick setup guide

WYLER Clinotronic S quick reference

WYLER

WYLER Clinotronic S quick reference

TAG Heuer POCKET PRO user manual

TAG Heuer

TAG Heuer POCKET PRO user manual

Elite Element DCM-120100C instruction manual

Elite Element

Elite Element DCM-120100C instruction manual

Leviton Series 2000 installation instructions

Leviton

Leviton Series 2000 installation instructions

Simex SRT-94-XA user manual

Simex

Simex SRT-94-XA user manual

Thermo Scientific AutoXP manual

Thermo Scientific

Thermo Scientific AutoXP manual

Temper Koban KTD-01 MINI user manual

Temper

Temper Koban KTD-01 MINI user manual

Stahl 8405/6 Series operating instructions

Stahl

Stahl 8405/6 Series operating instructions

Xylem SENSUS PolluFlow quick guide

Xylem

Xylem SENSUS PolluFlow quick guide

Smart Storm USI instruction manual

Smart Storm

Smart Storm USI instruction manual

Campbell VWIRE 305 product manual

Campbell

Campbell VWIRE 305 product manual

manuals.online logo
manuals.online logoBrands
  • About & Mission
  • Contact us
  • Privacy Policy
  • Terms and Conditions

Copyright 2025 Manuals.Online. All Rights Reserved.