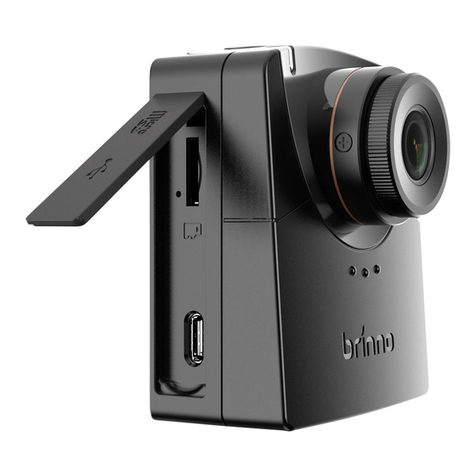
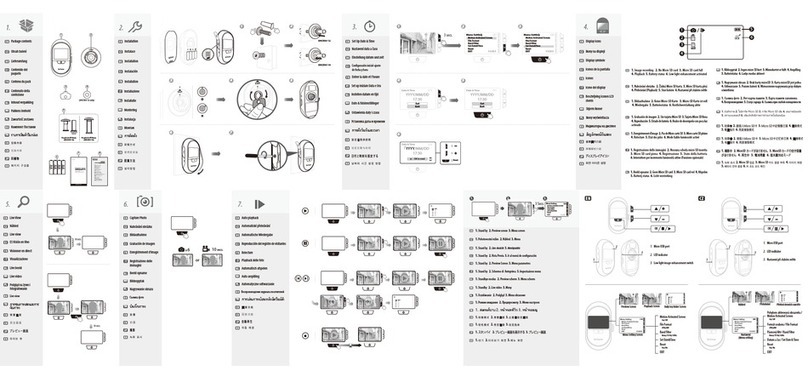
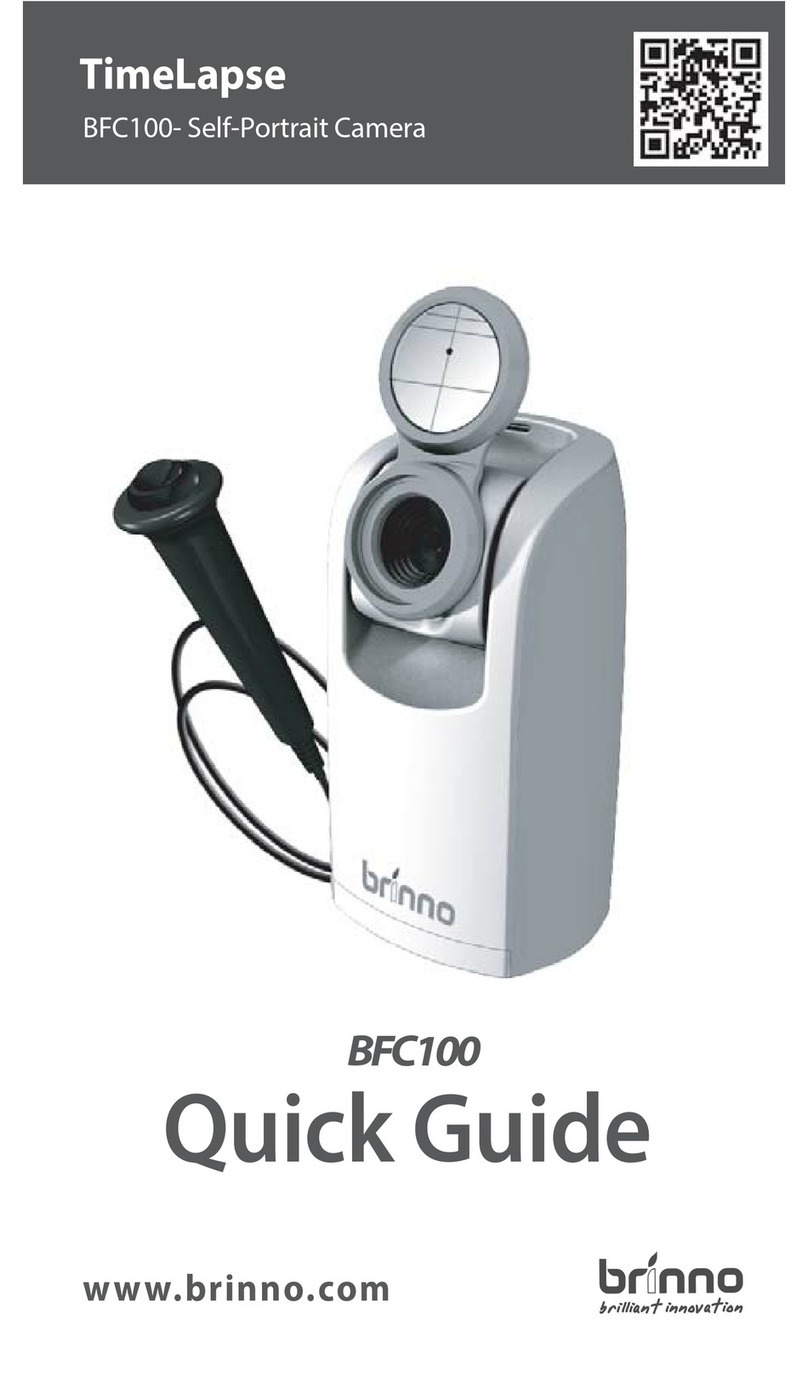
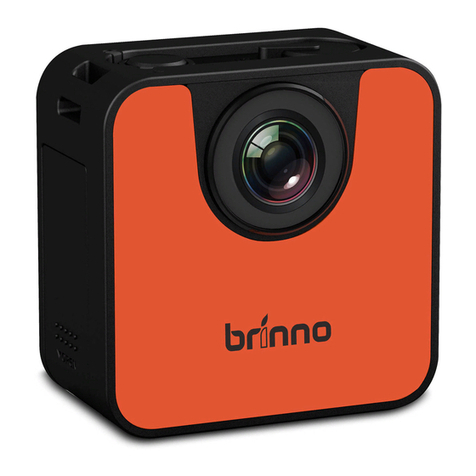
Brinno TCL200 Pro User manual

User Manual
Never miss a shot
TLC200 Pro


SEE the UNSEEN
TLC200 Pro
User Manual
HDR Time Lapse Video camera

English
Nederlands
Français
Deutsch
Italiano
Español
03
13
23
33
43
53

ENGLISH 03
Package Contents
Parts of the Camera
•HDR Time Lapse Camera (TLC200 Pro) • 4 AA Batteries
• SD Card • Lens cover • Kit Lens (BCS 019) • Screwdriver
• Screw
1
7
6
2
8
3
9
4
5
11
10
12
13
1 8
411
310
613
2 9
512
7
SD Card Slot TIME ( ) Button
Power Switch
Connector for Micro USB cable
OK/ START Button
Strap Eyelet Tripod Screw Hole
Connector for Accessories MENU ( ) Button
Battery Door
LCD Screen
LED indicator
Kit Lens BCS 019 (Page 27)
ENGLISH 03
English
TLC200 Pro

04 ENGLISH
Display Icons
Set Up screen At Set Up screen
At Preview screen
Status icon
BATTERY
EMPTY
FULL
ERROR
NO CARD
Preview screen
1
2
3
4
5
6
7
8
9
10
11
Capture mode
T.Lapse: Time Lapse mode
Shutter: Stop Motion mode
Motion: Motion Activated mode
Time interval
Select a pre-set time
interval or customize
yourself.
System date and time
Battery level
Scene mode
White Balance mode
Preview image capture window
Battery Empty
Please replace battery immediately.
SD Card Full
Please download les to clear SD card space.
SD Card Error
Please replace SD card.
No Card
Please Insert SD card.
T.Lapse
ASAP
2013/03/01
22:58:32
OK
READY
1
2
5
3
7
Icon
(green)
(green)
(yellow)
(red)
Description
Battery fully charged.
Battery partially charged.
Low battery.
Replace as soon as possible.
Out of battery.
Replace battery immediately.
8
9
10 11
SD
SD SD
4
6

ENGLISH 05
At The Set Up Screen After 10 seconds without activity
on the set up screen, the camera will go to Preview screen
automatically. You can press the MENU or TIME button to go
back to the set up screen.
At Preview Screen After 50 seconds without activity on
the set up or preview screen, the LCD screen will Turn off
automatically to save power. You can press the OK button
to wake up camera.
How Our Power Saving Technology Works
Installing the Batteries
1. Open battery door. 2. Insert 4 AA batteries. 3. Close battery
door. Be sure the battery cover is locked into place.
Installing SD Card
1. Open SD card cover. 2. Insert SD card until it clicks into place.
3. Close SD card cover.
Turning on the Camera
1. Rotate the Power switch to the ON position. 2. Process
screen It may display other information on screen, please
refer to "Display Icons" 3. Set Up screen.
Setting the Time and Date
1. Press the MENU button to go to Setting -> MORE 2. At
MORE Setting, select Set Date & Time, and press OK. 3. At
the highlight field, press MENU ( ) to decrease value, press
TIME ( ) to increase value, press OK to confirm and go to the
next field. When finished press OK to exit set up.
Time Lapse Mode
In Time Lapse Mode, the camera will take one photo at the
time interval you selected. When you are finished recording,
the camera will convert those photos into a time lapse video!
Before you begin recording, you can change the “Time Lapse
Frame Rate”.
Output file format: AVI. (Without audio) Resolution: 720P
Time Lapse video length: The maximum size of each single AVI
file ranges between 8,192 to 20,480 frames, depending on the
time interval setting.
Mode

06 ENGLISH
1. After selecting the time interval, press OK to proceed to the
Preview Screen. 2. On the Preview screen, press the OK button
to start recording. During the recording period, the LCD panel
will turn off to save power.
To Begin Recording
1. While recording, hold the OK button until the LCD turns
on and shows the text “Processing”, it means the camera is
processing file closing. When completed the processing it will
display the text "Ready” This indicates the recording session is
complete. 2. Remove the SD card from the camera, and insert
it into your computer or laptop to enjoy your amazing Time
Lapse Videos!
To Stop Recording
In this mode, the LCD will display the SD card capacity, so you
will know how much free space remains on the SD card.
Storage status
In this mode, the camera will enlarge the preview image, so you
can adjust the lens focus easily.
1. Select and enter “Focus” mode. 2. View the enlarged preview
image. 3. Use the screwdriver to loosen the screw and adjust
the lens focus. 4. When finished adjusting, use the screwdriver
to tighten the screw. 5. Press“OK”to exit focus mode.
Focus Mode
Setting the Time Interval
1. Press TIME button to enter time interval set up. 2. Press
MENU ( ) and TIME ( ) to select a pre-set time interval or
customize it by yourself. When complete, press the OK Button
to confirm and return to the Set up screen.
Time Interval range: from below 1 second to 24 hours.
1. Press MENU button to enter “Setting” mode. 2. Select and
enter“Time Lapse Frame Rate”.
What frame rate should I use?
Generally, 10 FPS is suitable for Time Lapse video, but we
suggested 30 FPS. 1 FPS: The video plays 1 frame per second,
so the video will not look smooth, and the video length will
be longer. 30 FPS: The video plays 30 frames per second, so the
video will look smooth, and the video length will be shorter.
Setting-Time Lapse Frame Rate
Settings
ENGLISH 07
HDR (High Dynamic Range ) setting let’s you choose the
requires HDR setting.
High: Suggested setting for sunrise or sunset. Medium: For any
standard shooting situation. Low: For portraits.
HDR Range
At the default setting of Auto (AWB), the camera automatically
adjusts white balance so that a white subject will appear white
regardless of the color of the light source. It may however be
necessary to match white balance to the light source under mixed
lighting or when photographing a subject that is a solid color.
White Balance
Option Description
Color Temperature
Auto The camera adjust white balance
automatically
Approx.
4000 to 7000K
Day Use when shooting in Daylight Approx. 5000K
Shade
Use when shooting in the shade Approx. 7000K
Cloudy
Use when shooting on cloudy day
Approx. 6000K
Fluorescent
Light-Cool
Use when shooting under
uorescent light Cool White Approx. 4000K
Fluorescent
Light-Warm
Use when shooting under uorescent
light Warm White
Approx. 3300K
Tungsten Light Use when shooting under Tungsten
light Approx. 2800K
Image Quality
The Image quality setting let s you choose a different image
quality to fit your needs, and the image quality will determine
the number of frames that can be stored on the SD Card.
[4GB SD card capability] Best 14,000 photos Better 20,000
photos Good 30,000 photos
Select scene to fit your shooting needs.
Scene
Option Description
Daylight For any shooting situation in Daytime .
Twilight Special setting for Sunrise & Sunset shooting. Time
Interval ASAP mode: 1seconds per picture.
Night
Special setting for Nighttime shooting. Low ISO
setting, long exposure time. Time Interval ASAP
mode: 2seconds per picture.
Moon
Special setting for Moon photography. Low ISO
setting, extra long exposure time up to 2sec. Time
Interval ASAP mode: 4seconds per picture.

08 ENGLISH
More Settings
You can choose if you want the time stamp to show at bottom
of your video.
1. Select Time Stamp. 2. Select ON or OFF.
Time Stamp
You can choose to set up your camera to record videos in a low
light environment or not. (< 5 Lux).
1. Select Low Light Recording. 2. ON: Allows your camera to
record video in a low light environment. OFF: Your camera will
go to sleep in a low lightenvironment.
Low Light Recording
Set the correct date and time for your camera.
1. Select Set Date & Time. 2. In the highlight field, press MENU
( - ) to decrease the number, press TIME ( +) to increase the
number, press OK to confirm and go to the next field.
When finished, press OK to exit set up.
Set Date & Time
You can choose whether or not the LED indicator will flash
while capturing each frame.
1. Select LED Display. 2. ON: When the camera is capturing a
frame, the LED indicator will flash once. OFF: During capture
period the LED indicator will not flash at all.
LED Indicator
Select the correct fluorescent lighting frequency to match your
indoor lighting frequency.
1. Select Band Filter. 2. None: For outdoor environment. 50 Hz:
USA 60 Hz: Europe
Band Filter
Exposure
Into Exposure setting, press MENU ( ) and TIME ( ) to
increase ( + ) or decrease ( - ) the exposure and press OK
to exit.
Custom Image
Control Saturation, Contrast, Sharpness. Select and enter each
setting, using MENU ( ) and TIME ( ) to adjust the effect.
Then press OK to exit.

ENGLISH 09
Firmware version
Displays the current version of firmware installed on the camera.
1. Select Firmware Version. 2. Displays the current version of
firmware for 30 seconds. Press the OK button to exit firmware.
Reference
CS-mount lens
The TLC200 Pro comes with a n interchangeable CS-Mount lens, so you
can change the CS-Mount lens by yourself to fit your shooting needs.
Extensional accessories
This extension connector is used for optional Brinno Time Lapse
accessories. Shutter Line (ATS110): For creating Stop Motion film and Face
Time Lapse video Motion Sensor (ATM110): For motion activated using,
turn your time lapse camera into a motion activated camera!
External Power
For long term use, you can attach an external power supply (DV
5V) through the Micro USB connector.
Micro USB connector
A. File transfer-You can connect the TLC200 Pro to your computer in order
to transfer the time lapse video from the SD card to the computer. OS
requirement: Windows 98 and above.
B. Webcam-With the TLC200 Pro connected to your computer you can install
free webcam software. The TOC200 Pro can then be used as a webcam
for your computer! Suggested software: please check on Brinno.com OS
requirement: Windows 98 and above.
Reset
You can reset your camera back to the default setting.
1. Select Reset. 2. Select YES and press the OK button to reset your camera.
Function Setting
Capture mode Time Lapse
Time Interval 2 seconds
Time Lapse Frame Rate 10 FPS
White Balance Mode Auto
Image Quality Better
Scene Daylight
HDR Range Medium
Time Stamp ON
Low Light Recording ON
LED Indicator ON
Band Filter None

10 ENGLISH
Subject Description Time Interval
Time Lapse
Frame Rate
Daily Life Recording kids, pets all parts of
daily life 1~ 30 seconds 10~30
Party
Recording family parties,
public events, and happy times
all around
1~10 seconds 10~30
Traveling Recording your trips, short and
long 2 sec~ 1 min 10~30
Plant
Recording Flowers growing,
or gardening over a period of
time
1~30 min 15~30
Construction
Recording a building being
built or any construction
project
30 min~ 1 hr 15~30
Biking Recording a bike ride or trip 1 sec 10~30
Face time lapse You’re the leading character in
your time lapse videos Shutter line 5
What Setting Should I use
What Size Card Should I use
Battery Life
SD card size Stored photos
4 GB SD Card 30,000
8 GB SD Card 60,000
16 GB SD Card 120,000
32 GB SD Card 240,000
Based on a selected image quality setting of “Good”
Scene: Day mode Scene: Twilight mode
Time interval Captured frames
to battery low Days
ASAP 168,000 1
1 SEC 200,000 2.3
2 SEC 244,000 5.6
5 SEC 204,000 11.5
10 SEC 145,000 17.0
20 SEC 108,000 25.0
30 SEC 84,500 29.0
1 MIN 51,000 35.0
5 MIN 12,300 42.0
10 MIN 6,300 43.0
1 HR 1070 44.0
4 HR 269
24 HR 45 45.0
Time interval Captured frames
to battery low Days
2 SEC 67,400 1.6
5 SEC 55,500 3.2
10 SEC 51,300 5.9
20 SEC 51,000 11.5
30 SEC 45,000 15.0
1 MIN 33,700 23.0
5 MIN 10,900 38.0
10 MIN 5,900 41.0
1 HR 1,060 44.0
4 HR 269
24 HR 45 45.0

ENGLISH 11
Scene: Night mode Scene: Moon mode
Time interval Captured frames
to battery low Days
5 SEC 39,000 2.3
10 SEC 30,000 3.5
20 SEC 28,100 6.5
30 SEC 26,200 9.0
1 MIN 21,800 15.0
5 MIN 9,300 32.0
10 MIN 5,400 37.0
1 HR 1,040 43.0
4 HR 268 44.0
24 HR 44
Time interval Captured frames
to battery low Days
7 SEC 18,300 1.5
10 SEC 18,800 2.2
20 SEC 16,000 3.5
30 SEC 15,500 5.0
1 MIN 13,800 9.0
5 MIN 7,400 25.0
10 MIN 4,700 32.0
1 HR 1,000 42.0
4 HR 266 44.0
24 HR 44
Battery Life
Specification
CAMERA
Model TLC200 Pro LCD Screen 1.44" TFT LCD
Lens Rotating Angle
120° Waterproof
Optional, (In use with TLC200Pro Weather Resistant Housing (ATH120))
CAPTURE MODE
Time Lapse Auto generation ofTime Lapse video Stop Motion Optional, (In use
with Shutter Line (ATS110)) Motion Activated Optional, (In use with Motion Sensor
(ATM110))
SENSOR
Type 1/3" HDR sensor Dynamic Range 115db Resolution 1.3 Mega pixel Pixel size
4.2um Sensitivity 3650mV/lux-sec (Ultra good low light quality)
OPTICS LENS (BCS 019)
Type CS Mount (Aspherical Glass Lens) Aperture F2.0 Field of View 112° Focal
Length 19 mm ( 35mm equivalent) Focus Distance Manual: 1cm to ∞ (factory
setting: 40 cm)
RECORDING
Time Lapse Video Format: AVI Resolution: 1280x 720 Still Image Format: JPEG (only
for using Shutter Line) Resolution: 1280x 720 Memory Storage SD Card ( Supported
up to 32 GB)
TIME INTERVAL
Custom From less than 1 second to 24 hours
POWER
Power source Battery: 4 AA Batteries \ DC IN: 5V (Micro USB connector)
DIMENSION
Size (DxWxH) 64x 52x 107 mm Weight 140 g (without batteries) Color Black


Nederlands 13
Inhoud van verpakking
Onderdelen van de camera
•HDR tijdverloop-camera (TLC200 Pro) •Kit lens (BCS 019) •4
AA-batterijen •SD-kaart •Schroevendraaier •Lensdop
1
7
6
2
8
3
9
4
5
11
10
12
13
1 8
411
310
613
2 9
512
7
Gleuf voor SD-kaart TIME ( ) knop
Voedingsschakelaar
Aansluiting voor Micro USB-kabel OK/ START knop
Oogje voor riem Statiefaansluiting
Aansluiting voor accessoires MENU ( ) knop
Batterijklep
LCD-scherm
LED-indicator
Kit Lens BCS 019
Dutch
TLC200 Pro
Nederlands 13

14 Nederlands
Weergavepictogrammen
Op instelscherm Op instelscherm
Op voorbeeldscherm
Statuspictogram
BATTERY
EMPTY
FULL
ERROR
NO CARD
Preview screen
1
2
3
4
5
6
7
8
9
10
11
Opnamemodus
T.Lapse: tijdverloop modus
Shutter: Modus Beweging stoppen
Motion:
Door beweging geactiveerde
Tijdinterval
Selecteer een
vooringestelde tijdsinterval
of stel deze zelf in.
Systeemdatum en -tijd
Batterijniveau
Scène-modus
Modus Witbalans
Voorbeeldvenster opname
Batterij leeg
Please replace
Batterij direct vervangen.
SD-kaart is vol
Download bestanden om ruimte
vrij te maken op de SD-kaart.
SD-kaartfout
Vervang de SD-kaart
Geen SD-kaart
Plaats een SD-kaart.
T.Lapse
ASAP
2013/03/01
22:58:32
OK
READY
1
2
5
3
7
Pictogra Beschrijving
(groen)
(groen)
(geel)
(rood)
Batterij geheel geladen.
Batterij gedeeltelijk ontladen.
Zwakke batterij.
Zo snel mogelijk vervangen.
Batterij leeg.
Batterij direct vervangen.
8
9
10 11
SD
SD SD
4
6

Nederlands 15
Op het instelscherm-1 Na 10 seconden zonder activiteit
op het instelscherm gaat de camera automatisch naar het
voorbeeldscherm. Druk op de knop MENU of TIME om terug te
keren naar het instelscherm.
Op het voorbeeldscherm-2 Na 50 seconden zonder activiteit
in het instelscherm of voorbeeldshcerm schakelt het LCD-
scherm automatisch uit (3) om energie te besparen. U kunt op
de knop OK drukken om de camera te activeren.
Hoe onze technologie voor energiebesparing werkt
De batterijen plaatsen
1. Open de batterijklep. 2. Plaats 4 AA-batterijen. 3. Sluit de
batterijklep.
Zorg er voor dat de batterijklep goed gesloten is.
De SD-kaart plaatsen
1. Open de klep van de SD-kaart. 2. Steek de SD-kaart er in tot
hij op zijn plaats klikt. 3. Sluit de SD-kaartklep.
De camera inschakelen
1. Draai de aan/uit-knop naar de stand AAN. 2 .
Verwerkscherm Op het scherm kan andere informatie staan,
"Weergavepictogrammen" 3. Instelscherm
1. Druk op de knop MENU om naar Instelling -> MEER te gaan 2.
Selecteer Datum en tijd instellen en druk op OK. 3. Druk op het
gemarkeerde veld op MENU ( ) om de waarde te verlagen,
druk op TIME ( ) om de waarde te verhogen, druk op OK om
te bevestigen en ga naar het volgende veld. Druk na afloop op
OK om de instelling te verlaten.
Datum en tijd instellen
Tijdverloop modus
In de tijdverloop-modus neemt de camera een foto op de
door u gekozen tijdsinterval. Als u klaar bent met vastleggen,
zet de camera de foto's om in een time-lapse video! Voordat
u met opnemen begint, kunt u de "Beeldsnelheid tijdverloop"
wijzigen.
Uitvoerbestand: AVI. (Zonder geluid) Resolutie: 720P
Lengte tijdverloop video: de maximale grootte van elk AVI-
bestand ligt tussen 8.192 en 20.480 beelden, afhankelijk van de
instelling van de tijdsinterval.
Modus

16 Nederlands
1. Druk na het selecteren van de tijdsinterval op OK om door te gaan naar
het voorbeeldscherm. 2. Druk op het voorbeeldscherm op OK om met
opnemen te starten. Tijdens het opnemen schakelt het LCD-scherm uit
om energie te sparen.
Met opnemen beginnen
1. Houd tijdens het opnemen de knop OK ingedrukt tot de
LCD-verlichting inschakelt en de tekst “Verwerken” verschijnt;
dat betekent dat de camera het bestand sluit en verwerkt. Na
afloop van het verwerken verschijnt de tekst "Klaar". Dit geeft
aan dat de opnamesessie voltooid is. 2. Verwijder de SD-kaart
uit de camera en steek hem in uw computer of laptop om te
genieten van uw geweldige Time Lapse-video's!
Opnemen stoppen
In deze modus geeft het LCD-scherm de capaciteit van de SD-kaart
weer, zodat u weet hoeveel vrije ruimte er nog is op de SD-kaart.
Opslagstatus
In deze modus vergroot de camera de voorbeeldweergave zodat u de
scherpte gemakkelijk kunt instellen.
1. Selecteer en open de modus "Scherpstellen". 2. Bekijk het vergrote
beeld. 3. Gebruik de schroevendraaier om de schroef los te draaien en
de scherpte in te stellen. 4. Gebruik de schroevendraaier om de schroef
aan te draaien als u klaar bent met scherpstellen. 5. Druk op "OK" om de
scherpstelmodus te verlaten.
Scherpstelmodus
De tijdsinterval instellen
1. Druk op de knop TIME om naar het instellen van de tijdsinterval te
gaan. 2. Druk op MENU ( ) en TIME ( ) om een vooraf ingestelde
tijdsinterval te selecteren of er zelf een in te stellen. Druk als u klaar bent
op OK ter bevestiging en om terug te gaan naar het instelscherm. Bereik
tijdsinterval: van minder dan 1 seconde tot 24 uur.
1. Druk op de knop MENU om naar de "instelmodus" te gaan.
2. Selecteer en open “Beeldsnelheid tijdverloop”.
Welke beeldsnelheid moet ik gebruiken?
10 FPS (Frames Per Seconde) betekent: in 1 seconde worden 10 beelden
weergegeven. 10 FPS is gewoonlijk geschikt voor tijdverloop-video
maar we raden 30 FPS aan. 1 FPS: de video speelt 1 frame gedurende 1
seconde, zodat de video er niet vloeiend uitziet, maar de videolengte zal
langer zijn. 30 FPS: de video speelt 30 frame gedurende 1 seconde, zodat
de video er vloeiend uitziet, maar de videolengte zal korter zijn.
TimeLapseFrameRate-De beeldsnelheid voor tijdverloop instellen
Basisinstellingen

Nederlands 17
Met de instelling HDR (High Dynamic Range) kunt u de vereiste
instelling voor HDR kiezen.
High(Hoog): Voorgestelde instelling voor zonsopkomst
of -ondergang. Medium(Gemiddeld): Voor alle
standaardsituaties. Low(Laag): Voor portretten.
HDR Range-HDR-bereik
Bij de standaardinstelling Auto (AWB) stelt de camera de
witbalans automatisch in zodat een wit onderwerp er wit uitziet,
ongeacht de kleur van de lichtbron. Het kan echter nodig zijn
om de witbalans aan te passen aan de lichtbron bij gemengd
licht of bij het fotograferen van een onderwerp met één kleur.
White Balance-Witbalans
Optie Beschrijving
Kleurtemperatuur
Auto De camera past de witbalans
automatisch aan
Ongeveer 4.000
tot 7.000K
Dag Gebruiken bij opnames bij daglicht Circa 5.000K
Schaduw
Gebruiken bij opnames in de
schaduw Circa 7.000K
Bewolkt
Gebruiken bij bewolkt weer
Circa 6.000K
TL licht-koel
Gebruiken bij koel wit tl-licht Circa 4.000K
TL licht-warm
Gebruiken bij warm wit tl-licht
Circa 3.300K
Gloeilamp Gebruiken bij verlichtinig met
gloeilampen Circa 2.800K
Image Quality-Beeldkwaliteit
Met de instelling van de beeldkwaliteit kunt u een andere beeldkwaliteit
kiezen die aan uw behoefte voldoet, en de beeldkwaliteit bepaalt het
aantal beelden dat op de SD-kaart kan worden opgeslagen:
[Geschikt voor SD-kaart van 4 GB] Best(Beste) 14,000 foto's
Better(Beter) 20,000 foto's Good(Goed) 30,000 foto's
Selecteer een scène die bij de omstandigheden aansluit.
Scene-Scène
Optie Beschrijving
Daglicht Voor elke opname overdag.
Schemering Réglage spécial pour les conditions de faible
luminosité
Nacht
Speciale instelling voor nachtopnames. Lage ISO-
waarde, lange belichtingstijd. Beperkte sluiterinterval:
5 seconden en langer
Maan
Speciale instelling voor foto's van de maan. Lage ISO-
waarde, extralange belichtingstijd tot 2 seconden.
Beperkte sluiterinterval: 7 seconden en langer

18 Nederlands
Meer instellingen
U kunt deze instelling kiezen als u wilt dat de tijdstempel
onderaan de video wordt weergegeven.
1. Selecteer Tijdstempel. 2. Selecteer AAN of UIT.
Time Stamp-Tijdstempel
U kunt de camera instellen voor opnames bij weinig licht. (< 5
Lux). 1. Selecteer Opname bij weinig licht 2. ON(AAN): hiermee
kan de camera video opnemen bij weinig licht. OFF(UIT): de
camera gaat naar de slaapstand als er weinig licht is.
Low Light Recording-Opname bij weinig licht
U kunt of de LED-indicator moet knipperen tijdens het
vastleggen van elk beeld.
1. Selecteer LED-indicator 2. ON(AAN): als de camera een beeld
vastlegt, knippert de LED-indicator éénmaal. OFF(UIT): tijdens
het vastleggen knippert de LED-indicator niet.
LED Indicator-LED-indicator
Selecteer de juiste frequentie van TL-licht zodat deze
overeenkomt met uw lichtfrequentie binnenshuis.
1. Selecteer Bandfilter. 2. None: Voor buitenshuis. 50 Hz: VS
60 Hz: Europa
Band Filter-Bandfilter
Exposure-Belichting
Druk in de instelling voor belichting op MENU ( ) en TIME ( )
om de belichtingstijd te verlengen ( + ) of verkorten ( - ) en druk
op OK om af te sluiten.
Custom Image-Aangepaste afbeelding
Bepaal de Verzadiging, Contrast, Scherpte. Selecteer en voer
elke instelling in met MENU ( ) en TIME ( ) om het effect
aan te passen Druk op OK om af te sluiten.
Stel de juiste datum en tijd in voor uw camera.
1. Selecteer Datu en tijd instellen 2. Druk op het gemarkeerde veld op
MENU ( - ) om de waarde te verlagen, druk op TIME (+) om de waarde te
verhogen, druk op OK om te bevestigen en naar het volgende veld te
gaan. Druk na afloop op OK om de instelling te verlaten.
Set Date & Time-Datu en tijd instellen
This manual suits for next models
1
Table of contents
Languages:
Other Brinno Digital Camera manuals

Brinno
Brinno tlc200 f1.2 User manual

Brinno
Brinno TLC120 User manual

Brinno
Brinno TLC 2000 User manual

Brinno
Brinno TLC120 User manual

Brinno
Brinno SHC500 User manual

Brinno
Brinno TLC120 User manual

Brinno
Brinno TLC200 Pro User manual

Brinno
Brinno SHC500 User manual

Brinno
Brinno BFC100 User manual

Brinno
Brinno TLC 2000 User manual