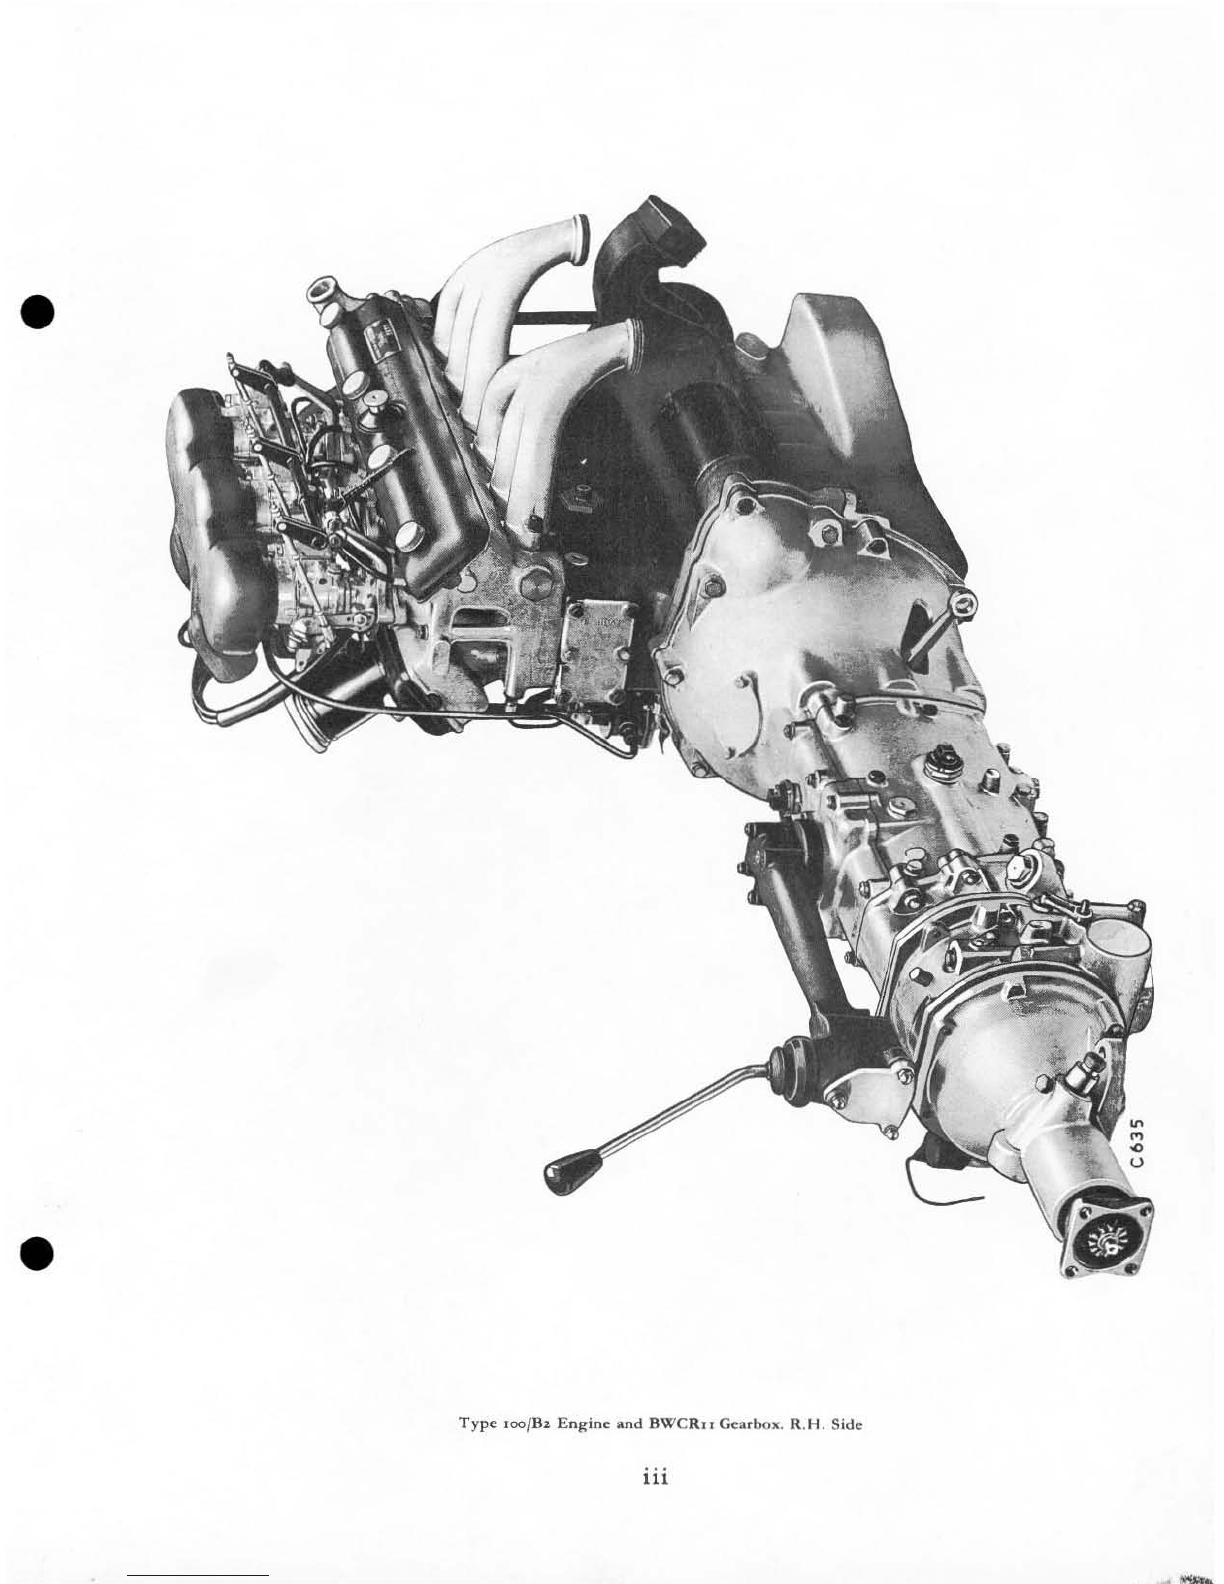
25
1.
2.
3.
4.
5.
6.
7.
8.
9.
10.
11.
12.
13.
2.
" " "
20
Fan.
Water
pump.
Inlet
rocker
cover
.
AII'
intake
manifold.
H.
T.
leads.
Air
clea
ner.
19
Petrol
feed
pipe
(pump
to
carbs
L
Oil feed pipe
co
rockers
.
Gearbox
remote
co
ntrol.
Rear
mounting.
Speedome
rer
drive
.
Cylinder
drain
coc
k.
Petrol
pump.
"
Key
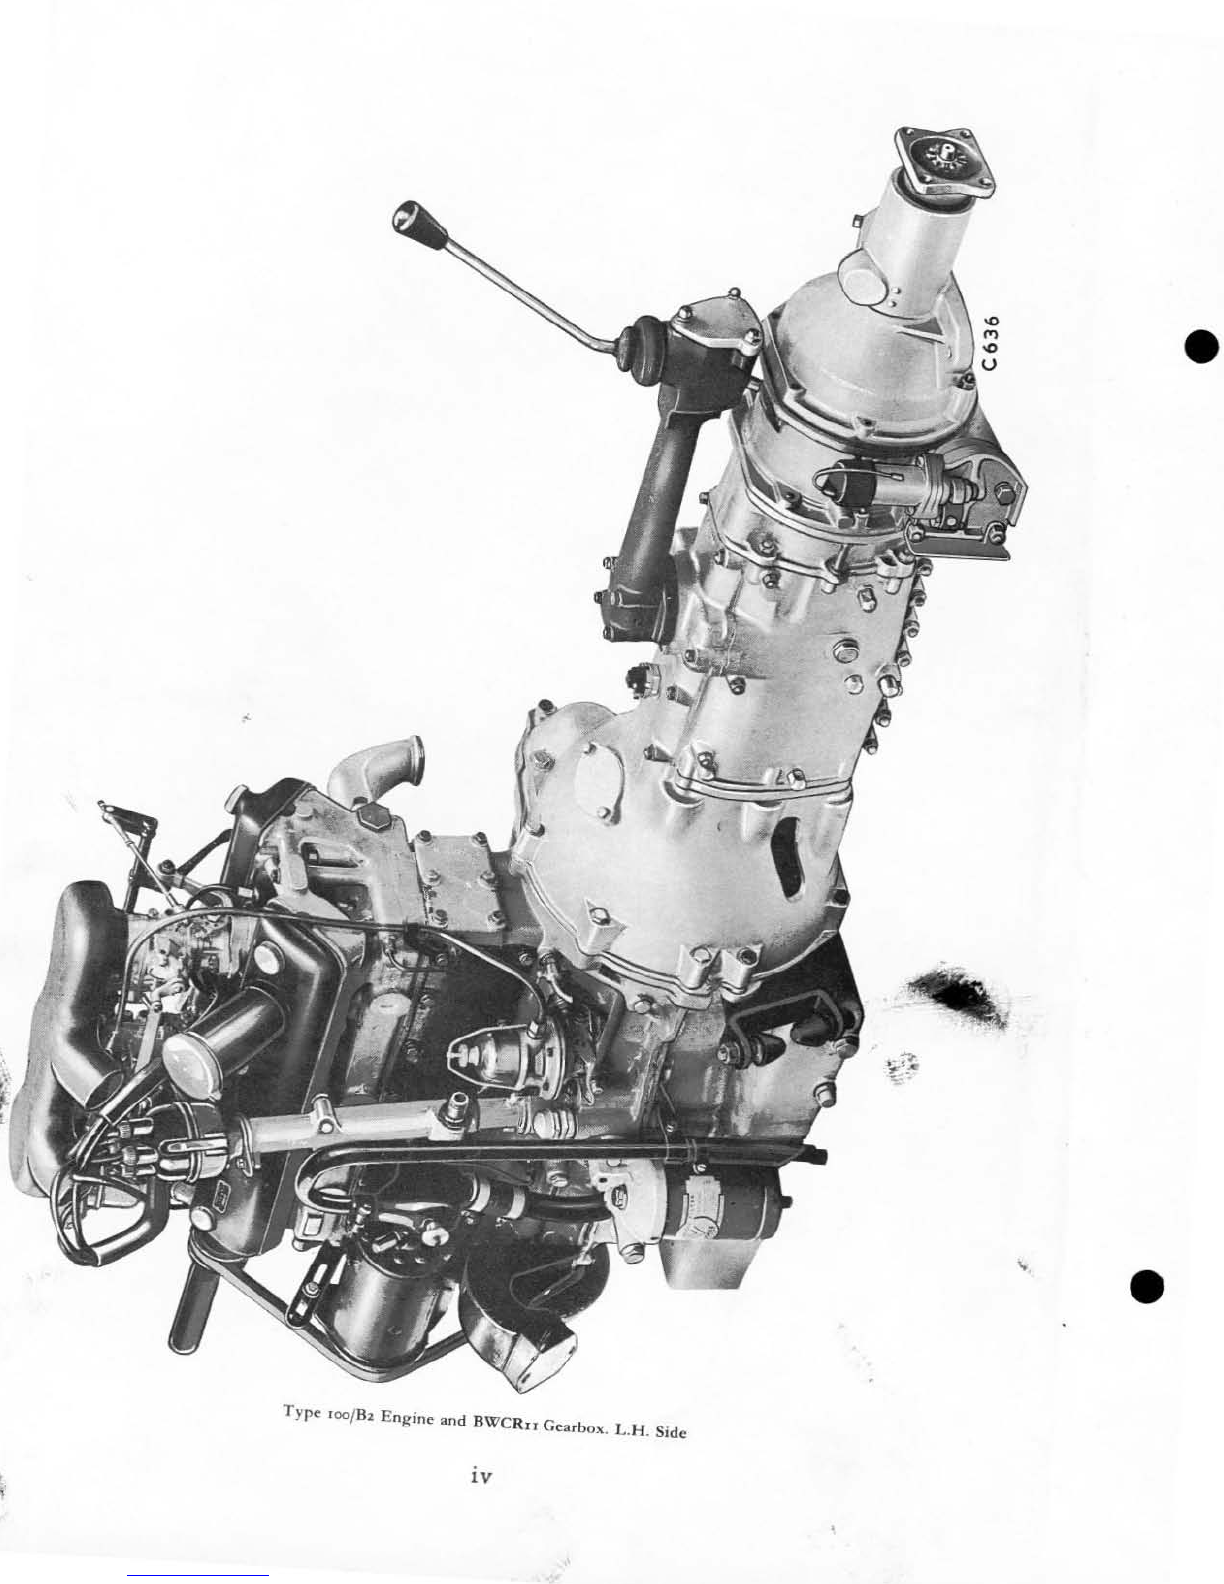
17
14.
15.
16.
17.
18.
19.
20.
21.
22
.
23.
24.
25
.
26.
"
Torque buffe
rs.
Sump
drain
plug.
Engine
breather
pipe.
10
Oil
thermometer
conn
ec
.tio
n.
Dipstick.
Oil
filter.
Oil
pressure
relief
valve.
Engine
speed
indica~or
drive.
Oil
return
pipe
separator.
Engine
fronc
mounting.
Dynamo.
Vibration
damper.
Gearbox l
evel
plug.
Type 100B
Engine
with BWCR7 Ge:.l,bo,.. L.H.
Side
u
•
•