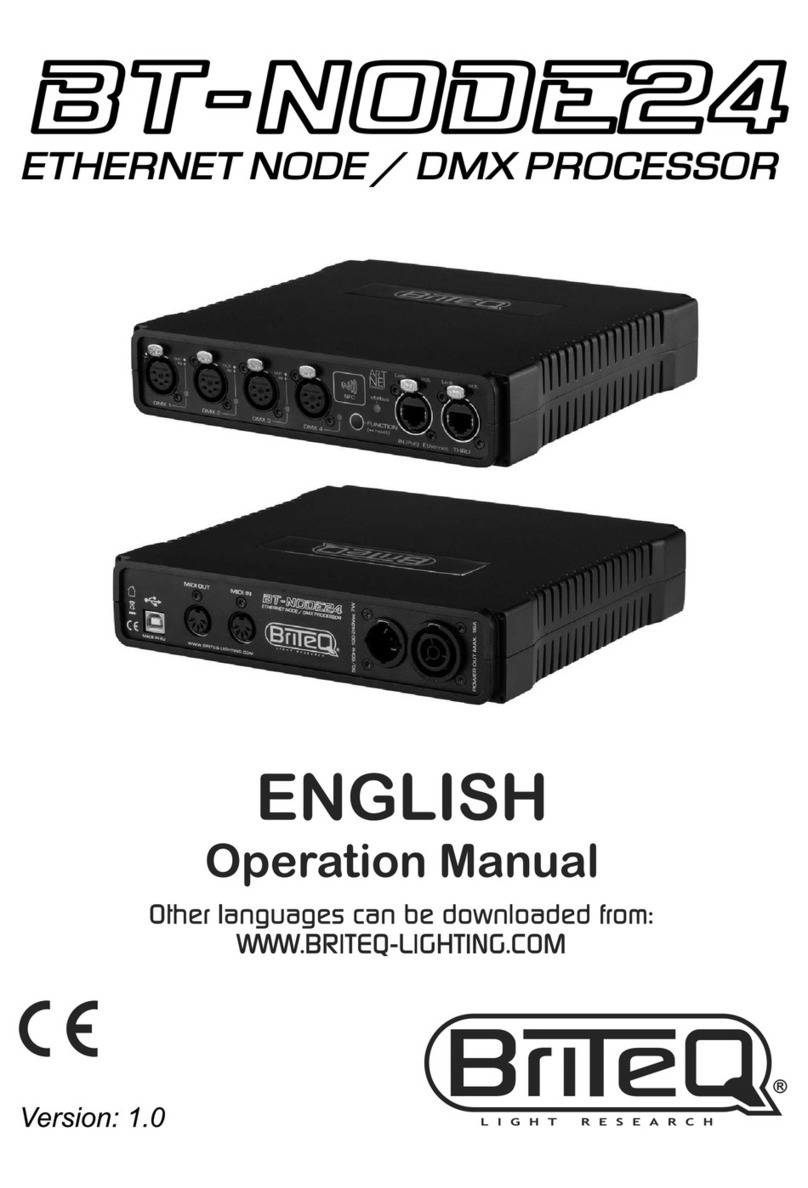
Briteq BT-NODE24 Mk2 User manual


ENGLISH USER MANUAL
BRITEQ®1/10 BT-NODE24 Mk2
OPERATION MANUAL
Thank you for buying this Briteq®product. To take full advantage of all possibilities and for your own safety,
please read these operating instructions very carefully before you start using this unit.
FEATURES
•High speed Art-Net and sACN Node with 4 highly configurable DMX ports.
•Gigabit Ethernet I/O, based on high-speed Marvell switch, without linking delay.
•Automatic Ethernet bypass on power fails.
•Perfect for install market with configurations over Art-Net support and DHCP.
•Complies to IEEE 802.3-2005 standard for fully compliant hi-speed Gigabit Ethernet over long cable lengths.
•Integrated web interface with support for mobile devices.
•Graphic OLED display for easy monitoring and setup.
•The 4 DMX ports can all be configured as in or outputs:
•Configured as input: normal mode
•Configured as output: single, LTP, HTP or ZERO mode.
•Multiple pre-defined presets available and custom presets.
•RDM over Art-Net compatible.
•All DMX ports are equipped with 3pin or 5pin Neutrik®XLR-connectors (both versions available)
•100% electrical isolation between all in/outputs: problems on 1 port will not influence the other ports.
•Power options:
•100-240VAC 50/60Hz Neutrik®TRUE-1 daisy chaining.
•PoE class 0 input. 36-57V
•Housing ½ 19” diecast housing with different installation options:
•1-unit fits 1U 19” rack (19” adapter included)
•2-units fit together in a 1U 19" rack (adapters included)
•Easy truss mounting with wall adapter (optional)
•Strong rubber protection adapters for stage use (optional)
•Developed by Briteq®in Belgium and made in Europe!
BEFORE USE
•Before you start using this unit, please check if there’s no transportation damage. Should there be any, do
not use the device and consult your dealer first.
•Important: This device left our factory in perfect condition and well packaged. It is absolutely necessary for
the user to strictly follow the safety instructions and warnings in this user manual. Any damage caused by
mishandling is not subject to warranty. The dealer will not accept responsibility for any resulting defects or
problems caused by disregarding this user manual.
•Keep this booklet in a safe place for future consultation. If you sell the fixture, be sure to add this user manual.
•To protect the environment, please try to recycle the packing material as much as possible.
Check the contents:
Check that the carton contains the following items:
•BT-NODE24 Mk2 (XLR 3pin or 5pin version)
•Operating instructions
•Power cable
•19” adapter to install 1 unit in a 19” rack
•19” adapter to install 2 units side by side in a 19” rack

ENGLISH USER MANUAL
BRITEQ®2/10 BT-NODE24 Mk2
SAFETY INSTRUCTIONS:
•To prevent fire or shock hazard, do not expose this appliance to rain or moisture.
•To avoid condensation to be formed inside, allow the unit to adapt to the surrounding temperatures when
bringing it into a warm room after transport. Condense sometimes prevents the unit from working at full
performance or may even cause damages.
•This unit is for indoor use only.
•Don’t place metal objects or spill liquid inside the unit. No objects filled with liquids, such as vases, shall be
placed on this appliance. Electric shock or malfunction may result. If a foreign object enters the unit,
immediately disconnect the mains power.
•No naked flame sources, such as lighted candles, should be placed on the appliance.
•Don’t cover any ventilation openings as this may result in overheating.
•Prevent use in dusty environments and clean the unit regularly.
•Keep the unit away from children.
•Inexperienced persons should not operate this device.
•Maximum save ambient temperature is 40°C. Don’t use this unit at higher ambient temperatures.
•Always unplug the unit when it is not used for a longer time or before you start servicing.
•The electrical installation should be carried out by qualified personal only, according to the regulations for
electrical and mechanical safety in your country.
•Check that the available voltage is not higher than the one stated on the rear panel of the unit.
•The socket inlet shall remain operable for disconnection from the mains.
•The power cord should always be in perfect condition: switch the unit immediately off when the power cord
is squashed or damaged. It must be replaced by the manufacturer, its service agent or similarly qualified
persons in order to avoid a hazard
•Never let the power-cord come into contact with other cables!
•This appliance must be earthed to in order comply with safety regulations.
•In order to prevent electric shock, do not open the cover. Apart from the mains fuse there are no user
serviceable parts inside.
•Never repair a fuse or bypass the fuse holder. Always replace a damaged fuse with a fuse of the same type
and electrical specifications!
•In the event of serious operating problems, stop using the appliance and contact your dealer immediately.
•Please use the original packing when the device is to be transported.
•Due to safety reasons it is prohibited to make unauthorized modifications to the unit.
MAINTENANCE
Clean by wiping with a polished cloth slightly dipped with water. Avoid getting water inside the unit. Do not use
volatile liquids such as benzene or thinner which will damage the unit.
CAUTION
CAUTION: To reduce the risk of electric shock, do not
remove the top cover. No user-serviceable parts inside.
Refer servicing to qualified service personnel only.
The lightning flash with arrowhead symbol within the equilateral triangle is intended to alert the
use or the presence of un-insulated “dangerous voltage” within the product’s enclosure that may
be of sufficient magnitude to constitute a risk of electric shock.
The exclamation point within the equilateral triangle is intended to alert the user to the presence
of important operation and maintenance (servicing) instructions in the literature accompanying
this appliance.
This symbol means: indoor use only
This symbol means: Read instructions

ENGLISH USER MANUAL
BRITEQ®3/10 BT-NODE24 Mk2
DESCRIPTION
FRONT PANEL
1. 4x XLR female connectors: DMX-in/outputs with XLR-3pin or XLR-5pin, depending on the version.
•LED on: port configured as output
•LED off: port not used (off state)
•LED blinking: port configured as input
IMPORTANT NOTE: All XLR-connectors are female, which is the standard
“DMX-output” connector. So if you configure a DMX-port as a “DMX-input”:
don’t forget to add an XLR male/male-adapter!
•Order optional XLR-3pin male/male adapters (order code: B01318)
•Order optional XLR-5pin male/male 0,5m cables (order code: B01208)
2. NAVIGATION BUTTONS: used to navigate the display (more information: see display functions)
•EXIT/▼-button:
•Short press: toggle between IP and PRESET-display or decrease the value of an option.
•2 second press: exit the current operation.
•ENTER/▲-button:
•Short press: choose one of the options or increase the value of an option.
•2 second press: select a parameter to change it. After changing, press again to save the
new parameter.
3. DISPLAY: shows the following information (also see chapter “DEVICE INTERFACE”)
•Upper left corner: the label (name) of the node is shown here to identify it in a bigger setup.
•Upper right corner: shows which information is displayed (IP-address / preset names / …)
•Lower part: IP-address parameters or the name of the currently loaded preset.
4. 2x Neutrik®RJ45 Ethercon: Gigabit network connection with one input for PoE.
•Link LED:
•Blinks when packets are received or sent.
•ACT. LED:
•1Gbit/s Gigabit connection: On.
•100Mbit/s or 10Mbit/s connection: Off.
REAR PANEL
5. USB port: Only used for service maintenance. Please do not use this port.
6. Neutrik®TRUE-1 power connector in /out: 100V –240V 50/60Hz. (16A linking capacity)
ABOUT ART-NET
Art-Net is an Ethernet protocol based on the TCP/IP protocol suite. Its purpose is to allow transfer of large
amounts of DMX512 data over a wide area using standard networking technology.
Credits: Art-Net™Designed by and Copyright Artistic License Holdings Ltd

ENGLISH USER MANUAL
BRITEQ®4/10 BT-NODE24 Mk2
DEVICE INTERFACE
The complete device can be configured from an intuitive Web interface. You just have to login on the IP address
of the unit. If you do not know the IP address, you can use Art-Net poll software like “DMX-Workshop”(free
downloadable tool: https://art-net.org.uk/resources/dmx-workshop/ ).
CONNECT TO A NETWORK
Press the ▼-button shortly until “Ip” is shown in the upper right corner of the display: the IP-address is shown.
By default, DHCP is enabled. After start-up the device will search for a DHCP server. This is indicated by the
display showing “DHCP Searching”. After a short time the display shows for example:
If no server is found after 30s, the display shows “DHCP Not Found” and the device takes a static IP address.
Make sure that the computer / network, used to open webpage, is setup in the correct network address range
(IP 2.x.x.x and subnet 255.0.0.0). Also make sure that the static IP-address does not conflict with already used
IP-addresses on the network.
DISPLAY: IP ADDRESS DHCP-MODE
In this display mode, no parameters can be adapted. You can only switch to “FIX” IP-address mode.
Switch to Fixed IP-address mode:
•Press ▲-button for 2s:
•“DHCP” will be highlighted
•press ▲-button again for 2s
•Display shows “Load Fixed ?”
•Press ▼-button to select “YES”
•Press ▲-button for 2s to confirm: the node will restart in FIXED IP-address mode.
→ →
DISPLAY: IP ADDRESS FIXED-MODE
In this display mode you can change the IP-address parameters (IP-address + Mask) or you can switch back
to “DHCP” IP-address mode:
Switch to DHCP IP-address mode:
•Press ▲-button for 2s:
•“Fixed” will be highlighted
•press ▲-button again for 2s
•Display shows “Load DHCP ?”
•Press ▼-button to select “YES”
•Press ▲-button for 2s to confirm: the node will restart in DHCP IP-address mode.
→ →
Change network parameters:
•Press ▲-button for 2s to start EDIT-mode:
•“Fixed” will be highlighted
•Press the ▼/▲-buttons shortly to choose line with parameters to change.
•Once the line is highlighted: press the ▲-button for 2s: the first digit is inversed
A. Press ▼-button to select the parameter you want to change
B. Press ▲-button for 2s to confirm: the digit starts flashing and is ready to be adapted.

ENGLISH USER MANUAL
BRITEQ®5/10 BT-NODE24 Mk2
→ → → →
C. Press the ▼/▲-buttons shortly to adjust the digits.
D. When the right digit is shown: press the ▲-button for 2s to confirm (display stops flashing)
E. Repeat the actions A→D to change other parameters
•When all parameters are adapted: press the ▼-button for 2s to stop EDIT-mode.
DISPLAY: PRESET-MODE
Press the ▼-button shortly until “Preset” is shown in the upper right corner of the display: the currently active
preset is shown.
Select a different Preset:
You can select either:
•One of the standard build-in presets.
•One of the 4 custom presets you made using the webpage of the device (see next chapter).
•Press ▲-button for 2s:
•The currently selected Preset will be highlighted
•Press the ▼/▲-buttons shortly to browse the available presets.
•Once the desire preset is shown: press ▲-button again for 2s to load it.
Example to switch from “DMX to Art-Net universe 1-4” to “Art-Net Clone”
→→ →

ENGLISH USER MANUAL
BRITEQ®6/10 BT-NODE24 Mk2
WEBPAGE INTERFACE
After all connections and setup on the computer are completed, open your favorite web browser (we
recommend Firefox) and enter the IP address you want to reach in the URL field: Http://2.x.x.x or the address
set by the DHCP server. The IP-address is indicated on the Display of the node.
The homepage of the BT-NODE24 Mk2 opens. This page has a complete overview of the DMX port settings.
Note1: press the small question mark buttons to get more information about a parameter.
Note2: the web page can be opened simultaneously on 1 or up to 2 different PCs.
The TOP of the screen contains 4 parts:
1. NAME (label) Tab: easy to identify a node when several devices are in the same installation. See point
(K) to know how to change the name / label of the nodes.
2. DMX PORTS Tab: used to configure all port settings.
A. Visual representation of the 4 I/O ports.
B. Port direction: Input, output or off.
•Input: Port used to inject DMX-in the port (male/male XLR-adapter needed)
•Output: port sends DMX-signals to the connected devices.
•Off: port not used
C. Protocol: Art-Net or sACN.
D. Port mode:
PORT DIRECTION = OUTPUT: the following modes are available:
•SINGLE: the DMX-signal is sent to the DMX Port from the selected Art-Net or sACN universe
in “Universe Number”.
•HTP: The DMX-signal is sent to the DMX Port from the IP merging of the selected Art-Net
universe in “Universe Number”. The BT-NODE24 Mk2 compares the values on the inputs and
sends the highest value to the DMX Port for each DMX channel.

ENGLISH USER MANUAL
BRITEQ®7/10 BT-NODE24 Mk2
•LTP: The DMX-signal is sent to the DMX Port from the merging of the selected Art-Net universe
in “Universe Number”. The BT-NODE24 Mk2 compares the values on the inputs and sends the
last changed value to the DMX Port for each DMX channel.
•ZERO: The BT-NODE24 Mk2 sends “0” to all channels.
PORT DIRECTION = INPUT: the following modes are available:
•NORMAL: the DMX Port receives the DMX-signal and sends it to the selected Art-Net or sACN
universe in the “Universe Number” section.
E. Frame Rate: When the port direction is set to output you can define the number of DMX frames sent
per second. The default setting is: 40 frames/second. But you can also select: 10, 15, 20, 25, 30 or
35 frames/second.
F. Universe Number: The used universe. Note. on some consoles like MA the universe 0 on this device
correspondents to the universe 1 on the MA.
G. RDM filter: turn RDM on or off.
H. No DMX behavior: when no new DMX-signal is available for 4s, the output can be set to Freeze or
Blackout.
Note: Use Blackout if effects like flamethrowers are connected.
3. PRESETS Tab:used to load, create presets
I. STANDARD Presets: to make life easier, 6 standard presets that are often used.
These are the most common factory standard presets in the node:
1. Art-Net to DMX universe 1-4: convert universe 1-4 from Art-Net to DMX.
2. Art-Net to DMX universe 5-8: convert universe 5-8 from Art-Net to DMX.
3. DMX to Art-Net universe 1-4: convert universe 1-4 from DMX to Art-Net.
4. DMX to Art-Net universe 5-8: convert universe 5-8 from DMX to Art-Net.
5. DMX splitter: Use port 1 as a DMX input and ports 2 to 4 as DMX output.
6. Art-Net clone: Convert 2 DMX inputs (port 1 and 2) into 2 separated Art-Net
outputs and duplicate them on ports 3 and 4.
J. CUSTOM Presets: the user can make and store up to 4 additional presets.
Loading presets: select / highlight the desired preset and press the “LOAD” button on the bottom.
Create a preset:
•First make the desired settings for all ports in the “DMX ports” Tab.
•When ready: Press the “CREATE” button and give the preset a name: the preset will be saved
and loaded, ready to be used.

ENGLISH USER MANUAL
BRITEQ®8/10 BT-NODE24 Mk2
4. SYSTEM Tab:used to adjust the general settings and perform firmware updates.
K. Name / Label: used to give the node a unique name so you can easily identify it on a network.
L. Network settings:
•DHCP:
•ON: the node receives its IP-setting from the DHCP-server on the network.
•OFF: the node uses a fixed address that can be set by the user. Make sure to choose a
unique IP-address to avoid problems.
•DHCP Search Time: used to determine how long the node should wait for a DHCP-server to
attribute an IP-address. When no DHCP-server is found, the node uses a static IP-address. The
standard waiting time is 30s.
•IP / Mask / Gateway: used to setup the static IP-address.
•Network Speeds: standard the node uses 1Gbit speed. You can Force the connection to
100Mbit if some devices on the network don’t support gigabit ethernet or you encounter
connection problems.
M. Front Panel: used to adjust the behavior of the display and LED-indicators:
•Blackout:
•ON: both the display and the LED-indicators are switched off to make sure that the node is
not visible in the truss on a stage. The display lights up when the ▲/▼-buttons are used
but goes dark again after a short time.
•OFF: the display and all indicators light up. The display goes dark while not used for a
while.
•Locate: to determine the physical location of the node in the installation, you can activate the
Locate function. The node's screen starts flashing so you can see where it is located.

ENGLISH USER MANUAL
BRITEQ®9/10 BT-NODE24 Mk2
N. Version:
•Hardware: indicates the version of the hardware of the node.
•Software: indicates the currently loaded software version of the node. If new software is
available on the product page of the website:
•Download the software and unzip it.
•Read the README file with changelog information BEFORE you start the update!
Important note: make sure to note down name/label of the node and the exact port
settings of the custom presets (take screen prints) because this information can be
overwritten by the new software and should be restored manually!
•Save the software file named “BtNode24.brtq” to your PC (DO NOT rename the file)
•Press the “UPDATE”-button on the webpage: the window below is shown.
•Press the “Choose File”-button and select the “BtNode24.brtq” file.
•Press the “Update”-button on the window and WAIT until node re-starts (Briteq logo
shown on the display of the node). The complete update takes at least 1minute!
•Check the IP-address on the display of the node and use it to load the webpage.
•Check if the software was correctly updated.
Note: If something goes wrong during a software update, the node may become unresponsive
(dead). Refer to the topic “load safe mode” in the troubleshooting section to learn how revive the
node after a failed firmware update.
O. System:
•Default Settings: When the device is rented out, it can be quickly restored to its factory values.
All default values are reloaded, and any custom presets are deleted.
Important note: use with care! Device labels + ALL presets, port/network settings are deleted!
•Reset Node: when something goes wrong or unexpected things happen, you can try to reset
the node. In this case the Device label + ALL presets, port/network settings are preserved.
MERGING FUNCTION
To use the BT-NODE24 Mk2 as a DMX merger we need two different sources. You must configure an output
to merge the signal of the two sources. The output merging option can be LTP (Last Takes Precedence) or
HTP (Highest Takes Precedence). The merging function on the BT-NODE24 is different from that on our BT-
NODE28. BT-NODE24 Mk2 uses “IP merging”instead of “Universe merging on our BT-NODE28. Meaning the
BT-NODE24 Mk2 will merge packets that have the same universe but a different source IP address. Hence
the setup is easier and better for back-up consoles:
1. Select LTP or HTP merge on one of the ports.
2. Connect 2 consoles on the network of the node.
3. Send on both consoles the same universe (note: be careful with universe selection on MA, universe
0 on this device correspondents to the universe 1 on MA).
4. The node checks the source IP address of both consoles and merges the universe automatically.
Note: Priority merging with sACN is also supported.

ENGLISH USER MANUAL
BRITEQ®10/10 BT-NODE24 Mk2
TROUBLESHOOTING
DEVICE KEEPS RESETTING OR IS NOT STARTING
If the device resets in a loop or if it does not start you can try to update the firmware. If you cannot access the
web page: use the safe mode. If the LOAD SAFE MODE is not working either, please contact your local dealer.
I CAN'T REACH THE WEB INTERFACE
Check if the link and/or activity leds are on. If so, make sure the IP range of the BT-NODE24 Mk2 is the same
as on your computer or console. Try to ping the BT-NODE24 Mk2 with a dedicated application, such as a DOS
session on Windows, or a terminal session on MAC. If this is not working, try to update the device in the LOAD
SAFE MODE or contact your local dealer.
LOAD SAFE MODE
When a firmware update fails and the device is not working anymore, you can load new firmware in the safe
mode:
1. Turn off the BT-NODE24 Mk2.
2. Press the ▲-button while turning on the BT-NODE24 Mk2.
3. The node starts in safe mode (port4 led is on + dark display)
4. Release the ▲-button
5. Wait for about 1minute until the display shows a white screen with “2.1.2.3”
6. Connect a PC directly to one of the Ethernet ports of the node.
Note: Make sure the PC is in the same address range as the node: for example, give the PC an IP
address like 2.1.2.1
7. Open the browser on the PC and go to the IP address http://2.1.2.3
Note: for this update Google Chrome browser is recommended.
8. A simple page opens where you can select the new firmware file ( BtNode24.brtq )
9. Load the file and press the UPLOAD-button on the PC: the display on the node turns dark while the
port4 led is blinking. After about 1 minute the display shows the Briteq-logo and restarts with the new
software.
Done!
SPECIFICATIONS
This unit is radio-interference suppressed. This product meets the requirements of the current European and
national guidelines. Conformity has been established and the relevant statements and documents have been
deposited by the manufacturer.
Mains Input: AC 100-240V, 50/60Hz
Power consumption: 7 Watt
Power connection: Neutrik TRUE-1 100V–240V 50/60Hz
PoE (Power over Ethernet): PoE class 0 input. 36-57V
DMX connections: 4x 3pin-XLR or 5pin-XLR female
Ethernet connections: 2x Neutrik RJ45 Ethercon (Gigabit)
Size: 222 x 44 x 205 mm (19" / 1U)
Weight: 1.25 kg
All information is subject to change without prior notice
You can download the latest version of this user manual on our website: www.briteq-lighting.com


WWW.BRITEQ-LIGHTING.COM
Copyright © 2023 by BEGLEC NV
‘t Hofveld 2C ~ B1702 Groot-Bijgaarden ~ Belgium
Reproduction or publication of the content in any manner, without express permission of the publisher, is prohibited.
MAILING LIST
EN: Subscribe today to our mailing list for the latest product news!
FR: Inscrivez-vous à notre liste de distribution si vous souhaitez suivre l'actualité de nos produits!
NL: Abonneer je vandaag nog op onze mailinglijst en ontvang ons laatste product nieuws!
DE: Abonnieren Sie unseren Newsletter und erhalten Sie aktuelle Produktinformationen!
ES: Suscríbete hoy a nuestra lista de correo para recibir las últimas noticias!
PT: Inscreva-se hoje na nossa mailing list para estar a par das últimas notícias!
Table of contents
Other Briteq Computer Hardware manuals
Popular Computer Hardware manuals by other brands

ICP DAS USA
ICP DAS USA A-626 user manual

DSM Computer AG
DSM Computer AG 96D2431o user guide

IBM
IBM QLogic 4Gb Fibre Channel Expansion Card At-a-glance guide

Alphacool
Alphacool Core Geforce RTX 4090 Founders Edition quick start guide

Measurement Computing
Measurement Computing PCI-2517 user guide

Intel
Intel SL6NQ - Xeon 2.4 GHz/533MHz/512 KB CPU Processor... specification