© 2018 Brivo Systems LLC. All rights reserved. P-MAN-PUB-Allegion AD400
Conguration Guide 1.0
6
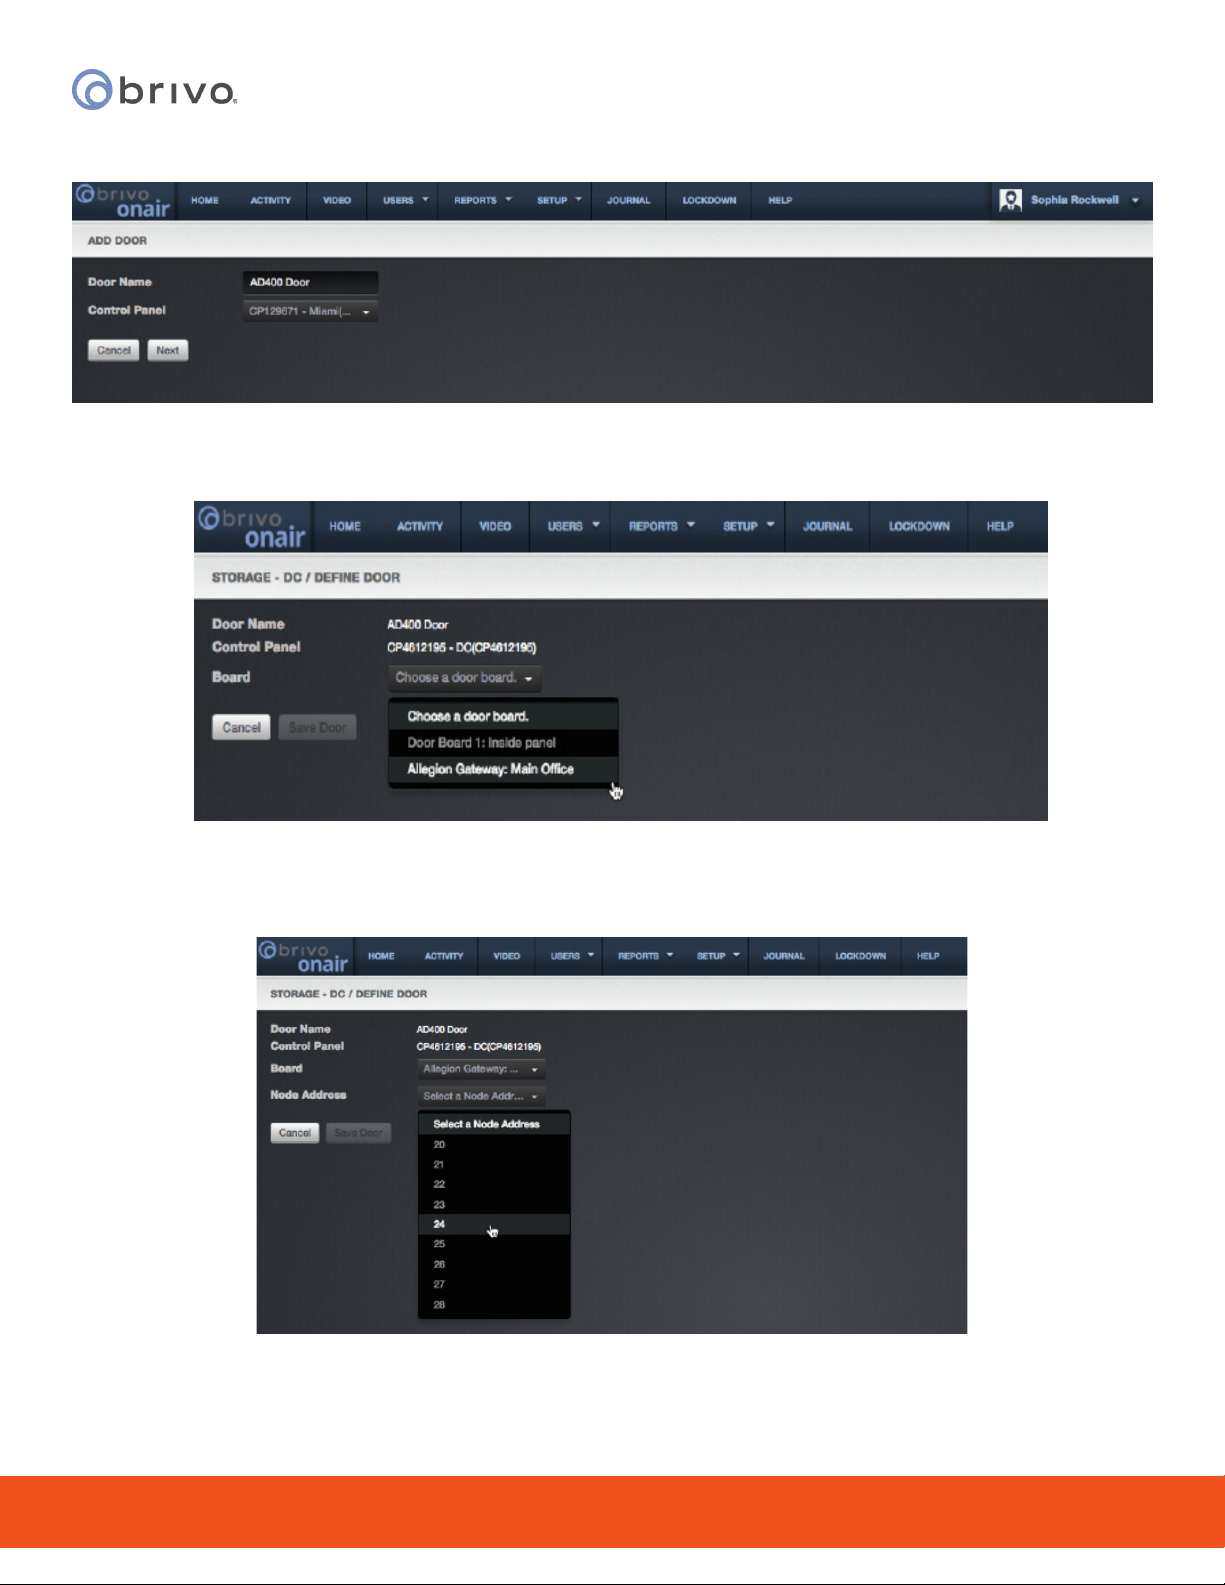
Allegion AD400 Conguration Guide
10. When Coupling is successful, a message will be displayed on the screen.
Update the AD400 Wireless Lock rmware
1. Select Device Options.
2. Select Update rmware for the AD400 Wireless Lock.
3. Select the latest package, wait, then click OK.
5. Wait for 3-5 minutes while the rmware updates. DO NOT unplug the HHD during this process.
Conguring an Allegion AD400 Wireless Lock
Note: These steps should be carried out for each AD400 Wireless Lock in use.
1. Wake up the AD400 Wireless Lock by pressing the Schlage button twice. The lock will be displayed on the
screen.
2. In SUS, select Device Options.
3. In SUS, select Lock Properties.
4. In SUS, select the Edit tab.
5. Scroll down to locate Comm Fail and Battery Fail and change to Fail Secure for both options.
6. In SUS, select Door Properties.
7. Set the Door Lock Address of the AD400 Wireless Lock to a unique address equal to, or between, the Low
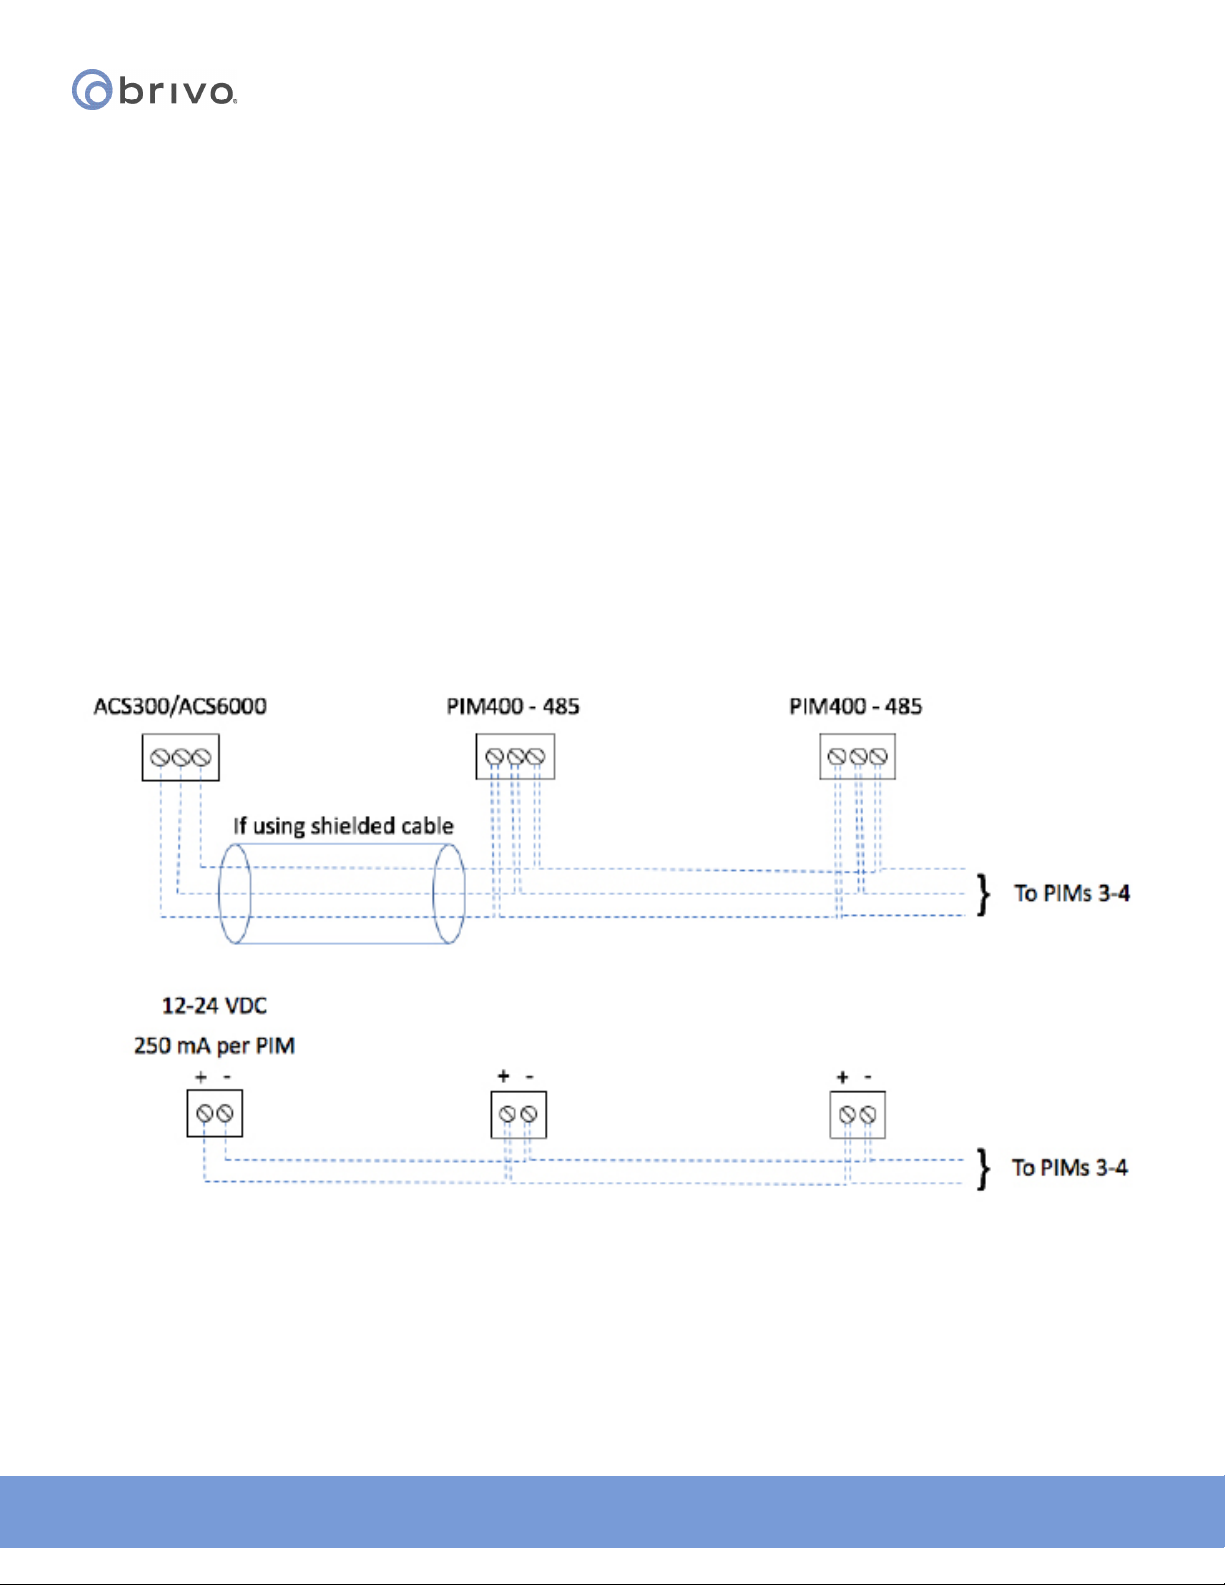
and High door numbers for the connected PIM400-485 as per table Conguring the PIM400-485.
8. Write down the Door Lock Address for your AD400 Wireless Lock. This address will be required when
conguring the AD400 Wireless Lock within Brivo Onair.
Linking an AD400 Wireless Lock and a PIM400-485 Unit
Note: To proceed, the PIM400-485 unit must be in Link Mode (see above).
1. Hold down the inside lever of the AD400 Wireless Lock.
2. While holding down the lever, present a credential to the AD400 Wireless Lock. For a keypad reader, press
the # sign. For non-keypad readers, simply press the Schlage button twice.
3. While still holding down the lever, wait until the AD400 Wireless Lock begins to quickly ash red/green
continuously (this indicates the linking process has started and will last approximately eight seconds).
4. Release the inside lever. The Schlage button will blink green and the beeper will beep. If using the default
Frequency Channel (default is one), you should see one green ash and hear one beep.
5. If the linking fails, the Schlage button will blink red three times and you will hear ve short beeps. The
PIM400-485 unit will remain in link mode. Carefully repeat the linking process. If failures continue, change
the Frequency Channel of the PIM400-485 unit and/or move the PIM400-485 unit to a dierent location and
then reattempt the link process.