Brother MD-601 User manual

AC
SERVOMOTOR
AC-SERVOMOTOR
SERVOMOTEUR
AC
SERVOMOTOR
DE
AC
I MD-601
'--------1
MD-611
INSTRUCTION MANUAL
BEDIENUNGSANLEITUNG
MANUEL D'INSTRUCTIONS
MANUAL
DE
INSTRUCCIONES
Please read
this
instruction
manual
before
using
the
machine.
Please keep
this
instruction
manual
within
easy reach
for
quick
reference.
Bitte
vor
Gebrauch
der
Maschine
diese
Bedienungsanleitung
lesen!
Bitte
halten
Sie
diese
Bedienungsanleitung
stets
griffbereit
zur
schnellen
Orien-
tierung!
Veuillez
lire
ce
manuel
d'instructions
avant
d'ut
i
liser
Ia
machine
.
Veuillez
garder
ce
manuel
d'instructions
pres
de
vous
pour
une
verification
ra-
pide
.
Por
favor
lea
este
manual
de
instrucciones
antes
de
usar
Ia
maquina.
Por
favor
guarde
este
manual
de
instrucciones
al
alcance
de
Ia
mano
para una
rapida referencia.
,,
'
I I
,,
t I I
II
II
II
,1
,,,,
I
't
I I 1
t
,,
I I
It/
...
,,
~~
'•
I
I
Ill
I I I
I I I
Ill
,,,
,
,,
j
From the library of: Superior Sewing Machine & Supply LLC
Thank you
for
purchasing the Brother AC servomotor
for
industrial sewing machines. Using the motor correctly
is important
for
fully utilizing the motor's performance. Before using the motor,
be
sure
to
read this instruction
manual. Furthermore,
as
we
are continually improving our products
as
a result
of
continuing research, the spe-
cifications
for
the product which you have purchased may differslightly
from
those listed in this manual.
Vielen Dank
fur
den Kauf des AC-Servomotors von Brother
fur
industrielle Nahmaschinen. Richtige Verwen-
dung des Motors ist wichtig, urn das hohe Leistungsvermogen des Motors voll nutzen
zu
konnen. Vor Verwen-
dung des Motors, unbedingt die Bedienungsanleitung aufmerksam durchlesen. Wegen der stetigen Weiterent-
wicklung unserer Produkte ist
es
moglich, daB die technischen Daten des von Ihnen gekauften Produktes ge-
ringfugig von denen in dieser Bedienungsanleitung angegebenen abweichen konnen.
Nous vous remercions d'avoir achete le servomoteur
AC
de Brother pour mchines a coudre industrielles. Pour
profiter
au
maximum des possibilites du moteur, il faut avant
tout
l'utiliser correctement. Avant d'utiliser le
moteur, lire attentivement le present manuel d'instructions.
De
plus,
en
raison des ameliorations que nous ap-
portons continuellement anos produits suite a nos recherches permanentes, il
se
peut que les specifications du
produit que vous avez achete different legerement de celles figurant dans le present manuel.
Gracias por haber adquirido un servomotor de AC de Brother para maquinas de coser industriales.
La
utilizaci6n
correcta del
motor
es
importante para aprovechar
al
maximo las prestaciones del motor. Antes de utilizar
el
motor,
lea
el
presente manual de instrucciones. Ademas, como resultado de las mejoras que estamos realizan-
do
continuamente
en
nuestros productos las cuales son el resultado de las investigaciones que realizamos con-
tinuamente, las especificaciones del producto que haya adquirido pueden ser un poco diferentes de las especi-
ficadas en este manual.
SAFETY INSTRUCTIONS
SAFETY INDICATIONS AND THEIR MEANINGS
This instruction manual and the indications and symbols that are used on the machine itself are provided in
order to ensure safe operation
of
this machine and
to
prevent accidents and injury
to
yourself or other people.
The meanings
of
each indication and symbol are classified
as
shown below in accordance
with
the degree and
type
of
damage
or
injury that each one represents. The instructions following each indication and symbol must
always be strictly observed.
SICHERHEITSHINWEISE
SICHERHEITSHINWEISE UNO IHRE BEDEUTUNG
Diese Bedienungsanleitung und die Hinweise und Symbole auf der Maschine sollen einen sicheren Betrieb der
Maschine sicherstellen und die Unfall- und Verletzungsgefahr verringern.
Die Bedeutung
der
einzelnen Ausdrucke und Symbole sind wie
folgt
nach dem Grad der Beschadigungs- und
Verletzungsgefahr eingeteilt. Die Anweisungen, die den Ausdrucken und Symbolen folgen, mussen strikt einge-
halten werden.
INSTRUCTIONS DE
SECURITE
INDICATIONS
DE
SECURITE
ET
LEUR SIGNIFICATION
Ce
manuel d'instructions et les indications et symboles figurant sur
Ia
machine elle-meme permettent d'utiliser
Ia
machine
en
toute securite et d'eviter des accidents et des blessures avotre entourage
eta
vous-meme.
Les
significations de chaque indication
et
de chaque symbole sont classees comme indique ci-dessous selon le
degre et le type d'endommagement ou de blessure que chacun
d'eux
represente.
Les
instructions suivant cha-
que indication
et
chaque symbole doiventetre toujours strictement respectees.
INSTRUCCIONES DE SEGURIDAD
INDICACIONES
DE
SEGURIDAD V SUS SIGNIFICADOS
Las
indicaciones y simbolos usados
en
este manual de instrucciones y
en
Ia
misma maquina son para asegurar
el
funcionamiento seguro de
Ia
maquina y para evitar accidentes y heridas.
Los significados de cada indicaci6n y simbolo
se
clasifican de
Ia
manera indicada a continuaci6n de acuerdo con
el
grado y
tipo
de dano o herida que representan.
Las
instrucciones que acompanan estas indicaciones y simbo-
los
se
deben tener
muy
en cuenta.
From the library of: Superior Sewing Machine & Supply LLC

Indications
Hinweise
Indications
lndicaciones
The indications which are used in this manual and their meanings are shown below.
Die in dieser Bedienungsanleitung verwendeten Ausdrucke und ihre Bedeutung sind nachstehend aufgefuhrt.
Les
indications utilisees dans le presentmanuel
et
leurs significations sont indiquees ci-dessous.
Las
indicaciones que
se
usan
en
este manual y sus significados
se
indican a continuaci6n.
A Warning
....................
.
A Warnung
A Avertissement
.....
A Aviso
............................
.
A Caution
.....................
.
A Achtung
...................
.
A Attention
A Atencion
..................
.
Failure
to
observe the instructions which appear after this indi-
cation while using the
motor
will almost certainly result in death
or
severe injury
to
the user.
Die Anweisungen, die diesem Ausdruck folgen, sind
fur
Gefah-
rensituationen bei Verwendung des Motors, bei deren MiBach-
tung eine hohe Verletzungsgefahr oder sogar Lebensgefahr be-
steht.
Si
l'on ne respecte pas les instructions mentionnees apres cette
indication lorsqu'on utilise le moteur, il y aura une tres grande
probabilite de blessures ou de deces de l'utilisateur.
Las
instrucciones a continuaci6n de esta indicaci6n representan
situaciones
en
las cuales
el
no respetar las instrucciones
al
usar
el
motor
seguramente puede resultar en heridas serias o muer-
te.
Failure
to
observe the instructions which appear after this indi-
cation while using the
motor
could possibly result in slight
to
moderate injuryto the user,
or
physical damage.
Die Anweisungen, die diesem Ausdruck folgen, sind
fur
Gefah-
rensituationen bei Verwendung des Motors, bei deren MiBach-
tung eine geringere Verletzungsgefahr oder Beschadigungsge-
fahr besteht.
Si
l'on
ne
respecte pas les instructions mentionnees apres cette
indication lorsqu'on utilise le moteur, il y aura un risque de bles-
sures legeres ou moyennes de l'utilisateur, ou d'endommage-
mentde
Ia
machine.
Las
instrucciones a continuaci6n de esta indicaci6n representan
situaciones
en
las cuales
el
no respetar las instrucciones
al
usar
el
motor
posiblemente puede resultar
en
heridas moderadas a
leves o danos.
-i-
From the library of: Superior Sewing Machine & Supply LLC

Symbols
Symbole
Symboles
Simbolos
The symbols which are used in this manual and their meanings are shown below.
Die in dieser Bedienungsanleitung verwendeten Symbole und ihre Bedeutung sind nachstehend aufgefuhrt.
Les
symboles utilises dans
ce
manuel et leurs significations sont indiques ci-dessous.
Los simbolos que
se
usan
en
este manual y sus significados
se
indican acontinuaci6n.
Lt
....................................
This symbol is used to indicate the danger
of
electric shocks.
Lt
....................................
Mit
diesem Symbol wird auf die Gefahr von elektrischen Schlagen hin-
gewiesen.
Lt
....................................
Ce
symbole indique
Je
danger d'electrocution.
Lt
....................................
Este
simbolo
se
usa
para indicar que existe peligro de golpes electri-
cos.
~
....................................
This symbol is used
to
indicate general cautions that should be ob-
served.
~
....................................
Mit
diesem Symbol
wird
auf allgemeine VorsichtsmaBnahmen hinge-
wiesen, die beachtet werden mussen.
~
....................................
Ce
symbole indique les precautions generales aprendre.
~
....................................
Este
simbolo
se
usa
para indicar que
se
debe tener cuidado
en
general.
•
....................................
This symbol is used
to
indicate that the ground connection must be
made.
•
....................................
Mit
diesem Symbol wird darauf hingewiesen, daB ein ErdungsanschluB
gemachtwerden muB.
•
....................................
Ce
symbole indique qu'il faut faire
Ia
connexion de terre.
•
....................................
Este
simbolo
se
usa
para indicar que
se
debe conectar a tierra.
8
....................................
This symbol is used to indicate general actions which you must
do
.
8
....................................
Mit
diesem Symbol werden allgemeine MaBnahmen bezeichnet, die
gemachtwerden mussen.
8
....................................
Ce
symbole indique
Jes
actions generales qu'il faut effectuer.
8
....................................
Este simbolo
se
usa para indicar procedimientos generales que debe
realizar.
(S)
....................................
This symbol is used
to
indicate general actions which you must
not
do.
(S)
....................................
Mit
diesem Symbol werden allgemeine MaBnahmen bezeichnet, die
Sie unterlassen mussen.
(S)
....................................
Ce
symbole indique les actions generales qu'il
ne
faut pas effectuer.
(S)
....................................
Este
simbolo
se
usa
para indicar procedimientos generales que no de-
be realizar.
-
ii-
From the library of: Superior Sewing Machine & Supply LLC
Cautions
with
regard
to
safety
Vorsichtshinweise zur Sicherheit
Precautions de securite
Precauciones con respecto a Ia seguridad
The warnings and cautions
with
regard
to
safety listed in this manual are shown below.
Die Warnungen und AchtungsmaBnahmen, die hinsichtlich der Sicherheit in dieser Anleitung aufgefOhrt sind,
sind nachfolgend gezeigt.
Les
avertissements
et
les attentions relatives a
Ia
securite utilisees dans
le
present manuel sont indiquees ci-
dessous.
A continuaci6n
se
da una lista de los avisos y atenciones para
su
seguridad.
A
Warning
A
Warnung
A
Avertissement
A
Aviso
/A.
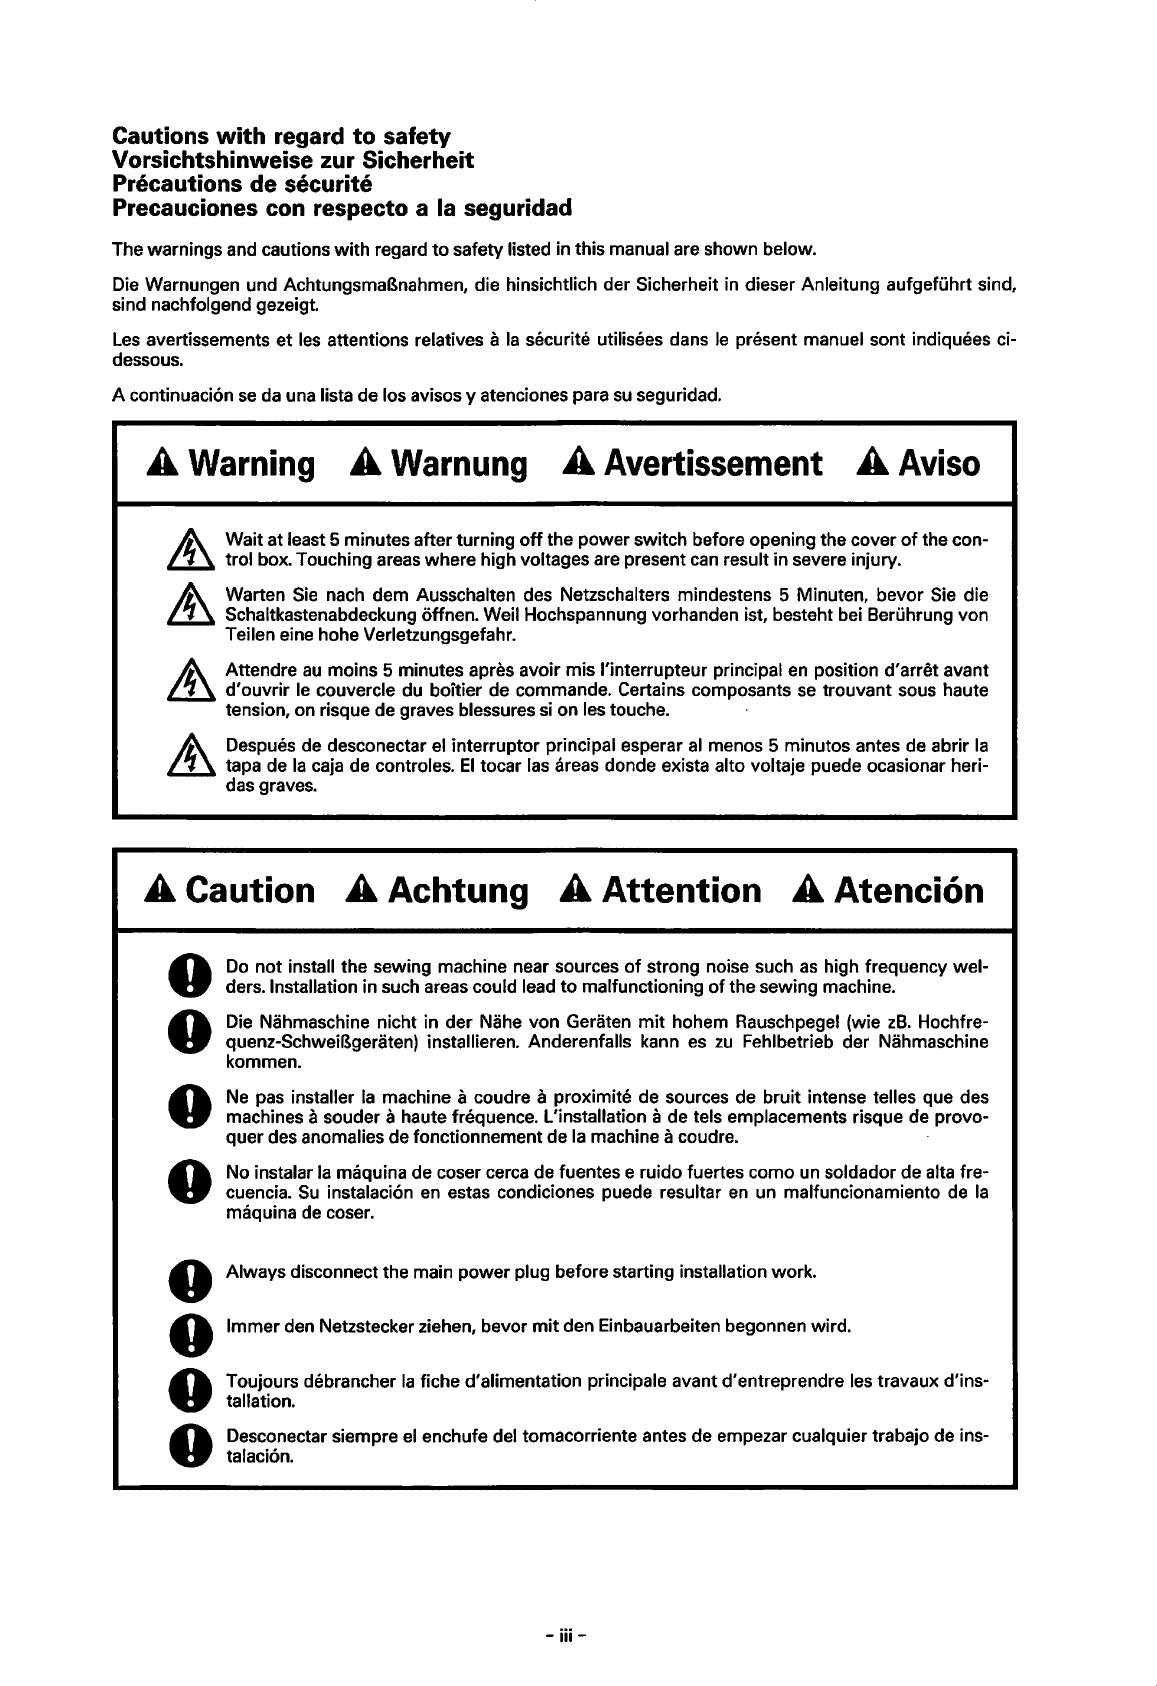
Waitat least 5 minutes afterturning
off
the powerswitch before opening the cover
of
the con-
~
trol box. Touching areas where high voltages are present
can
result in severe injury.
/A.
Warten Sie nach dem Ausschalten des Netzschalters mindestens 5 Minuten, bevor Sie die
~
Schaltkastenabdeckung offnen. Weil Hochspannung vorhanden ist, besteht bei Beruhrung von
Teilen eine hohe Verletzungsgefahr.
/A.
Attendre
au
moins 5 minutes apres avoir mis l'interrupteur principal
en
position d'arret avant
~
d'
ouvrir le couvercle du boitier de command
e.
Certains composants
se
trouvant so
us
haute
tension, on risque de graves blessures si on les touche.
/A.
Despues de desconectar
el
interruptor principal esperar
al
menos 5 minutos antes de abrir
Ia
~
tapa de
Ia
caja de controles.
El
tocar las areas donde exista alto voltaje puede ocasionar heri-
das graves.
A Caution A Achtung A Attention A Atenci6n
0
0
0
0
0
0
0
0
Do
not
install the sewing machine near sources
of
strong noise such
as
high frequency wel-
ders. Installation in such areas could lead
to
malfunctioning
of
the sewing machine.
Die Nahmaschine nicht in der Nahe von Geraten
mit
hohem Rauschpegel (wie
zB.
Hochfre-
quenz-SchweiBgeraten) installieren. Anderenfalls kann
es
zu
Fehlbetrieb der Nahmaschine
kommen.
Ne
pas installer
Ia
machine acoudre aproximite de sources de bruit intense telles que des
machines asouder ahaute frequence. L'installation ade tels emplacements risque de provo-
quer des anomalies defonctionnement de
Ia
machine acoudre.
No instalar
Ia
maquina de coser cerca de fuentes e ruido fuertes como un soldador de alta fre-
cuencia.
Su
instalaci6n
en
estas condiciones puede resultar
en
un malfuncionamiento de
Ia
maquina de coser.
Always disconnect the main power plug before starting installation work.
lmmer
den Netzstecker ziehen, bevor
mit
den Einbauarbeiten begonnen wird.
Toujours debrancher
Ia
fiche d'alimentation principale avant d'entreprendre les travaux d'ins-
tallation.
Desconectar siempre
el
enchufe del tomacorriente antes de empezar cualquier trabajo de ins-
talaci6n.
-iii-
From the library of: Superior Sewing Machine & Supply LLC
A Caution A Achtung A Attention
AAtenci6n
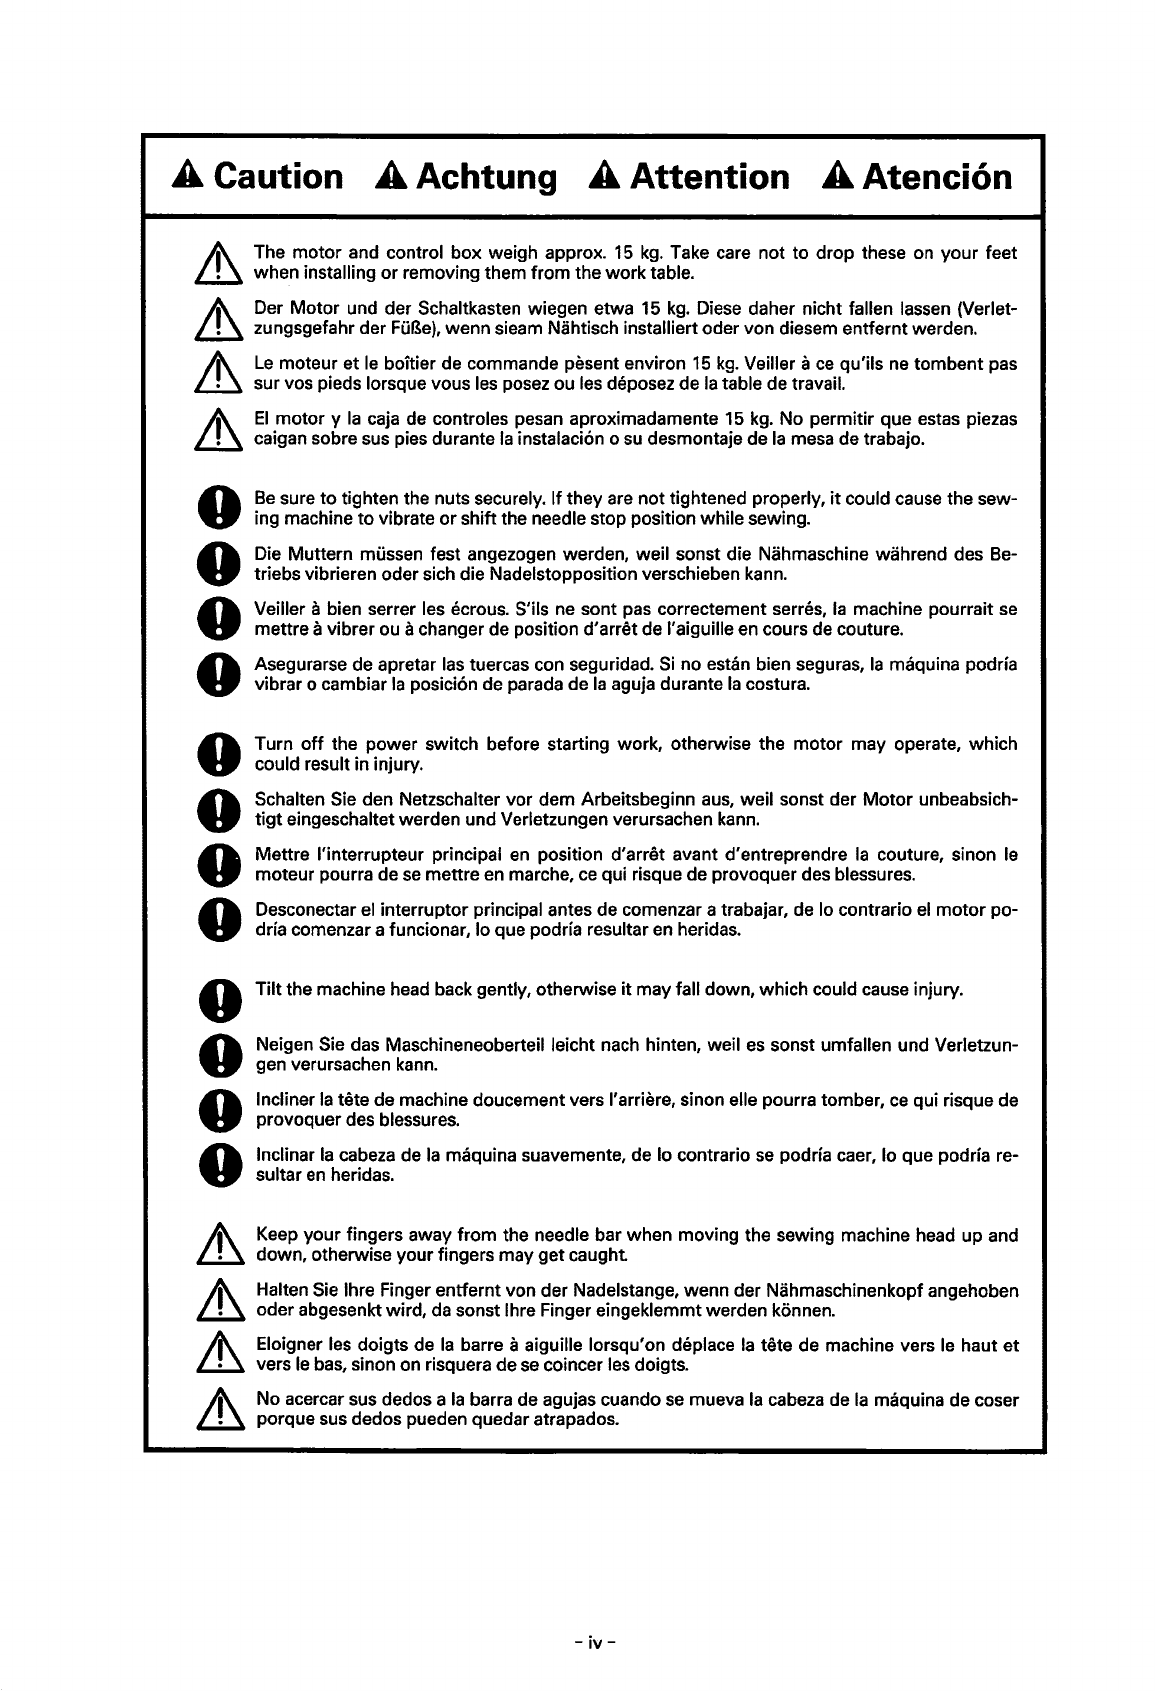
A\ The motor and control box weigh approx.
15
kg.
Take care not to drop these on your feet
~
when installing or removing them from the
work
table.
A\ Der
Motor
und der Schaltkasten wiegen etwa 15
kg.
Diese daher nicht fallen lassen (Varlet-
~
zungsgefahr der
FGBe),
wenn sieam Nahtisch installiert oder von diesem entferntwarden.
0
0
0
0
0
0
0
0
0
0
0
0
Le
moteur et
le
boitier de commande pesent environ
15
kg.
Veiller
ace
qu'ils
ne
tombent pas
sur vos pieds lorsque vous les posez ou les deposez de
Ia
table de travail.
El
motor y
Ia
caja de controles pesan aproximadamente 15
kg.
No permitir que estas piezas
caigan sobre sus pies durante
Ia
instalaci6n o
su
desmontaje de
Ia
mesa de trabajo.
Be
sure
to
tighten the nuts securely. Ifthey are
not
tightened properly,
it
could cause the sew-
ing machine
to
vibrate
or
shiftthe needle stop position while sewing.
Die Muttern mussen fest angezogen warden, weil sonst die Nahmaschine wahrend des Be-
triebs vibrieren oder sich die Nadelstopposition verschieben kann.
Veiller a bien serrer les ecrous. S'ils
ne
sont pas correctement serres,
Ia
machine pourrait
se
mettre a vibrer ou achanger de position d'arn3t de l'aiguille en cours de couture.
Asegurarse de apretar las tuercas con seguridad.
Si
no estan bien seguras,
Ia
maquina podria
vibrar o cambiar
Ia
posicion de parada de
Ia
aguja durante
Ia
costura.
Turn
off
the power switch before starting work, otherwise the motor may operate, which
could result in injury.
Schalten Sie den Netzschalter vor dem Arbeitsbeginn
aus,
weil sonst der
Motor
unbeabsich-
tigt
eingeschaltet warden und Verletzungen verursachen kann.
Mettre l'interrupteur principal
en
position d'arret avant d'entreprendre
Ia
couture, sinon le
moteur pourra de
se
mettre
en
marche,
ce
qui risque de provoquer des blessures.
Desconectar
el
interruptor principal antes de comenzar a trabajar, de lo contrario
el
motor
po-
dria comenzar a funcionar, lo que podria resultar
en
heridas.
Tilt
the machine head back gently, otherwise
it
may fall down, which could cause injury.
Neigen Sie das Maschineneoberteil Ieicht nach hinten, weil
es
sonst umfallen und Verletzun-
gen verursachen kann.
Incliner
Ia
tete de machine doucement vers l'arriere, sinon elle pourra tomber, ce qui risque de
provoquerdes blessures.
lnclinar
Ia
cabeza de
Ia
maquina suavemente, de lo contrario
se
podria caer, lo que podria re-
sultar
en
heridas.
Keep your fingers away
from
the needle bar when moving the sewing machine head up and
down, otherwise your fingers may get
caught
Halten Sie lhre Finger entfernt von der Nadelstange, wenn der Nahmaschinenkopf angehoben
oder abgesenkt wird, da sonst lhre Finger eingeklemmtwarden konnen.
Eloigner les doigts de
Ia
barre a aiguille lorsqu'on deplace
Ia
tete de machine vers le haut
et
vers le bas, sinon on risquera de
se
coincer les doigts.
No acercar sus dedos a
Ia
barra de agujas cuando
se
mueva
Ia
cabeza de
Ia
maquina de coser
porque sus dedos pueden quedar atrapados.
-
iv-
From the library of: Superior Sewing Machine & Supply LLC
A Caution A Achtung A Attention A Atenci6n
0
0
0
0
0
0
0
0
0
0
0
0
•
•
•
•
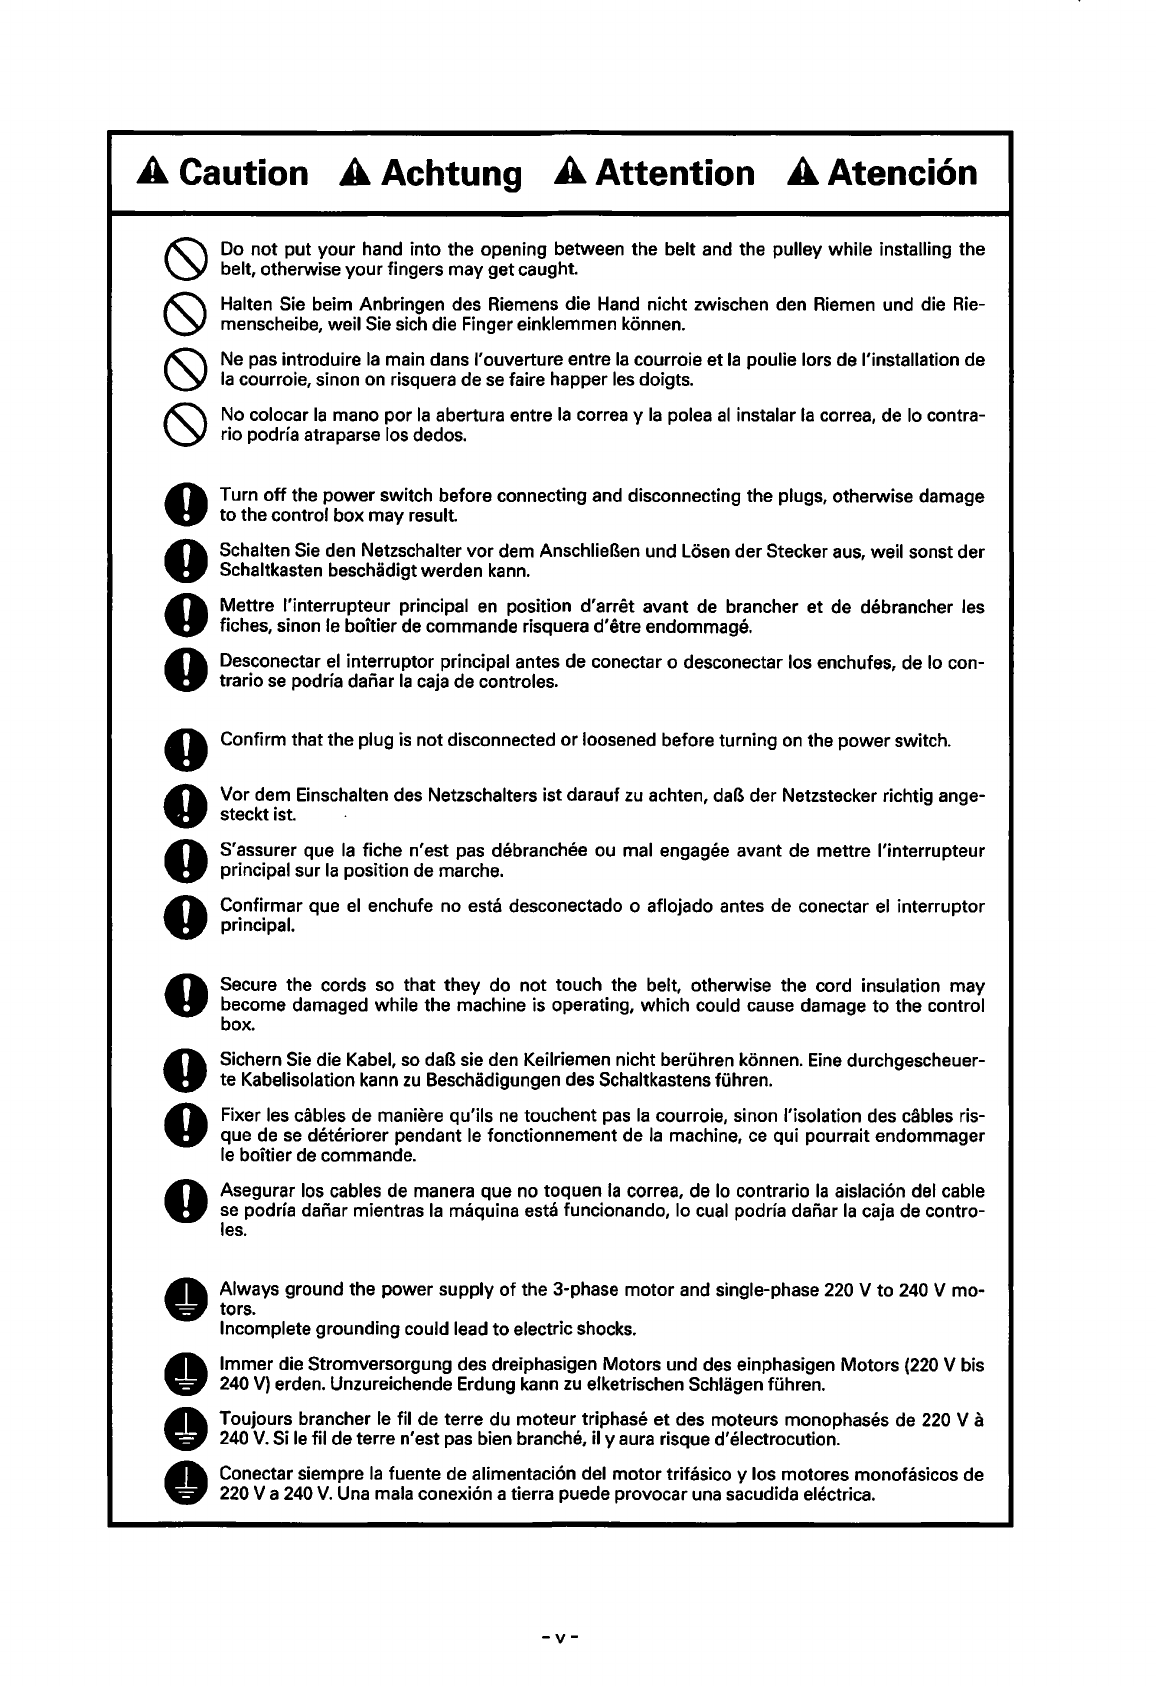
Do
not put your hand into the opening between the belt and the pulley while installing the
belt, otherwise your fingers may get
caught
Halten Sie beim Anbringen des Riemens die Hand nicht zwischen den Riemen und die
Rie-
menscheibe, weil
Sie
sich die Finger einklemmen konnen.
Ne pas introduire
Ia
main dans l'ouverture entre
Ia
courroie
et
Ia
poulie lors de !'installation de
Ia
courroie, sinon on risquera de
se
faire happer les doigts.
No colocar
Ia
mano
porIa
abertura entre
Ia
correa y
Ia
polea
al
instalar
Ia
correa, de lo contra-
rio podrfa atraparse los dedos.
Turn
off
the power switch before connecting and disconnecting the plugs, otherwise damage
to
the control box may result.
Schalten
Sie
den Netzschalter vor dem AnschlieBen und Losen derStecker aus, weil sonst der
Schaltkasten beschadigt werden
kann.
Mettre l'interrupteur principal
en
position d'arret avant de brancher et de debrancher les
fiches, sinon le boitierde commande risquera d'etre endommage.
Desconectar
el
interruptor principal antes de conectar o desconectar los enchufes, de lo con-
trario
se
podrfa daiiar
Ia
caja
de controles.
Confirm that the plug is notdisconnected
or
loosened before turning on the powerswitch.
Vor dem Einschalten des Netzschalters ist darauf
zu
achten,
daB
der Netzstecker richtig ange-
steckt ist.
S'assurer que
Ia
fiche n'est pas debranchee ou mal engagee avant de mettre l'interrupteur
principal sur
Ia
position de marche.
Confirmar que
el
enchufe no esta desconectado o aflojado antes de conectar el interruptor
principal.
Secure the cords
so
that they do not touch the belt, otherwise the cord insulation may
become damaged while the machine is operating, which could cause damage
to
the control
box.
Sichern
Sie
die Kabel,
so
daB sie den Keilriemen nicht beruhren konnen.
Eine
durchgescheuer-
te Kabelisolation kann
zu
Beschadigungen des Schaltkastens fuhren.
Fixer les cables de maniere qu'ils
ne
touchent
pas
Ia
courroie, sinon !'isolation des cables ris-
que de
se
deteriorer pendant
le
fonctionnement de
Ia
machine,
ce
qui pourrait endommager
le boitier de commande.
Asegurar los cables de manera que no toquen
Ia
correa, de lo contrario
Ia
aislaci6n del cable
se
podrfa daiiar mientras
Ia
maquina esta funcionando, lo cual podrfa daiiar
Ia
caja de contro-
les.
Always ground the power supply
of
the 3-phase
motor
and single-phase
220
V
to
240
V mo-
tors.
Incomplete grounding could lead
to
electric shocks.
lmmer die Stromversorgung des dreiphasigen Motors und des einphasigen Motors
(220
V bis
240
V)
erden. Unzureichende Erdung kann
zu
elketrischen Schlagen fuhren.
Toujours brancher
le
fil de terre du moteur triphase
et
des moteurs monophases de
220
V a
240
V.
Si
le
fil de terre n'est
pas
bien branche, il y aura risque d'electrocution.
Conectar siempre
Ia
fuente de alimentaci6n del motortrifasico y los motores monofasicos de
220 V a
240
V.
Una mala conexi6n atierra puede provocar una sacudida electrica.
-v-
From the library of: Superior Sewing Machine & Supply LLC
A Caution A Achtung A Attention A Atenci6n
~
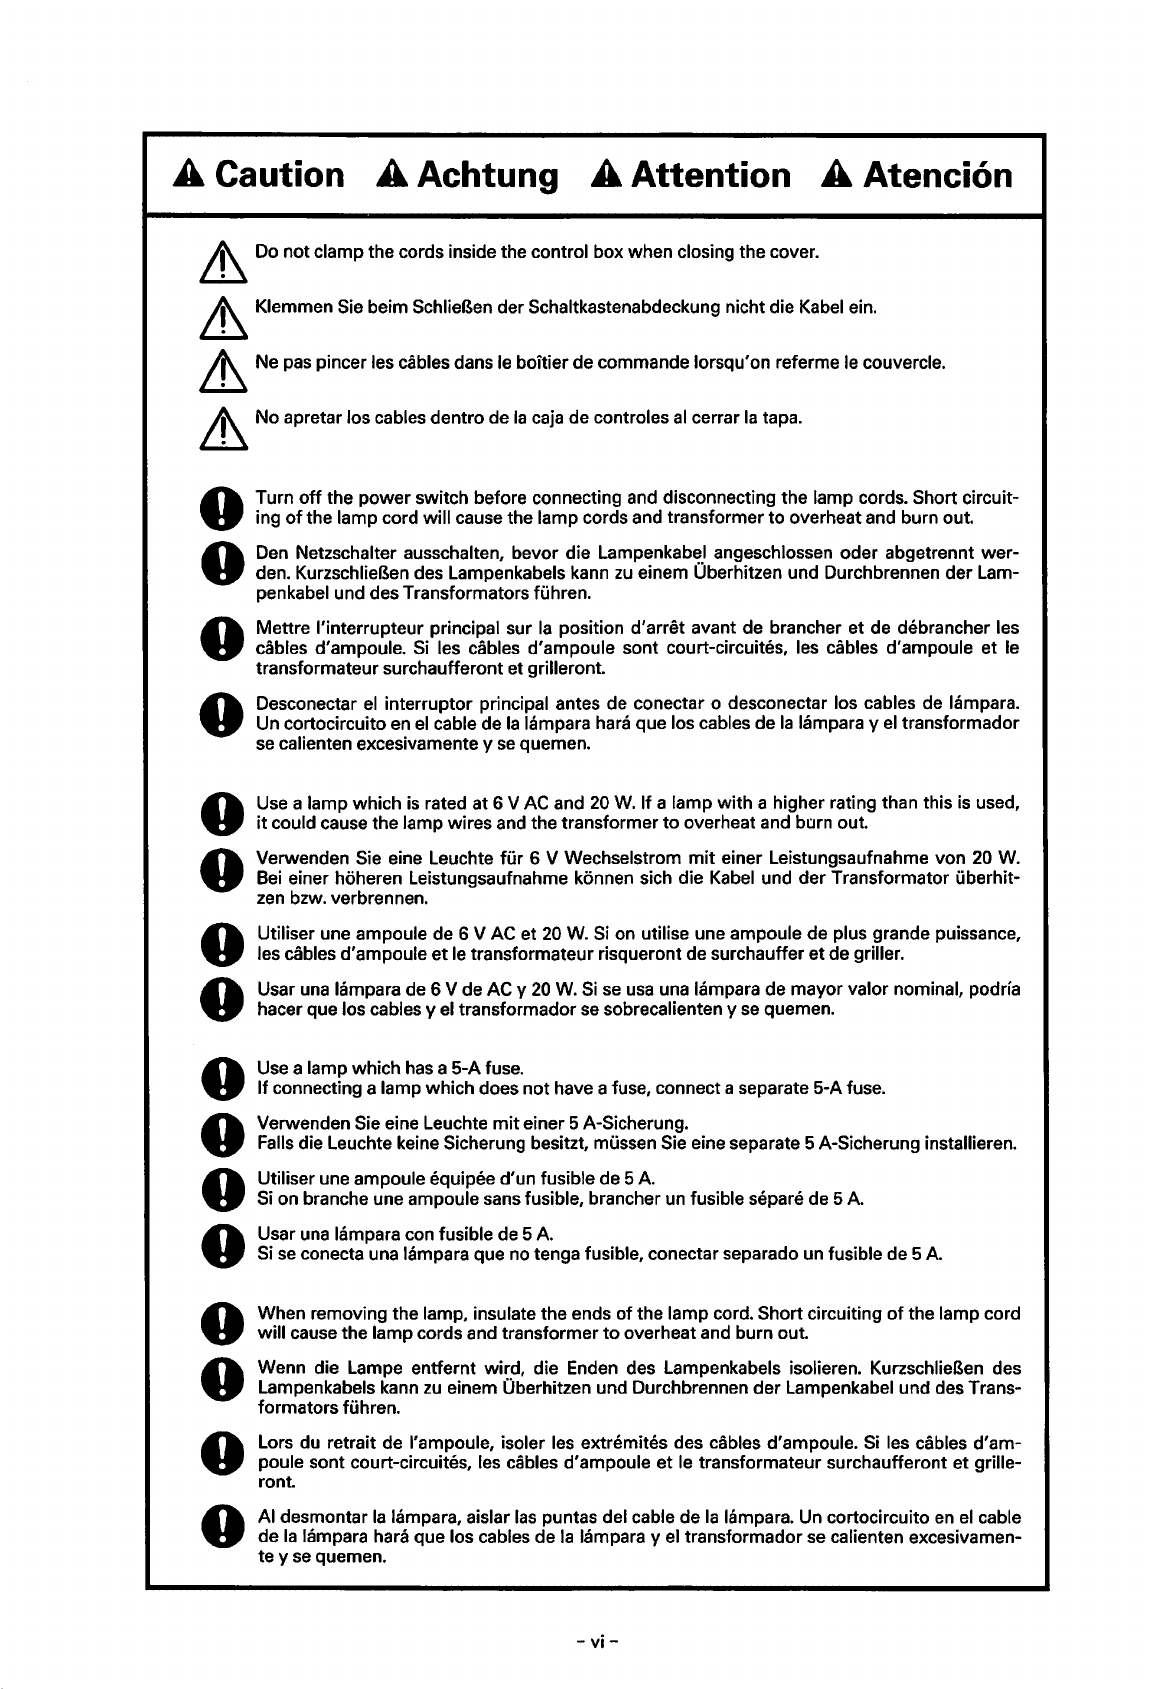
Do notclamp the cords inside the control box when closing the cover.
~
Klemmen Sie beim SchlieBen derSchaltkastenabdeckung nicht die Kabel ein.
~
Ne pas pincer les cables dans le boitier de commande lorsqu'on referme le couvercle.
~
No apretar los cables dentro de
Ia
caja de controles
al
cerrar
Ia
tapa.
0
0
0
0
0
0
0
0
0
0
0
0
0
0
0
0
Turn
off
the
power
switch before connecting and disconnecting the lamp cords. Short circuit-
ing
of
the lamp cord will cause the lamp cords and transformer to overheat and burn out.
Den Netzschalter ausschalten, bevor die Lampenkabel angeschlossen oder abgetrennt
wer-
den. KurzschlieBen des Lampenkabels kann
zu
einem Oberhitzen und Durchbrennen der Lam-
penkabel und des Transformators fGhren.
Mettre l'interrupteur principal sur
Ia
position d'arret avant de brancher
et
de debrancher les
cables d'ampoule.
Si
les cables d'ampoule sont court-circuites, les cables d'ampoule et le
transformateur surchaufferont et
grilleront
Desconectar
el
interrupter principal antes de conectar o desconectar los cables de lampara.
Un cortocircuito
en
el
cable de
Ia
lampara hara que los cables de
Ia
lampara y
el
transformador
se
calienten excesivamente y
se
quemen.
Use a lamp which
is
rated at 6 V AC and
20
W.
If a lamp with a higher rating than this is used,
it
could cause the lamp wires and the transformer
to
overheat and barn out.
Verwenden Sie eine Leuchte
fur
6 V Wechselstrom
mit
einer Leistungsaufnahme von
20
W.
Bei
einer hoheren Leistungsaufnahme konnen sich die Kabel und der Transformator uberhit-
zen
bzw. verbrennen.
Utiliser une ampoule de 6 V AC et
20
W.
Si
on utilise une ampoule de plus grande puissance,
les cables d'ampoule
et
le transformateur risqueront de surchauffer
et
de griller.
Usar una lampara de 6 V de AC y
20
W.
Si
se
usa
una lampara de mayor valor nominal, podria
hacer que los cables y
el
transformador
se
sobrecalienten y
se
quemen.
Use a lamp which
has
a 5-A fuse.
Ifconnecting a lamp which does
not
have afuse, connect aseparate 5-A fuse.
Verwenden Sie eine Leuchte
mit
einer 5A-Sicherung.
Falls die Leuchte keine Sicherung besitzt, mussen Sie eine separate 5 A-Sicherung installieren.
Utiliser une ampoule equipee d'un fusible de 5
A.
Si on branche une ampoule sans fusible, brancher un fusible separe de 5
A.
Usar una lampara con fusible de 5
A.
Si
se
conecta una lampara que no tenga fusible, conectar separado un fusible de 5A
When removing the lamp, insulate the ends
of
the lamp cord. Short circuiting
of
the lamp cord
will cause the lamp cords and transformer
to
overheat and burn
out
Wenn die Lampe entfernt wird, die Enden des Lampenkabels isolieren. KurzschlieBen des
Lampenkabels kann
zu
einem Oberhitzen und Durchbrennen der Lampenkabel und des Trans-
formators fGhren.
Lors du retrait de !'ampoule, isoler les extremites des cables d'ampoule. Si les cables d'am-
poule sont court-circuites, les cables d'ampoule
et
le transformateur surchaufferont et grille-
root
AI
desmontar
Ia
lampara, aislar
las
puntas del cable de
Ia
lampara. Un cortocircuito
en
el
cable
de
Ia
lampara hara que los cables de
Ia
lampara y
el
transformador
se
calienten excesivamen-
te y
se
quemen.
-vi-
From the library of: Superior Sewing Machine & Supply LLC
A Caution A Achtung A Attention A Atenci6n
~
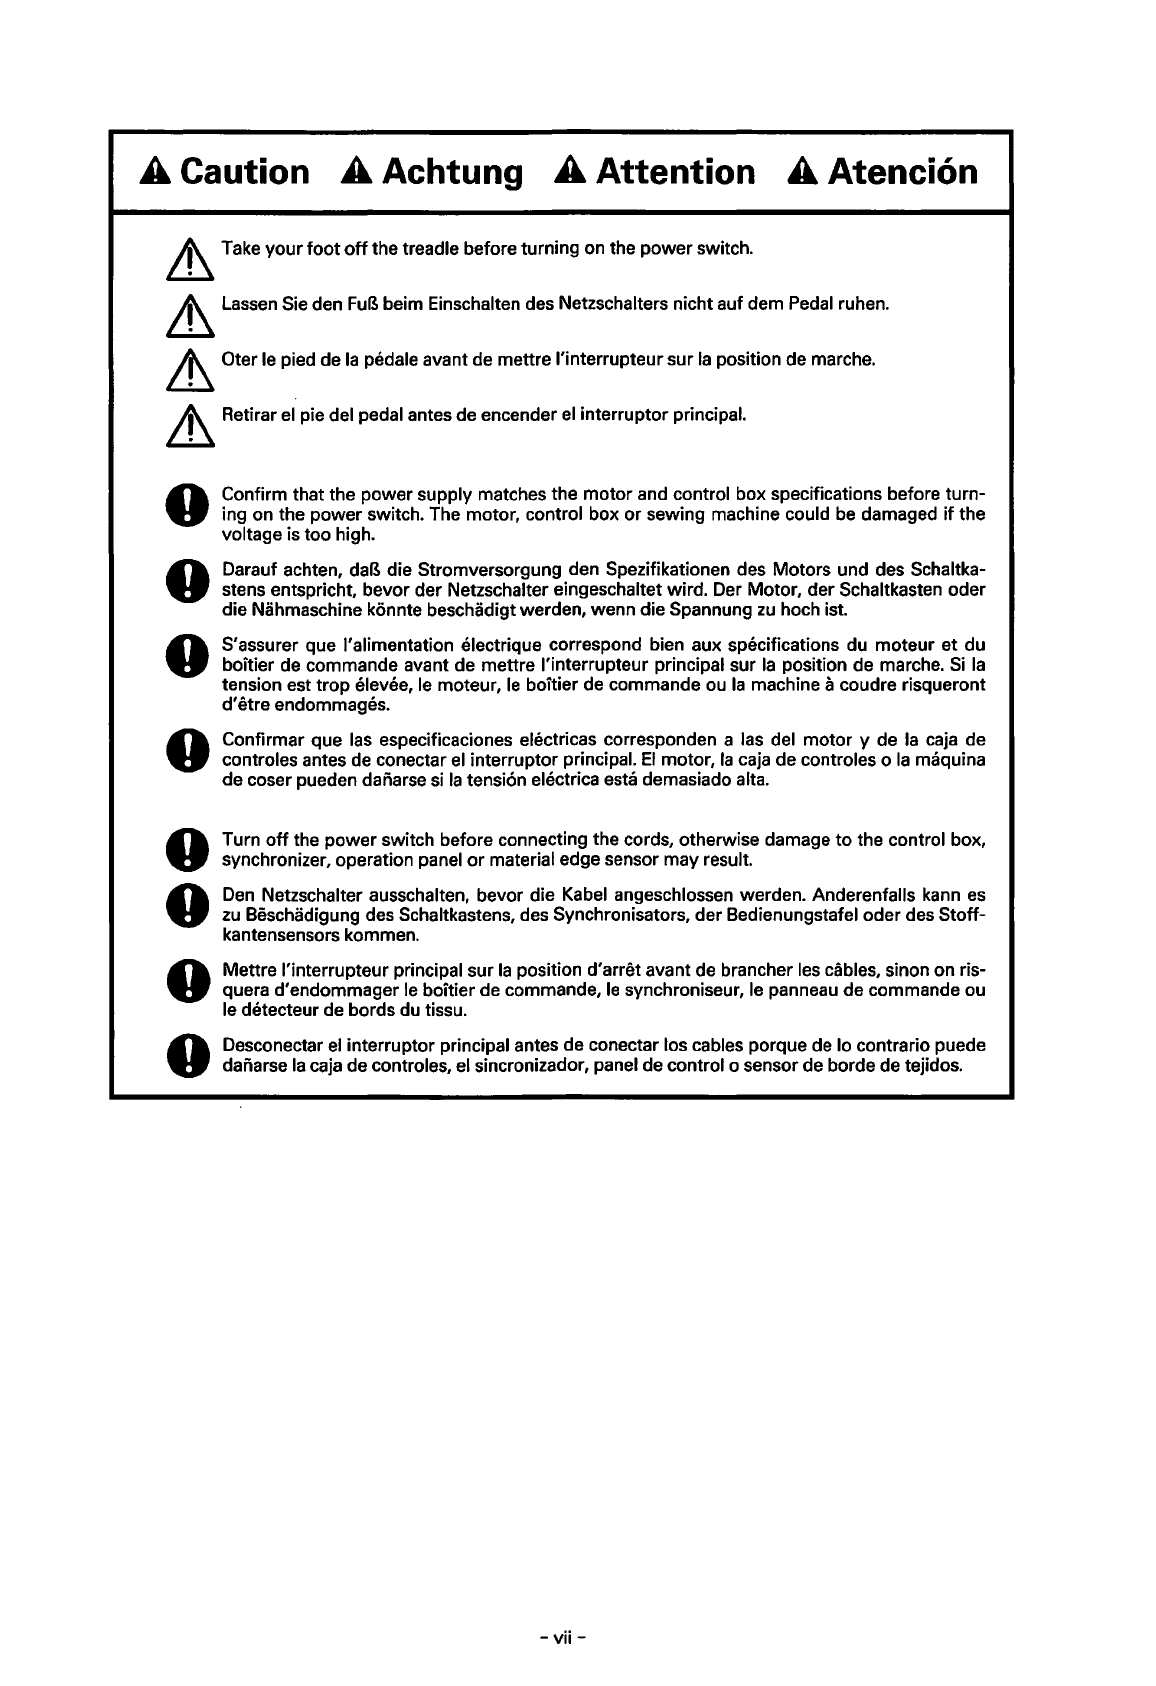
Take your
foot
off
the treadle before turning on the
power
switch.
~
Lassen Sie den
FuB
beim Einschalten des Netzschalters nicht auf dem Pedal ruhen.
~
Oter le pied de
Ia
pedale avant de mettre l'interrupteursur
Ia
position de marche.
~
Retirar
el
pie del pedal antes de encender
el
interrupter principal.
0
0
0
0
0
0
0
Confirm that the power supply matches the
motor
and control box specifications before turn-
ing on the power switch. The motor, control box
or
sewing machine could be damaged
if
the
voltage is too high.
Darauf achten, daB die Stromversorgung den Spezifikationen des Motors und des Schaltka-
stens entspricht, bevor der Netzschalter eingeschaltet wird. Der Motor, der Schaltkasten oder
die Nahmaschine konnte beschadigt werden, wenn die Spannung
zu
hoch ist.
S'assurer que !'alimentation electrique correspond bien aux specifications du moteur et du
boitier de commande avant de mettre l'interrupteur principal sur
Ia
position de marche.
Si
Ia
tension est
trop
elevee, le moteur,
le
boitier de commande
ou
Ia
machine acoudre risqueront
d'
etre endommages.
Confirmar que las especificaciones electricas corresponden a las del motor y de
Ia
caja de
controles antes de conectar el interrupter principal.
El
motor,
Ia
caja de controles o
Ia
maquina
de coser pueden daliarse si
Ia
tension electrica esta demasiado alta.
Turn
off
the power switch before connecting the cords, otherwise damage
to
the control box,
synchronizer, operation panel
or
material edge sensor may result.
Den
Netzschalter ausschalten, bevor die Kabel angeschlossen werden. Anderenfalls kann
es
zu
Beschadigung des Schaltkastens, des Synchronisators, der Bedienungstafel oder des Stoff-
kantensensors kommen.
Mettre l'interrupteur principal sur
Ia
position d'arret avant de brancher les cables, sinon on ris-
quera d'endommager le boitier de commande,
le
synchroniseur, le panneau de commande ou
le detecteur de bords du tissu.
Desconectar
el
interrupter principal antes de conectar los cables porque de lo contrario puede
daliarse
Ia
caja de controles, el sincronizador, panel de control o sensor de borde de tejidos.
-vii-
From the library of: Superior Sewing Machine & Supply LLC
Warning label
Warnschild
Etiquette
d'
avertissement
Etiqueta
de
advertencia
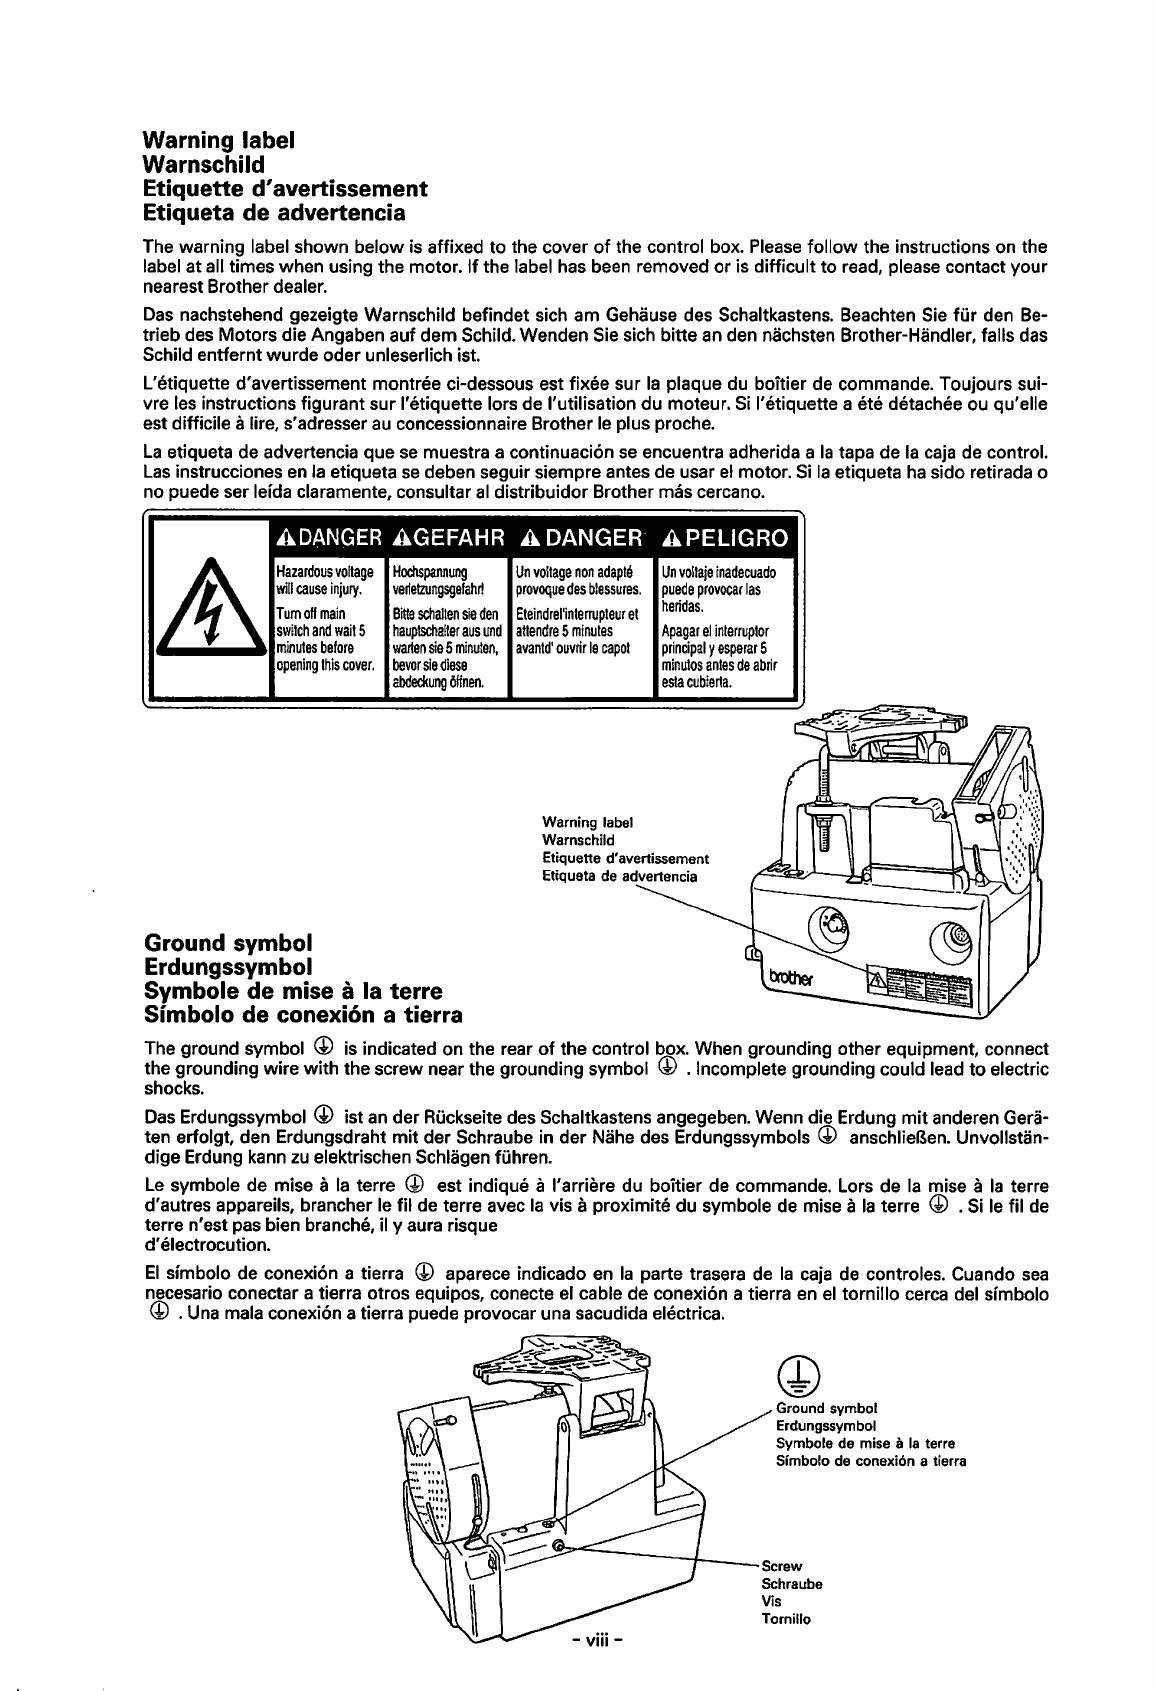
The warning label shown below is affixed
to
the cover
of
the control box. Please follow the instructions on the
label at all times when using the motor.
If
the label has been removed or is difficult to read, please contact your
nearest Brother dealer.
Das
nachstehend gezeigte Warnschild befindet sich am Gehause des Schaltkastens. Beachten Sie
fur
den Be-
trieb des Motors die Angaben auf dem Schild. Wenden Sie sich bitte
an
den nachsten Brother-Handler, falls das
Schild entfernt wurde oder unleserlich ist.
L'etiquette d'avertissement montree ci-dessous est fixee sur
Ia
plaque du boitier de commande. Toujours sui-
vre les instructions figurant sur I'etiquette Iars de !'utilisation du moteur.
Si
I'etiquette a ete detachee ou qu'elle
est difficile alire, s'adresser
au
concessionnaire Brother le plus proche.
La
etiqueta de advertencia que
se
muestra a continuaci6n
se
encuentra adherida a
Ia
tapa de
Ia
caja de control.
Las
instrucciones
en
Ia
etiqueta
se
deben seguir siempre antes de usar
el
motor. Si
Ia
etiqueta
ha
sido retirada o
no puede ser lelda claramente, consultar
al
distribuidor Brother mas cercano.
A
DANGER
AGEFAHR A DANGER· A PELIGRO
Hazardous
voltage
will
cause
injury.
Tum
off
main
switch
and
wait
5
minutes
before
opening
this
cover.
Ground symbol
Erdungssymbol
Hochspannung
Un
voltage
non
adapte
vertetzungsgefaM
provoque
des
blessures.
Bitte
schalten
sie
den
Eteindrel'interrupteur
et
hauptschalter
aus
und
attendre
5
minutes
warten
sie
5
minuten,
avantd'
ouvrir
le
capo!
bevor
sie
diese
abdeckung
offnen.
Warning label
Warnschild
Symbole
de
mise aIa
terre
Simbolo
de
conexion a
tierra
Un
voltaje
inadecuado
puede
provocar
las
heridas.
Apagar
el
interrupter
principal
y
esperar
5
minutes
antes
de
abrir
esta
cubierta.
The ground symbol @ is indicated on the rear
of
the control box. When grounding other equipment, connect
the grounding wire
with
the screw near the grounding symbol (!) .Incomplete grounding could lead
to
electric
shocks.
Das
Erdungssymbol @ ist
an
der Ruckseite des Schaltkastens angegeben. Wenn die Erdung
mit
anderen Gers-
ten erfolgt, den Erdungsdraht
mit
der Schraube in der Nahe des Erdungssymbols @ anschlieBen. Unvollstan-
dige Erdung kann
zu
elektrischen Schlagen fuhren.
Le
symbole de mise a
Ia
terre @ est indique al'arriere du boitier de commande. Lars de
Ia
mise a
Ia
terre
d'autres appareils, brancher le fil de terre avec
Ia
vis aproximite du symbole de mise a
Ia
terre @ .
Si
le fil de
terre n'est pas bien branche, il y aura risque
d'
electrocution.
El
slmbolo de conexi6n a tierra @ aparece indicado en
Ia
parte trasera de
Ia
caja de controles. Cuando
sea
necesario conectar a tierra otros equipos, conecte
el
cable de conexi6n a tierra
en
el
tornillo cerca del sfmbolo
@ .Una mala conexi6n a tierra puede provocar una sacudida electrica.
(£)
Ground symbol
Erdungssymbol
Symbole de mise a
Ia
terre
Simbolo de conexi6n a tierra
From the library of: Superior Sewing Machine & Supply LLC

CONTENTS
SAFETY INSTRUCTIONS
1. INSTALLATION
..................................................
1
1.1
Installing the
motor
to the work table
.......
1
1.2
Attaching the belt
....................................................
3
1.3
Installing the belt cover
.......................................
5
1.4
Connecting the connecting rod
.......................
5
1.5
Connecting the cords
............................................
6
1.6
Connecting the operation panel
......................
10
1.7
Installing the head lamp
......................................
14
2.
STANDARD ADJUSTMENTS
................
16
2.1
Adjusting the belt cover safety
mechanism
...................................................................
16
2.1.1
Adjusting the belt casting prevention
guide
......................................................................
16
2.1.2
Adjusting the finger guard
.......................
16
2.2
Adjusting the treadle
.............................................
18
2.2.1
Adjusting the treadle pressure
...............
18
2.2.2
Adjusting the treadle return
pressure
...............................................................
18
2.2.3
Adjusting the treadle stroke
....................
18
3. CORRECT OPERATION
.............................
20
3.1
Operating the treadle
............................................
20
3.1.1
For treadles with one forward and
one rear stage
..................................................
20
3.1.2
For treadles with
two
forward and
two
rear stages
...............................................
24
3.2
Using the control box
...........................................
26
3.2.1
Power switch and power indicator
......
26
3.2.2
Setting the sewing speed
.........................
26
3.3
Setting the
DIP
switches
.....................................
28
3.4
Daily precautions
.....................................................
30
4. CONNECTING OPTIONS
..........................
34
4.1
Connecting the pedal
for
standing
operations
.....................................................................
34
4.2
Connecting the material edge sensor
.........
37
5. TROUBLESHOOTING
...................................
39
INHALT
SICHERHEITSHINWEISE
1. MONTAGE
...............................................................
1
1.1
Montage des Motors am Nahtisch
...............
1
1.2
Montage des Riemens
..........................................
3
1.3
Montage der Riemenschutzes
..........................
5
1.4
Montage der Zwischenstange
..........................
5
1.5
AnschluB der Kabel
................................................
6
1.6
AnschlieBen der Bedienungstafel
...................
10
1.7
Montage der Leuchte
............................................
14
2. STANDARDEINSTELLUNGEN
.............
16
2.1
Einstellen der Riemenschutz-
Sicherheitsvorrichtung
...........................................
16
2.1.1
Einstellen der Riemenschutzfuhrung
...
16
2.1.2
Einstellen des Fingerschutzes
..................
16
2.2
Einstellen des Pedals
.............................................
18
2.2.1
Einstellen der Pedaldruckkraft
.................
·18
2.2.2
Einstellen der Pedalruckstellkraft
...........
18
2.2.3
Einstellen des Pedalhubs
...........................
18
3. RICHTIGE BEDIENUNG
............................
21
3.1
Bedienung des Pedals
..........................................
21
3.1.1
Fur Pedale
mit
einer Vorwarts-
und einer Ruckwartsstufe
..........................
21
3.1.2
Fur Pedale
mit
zwei Vorwarts-
und zwei Ruckwartsstufen
........................
24
3.2
Schaltkasten
................................................................
26
3.2.1
Netzschalter und Netzkontrolleuchte
...
26
3.2.2
Einstellen der Nahgeschwindigkeit
.....
26
3.3
Einstellen der DIP-Schalter
.................................
28
3.4
Tagliche VorsichtsmaBnahmen
........................
31
4. ANSCHLIESSEN VON OPTIONEN
..
34
4.1
AnschlieBen des Pedals
fur
stehenden
Betrieb
............................................................................
34
4.2
AnschlieBen des Stoffkantensensors
............
37
5. FEHLERSUCHE
....................................................
39
From the library of: Superior Sewing Machine & Supply LLC
TABLE DES MATIERES
INSTRUCTIONS DE SECURITE
1. INSTALLATION
..................................................
1
1.1
Installation du moteur sur
Ia
table
de
travail
.......................................................................
1
1.2
Fixation de
Ia
courroie
..........................................
3
1.3 Installation du couvercle de courroie
..........
5
1.4
Branchement de
Ia
tige de connexion
........
5
1.5
Branchement des cordons
..................................
7
1.6
Branchement du panneau
de
commande
...................................................................
11
1.7 Installation de !'ampoule de tete
de machine
..................................................................
14
2. REGLAGES STANDARD
...........................
17
2.1
Reglage
du dispositif de securite du
couvercle de courroie
...........................................
17
2.1.1
Reglage
du guide de prevention de
saute de courroie
...........................................
17
2.1.2
Reglage
du protege-doigts
.......................
17
2.2
Reglage
de
Ia
pedale
.............................................
19
2.2.1
Reglage
de
Ia
pression
de
pedale
.......
19
2.2.2
Reglage
de
Ia
pression
de
retour de
pedale
....................................................................
19
2.2.3
Reglage
de
Ia
course de pedale
...........
19
3. FONCTIONNEMENT CORRECT
.........
22
3.1
Fonctionnement
de
Ia
pedale
...........................
22
3.1.1
Pedales
avec
un
palier avant et un
palier arriere
......................................................
22
3.1.2
Pedales
avec deux paliers avant et
deux paliers arriere
.......................................
25
3.2 Utilisation du boitier de commande
.............
27
3.2.1 lnterrupteur d'alimentation et temoin
d'alimentation
...................................................
27
3.2.2
Reglage
de
Ia
vitesse
de
couture
.........
27
3.3 Reglage
des
interrupteurs
DIP
.........................
29
3.4 Precautions journalieres
.......................................
32
4.
OPTIONS DE CONNEXION
...................
35
4.1
Branchement de
Ia
pedale pour
!'utilisation debout
...................................................
35
4.2 Branchement du detecteur de bords
du tissu
..........................................................................
38
5. GUIDE DU DEPANNAGE
.......................
39
CONTENIDO
INSTRUCCIONES DE SEGURIDAD
1. INSTALACION
.....................................................
1
1.1
lnstalacion del motor
en
Ia
mesa
de
trabajo
............................................................................
1
1.2
lnstalacion de
Ia
correa
........................................
3
1.3 lnstalacion de
Ia
cubierta de
Ia
correa
.......
5
1.4
Conexi6n de
Ia
biela
..............................................
5
1.5
Conexi6n de los cables
........................................
7
1.6
Conexi6n del panel de control
........................
11
1.7
lnstalacion de
Ia
luz
...............................................
14
2. AJUSTES ESTANDAR
..................................
17
2.1
Ajuste del mecanismo de seguridad de
Ia
cubierta de
Ia
correa
........................................
17
2.1.1
Ajuste de
Ia
guia de prevencion de
salida de
Ia
correa
.........................................
17
2.1.2 Ajuste
de
Ia
proteccion para dedos
....
17
2.2
Ajuste del pedal
.......................................................
19
2.2.1
Ajuste de
Ia
presion del pedal
...............
19
2.2.2 Ajuste de
Ia
presion
de
retorno del
pedal
......................................................................
19
2.2.3 Ajuste del recorrido del pedal
................
19
3. FUNCIONAMIENTO CORRECTO
.....
23
3.1
Uso del pedal
.............................................................
23
3.1.1
Para
pedales
con
una
posicion
hacia adelante y
una
posicion
hacia
atn3s
.........................................................
·.
23
3.1.2
Para
pedales con dos posiciones
hacia
adelante y dos posiciones
hacia
atras
..........................................................
25
3.2 Uso de
Ia
caja
de controles
..............................
27
3.2.1
Interrupter principal e indicador de
alimentacion
.......................................................
27
3.2.2 Ajuste
de
Ia
velocidad
de
costura
.......
27
3.3 Ajuste
de
los interruptores
DIP
.......................
29
3.4 Precauciones diarias
...............................................
33
4. CONEXION DE LAS OPCIONES
.....
35
4.1
Conexion del pedal para trabajar
parado
............................................................................
35
4.2 Conexion del sensor de borde de
material
..........................................................................
38
5. LOCALIZACION DE AVERIAS
.........
39
From the library of: Superior Sewing Machine & Supply LLC

1. INSTALLATION
1. MONTAGE
1.1
Installing the motor to the work table
1.1
Montage des Motors am Nahtisch
1. INSTALLATION
1. INSTALACION
1.1
Installation
du
moteur sur
Ia
table de travail
1.1
lnstalaci6n del motor
en
Ia
mesa de trabajo
A A Caution
V
Do
not install the sewing machine near sources
of
strong noise such
as
high frequency welders. Installation in such
areas could lead
to
malfunctioning
of
the sewing machine.
A A Caution
V Always disconnectthe main power plug before starting installation work.
A\
A Caution
~The
motor and control box weigh approx. 15kg. Take care not
to
drop these on your feet when installing
or
remov-
ing them
from
the
work
table.
A A Caution
V
Be
sure to tighten the nuts securely.
If
they are not tightened properly,
it
could cause the sewing machine
to
vi-
brate
or
shiftthe needle stop position while sewing.
A Achtung
8
8 Die Nahmaschine nicht in der Nahe von Geraten
mit
hohem Rauschpegel (wie
zB.
Hochfrequenz-SchweiBgeraten)
installieren. Anderenfalls kann
es
zu
Fehlbetrieb der Nahmaschine kommen.
A Achtung
lmmer
den Netzstecker ziehen, bevor
mit
den Einbauarbeiten begonnen wird.
A\
A Achtung
~
Der
Motor
und der Schaltkasten wiegen etwa
15
kg.
Diese daher nicht fallen lassen (Verletzungsgefahr der
FGBe},
wenn sieam Nahtisch installiert oder von diesem entferntwerden.
A
AAchtung
V Die Muttern mussen fest angezogen werden, weil sonst die Nahmaschine wahrend des Betriebs vibrieren oder
sich die Nadelstopposition verschieben kann.
A A Attention
V
Ne
pas installer
Ia
machine acoudre aproximite de sources de bruit intense telles que des machines asouder a
haute frequence. L'installation ade tels emplacements risque de provoquer des anomalies de fonctionnement de
Ia
machine acoudre.
A A Attention
V Toujours debrancher
Ia
fiche d'alimentation principale avant d'entreprendre les travaux d'installation.
A\
A Attention
~
Le
moteur
et
le boitier de commande pesent environ
15
kg.
Veiller a
ce
qu'ils
ne
tombent pas sur vos pieds lorsque
vous les posez ou les deposez de
Ia
table de travail.
A A Attention
V Veiller abien serrer les ecrous. S'ils ne sont pas correctement serres,
Ia
machine pourrait
se
mettre avibrer ou a
changer de position d'arret de l'aiguille
en
cours de couture.
A A Atenci6n
V No instalar
Ia
maquina de coser cerca de fuentes e ruido fuertes como un soldador de alta frecuencia.
Su
instala-
ci6n
en
estas condiciones puede resultar
en
un malfuncionamiento de
Ia
maquina de coser.
A
AAtenci6n
V Desconectar siempre
el
enchufe del tomacorriente antes de empezar cualquier trabajo de instalaci6n.
A\
A Atenci6n
~
El
motor
y
Ia
caja de controles pesan aproximadamente
15
kg.
No permitir que estas piezas caigan sobre sus pies
durante
Ia
instalaci6n o
su
desmontaje de
Ia
mesa de trabajo.
A A Atenci6n
V Asegurarse de apretar las tuercas con seguridad.
Si
no estan bien seguras,
Ia
maquina podrfa vibrar o cambiar
Ia
posicion de parada de
Ia
aguja durante
Ia
costura.
-
1-
From the library of: Superior Sewing Machine & Supply LLC
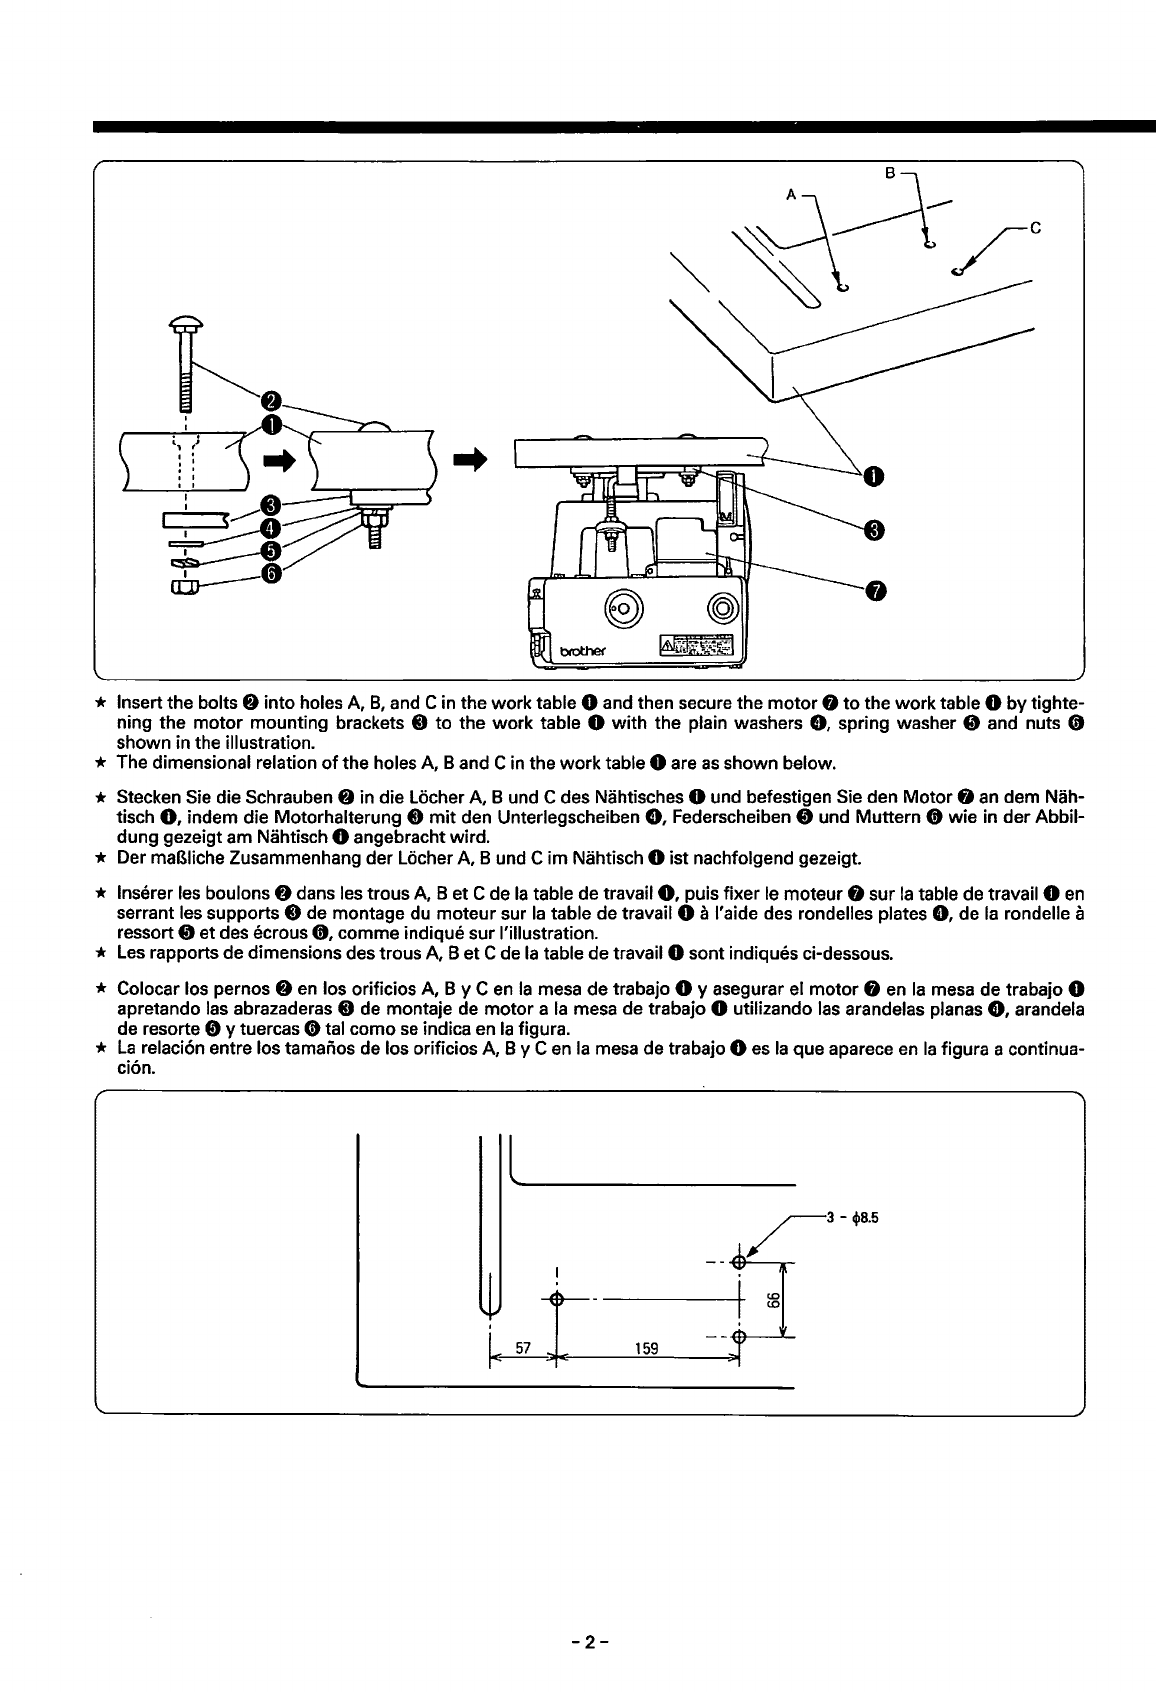
* Insertthe bolts 8 into holes A,
8,
and Cin the work table 0 and then secure the
motor
0
to
the worktable 0 by tighte-
ning the
motor
mounting brackets 0
to
the work table 0 with the plain washers
8,
spring washer 0 and nuts 0
shown in the illustration.
* The dimensional relation
of
the holes A, Band C in the
work
table 0 are
as
shown below.
* Stecken Sie die Schrauben 8 in die Locher A, B und C des Nahtisches 0 und befestigen Sie den
Motor
0
an
dem Nah-
tisch
0,
indem die Motorhalterung 0
mit
den Unterlegscheiben
8,
Federscheiben 0 und Muttern 0 wie in der Abbil-
dung gezeigt am Nahtisch 0 angebracht wird.
* Der maBiiche Zusammenhang der Locher A, B und C
im
Nahtisch 0 ist nachfolgend gezeigt.
* lnserer les boulons 8 dans les trous A, B et Cde
Ia
table de travail
0,
puis fixer le moteur0 sur
Ia
table de travail 0
en
serrant les supports 0 de montage du moteur sur
Ia
table de travail 0 aI'aide des rondelles plates
8,
de
Ia
rondelle a
ressort 0 et des ecrous
0,
comme indique sur !'illustration.
*
Les
rapports de dimensions des trous A, B
et
Cde
Ia
table de travail 0 sont indiques ci-dessous.
* Colocar los pernos 8
en
los orificios A, B y C
en
Ia
mesa de trabajo 0 y asegurar el
motor
8
en
Ia
mesa de trabajo 0
apretando las abrazaderas 0 de montaje de
motor
a
Ia
mesa de trabajo 0 utilizando las arandelas planas
8,
arandela
de resorte 0 y tuercas 0 tal como
se
indica en
Ia
figura.
*
La
relaci6n entre los tamaiios de los orificios A, By C
en
Ia
mesa de trabajo 0
es
Ia
que aparece
en
Ia
figura a continua-
cion.
l
/3-+8.5
--
_l.
+ I
~
~
~-
I 1.0
1.0
~
~
--
J'
159
I
-2-
From the library of: Superior Sewing Machine & Supply LLC
1.2 Attaching the belt
1.2 Montage des Riemens
1.2 Fixation de Ia courroie
1.2 lnstalaci6n de Ia correa
A A Caution
V Turn
off
the
power
switch before starting work, otherwise the
motor
may operate, which could result in injury.
A
ACaution
V
Tilt
the machine head back gently, otherwise
it
mayfall down, which could cause injury.
A\ A Caution
~
Keep your fingers away
from
the needle bar when raising or lifting the sewing machine head, otherwise your fin-
gers may getcaught.
!(:\
A Caution
\Y
Do
not
put
your
hand into the opening between the belt and the pulley while installing the belt, otherwise yourfin-
gers may getcaught.
A
AAchtung
V Schalten Sie den Netzschalter
vor
dem Arbeitsbeginn aus, weil sonst der
Motor
unbeabsichtigt eingeschaltet war-
den und Verletzungen verursachen kann.
A
AAchtung
V Neigen Sie das Maschineneoberteilleicht nach hinten, weil
es
sonst umfallen und Verletzungen verursachen kann.
A\
AAchtung
~
Halten
Sie
lhre Finger entfernt von der Nadelstange, wenn der Nahmaschinenkopf angehoben wird, da sonst lhre
Finger eingeklemmt werden konnen.
!(:\
A Achtung
\Y
Halten Sie beim Anbringen des Riemens die Hand nicht zwischen den Riemen und die Riemenscheibe, weil Sie
sich die Finger einklemmen konnen.
A A Attention
V Mettre l'interrupteur principal
en
position d'arret avant d'entreprendre
Ia
couture, sinon le moteur pourra de
se
mettre
en
marche,
ce
qui risque de provoquer des blessures.
A A Attention
V Incliner
Ia
tete de machine doucement vers l'arriere, sinon elle pourra tomber,
ce
qui risque de provoquer des bles-
sures.
A\
A Attention
~
Eloigner les doigts de
Ia
barre aaiguille lorsqu'on eleve ou qu'on souleve
Ia
tete de machine, sinon on risquera de
se coincer les doigts.
!(:\
A Attention
\Y
Ne
pas introduire
Ia
main dans l'ouverture entre
Ia
courroie et
Ia
poulie lors de !'installation de
Ia
courroie, sinon on
risquera de
se
faire happer les doigts.
A
AAtenci6n
V Desconectar
el
interruptor principal antes de comenzar a trabajar, de lo contrario el
motor
podria comenzar a fun-
cionar, lo que podria resultar
en
heridas.
A
AAtenci6n
V lnclinar
Ia
cabeza de
Ia
maquina suavemente, de lo contrario
se
podria caer, lo que podria resultar
en
heridas.
A\ A Atenci6n
~
No acercar sus dedos a
Ia
barra de agujas cuando
se
Ia
levanta o
se
sube
Ia
cabeza de
Ia
maquina de coser porque
sus dedos pueden quedar atrapados.
!(:\
A Atenci6n
\Y
No colocar
Ia
mano
porIa
abertura entre
Ia
correa y
Ia
polea
al
instalar
Ia
correa, de lo contrario podrla atraparse
los dedos.
-3-
From the library of: Superior Sewing Machine & Supply LLC
Hinweis:
*
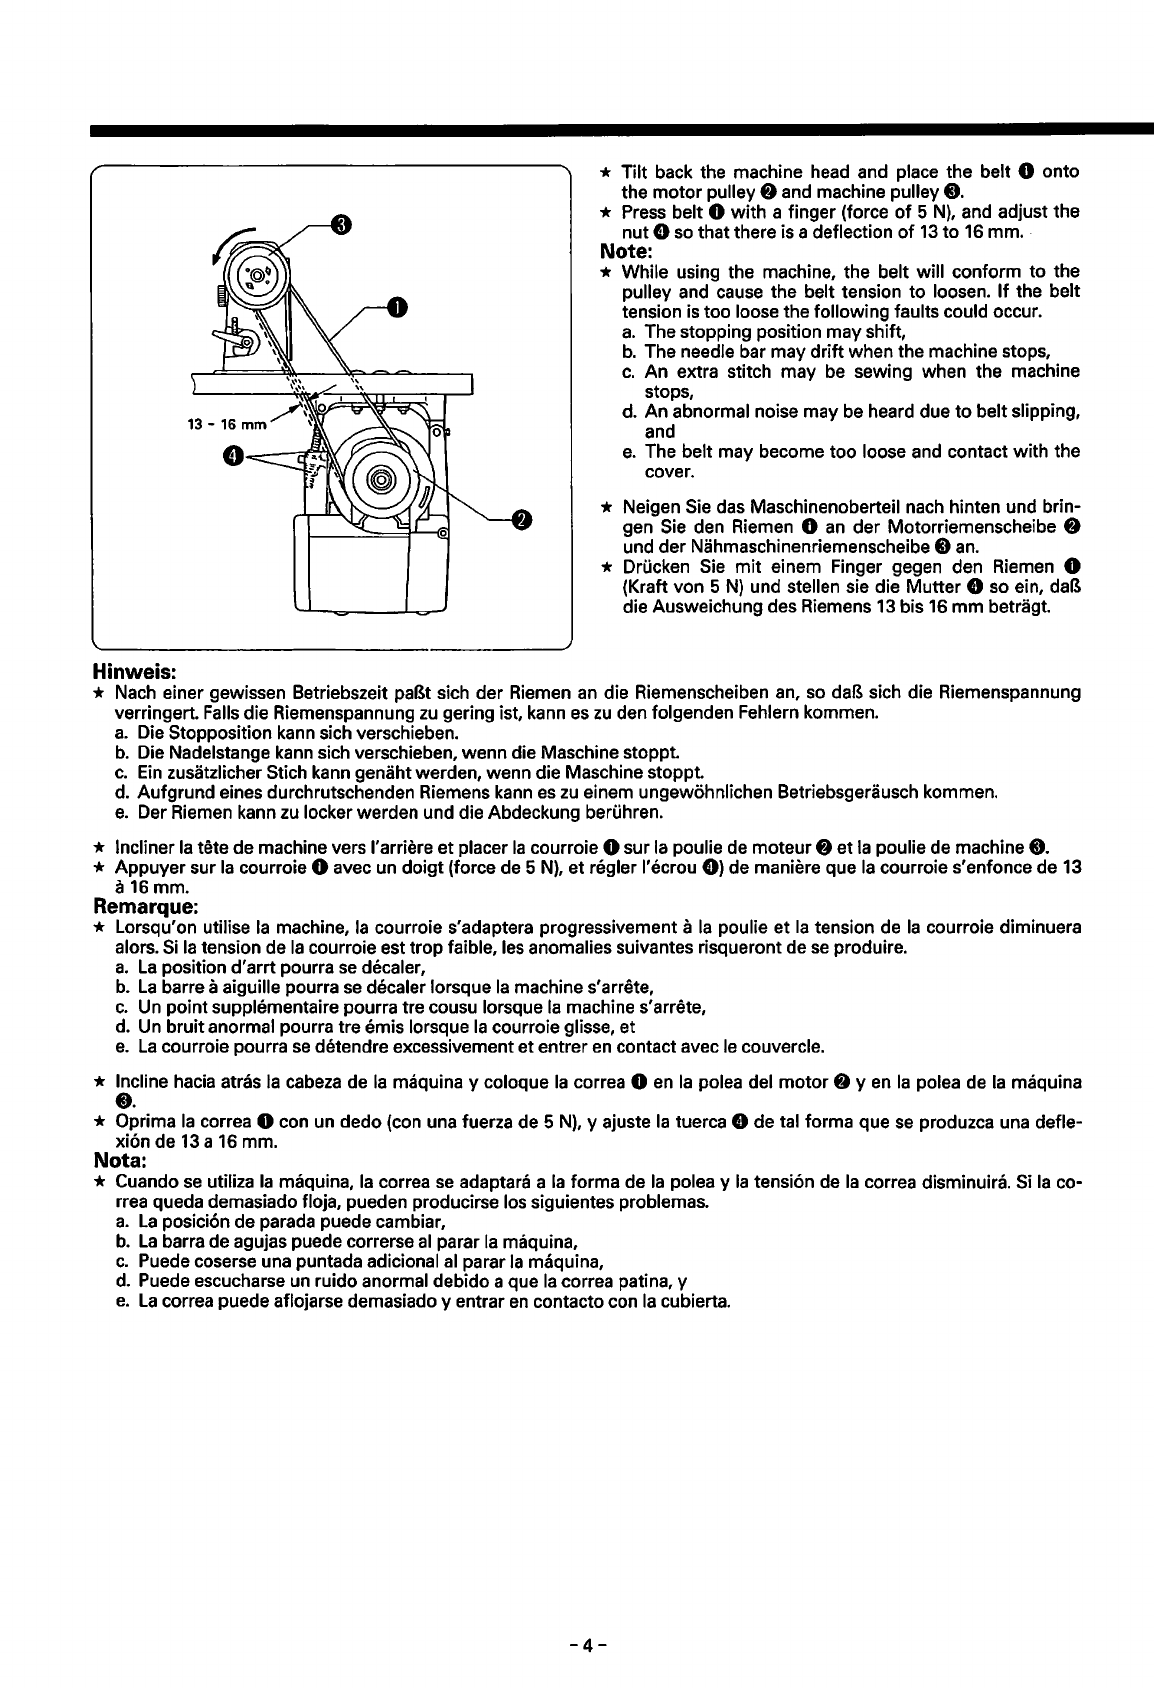
Tilt
back the machine head and place the belt 0 onto
the
motor
pulley 8 and machine pulley
8.
* Press belt 0
with
a finger (force
of
5
N),
and adjust the
nut
8 so that there is a deflection
of
13
to
16
mm.
Note:
* While using the machine, the belt will conform
to
the
pulley and cause the belt tension
to
loosen.
If
the
belt
tension is
too
loose the
following
faults could occur.
a.
The stopping position
may
shift,
b.
The needle bar
may
drift
when the machine stops,
c.
An
extra stitch
may
be sewing when the machine
stops,
d.
An
abnormal noise
may
be heard due
to
belt slipping,
and
e.
The belt may become
too
loose and contact
with
the
cover.
* Neigen Sie das Maschinenoberteil nach hinten und brin-
gen Sie den Riemen 0 an der Motorriemenscheibe 8
und
der
Nahmaschinenriemenscheibe 8 an.
* Drucken Sie
mit
einem Finger gegen den Riemen 0
(Kraft
von
5
N)
und stellen sie die
Mutter
8 so ein, daB
die Ausweichung des Riemens 13 bis 16
mm
betragt.
* Nach einer gewissen Betriebszeit paBt sich
der
Riemen an die Riemenscheiben an, so daB sich die Riemenspannung
verringert. Falls die Riemenspannung
zu
gering ist, kann es
zu
den folgenden Fehlern kommen.
a.
Die Stopposition kann sich verschieben.
b.
Die Nadelstange kann sich verschieben,
wenn
die Maschine stoppt.
c.
Ein
zusatzlicher Stich kann genahtwerden, wenn die Maschine stoppt.
d. Aufgrund eines durchrutschenden Riemens kann
es
zu
einem ungewohnlichen Betriebsgerausch kommen.
e.
Der Riemen kann zu locker werden und die Abdeckung beruhren.
* Incliner
Ia
tete de machine vers l'arriere
et
placer
Ia
courroie 0
sur
Ia
poulie de
moteur
8
et
Ia
poulie de machine
8.
*
Appuyer
sur
Ia
courroie 0 avec un
doigt
(force de 5
N),
et
regler I'ecrou
8)
de maniere que
Ia
courroie
s'
enfonce
de
13
a16 mm.
Remarque:
* Lorsqu'on utilise
Ia
machine,
Ia
courroie s'adaptera progressivement a
Ia
poulie et
Ia
tension de
Ia
courroie diminuera
alors.
Si
Ia
tension de
Ia
courroie est
trop
faible, les anomalies suivantes risqueront de se produire.
a.
La
position
d'arrt
pourra
se
decaler,
b.
La
barre aaiguille pourra se decaler lorsque
Ia
machine s'arrete,
c.
Un
point
supplementaire pourra tre cousu lorsque
Ia
machine s'arrete,
d.
Un
bruit
anormal pourra
tre
emis lorsque
Ia
courroie glisse, et
e.
La
courroie pourra
se
detendre excessivement et entrer en contact avec le couvercle.
* Incline hacia atras
Ia
cabeza de
Ia
maquina y coloque
Ia
correa 0 en
Ia
polea del
motor
8 y en
Ia
polea de
Ia
maquina
••
* Oprima
Ia
correa 0 con un dedo (con una fuerza de 5
N),
y ajuste
Ia
tuerca 8
de
tal forma que se produzca una defle-
xion de 13 a 16 mm.
Nota:
* Cuando
se
utiliza
Ia
maquina,
Ia
correa
se
adaptara a
Ia
forma
de
Ia
polea y
Ia
tension de
Ia
correa disminuira. Si
Ia
co-
rrea queda demasiado floja, pueden producirse los siguientes problemas.
a.
La
posicion
de
parada puede cambiar,
b.
La
barra de agujas puede correrse al parar
Ia
maquina,
c.
Puede coserse una puntada adicional al parar
Ia
maquina,
d.
Puede escucharse un ruido anormal debido a que
Ia
correa patina, y
e.
La
correa puede aflojarse demasiado y entrar en contacto con
Ia
cubierta.
-4-
From the library of: Superior Sewing Machine & Supply LLC

1.3 Installing
the
belt
cover
1.3
Montage
der
Riemenschutzes 1.3 Installation du couvercle de courroie
1.3 lnstalaci6n de Ia cubierta de Ia correa
A A Caution
V Turn
off
the
power
switch before starting work, otherwise the
motor
may operate, which could result in injury.
A
AAchtung
V Schalten Sie den Netzschalter
vor
dem Arbeitsbeginn aus, weil sonst der
Motor
unbeabsichtigt eingeschaltet war-
den und Verletzungen verursachen kann.
A A
Attention
V Mettre l'interrupteur principal en position d'arret avant d'entreprendre
Ia
couture, sinon le moteur pourra de
se
mettre
en
marche, ce qui risque de provoquerdes blessures.
A A Atenci6n
V Desconectar
el
interrupter principal antes de comenzar a trabajar, de lo contrario
el
motor podrla comenzar a fun-
cionar, lo que podrla resultar
en
heridas. * Secure the belt cover 0 to the
motor
0
with
the four
0 screws 8
as
shown in the illustration.
At
this time, posi-
tion the beltcover 0 so that
it
does
not
touch the belt.
* A belt casting prevention guide and finger guard are
provided on the belt cover so refer
to
section
"2.1
Ad-
justing the belt cover safety mechanism" on page
16.
*
Die
Riemenabdeckung 0
mit
den vier in der Abbildung
gezeigten Schrauben 8 am
Motor
0 anbringen. Dabei
die Riemenabdeckung so ausrichten, daB sie den Ria-
men nicht beruhrt.
* Eine Riemenschutzfuhrung und ein Fingerschutz sind
an
der Riemenabdeckung angebracht; beachten Sie daher
Abschnitt
"2.1
Einstellen der Riemenschutz-Sicherheitsvorichtung" aufSeite
16.
* Fixer le couvercle 0 de courroie sur
le
moteur 0 al'aide des quatre vis 8 comme indique sur !'illustration.
Ace
mo-
ment, placer le couvercle 0 de courroie de maniere qu'il n'entre pas en contact avec
Ia
courroie.
*
Un
guide de prevention de saute de courroie
et
un protege-doigts sont fixes sur le couvercle de courroie;
se
reporter a
Ia
section
"2.1
Reglage du dispositif de securite du couvercle de courroie" a
Ia
page
17.
* Asegurar
Ia
cubierta 0 de
Ia
correa en el
motor
0 con los cuatro tornillos 8 tal como
se
indica
en
Ia
figura.
En
este mo-
menta, instalar
Ia
cubierta 0 de
Ia
correa de tal forma que no toque
Ia
correa.
* Hay una gula de prevencion de salida de
Ia
correa y una proteccion para dedos
en
Ia
cubierta de
Ia
correa; consultar
Ia
seccion
"2.1
Ajuste del mecanisme de seguridad de
Ia
cubierta de
Ia
correa"
en
Ia
pagina
17.
1.4 Connecting
the
connecting rod
1.4
Montage
der
Zwischenstange
Hinweis:
1.4 Branchement de Ia
tige
de connexion
1.4 Conexi6n de Ia biela
*
Pass
the connecting rod joint 0 through hole A in the
treadle lever
8,
and tighten
it
with
the spring washer 0
and
nut
G.
* Adjust the position
of
the machine treadle plate so that
the connecting rod is perpendicular
to
the treadle plate.
Note:
* The treadle pressure is adjusted
to
the position
of
hole
A at the time
of
shipment
from
the factory. Refer
to
"2.2
Adjusting the treadle" on page
18.
* Stecken Sie das Zwischenstangengelenk 0 in das Loch
A des Pedalhebels 8 und befestigen Sie
es
mit
der
fe-
derscheibe 0 und der Mutter
G.
* Stellen Sie die Position derMaschinenpedalplatte so ein,
daB die Zwischenstange senkrecht zur Pedalplatte ange-
ordnet ist.
*
Bei
der Auslieferung wurde der Pedaldruck auf die Position des Loches A eingestellt. Fur die Einstellung
wird
auf den
Abschnitt "2.2 Einstellen des Pedals" aufSeite 18 verwiesen.
* Faire passer le raccord 0 de
Ia
tige de connexion atravers le trou A du levier 8 de pedale, puis le serrer aI'aide de
Ia
rondelle aressort 8
et
de l'ecrou
G.
* Regier
Ia
position de
Ia
plaque de pedale de machine de maniere que
Ia
tige de connexion soit perpendiculaire a
Ia
pla-
que de pedale.
Remarque:
*
La
pression de
Ia
pedale est reglee a
Ia
position du trou A au moment de I'expedition de l'usine.
Se
reporter a
Ia
section
"2.2 Reglage de
Ia
pedale" a
Ia
page
19.
* Pasar
Ia
junta de
Ia
biela 0 a traves del orificio A
en
Ia
palanca del pedal 8 y apretarla con
Ia
arandela de resorte 0 y
Ia
tuerca
8.
* Ajustar
Ia
posicion de
Ia
placa del pedal de
Ia
maquina de tal forma que
Ia
biela este perpendicular a
Ia
placa del pedal.
Nota:
*
La
presion del pedal
ha
sido ajustada a
Ia
posicion del orificio A antes de salir de
Ia
fabrica.
Para
mas informacion. Con-
sultar
Ia
seccion "2.2 Ajuste del pedal"
en
Ia
pagina
19.
-5-
From the library of: Superior Sewing Machine & Supply LLC

1.5 Connecting
the
cords
1.5. AnschluB der Kabel
A A Caution
V Turn
off
the power switch before connecting and disconnecting the power cord, otherwise damage
to
the control
box may result.
A A Caution
V Confirm that the plug is notdisconnected or loosened before turning on the
power
switch.
A Caution
8 Secure the cords so thatthey do
not
touch the belt, otherwise the cord insulation may become damaged while the
machine is operating, which could cause damage to the control box.
eA Caution
Always ground the power supply
of
the 3-phase
motor
and single-phase 220 V
to
240 V motors.
Incomplete grounding could lead
to
electric shocks.
A
AAchtung
V Schalten Sie den Netzschalter vor dem AnschlieBen und Losen des Netzkabels aus, weil sonst der Schaltkasten be-
schadigt werden kann.
A
AAchtung
V Vor dem Einschalten des Netzschalters ist darauf
zu
achten, daB der Netzstecker richtig angesteckt ist.
A
AAchtung
V Sichern Sie die Kabel, so daB sie den Keilriemen nicht beruhren konnen. Eine durchgescheuerte Kabelisolation
kann
zu
Beschadigungen des Schaltkastens fuhren.
e
AAchtung
lmmer
die Stromversorgung des dreiphasigen Motors und des einphasigen Motors (220 V bis
240
V)
erden. Unzu-
reichende Erdung kann
zu
elketrischen Schlagen fuhren.
*
Pass
the connectors through the hole in the
work
table, and connect them
with
the binding band
as
shown in the illus-
tration
to
prevent loosening.
* Ziehen Sie die Stecker durch das Loch
im
Nahtisch und schlieBen Sie sie
mit
dem Befestigungsband
wie
gezeigt
an,
urn
ein Losen
zu
verhindern.
Binding band
Befestigungsband
12-pin plug
12
poliger Stecker
I
.J
Synchronizer cord
_1j
Synchronlsatorlcabe~
1
12-pin plug
12
poliger Stecker
6-pin plug
6 poliger Stecker
-6-
From the library of: Superior Sewing Machine & Supply LLC

1.5 Branchement des cordons
1.5 Conexi6n de los cables
8
8
A Attention
Mettre l'interrupteur principal
en
position d'arret avant de brancher
et
de debrancher le cordon d'alimentation, si-
non le boitier de commande risquera d'etre endommage.
A Attention
S'assurer que
Ia
fiche n'est pas debranchee ou mal engagee avant de mettre l'interrupteur principal sur
Ia
position
demarche.
A A Attention
V Fixer les cables de maniere qu'ils
ne
touchent pas
Ia
courroie, sinon !'isolation des cables risque de
se
deteriorer
pendant le fonctionnement de
Ia
machine,
ce
qui pourrait endommager le boitierde commande.
A A Attention
V Toujours brancher le fil de terre du moteur triphase
et
des moteurs monophases de 220 V a240
V.
Si
le fil de terre
n'est pas bien branche, il y aura risque d'electrocution.
8
8
A Atenci6n
Desconectar
el
interrupter principal antes de conectar o desconectar
el
cable de alimentaci6n, de lo contrario
se
podria daliar
Ia
caja de controles.
AAtenci6n
Confirmar que
el
enchufe no esta desconectado o aflojado antes de conectar
el
interrupter principal.
A
AAtenci6n
V Asegurar los cables de manera que no toquen
Ia
correa, de lo contrario
Ia
aislaci6n del cable
se
podria daliar mien-
tras
Ia
maquina esta funcionando, lo cual podria daliar
Ia
caja de controles.
A
AAtenci6n
V Conectar siempre
Ia
fuente de alimentaci6n del
motor
trifasico y los motores monofasicos de
220
V a 240
V.
Una
mala conexi6n a tierra puede provocar una sacudida electrica.
* Faire passer les connecteurs atravers le trou de
Ia
table de travail, puis les brancher fermement al'aide de
Ia
bande
d'attache fournies, comme indique sur !'illustration.
* Pasar los conectores
por
el
orificio
en
Ia
mesa de trabajo, y conectarlos con
Ia
banda de fijaci6n incluidas tal como
se
indica
en
Ia
figura para evitar que
se
afloje.
Bande d'attache
Banda de fijaci6n
Fiche a
12
broches
Enchufe de
12
clavijas
I
Fiche a6 broches
Enchufe de 6 clavijas
.J
CAble du synchronlseur
~
Cable del slncronizador
___/
f
-7-
Fiche a
12
broches
Enchufe de
12
clavijas
Fiche a6 broches
Enchufe de 6 clavijas
From the library of: Superior Sewing Machine & Supply LLC
* 12-pin plug
terminal
* Klemmen des 12poligen Steckers
* Borne defiche a12broches
* Terminal del enchufe de 12clavijas
12-pin plug No.
12poliger Stecker Nr.
Fiche
a
12
broches No.
Enchufe de
12
clavijas No.
Thread trimming solenoid
Fadenabschneidersolenoid
@@
Soleno"ide
du coupe du fil
Solenoide del cortahilos
Thread wiping solenoid
Fadenwischersolenoid ®®
Soleno"ide
du tire-fil
Solenoide dellimpiahilos
Reverse solenoid
Umkehrsolenoid ®®
Soh3no"ide
de couture arriere
Solenoide de marcha atras
Actuator switch
Betriebsschalter ®@
lnterrupteur d'actionneur
Interrupter del actuador
Option output
Zusatzausgang
<D®
Sortie d'option
Salida opcional
Ground
Masse ®
Terre
Conexi6n a tierra
Spare
Frei
®
Rechange
Repuesto
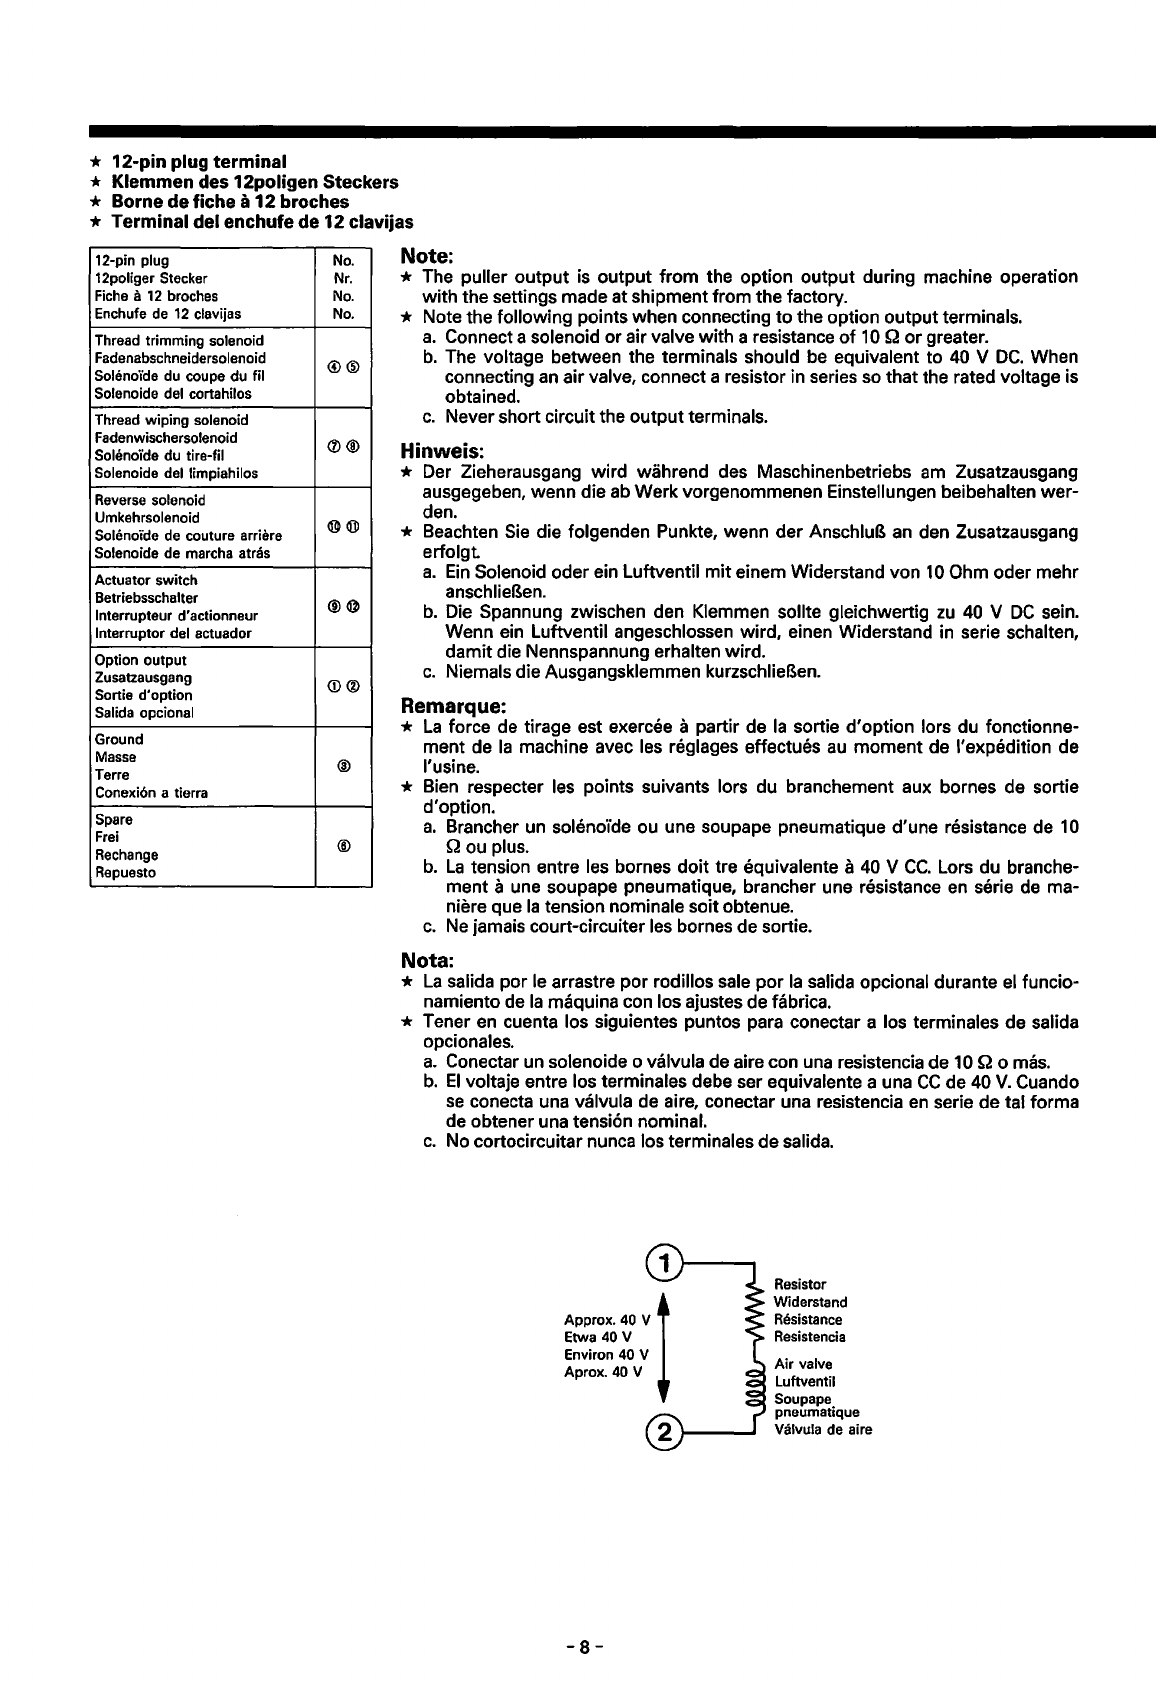
Note:
* The puller output
is
output from the option output during machine operation
with the settings made at shipment from the factory.
* Note the following points when connecting
to
the option outputterminals.
a.
Connect a solenoid or air valve with a resistance
of
10
Q
or
greater.
b.
The voltage between the terminals should
be
equivalent to 40 V
DC.
When
connecting
an
air valve, connect a resistor in series so thatthe rated voltage is
obtained.
c.
Never short circuit the outputterminals.
Hinweis:
* Der Zieherausgang wird wahrend des Maschinenbetriebs
am
Zusatzausgang
ausgegeben, wenn die
ab
Werk vorgenommenen Einstellungen beibehalten wer-
den.
* Beachten
Sie
die folgenden Punkte, wenn der AnschluB
an
den Zusatzausgang
erfolgt
a.
Ein
Solenoid oder ein Luftventil
mit
einem Widerstand von
10
Ohm oder mehr
anschlieBen.
b.
Die Spannung zwischen den Klemmen sollte gleichwertig
zu
40 V
DC
sein.
Wenn ein Luftventil angeschlossen wird, einen Widerstand in serie schalten,
damitdie Nennspannung erhalten wird.
c.
Niemals die Ausgangsklemmen kurzschlieBen.
Remarque:
*
La
force de tirage est exercee apartir de
Ia
sortie d'option lors du fonctionne-
ment de
Ia
machine avec les reglages effectues
au
moment de !'expedition de
l'usine.
* Bien respecter les points suivants lors du branchement aux bornes de sortie
d'option.
a.
Brancher un soleno'ide ou une soupape pneumatique d'une resistance de
10
Q ou plus.
b.
La
tension entre les bornes doit tre equivalente a
40
V
CC.
Lors du branche-
ment aune soupape pneumatique, brancher une resistance
en
serie de ma-
niere que
Ia
tension nominale soitobtenue.
c.
Ne
jamais court-circuiter les barnes de sortie.
Nota:
*
La
salida por
le
arrastre por rodillos sale por
Ia
salida opcional durante
el
funcio-
namiento de
Ia
maquina con los ajustes de fabrica.
* Tener
en
cuenta los siguientes puntos para conectar a los terminales de salida
opcionales.
a.
Conectar un solenoide o valvula de aire con una resistencia de
10
Q o
mas.
b.
El
voltaje entre los terminales debe ser equivalente a una
CC
de 40
V.
Cuando
se
conecta una valvula de aire, conectar una resistencia
en
serie de tal forma
de obtener una tension nominal.
c.
No cortocircuitar nunca los terminales de salida.
1
:~~o;
0
~o
v t
Environ 40 V
Aprox.
40
V
-8-
Resistor
Widerstand
Resistance
Resistencia
Air
valve
Luftventil
Soupape
pneumatique
Valvula de aire
From the library of: Superior Sewing Machine & Supply LLC
Other manuals for MD-601
1
This manual suits for next models
1
Table of contents
Other Brother Engine manuals


Popular Engine manuals by other brands

Yanmar
Yanmar 4JH3-TE Service manual

Lycoming
Lycoming VO-540 Series Operator's manual

Briggs & Stratton
Briggs & Stratton 90000 series Operating & maintenance instructions

NSK
NSK MEGATORQUE MOTOR SYSTEM user manual

Northern Lights
Northern Lights NL773LW4 Operator's manual

Grundfos
Grundfos MS 4000 Product guide

Doosan
Doosan G430 LP Service manual

Siemens
Siemens 6FB1203-5AT00-7MP0 Compact operating instructions

Weber
Weber MPE 750 NA Marine Service manual

MOBILUS
MOBILUS M35 MR Installation and operating instructions

Thermador
Thermador VTN630W installation instructions

Lycoming
Lycoming IO-390-D Series Installation and operation manual


