manuals.online logo
Brands
  1. Home
  2. •
  3. Brands
  4. •
  5. BRUEL & KJAER
  6. •
  7. Protection Device
  8. •
  9. BRUEL & KJAER VIBROCONTROL 8000 User manual

BRUEL & KJAER VIBROCONTROL 8000 User manual

Keep it accessible for future reference
VIBROCONTROL 8000 Machinery
Protection System (VC-8000)
Operation and Maintenance
OPERATION AND MAINTENANCE INSTRUCTION
MANUAL
Instruction
Trademarks and Copyrights
All trademarks, service marks, and/or registered trademarks used in this document belong to BK Vibro America
Inc., except as noted below:
Bently Nevada , Velomitor, REBAM, and Keyphasor are marks of the General Electric Company in the
United States and other countries.
Microsoft, Excel, Windows, and Outlook and their respective designs are marks of Microsoft Corporation in
the United States and other countries.
Modbus® is a mark of Schneider Automation in the United States and other countries.
OSIsoft, the OSIsoft logo and logotype, Managed PI, OSIsoft Advanced Services, OSIsoft Cloud Services,
OSIsoft Connected Services, PI ACE, PI Advanced Computing Engine, PI AF SDK, PI API, PI Asset
Framework, PI Audit Viewer, PI Builder, PI Cloud Connect, PI Connectors, PI Vision, PI Data Archive, PI
DataLink, PI DataLink Server, PI Developer's Club, PI Integrator for Business Analytics, PI Interfaces, PI JDBC
driver, PI Manual Logger, PI Notifications, PI ODBC, PI OLEDB Enterprise, PI OLEDB Provider, PI OPC HDA
Server, PI ProcessBook, PI SDK, PI Server, PI Square, PI System, PI System Access, PI Visualization Suite,
PI Web API, PI WebParts, PI Web Services, RLINK and RtReports are all trademarks of OSIsoft, LLC.
Trademarks used herein are the property of their respective owners.
Data and specifications are subject to change without notice.
Copyright © 2020 Brüel & Kjaer Vibro GmbH
All rights to this technical documentation remain reserved.
Any corporeal or incorporeal reproduction or dissemination of this technical documentation or making this
document available to the public without prior written approval from Brüel & Kjaer Vibro GmbH shall be
prohibited. This also applies to parts of this technical documentation.
Instructions VC-8000 MPS, S1079330.002 / V04, EN, date of issue: 05.03.2020
Technical alterations reserved!
BK Vibro America Inc.
2243 Park Place
Suite A
Minden, NV 89423
U.S.A.
Phone: +1 (775) 552-3110
E-Mail:
info@setpointvibration.com
Brüel & Kjaer Vibro GmbH
Leydhecker Str. 10
64293 Darmstadt
Germany
Phone: +49 (0) 6151 428 0
Fax: +49 (0) 6151 428 10 00
E-Mail: info@bkvibro.com
www.bkvibro.com
Hotline:
Phone: +49 6151 428 1400
E-Mail: support@bkvibro.com
https://www.bkvibro.com/en/products/setpoint-machinery-protection-system-vc-8000.html
© Brüel & Kjaer Vibro ●S1079330.002 / V04 ●█Page 3 of 188
Technical alterations reserved!
Brüel & Kjaer Vibro │Instruction
VC-8000 MPS Content EN
Content
1VC-8000 Machinery Protection System 16
1.1 Rack Chassis 17
1.2 Four Basic Cards for the VC-8000 18
1.2.1 Rack Connection Module (RCM) 19
1.2.2 System Access Module (eSAM or bSAM) 20
1.2.3 Universal Monitoring Module (UMM) 21
1.2.4 Temperature Monitoring Module (TMM) 22
1.3 Touch Screen Display Panel 23
1.3.1 Buffered Output BNC Connectors 23
1.4 Rack Setup and Maintenance Software 23
2Safety Information 24
2.1 Intended use 24
2.2 Sources of Danger 24
2.2.1 Supply Voltage 24
2.2.2 Relay/Trip Voltage 24
2.3 User Qualification 25
2.4 Regular Maintenance Schedules 25
2.4.1 Firmware Updates 25
2.5 Pictograms 25
2.6 Related Documents 26
2.6.1 Instruction Manuals 26
2.6.2 Specifications 26
2.6.3 Drawings 26
2.6.4 Application Notes 26
3Engineering - Choosing a Mounting Method 27
3.1 Helpful Tips for Rack Installation 27
3.2 Bulkhead Mounting 28
3.3 Panel Mounting 29
3.3.1 VC-4000, VC-6000, or BN 3300 Replacement (Wire from Rear) 29
3.4 19” EIA Rack Mounting (rare) 30
3.5 Weather Proof Enclosure Mounting 30
3.6 Mounting Hole Drawings 31
3.7 Other Considerations 31
3.7.1 Mounting the Display Remotely 31
Page 4 of 188 █ © Brüel & Kjaer Vibro ●S1079330.002 / V04
Technical alterations reserved
EN
CORPORATE DOCUMENT
3.7.2 Clearance and Cooling 31
3.7.3 3300 or 7200 Replacement 32
3.7.4 Mounting Orientation 32
3.7.5 Moving Mounting Brackets in the Field 32
4Engineering - Channel Layout 33
4.1 Phase Trigger Channels 33
4.2 Orbit (XY) Pairs 33
4.3 Relay Logic (Group Lines) 34
5Engineering – CMS Gateway 35
6Engineering - Managing and Minimizing Alarms 36
6.1 Set Effective Time Delays 36
6.2 Use Non-Latching Alarms, & Latching Relays 36
6.3 Increase Confidence with Regular Maintenance 36
6.4 Install a Remote Reset 36
6.5 Use Rack Inhibit for Light Maintenance Activities 37
6.6 Use Channel Bypass Appropriately 37
6.7 Reading the Event List 37
6.8 Trip Multiply 38
6.9 Avoid False Trips 38
6.9.1 Install an External Bypass Device 38
6.9.2 If the Machine is Running – Don’t Touch the Rack. 38
6.9.3 Can I Bypass “the Rack” to Avoid a False Trip? No. 39
6.9.4 Every Card is a Relay Card 39
7Wiring - Power and Grounding 40
7.1 RCM Power Strategy 40
7.2 Connecting Power 40
7.2.1 RCM Power Connections 40
7.2.2 Input Power Fuse Protection 41
7.2.3 Power Status (LEDs) 41
7.2.4 Selecting an External Power Supply 41
7.2.5 Using Plant-Wide +24 Vdc Power 42
7.2.6 Designating a “Primary” Power Supply 42
7.2.7 Power Redundancy (Do I need a PCM?) 42
7.2.8 Power Wiring Cable Lengths 42
7.3 Connecting Grounds 43
7.3.1 System Chassis Ground 43
7.3.2 Single Point Ground (System Common to Chassis Connection) 43
8Wiring – Sensors 44
© Brüel & Kjaer Vibro ●S1079330.002 / V04 ●█Page 5 of 188
Technical alterations reserved!
Brüel & Kjaer Vibro │Instruction
VC-8000 MPS Content EN
8.1 UMM Sensor Wiring 44
8.1.1 3-Wire Proximity Transducers 44
8.1.2 Wiring 3-Wire Accelerometers 44
8.1.3 Wiring IEPE Transducers 45
8.1.4Wiring Moving Coil Velocity Sensors 45
8.1.5 Wiring Proximity - Speed Sensors 46
8.1.6 Wiring Magnetic Pickup - Speed Sensors 46
8.1.7 Wiring Proximity Switch - Speed Sensors 46
8.1.8 Wiring Two-wire (4-20 mA) Loop-Powered Transmitters 47
8.1.9 Wiring Externally Powered (4-20 mA) Transmitters 48
8.2 TMM Sensor Wiring 49
8.2.1 Wiring RTDs 49
8.2.2 Wiring Thermocouples 50
8.2.3 TMM and Externally Powered (4-20 mA) Transmitters (Use Caution) 51
8.2.4 Connecting Voltage Mode (< 1.5V) Transmitters 52
9Wiring - Interfacing to External Systems (DCS) 53
9.1 Modbus Connections and Wiring 53
9.1.1 Modbus/TCP Ethernet Port (Also NTP) 54
9.1.2 Modbus Serial Port (RS-232, RS-422/485) 55
9.1.3 Redundant Modbus Communication 56
9.2 Fault (Not OK) Relay 57
9.2.1 Wiring to the Fault (Not OK) Relay 58
9.3 Rack Control Signals (Reset, Inhibit, Trip Multiply, SAI, Bypass) 59
9.3.1 RCM Discrete Input Connector 60
9.3.2 UMM Discrete Input Channel 60
9.3.3 Modbus Discrete Input Commands 61
9.3.4 VC-8000 Rack Maintenance Software Commands 61
9.4 Buffered Output Connectors 62
9.4.1 UMM Buffered Output Connector (RJ-45) 62
9.4.2 RCM (Secondary) Buffered Output Connector 63
9.5 Analog (4-20 mA) Output 63
9.5.1 4-20 mA Fault Conditions 64
9.5.2 4-20 mA Output Wiring 64
9.6 Relay Output 65
9.6.1 Relay Wiring 65
9.7 Rack Time Synchronization 66
9.7.1 Choosing a Time Zone 66
9.7.2 Time Synchronization via CMS (DAC) 66
9.7.3 Time Synchronization via NTP (via SAM DCS port) 67
Page 6 of 188 █ © Brüel & Kjaer Vibro ●S1079330.002 / V04
Technical alterations reserved
EN
CORPORATE DOCUMENT
9.7.4 Set Rack Time with Rack Maintenance Software 67
9.7.5 Time Synchronization via Modbus 68
10 Software – Introduction (Start Here) 69
10.1 Software Installation 69
10.2 Rack Setup - Software Navigation 70
10.3 Helpful Tips 71
10.3.1 Default Units 71
10.3.2 Copy and Paste 71
10.3.3 Sort and Multiple Column Sort 72
10.3.4 Disable Unused (Spare) Channels 72
10.3.5 Configuration Errors 72
10.3.6 Grid Filter 73
10.3.7 Hard to Find (Hidden) Properties 74
10.4 Basic Rack Configuration 75
11 Software – Connecting to the Rack 76
11.1 Local Connection (Mini-B USB port) 76
11.1.1 Troubleshooting the USB Connection 76
11.2 Remote Connection (Ethernet) 77
11.2.1 Troubleshooting Remote Connection 77
11.2.2 I Forgot My Password 77
11.2.3 Simultaneous Connections (Local and Remote etc.) 77
11.3 Get the Configuration from the Rack 78
11.4 Send the Configuration to the Rack 78
11.5 User Account Connection Privileges 78
11.6 Configure Remote Connection 79
11.6.1 Verify Your Remote MPS License 80
11.6.2 Configure Remote Access in the SAM 80
11.6.3 Set User Account Passwords 80
11.6.4 Disable Remote MPS Access 81
11.7 Is it Safe to Connect a Laptop (or PC) to VC-8000? 81
12 Software - Visualizing VC-8000 Data 82
12.1 Viewing the Maintenance Display 82
12.1.1 Rack View 83
12.1.2 Percent-to-Danger (Red) Line 85
12.1.3 Signal Channel View 85
12.1.4 Full Signal Channel View 86
12.1.5 Relay Channel View 86
12.1.6 Machine View 87
12.1.7 Large Speed Readout 87
© Brüel & Kjaer Vibro ●S1079330.002 / V04 ●█Page 7 of 188
Technical alterations reserved!
Brüel & Kjaer Vibro │Instruction
VC-8000 MPS Content EN
12.1.8 Event Lists 88
12.1.9 Firmware and Hardware Info 88
12.2 Configuring the VC-8000 Displays 88
12.2.1 Module Description 89
12.2.2 Channel Names 89
12.2.3 Asset level 1 & Asset Level 2 Groups 90
12.2.4 Channel and Asset Group Order 92
12.3 Simulating the Display 93
12.4 Troubleshooting the Display Panel 94
12.4.1 Display Cursor Visible 94
12.4.2 Replacing the Display Cable 94
12.4.3 Touch Screen Calibration 94
12.5 Connecting a Digital Multimeter 95
12.5.1 Touch Screen Display Buffered Output Connectors (BNC) 95
12.5.2 UMM Buffered Output Connector (RJ-45) 95
13 Configuring - CMS Data Collection 96
13.1 Data Types 96
13.2 Managing Data Collection 96
13.2.1 SETPOINT CMS Licensing & Firmware Revisions 96
13.2.2 CMS (SAM) Connection Settings 97
13.2.3 CMS Navigation Path 97
13.2.4 Synchronous Waveforms 98
13.2.5 Asynchronous Waveforms 98
13.3 Waveform Data Collection Triggers 99
13.3.1 Delta Time (Dynamic Collection Rate (Time)) 99
13.3.2 Delta RPM (Dynamic Collection Rate (RPM)) 99
13.3.3 I-Factor % (Dynamic Collection Rate (% Change)) 100
13.3.4 Adaptive I-Factor 100
13.3.5 Boost Mode 101
13.3.6 Paired Channels (XY) 102
13.3.7 Group Channels (Machine Train) 102
13.4 Static Data Collection Triggers 102
13.4.1 Low Trigger (RPM), High Trigger (RPM) – Static Data Collection 103
13.5 CMS-SD, and CMS-HD 105
13.5.1 Excellent “Flight Recorder” Solution 105
13.5.2 CMS-SD (SD Card) 105
13.5.3 CMS-HD (Internal Solid Sate Drive) 106
14 Configuring - Modules Tab 107
14.1 All View 107
Page 8 of 188 █ © Brüel & Kjaer Vibro ●S1079330.002 / V04
Technical alterations reserved
EN
CORPORATE DOCUMENT
14.1.1 Slot, Type, Description, Notes 107
14.2 SAM View 107
15 Configuring - Channels Tab 108
15.1 Summary View 108
15.1.1 Channel On/Off, Slot, Channel 108
15.1.2 Channel Type, Transducer Type 108
15.1.3 Transducer Direction, Orientation 108
15.1.4 Associated Phase Trigger 108
15.1.5 Channel (Tag) Name 108
15.1.6 Asset Level 1 & Asset Level 2 109
15.1.7 Alert & Danger Latching 109
15.1.8 Display Order 109
15.2 Customize Transducer View 109
15.2.1 Barrier 109
15.2.2 Scale Factor (mV) & Unit 109
15.2.3 Max OK & Min OK (Fault Limits) 110
15.2.4 Transducer Power 110
15.2.5 Transducer Fault Mode 110
16 Configuring - Measurements Tab 111
16.1 Primary and All – Views 111
16.1.1 Measurement Name 111
16.1.2 Maximum & Minimum Scale, Units & Sub Units 111
16.1.3 Alert Alarm Type, Alert Alarms 112
16.1.4 Danger Alarm Types, Danger Alarms 112
16.1.5 Alert and Danger Alarms - Time Delay 112
16.1.6 High Pass, Low Pass Corner Frequency 113
16.1.7 Trip Multiply 113
16.1.8 X (Tracking Filter) 114
16.1.9 Clamp & 2 mA Clamp 114
16.1.10Adding Measurements or Waveforms to a Channel 115
16.1.11 Deleting Measurements or Waveforms from a Channel 115
16.2 Vector (nX) View 116
16.3 Waveform View 116
17 Configuring - Relays Tab 117
17.1 Basic Navigation and Layout 117
17.2 Relay Channel (and Relay Settings) 118
17.3 Using Pre-Programmed Logic Blocks 119
17.3.1 Define Machine Groups and Channel Types 119
17.3.2 For Any (1 or 2 or 3…) Logic Block 120
© Brüel & Kjaer Vibro ●S1079330.002 / V04 ●█Page 9 of 188
Technical alterations reserved!
Brüel & Kjaer Vibro │Instruction
VC-8000 MPS Content EN
17.3.3 For All (1 and 2 and 3…) Logic Block 121
17.3.4 For Any XY Pair (2oo2 Enforced) 122
17.3.5 For Any XY Pair (2oo2) 123
17.4 Using Channel Input Blocks 124
17.4.1 Channel Input with ‘Or’ 124
17.4.2 Channel Input with ‘And’ 125
17.4.3 Deleting a Block 126
17.4.4 Configuring DPDT Pairs 126
17.4.5 Group Line Limitation 126
17.4.6 Viewing the Summary 126
18 Configuring - Analog Outputs Tab 127
19 Configuring - Asset Display Order Tab 128
20 Configuring – Examples 129
20.1 Acceleration 129
20.2 Axial Position (Thrust) 129
20.2.1 Zero Position 129
20.2.2 Upscale (Normal) Direction 130
20.3 Phase Trigger 130
20.3.1 Direction of Rotation 130
20.3.2 Event Ratio 130
20.3.3 Auto Threshold and Hysteresis 131
20.3.4 Threshold (manual) 131
20.3.5 Trigger Type 131
20.3.6 Phase Trigger Installation 131
20.4 Process Variable Channels 132
20.5 Radial Vibration 132
20.6 Temperature Channels 133
20.6.1 Transducer Power 133
20.7 Velocity 133
21 Configuring – Modbus 134
21.1 Modbus Ethernet Connection 134
21.2 Serial Modbus Connection 134
21.3 Modbus Settings 134
21.3.1 Slave Address 134
21.3.2 Scaled Value 135
21.3.3 Modbus Map (Standard or Custom) 135
21.3.4 Communications Fault - Time Delay 135
21.3.5 Word Order 135
Page 10 of 188 █ © Brüel & Kjaer Vibro ●S1079330.002 / V04
Technical alterations reserved
EN
CORPORATE DOCUMENT
21.3.6 Allow Invalid Address 135
21.3.7 Allow Status Register Writes 135
21.4 The Standard (or Default) Modbus Map 136
21.4.1 View (Export) the Modbus Map 136
21.5 Create a Custom Modbus Map 137
21.5.1 Reverting Back to the Standard Map 137
21.6 Modbus Functions 138
21.6.1 Read Relay Channel Status Registers 138
21.6.2 Read Channel (or Measurement) Status Registers 138
21.6.3 Read Rack Status Registers 139
21.6.4 Read System Status Registers 140
21.6.5 Bit Packing (Status) into 16 bit Registers 140
21.6.6 Read Current Values 141
21.6.7 Read Alarm Setpoint Values 142
21.6.8 Read Rack Time 142
21.7 Modbus Wiring 143
21.8 Common Mistakes 143
21.8.1 Modbus Error Messages 144
22 Verification 145
22.1 Verification Procedure (General) 145
22.2 Channel Verification (Common Channel Types) 146
22.2.1 Verifying Axial (Thrust) Channels 146
22.2.2 Verifying Radial Vibration, Acceleration, and Velocity 147
22.2.3 Verifying Process Variable 149
22.2.4 Verifying nX Amplitude and Phase 150
22.2.5 Verifying Temperature Channels 151
23 Troubleshooting (Maintenance) 152
23.1 Save a Rack Maintenance File 152
23.2 USB (or Remote) Connection Problems 152
23.3 LED Indicators 152
23.3.1 RCM LED Indicators 153
23.3.2 SAM LED Indicators 153
23.3.3 UMM and TMM LED Indicators 154
23.4 Touchscreen Display 154
23.5 Event Lists 155
23.6 Inserting and Removing Modules 155
23.7 Firmware Upgrades 156
23.7.1 View Current Firmware Revisions 156
23.7.2 Update Firmware 157
© Brüel & Kjaer Vibro ●S1079330.002 / V04 ●█Page 11 of 188
Technical alterations reserved!
Brüel & Kjaer Vibro │Instruction
VC-8000 MPS Content EN
23.7.3 Upgrading the SAM (CMS) Firmware 158
23.8 License Upgrades 160
23.9 Password Reset 161
23.10 Hardware Information 162
23.11 Bypass a Signal (or Relay) Channel 163
23.11.1 Bypass Signal Channel 163
23.11.2 Bypass Relay Channel 165
23.12 Troubleshooting Phase Trigger Channels 167
24 Complete List of Channel Types 168
24.1 Standard Channels 168
24.1.1 Acceleration 168
24.1.2 Axial Position 169
24.1.3 Axial Position with Sync 169
24.1.4 Phase Trigger 169
24.1.5 Radial Vibration 169
24.1.6 Velocity 170
24.2 Aero Derivative 170
24.2.1 Aero-Derivative Accel 170
24.2.2 Aero-Derivative Velocity Tracking 170
24.2.3 Aero-Derivative Velocity 171
24.3 Diagnostic Channels 171
24.3.1 Diagnostic Proximity (Radial Vibration) 171
24.3.2 Diagnostic Velocity 171
24.3.3 Diagnostic Acceleration 171
24.3.4 General Dynamic 171
24.4 Hydro and Low Speed Machines 171
24.4.1 Accel Slow RMS 171
24.4.2 Air Gap 172
24.4.3 Hydro Radial Vibration 172
24.4.4 Hydro Velocity 172
24.4.5 Low Frequency Acceleration 172
24.4.6 Low Frequency Velocity 173
24.5 Pressure and Sound 173
24.5.1 Accoustic 173
24.5.2 Dynamic Pressure 173
24.6 Process Variable 174
24.6.1 Discrete Input 174
24.6.2 Process Variable 174
24.7 (Other) Radial Vibration 174
Page 12 of 188 █ © Brüel & Kjaer Vibro ●S1079330.002 / V04
Technical alterations reserved
EN
CORPORATE DOCUMENT
24.7.1 Air Machine Radial Vibration 174
24.7.2 Radial Vibration with Smax 175
24.8 Reciprocating Machines 175
24.8.1 Recip Crankcase Velocity 175
24.8.2 Recip Cylinder Pressure 175
24.8.3 Recip Impact 176
24.8.4 Recip Rod Drop 176
24.9 Rolling Element Bearing Monitoring 176
24.9.1 Enveloped Acceleration (Don’t use) 176
24.9.2 REBAM channel 177
24.9.3 REB Acceleration 177
24.9.4 REB Acceleration (Slow) 177
24.9.5 Tracking REB Acceleration (Recommended) 178
24.10 Rotation and Speed 178
24.10.1 Reverse Rotation 178
24.10.2 Tachometer (Rotation and Speed) 179
24.10.3 Zero Speed 179
24.11 Steam Turbine Monitoring 179
24.11.1 Case Expansion 179
24.11.2 Case Expansion (2 ch) 179
24.11.3 Diff Exp Single Probe 180
24.11.4 Diff Exp Comp Input 180
24.11.5 Diff Exp Dual Ramp 180
24.11.6Diff Exp Single Ramp 180
24.11.7 Eccentricity 181
24.11.8 Shaft Absolute RV 181
24.11.9 Shaft Absolute Vel 181
24.11.10 Valve Position 181
24.12 Temperature 182
25 Other MPS Features (less used) 183
25.1 Simulated Phase Triggers 183
25.2 My Rack Does Not Use a SAM Module 184
25.3 Resetting Held Values 184
25.4 Contacts View (Discrete Input Channels) 184
25.4.1 Contact Function 184
25.4.2 Group Name (Asset Level 1) 185
25.4.3 Polarity 185
25.5 Simulator Enable (SAM) 185
25.6 Power Connection Module (PCM) 186
© Brüel & Kjaer Vibro ●S1079330.002 / V04 ●█Page 13 of 188
Technical alterations reserved!
Brüel & Kjaer Vibro │Instruction
VC-8000 MPS Content EN
26 Appendices 187
26.1 Environmental Information 187
26.2 File Extensions 187
Page 14 of 188 █ © Brüel & Kjaer Vibro ●S1079330.002 / V04
Technical alterations reserved
EN
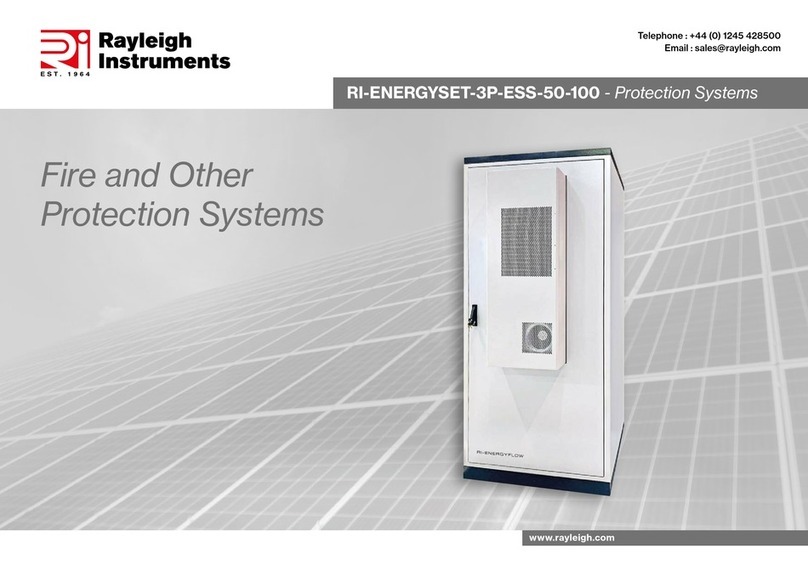
Figure Best Practice VC-8000 Installation 16 position rack, bulkhead mounted to subpanel
© Brüel & Kjaer Vibro ●S1079330.002 / V04 ●█Page 15 of 188
Technical alterations reserved!
Page 16 of 188 █ © Brüel & Kjaer Vibro ●S1079330.002 / V04
Technical alterations reserved
EN
1 VC-8000 Machinery Protection System
The VIBROCONTROL 8000, or VC-8000 is a versatile API 670, ISO 10816 and ISO 7919 compliant
machinery protection system consisting of the following components:
•VC-8000 rack, 3 sizes with different mounting options.
•Rack Connection Module (RCM)
•System Access Module (SAM)
•Universal Monitoring Module (UMM)
•Temperature Monitoring Module (TMM)
•Touch Screen Display Panel (optional)
There are many advantages with the VC-8000, starting with the architecture of the system which is
designed to simplify your installation and sustaining costs as much as possible. For example:
No I/O Modules, Compact Design
The rack was designed to save space. The 8 slots (8P) version of the rack (our most popular) is only
9.1’ (H) x 11.0’ (W) x 11.5’ (D) [230 mm (H) x 279 mm (L) x 217 mm (D)]. Yet it can easily handle
most machines with up to 24 channels available.
Integrated Relay, Phase, Modbus and Display
The VC-8000 does not require separate cards for Phase Trigger, Relay Channels, Modbus or local
Display. This saves up to four slots per rack and allows a smaller size rack to be used for many
machines.
Only 4 Spare Cards for Your Entire Site (that’s it!)
A single UMM handles every channel type and external interfaces. For example, Phase, Differential
Expansion, Radial Vibration, Relay Logic, and Analog Outputs.
Only four spares are needed for your entire site (RCM, SAM, UMM, TMM).
Simple Configuration Interface
The VC-8000 Rack Setup software uses a grid based interface, making it easy to see the
relationships between channels and configure your system.
© Brüel & Kjaer Vibro ●S1079330.002 / V04 ●█Page 17 of 188
Technical alterations reserved!
Brüel & Kjaer Vibro │Instruction
VC-8000 MPS VC-8000 Machinery Protection
System EN
1.1 Rack Chassis
The VC-8000 rack provides flexibility in mounting and arranging monitors modules. The rack is
available in three sizes:
•• 16 slots, full size rack (19”)
•• 8 slots, half-sized rack (most popular)
•• 4 slots, compact rack
All rack sizes support panel, bulkhead, and weatherproof box mounting. The 19” full size rack also
supports mounting in a 19” EIA enclosure.
There is an optional locking door to prevent tampering with wiring and network lines. The rack can
also be ordered with a touchscreen display.
The rack supports 1 to 15 Monitoring Modules depending on rack size and number of System Access
Modules. UMMs and TMMs will operate correctly when installed into any slot other than the first slot
which is reserved for the RCM.
Figure 1-1) The VC-8000
Page 18 of 188 █ © Brüel & Kjaer Vibro ●S1079330.002 / V04
Technical alterations reserved
EN
1.2 Four Basic Cards for the VC-8000
There are only four basic cards for the VC-8000 Machinery Protection System.
•RCM: Rack Connection Module
•SAM: System Access Module
•UMM: Universal Monitoring Module
•TMM: Temperature Monitoring Module
Figure 1-2) Four basic cards for the VC-8000
© Brüel & Kjaer Vibro ●S1079330.002 / V04 ●█Page 19 of 188
Technical alterations reserved!
Brüel & Kjaer Vibro │Instruction
VC-8000 MPS VC-8000 Machinery Protection
System EN
1.2.1 Rack Connection Module (RCM)
The Rack Connection Module (RCM) installs
in slot 1 and provides rack power
connections and other rack level interfaces.
•Primary power input
•Secondary power input
•Discrete contact control inputs
•Rack Fault Relay
•Reset button
•LED indictors
•Buffered transducer outputs
1.2.1.1 Redundant Power Supplies
The VC-8000 rack requires +24 Vdc external
power to operate. Redundant power inputs
are provided.
Plant +24 Vdc power can also be used.
IMPORTANT
+24Vdc COM is not isolated from the
Signal COM (in the UMM).
When using plant power (+24 Vdc), a
24V to 24V isolator is necessary.
Refer to the datasheets for information on
external power supply hardware, input
voltage tolerance, and current requirements.
Figure 1-3) RCM
Buffered Out
connector to external
device
+24 Vdc power input
connectors (2 pos)
Status LEDs
Latched Status Reset
Pushbutton
Discrete control contacts
(to dry relay contacts or
+5V TTL logic)
Fault Relay Contacts.
NC closes on fault
(or power loss)
Page 20 of 188 █ © Brüel & Kjaer Vibro ●S1079330.002 / V04
Technical alterations reserved
EN
1.2.2 System Access Module (eSAM or bSAM)
The System Access Module (SAM) installs
in slot 2 of the rack, it provides data to
external systems and simplifies
configuration of the rack. There are two
versions of the SAM; The basic SAM
(bSAM) and the enhanced SAM (eSAM).
bSAM
•Configuration of all modules
•Rack system and alarm event lists
•Modbus data
eSAM (preferred)
•All bSAM functionality
•Remote configuration and display
•CMS-SD
•CMS-HD
•CMS-XC
•CMS-PI
•Local touch panel display
eSAM features are a la carte and must be
selected (licensed) when ordering.
The serial Modbus links for the SAM include
RS-232, RS-422, and RS-485. The Serial
Modbus port uses an RJ-45 connector for
convenience, but it is not an Ethernet port.
Redundant Modbus is accomplished using a
primary SAM in slot 2 and a secondary SAM
in slot 3.
A SAM is not mandatory. Both slot 2 and
slot 3 support monitoring modules if a SAM
is not installed. All UMM/TMM monitoring
and alarming functions are independent of
the SAM. However, without a SAM in the
rack, all modules must be configured
independently.
The bSAM and the eSAM use the same
faceplate and look the same. Use VC-8000
maintenance software to verify which SAM
(and licenses) that you have installed (see
section 23.10).
Figure 1-4) SAM
Status LEDs
DCS Net (Modbus)
10/100 base T
Ethernet
CMS Ethernet
10/100/1000 base T
Touch Panel Display
connector
Serial Modbus
RS/232, 422, 485
(Not an Ethernet port)
SD Card
HD Memory (Internal)

This manual suits for next models

1

Popular Protection Device manuals by other brands

Guardian 01600 instruction manual

Guardian

Guardian 01600 instruction manual

Siemens Siprotec 7SD600 System manual

Siemens

Siemens Siprotec 7SD600 System manual

WAPRO WASTOP FLOOR DRAIN installation instructions

WAPRO

WAPRO WASTOP FLOOR DRAIN installation instructions

PPE PK6S user manual

PPE

PPE PK6S user manual

Tie Down Engineering Roof Zone Penetrator 2+2 instruction sheet

Tie Down Engineering

Tie Down Engineering Roof Zone Penetrator 2+2 instruction sheet

Quikserv QSB-12 Service manual

Quikserv

Quikserv QSB-12 Service manual

Eizo FP-2101 user manual

Eizo

Eizo FP-2101 user manual

Bender LifeGuard Series quick start guide

Bender

Bender LifeGuard Series quick start guide

DoorHan PHOTOCEL-N installation manual

DoorHan

DoorHan PHOTOCEL-N installation manual

THORLABS IO-F-SLD150-895 user manual

THORLABS

THORLABS IO-F-SLD150-895 user manual

Silverline 140903 Safety instructions

Silverline

Silverline 140903 Safety instructions

Cambium Networks PTP 650 LPU installation guide

Cambium Networks

Cambium Networks PTP 650 LPU installation guide

STEIN KRIEGER SS-7AZ150 quick start guide

STEIN

STEIN KRIEGER SS-7AZ150 quick start guide

Walter WaluCover Initial installation instructions

Walter

Walter WaluCover Initial installation instructions

Eclipse Security ECL-ACC997 manual

Eclipse Security

Eclipse Security ECL-ACC997 manual

CXS CAMBRIDGE Information for users

CXS

CXS CAMBRIDGE Information for users

Hitachi Relion RED670 Commissioning manual

Hitachi

Hitachi Relion RED670 Commissioning manual

Falltech 7083B User instruction manual

Falltech

Falltech 7083B User instruction manual

manuals.online logo
manuals.online logoBrands
  • About & Mission
  • Contact us
  • Privacy Policy
  • Terms and Conditions

Copyright 2025 Manuals.Online. All Rights Reserved.