16 17
Operation Operation
B
A
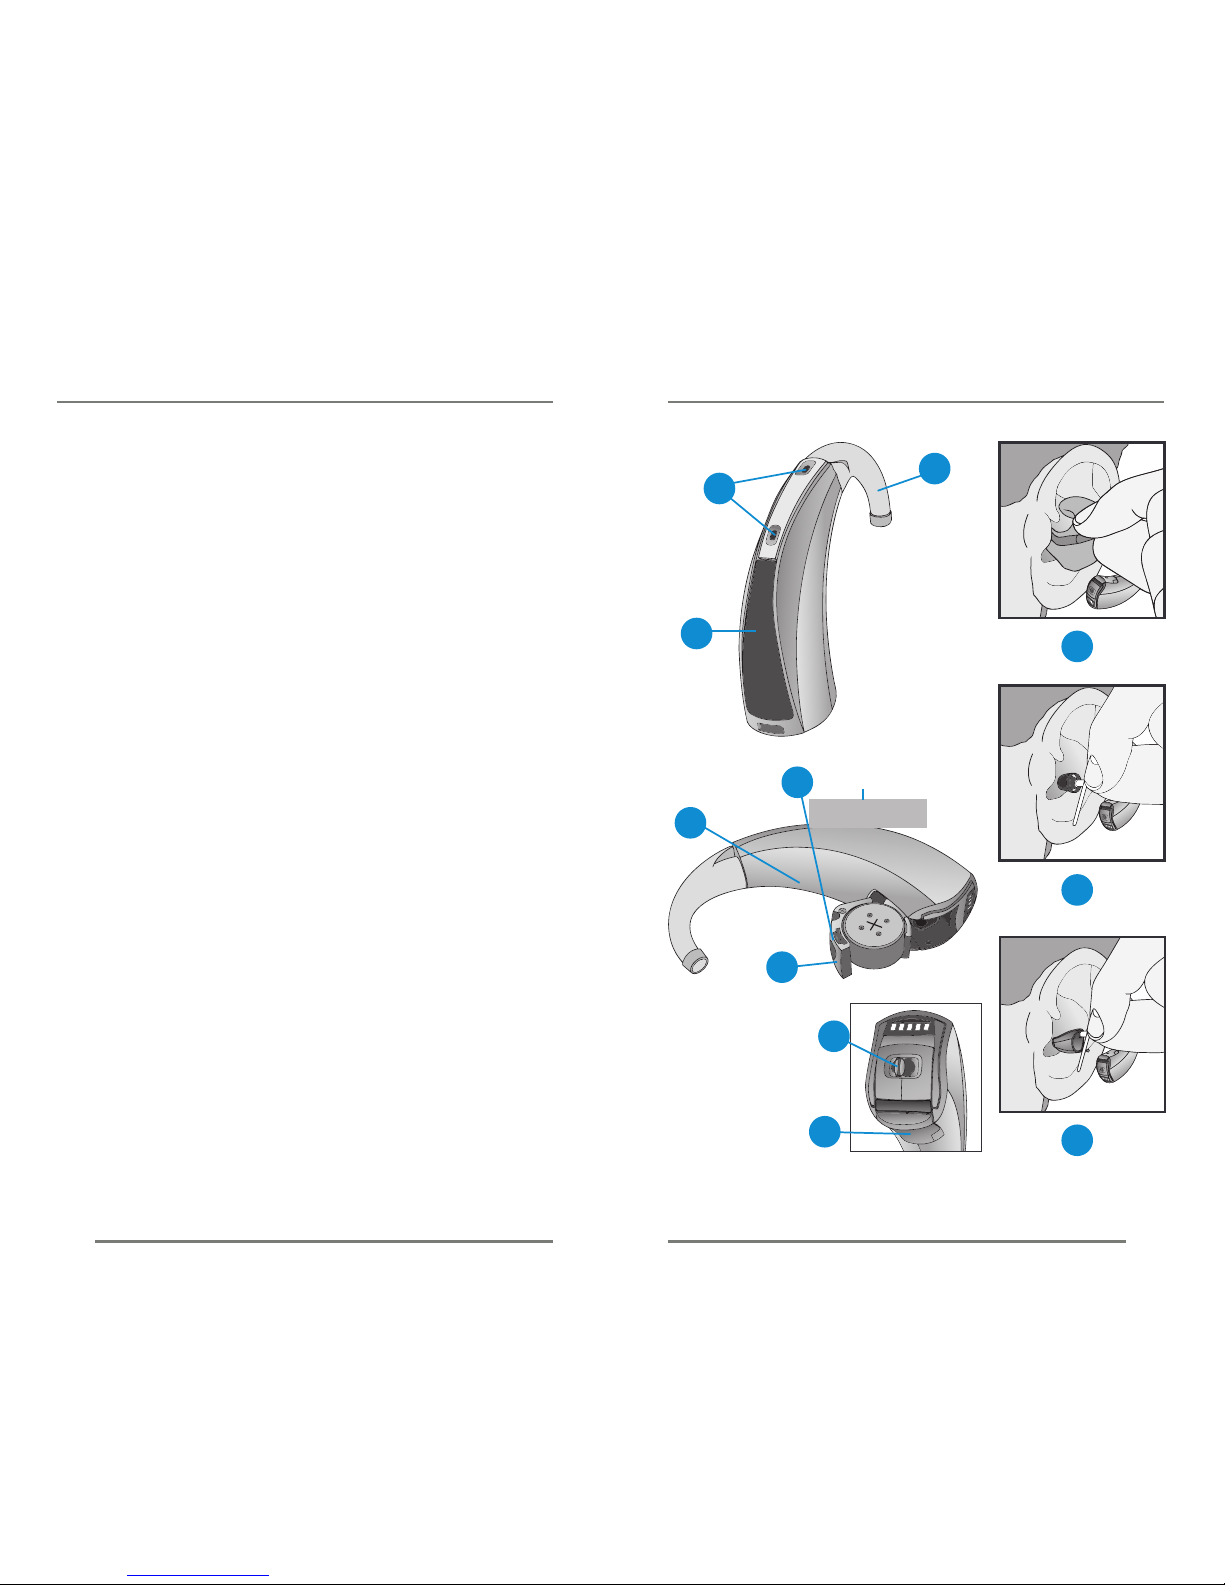
Your Hearing Aid uses the following volume controls:
Automatic Volume Control. See below.
Rocker Switch Volume Control. See next page.
Sweep Volume Control. See next page.
Touch and Release Volume Control.
See next page.
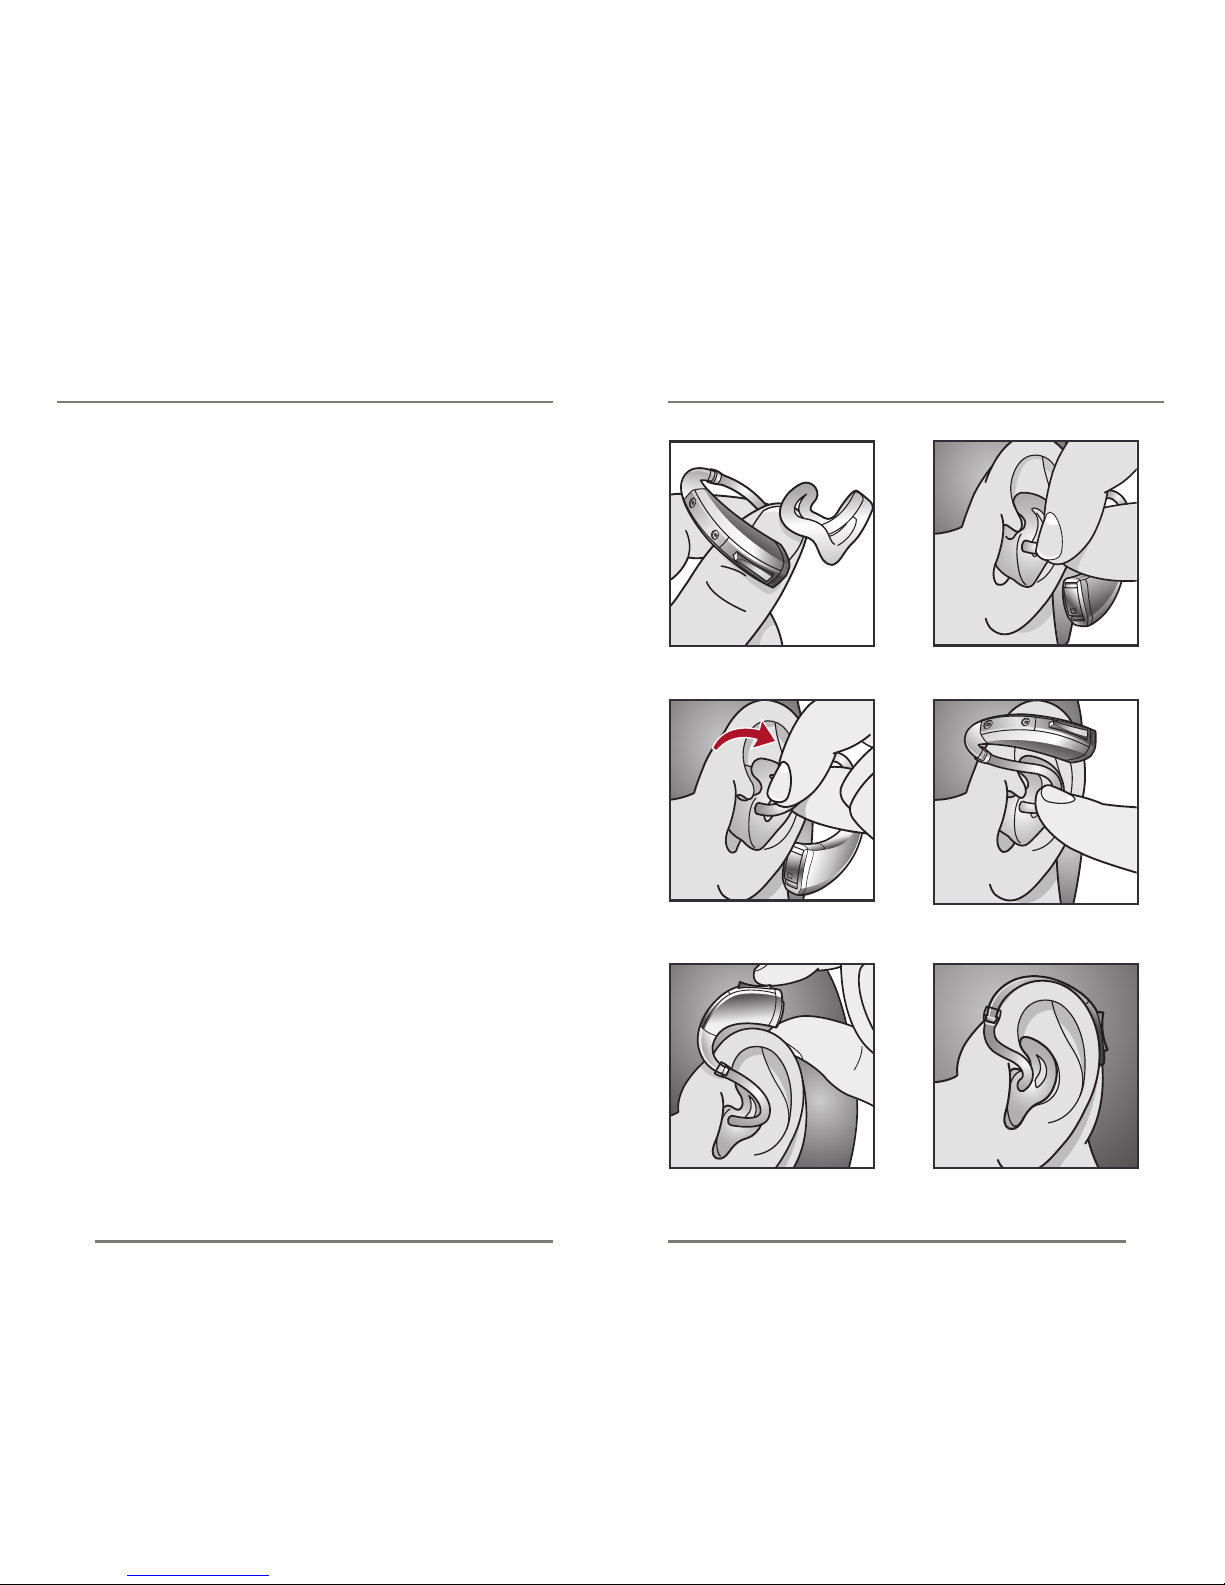
On & Off
To turn ON: Insert a battery and completely close the
battery door.
To turn OFF: Open the battery door until the battery is
no longer touching the battery contacts.
Your instrument has a Power-On delay and may require
a few seconds to power on.
You may hear a tone series indicating that your device
is fully powered on.
Your switch can be set to perform different functions.
Ask your hearing care professional how your device
is set.
Volume Control
Automatic Volume Control
Your hearing system has been set to a specific volume
level by your hearing care professional. If sounds are
generally too loud or too soft, please contact your
hearing care professional for advice and adjustment.
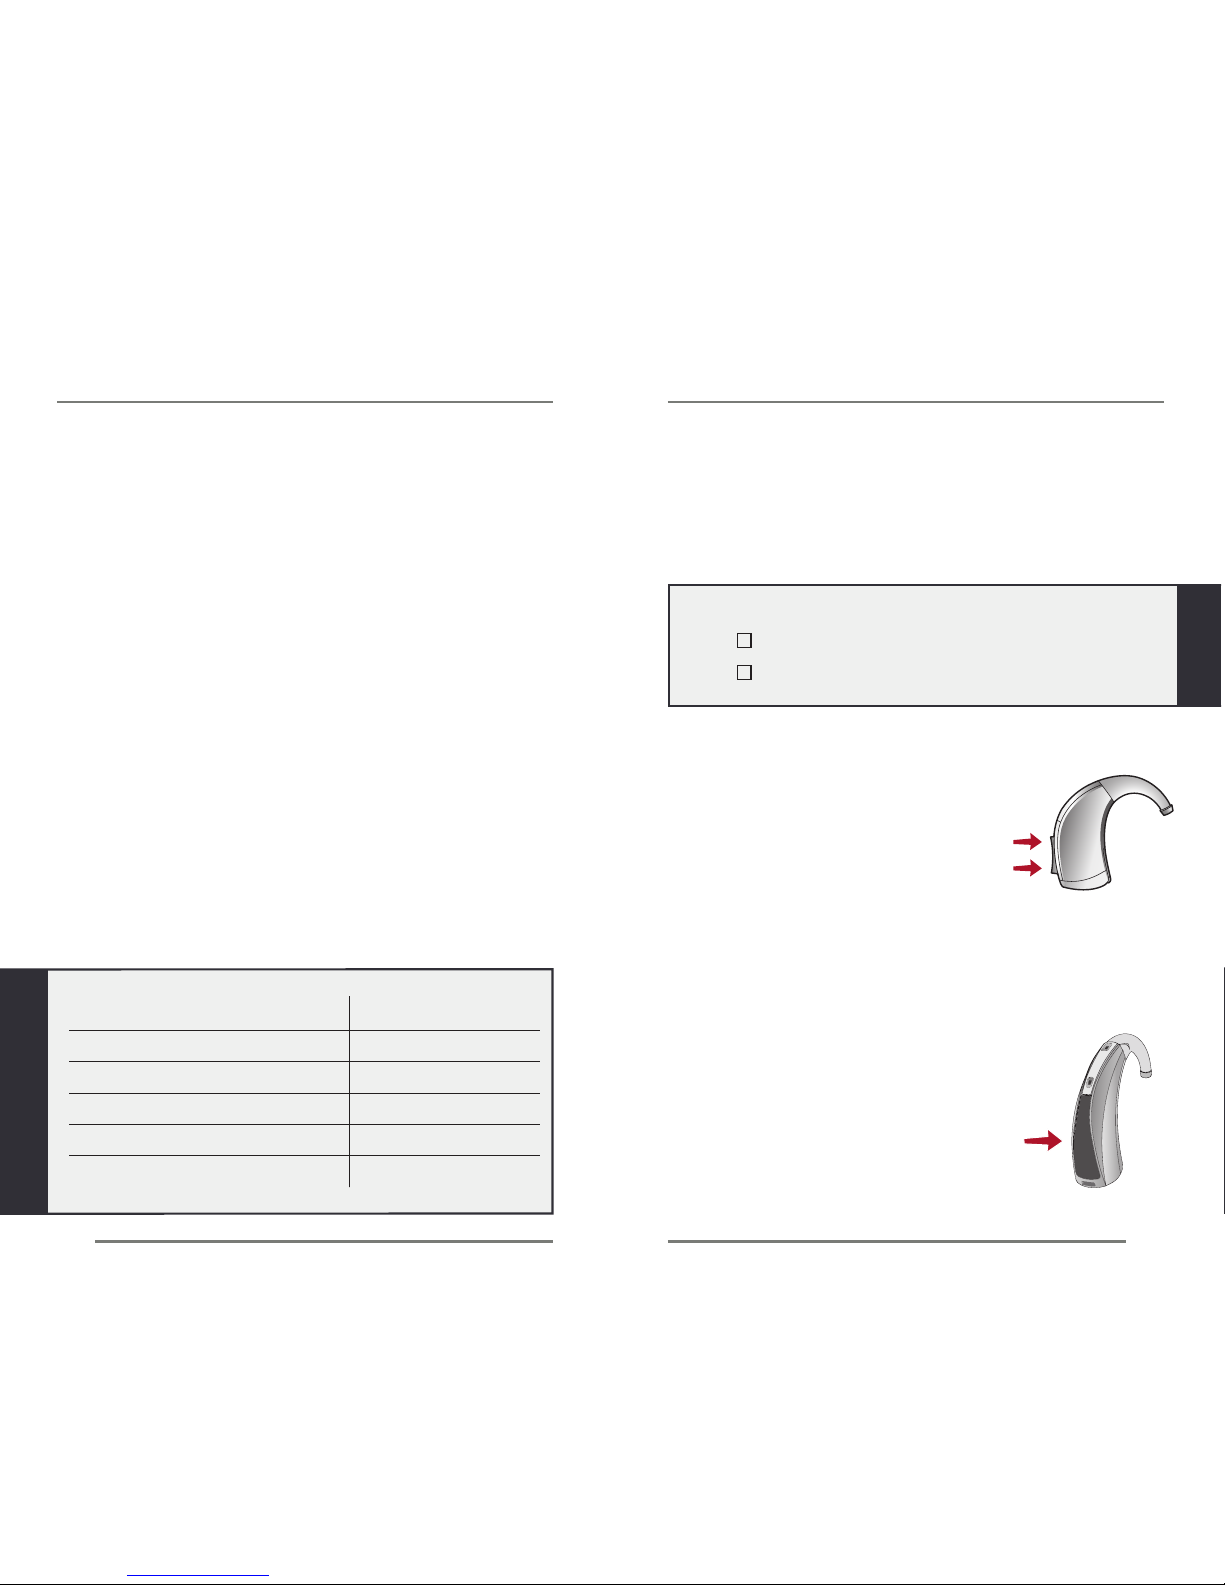
Rocker Switch Volume Control
Your hearing system uses the
rocker switch to control volume.
To increase volume, press then
release the top part of the switch.
To decrease volume, press then
release the bottom part of the
switch.
Sweep Volume Control
Your volume control is a Sweep
volume control. To make sounds
louder, sweep your finger from B to
A. Each sweep increases the volume
one step until you reach the desired
volume or the maximum setting.
To make sounds softer, sweep your
finger from A to B. Each sweep decreases the volume
one step until you reach the desired loudness or the
minimum setting.
Touch and Release Volume Control
Your volume control is configured as
a Touch and Release volume control.
Each time you touch anywhere on the
control surface the volume of your
hearing instrument changes.
The Touch and Release volume control is configured to
automatically decrease in volume before it increases.
To make sounds louder, touch and release the control