BTM SuperChek Plus User manual

5228BT-M01A1 Rev.date:11/2013
USER GUIDE
Model: 5228B

Explanation of symbols:Caution (refer to accompanying documents). Please refer to safety-related notes in the manual accompanying this instrument.Consult instructions for use.Keep away from sunlight.Authorised representive in the european community.ManufacturerDo not re-useUse-by dateBatch codeIn vitro diagnostic medical device. Temperature limit

1. ContentsSection Topic Page1. Contents 2. Introduction 3. Appearance and Key Functions of the meter 4. Alternate Site Testing 5. Safety Information 6. Quick Testing InstructionsPreparing for Testing 7. Installing the Battery 8. Settings (Date/Time/Alarm/Measuring Unit/ Memory Deletion )9. Running a Control Solution TestBlood Testing10. Running a Blood Glucose Test11. Recalling the Memory and Viewing the Average12. Expected Values13. Transmitting Results Maintenance 14. Maintenance of Your System
15. Troubleshooting 16. Customer Service
17. Limitations
Important Additional Information 18. Specifications 19. Ordering Supplies 20. Warranty Information 1 1 2-3 4 5-8910 11 12-1617-1819-2122-2324242526-272829303131NOTE: For information about the name of the manufacturer of the lancing device and the lancets, please refer to the package inserts that came with your starter kits.

22. Introduction to the SystemIntended Use / Indications for UseThe SuperCheck Plus Blood Glucose Monitoring System is intended for use in the quantitative measurement of glucose in fresh capillary whole blood from the finger and the forearm and venous whole blood. It is intended for self-testing by people with diabetes mellitus at home and healthcare professionals as an aid in monitoring the effectiveness of a diabetes control program. The SuperCheck Plus Blood Glucose Monitoring System is not intended for the diagnosis of or screening for diabetes mellitus, nor for use with neonates. The alternative site testing (forearm) in this system can only be used during steady-state blood glucose conditions.Contents of the SystemThis User Guide has been prepared to describe the proper use of the SuperCheck Plus Blood Glucose Monitoring System. Please read this User Guide and the package insert that comes with the SuperCheck Plus Glucose Test Strips before testing.The system is available either as a meter alone or as a kit. If you have a meter only, you can purchase the system supplies from your system provider.

The starter kit of SuperCheck Plus Blood Glucose Monitoring System includes the following items: 1. SuperCheck Plus Glucose Meter with 2 AAA batteries2.U ser Guide3.L og Book4.C arrying Case5. SuperCheck Plus Glucose Test Strips6. SuperCheck Plus Control Solution (Medium) 7.S terile Lancets 8.L ancing Device9.P ackage Inserts for Test Strips, Control Solution, and Lancets/Lancing Device"A single level control solution (Medium) is provided in the "Starter Kit," and no control solution is included in the "Meter Kit". You may purchase any control solutions that you need from your system provider."The SuperCheck Plus Glucose Meter uses SuperCheck Plus Glucose Test Strips. Neither the meter nor the test strips will work when used with any other brand of glucose products.3

4 3. Appearance and Key functions of the meter
The principle of the methodWhen glucose reacts with the reagents on the test strips, an electrical current is produced, which is proportional to the glucose concentration in the blood sample.The glucose concentration is calculated by the meter and based on the current measured.
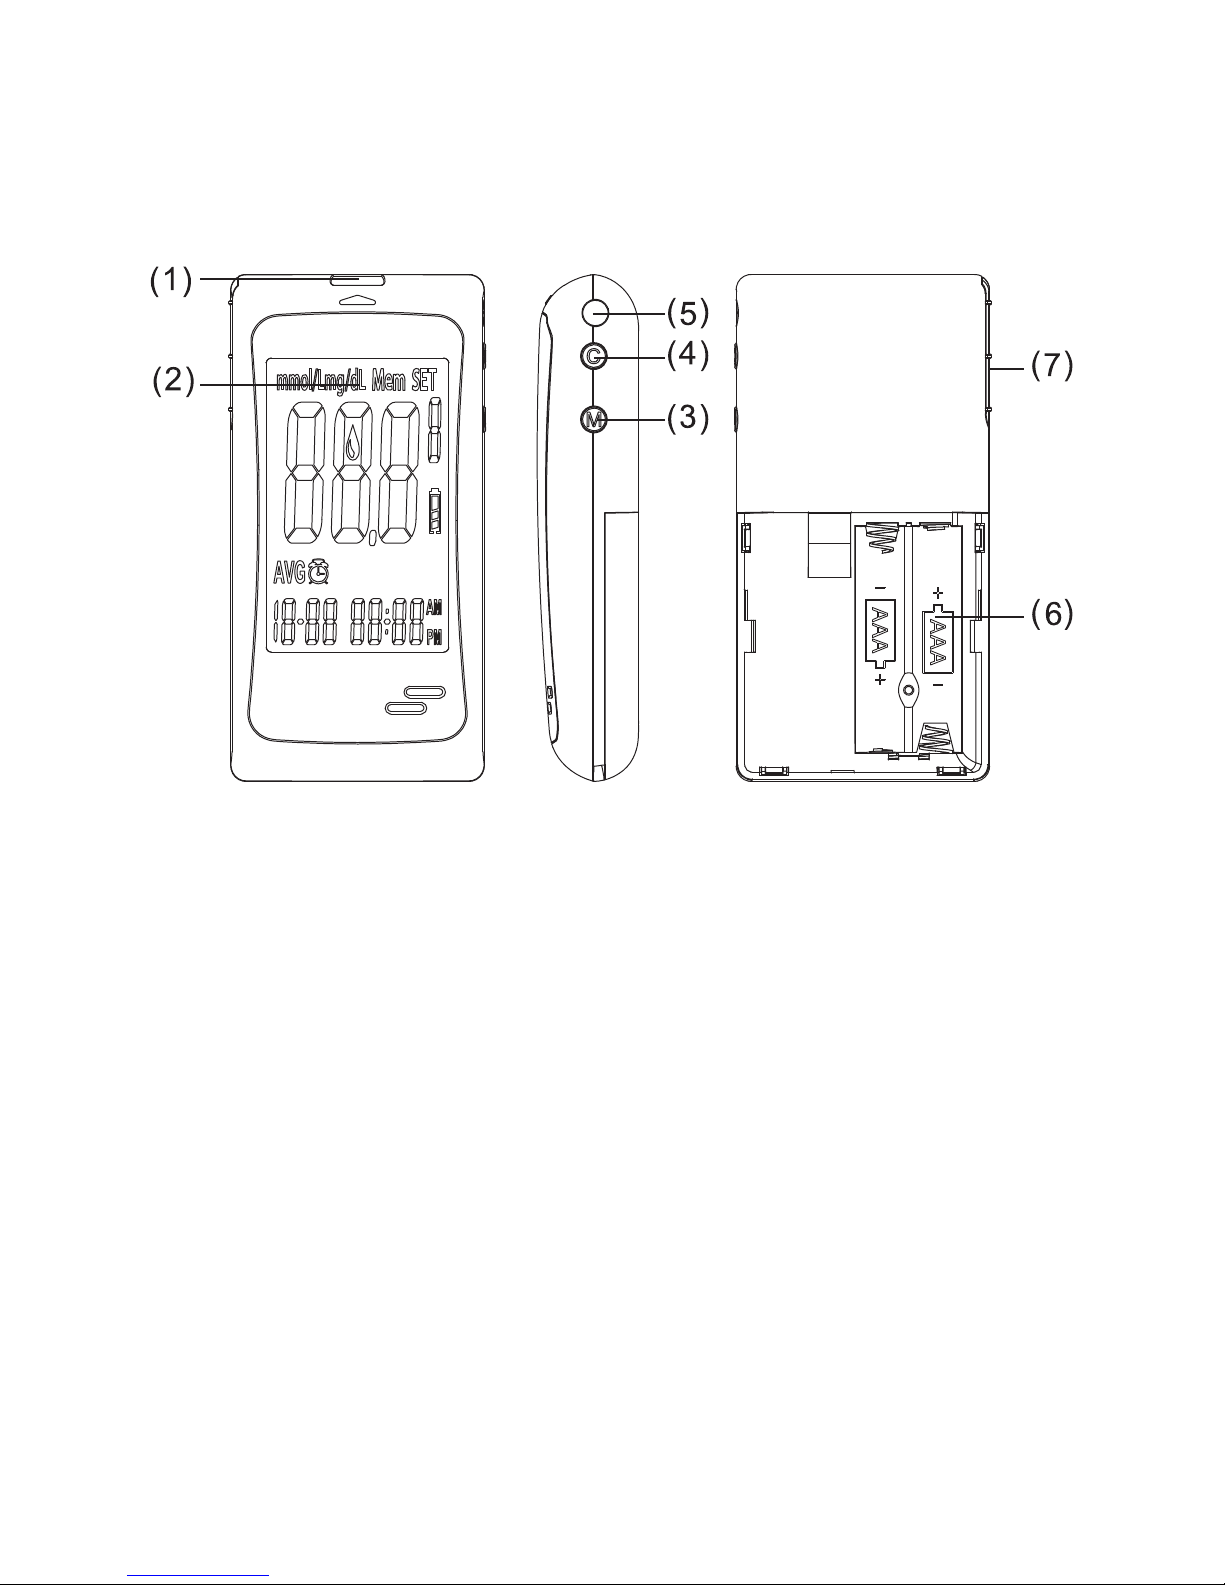
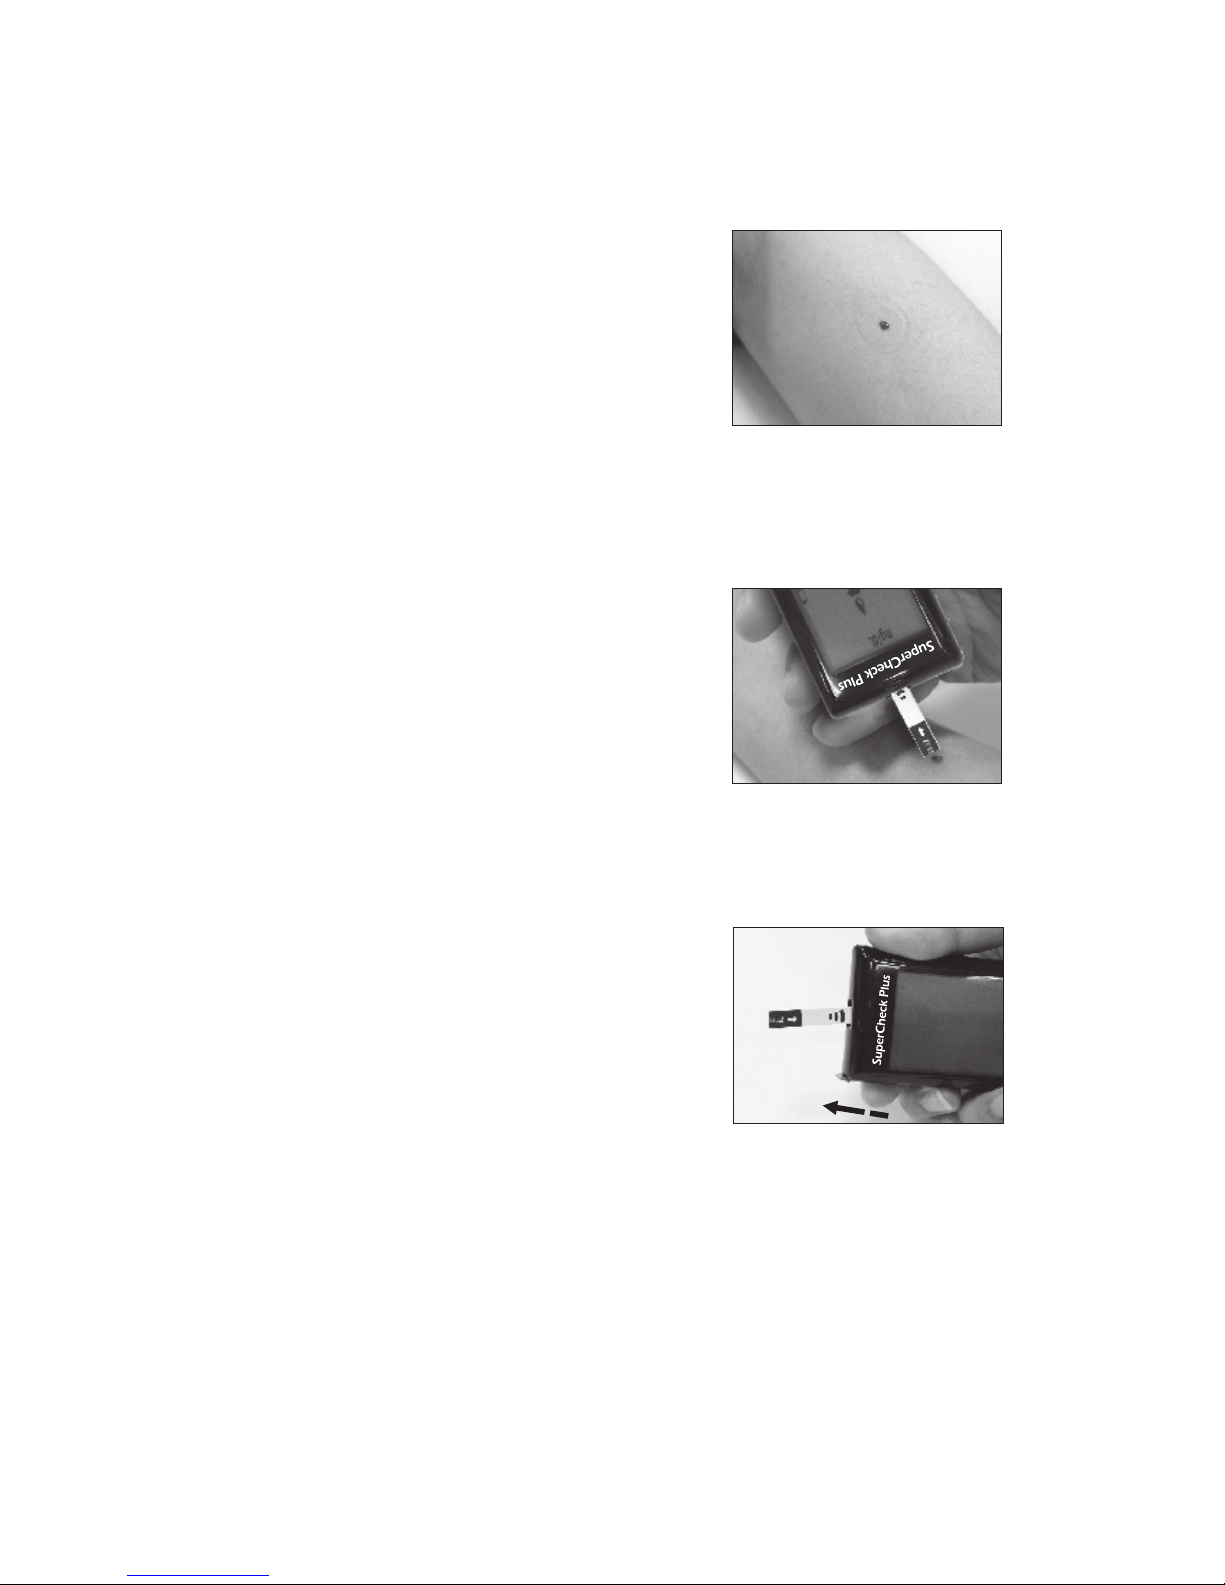
1.Test strip slot - When the strip is inserted into the slot, the meter will automatically turn on.2. LCD Display - Guide you through the test using symbols and simple messages.3. M Key - Power ON/OFF, also for memory recalling mode, please refer to manual for detailed function description.4. C Key - Setting mode, please refer to manual for detailed function description.5. RS232 port - Cable connection and data transmitting. The built-in Bluetooth also supports the data transmitting.6. Battery Compartment - Where batteries are located.7. Ejector - Remove used strip.
*If your meter has the backlight feature, it will be on in every operation to increase the readability in operation, hence help the user to operate the meter more smoothly.

54. Alternate Site Testing (AST)What is AST?AST is the sampling from anatomical sites (parts of the body) other than the fingertip (i.e. forearm) to check the blood glucose levels. This system allows you to test on the forearm with the equivalent results to fingertip testing.There are important limitations to AST. Please consult your healthcare professional before you use AST.What is the advantage ?It is more painful feeling when taking blood sample from fingertips because fingertips have many nerve endings. Other body sites do not have as many nerve endings, so you will not feel as much pain as at the fingertip.When to use AST ?Medication, stress, illness, food and exercise can affect blood glucose levels. Capillary whole blood at the fingertip can reflect test changes faster than capillary blood at other sites of body. If you test your blood glucose level during or immediately after a meal, physical exercise or stressful events, take the blood sample from your fingertip instead of from other sites.Use AST only:1. 2 hours or more after taking insulin;2. 2 hours or more after a meal;3. 2 hours or more after exercise.Do not use AST if you are pregnant, or if you are aware that your glucose level is not as stable as usual, or if you think you have hypoglycemia (low blood sugar) or hyperglycemia (high blood sugar).Do not use AST if you think your blood glucose is low and if your AST results do not match the way you feel.

6 Testing Procedure for AST1.Please unscrew the lancing device by turning the end cap counter clockwise. A clear cap will come with the package of a meter kit or a lancing device. The clear cap on the lancing device will make it easy for you to get a drop of blood forAST.2.Insert a new lancet firmly into the lancet holder.3.Twist off the protective top of the lancet.4.Close the end cap of the lancing device and grasp the lancing device as shown. Slide into locking position. If necessary, please set the lancing device for a deeper puncture. 5.Select a soft, fleshy area on your forearm that is clean and dry, awayfrom bone and free of visible veinsand hair. 12345

7
6.Massage the selected area gentlyto increase blood flow to the puncture site. Clean the test locationwith an alcohol wipe or with soapand water. 7.O pen the test strip vial. Take one new test strip out of the vial and quickly recap the vial to keep air out.8.Insert the test strip into the meter while the meter is off. The meter will turn on automatically. A blinking blood icon will be displayed on the screen. If no action is taken in 2 minutes, the meter will turn off automatically.9.Press and hold the loaded lancing device against the forearm for a few seconds, then press and release the button.6789

8 10111210. Wait for a few seconds until the blood drop forms. Make sure you have sufficient blood to fill the small window of the test strip. Forindividuals who experience difficulty in getting sufficient blood for a test, it may be helpful to rub the puncture site a little longer before using the lancing device.11. Apply your blood to the front edge (the tip) of the test strip, and the meter will start counting down for 5 seconds then display the test results on the screen. 12. Remove the used strip by hand or by pushing the ejector button. The meter will turn off automatically.

95. Safety InformationPlease use this device only for the intended use describedin this user guide. Before using this system to test your blood glucoseplease read instructions thoroughly and practice the testwhen you first use this system. Do a quality check on the system following the instructions and consult with your healthcare professionals for questions or problems.Be aware of the safety of young children or handicapped persons near you when you conduct a glucose test using this system.Please keep the test strip vial away from children. The test strips and vial cap can present a choking hazard.Please be cautious when removing the lancet. Take the lancet out carefully. Always place the protective cap back on the exposed tip or (if using a twist lancet)place the cap on a hard surface and push the exposed tip into the protective cap and discard of properly.Never try to disassemble the meter in any circumstance. If your meter is not working properly, or if you need the Technical Support, please contact your local distributorfor help.

10
6. Quick Testing Instructions
1.Insert a new test strip into the meter while the meter is off. The meter will turn on automatically. A blinking blood icon will be displayed on the screen.2.Lance the finger and let a blood drop form. 3.Apply the blood drop to the front edge of the test strip when the blood drop icon is still blinking on the meter. Wait for 5 seconds, and the meter will display the test result. 4.Remove the used strips by hand or by pushing the ejector and the meter will power off.(For detailed instructions start on page 17 for Control Solutions and page for Blood Testing.) 191234

7. Installing the battery 1.Turn off the meter by pressing “M” button and hold for 2 seconds before replacing the batteries. Slide down the battery cover on the back of the meter by pushing the cover in the direction of the arrow and put the cover aside.2.Remove the two used batteries.3.Insert 2 new batteries with correct +/- direction.(Battery:AAA 1.5V 2 Alkaline 24A LR03) 4.Put the battery cover back in place by pushing the cover in the opposite direction of the arrow to close the cover into position.11Note: 1.I t is suggested that batteries need to be replaced when the battery icon appears empty. If you keep using the meter, the battery icon will start flashing and an error message E_3 will appear on the screen.2.N ote that replacing the battery will not reset the stored testing results.3 . You need to reset the time and date after the batteries are replaced. 4 .I f there is any unexpected symbol on the display, please follow the above procedure to replace the batteries again. 5.Please dispose of batteries according to your local ordinances.1234

8. Settings (Date / Time / Alarm / Measuring Unit / Memory Deletion)1.Appears with the test result either in mg/dL or in mmol/L.2.Appears when you recall the memory.3.Appears when you are in setting mode.4.Appears for control solution test flag (c).5.Indicates the meter is ready to take the blood sample when it flashes.6.Indicates the battery status.7.Indicates current displayed result is an average.8.Appears when alarm is on.9.Month10.Day11.Hour12.MinuteThe LCD screen will show as below:12
(1)MeasurementUnits(6)BatterySymbol(3)Setting(2)Memory(9)Month(10)Day(11)Hour(12)Minute(4)Testflag(5)Blooddropicon(7)DayAverage(8)AlarmReminder

1. 2. 3. Set the Year - With the meter off, bypressing the M key and hold for 2seconds, you will enter the settingmodes, press C key to adjust the year until the desired year is displayed and then press the M key to confirm the year setting. When pressing the C key, the year will be adjusted in the range of 2009 to 2029. After the year setting is confirmed, you will see the month segment flashing on the screen. Set the Month - Press C key to adjust the month until the desired month is displayed and then press the M key to confirm the month setting. You will then see the day segment is flashing on the screen. Set the Day - Press C key to adjust the day until the desired day appears and then press the M key to confirm the day setting. You will then see thehour segment is flashing on the LCD screen. 1213
AM
SET
AM
SET
3
AM
SET

Set the Hour - Press C key to adjust the hour until the desired hour appears on the screen and then press the M key to confirm the setting. You will then see the minute segment is flashing on the screen. Set the Minute - Press C key to adjust the minute until the desired minute appears on the screen and then press the M key to confirm the setting. You will then see an “AL” displayed on the screen center. 4. 5. Set the Alarm Reminder - Press C key to toggle between the alarm reminder setting and no-setting mode. If you see the LCD display a small flashing icon of alarm clock in the lower left corner with a time segment display, it means that you are in the alarm setting mode. If you see only AL without the icon ofthe small alarm clock, it means that you are not in the alarm setting mode. Press M key to confirm the alarm setting mode. If you select the alarm setting mode, alarm clock icon will stop flashing and thehour of the time segment will start flashing. Press C key until the desired alarm hour appears and then press M key to confirm the hour setting. Then the minute segment will start flashing. Press C key until the desired minute appears on the screen and then press M key to confirm the minute setting. You will see the measuring unit flashing on the upper left corner of the LCD display. 614 4
PM
SET
5
PM
SET
AM
SET
6.

7815Set the measurement unit - Press C key to toggle between mg/dL and mmol/L measurement units. Press M key to confirm the setting. You will see a “dEL” displayed in the center of the screen. The unit ofmeasurement -mmol/L is the standard unit of measurement in the Europe. If the meter is to be sold in the Europe, the unit of measurement will be set to mmol/L by default. Delete Memory - Press C key to toggle between a flashing “dEL” for memory deletion and a non-flashing“dEL”. If you want to delete all memory, press M key while the “dEL” is flashing. If you do not want to delete all memory, press M key when the “dEL” is not flashing. 7. 8.

Note: 1.When you change the date and time backward, you will not change the test results in the meter memory.2.Y ou need to move through the year, month, day, hour, minutes, alarm, measurement unit, and dEL to save the meter settings and turn off the meter.3.T he average readings in the meter memory are calculated from the results obtained during the 7, 14, 28, 60,and 90 calendar days preceding the current date and time settings.Note: Your meter can show results either in “mg/dL” or “mmol/L”units. It is very important to use the correct unit of measurement to properly manage your diabetes. If you live in the Europe, you should use mmol/L; your results will always have a decimal point. The unit of measurement will be setto mmol/L by default. If you do not see a decimal point in your test results, it indicates the measuring unit is in mg/dL.16

179.Running a Control Solution TestIMPORTANT: Always make sure you press C key for Control Solution test, otherwise the control solution test result will be stored in the memory, and affect yourAVGresults. 123452.Press the C key, and the meter will display a letter “C” on the upper right corner of screen, indicating the control test mode. The test result will not be stored in the memory.3.Squeeze a small amount of Control Solution on a flat surface and apply to the front edge of the test strip.4.Wait for 5 seconds, and the meter will display the result. 5.Remove the used strips by hand or by pushing the ejector and the meter will power off.1. Insert a test strip into the meter while the meter is off. The meter will turn on automatically. A blinking blood icon will be displayed on the screen.

18 IMPORTANT!!!1.You must press the C key to distinguish the control solution test from the blood glucose test. Do not perform the blood test in Control Solution mode.(If you perform the blood test in Control Solution mode, the test result will not be stored in the memory.)2. Use only SuperCheck Plus Control Solution with SuperCheck Plus Glucose Meter.3. SuperCheck Plus Control Solutions are used to check that the meter and the test strips are working together as a system and that you are performing the test correctly.4. SuperCheck Plus Control Solution contains a known amount of glucose that reacts with test strips. The Medium and High level Control Solution are intended to check the monitoring system in different measurement ranges. 5.Shake the vial, discard the first drop of control solution, and wipe off the dispenser tip to ensure a good sample and an accurate result.6.Use only for 3 months after first opening. Record the open date on the Control Solution vial. Discard after 3 months.7. Compare your Control Solution test results with the expected range printed on the test strip vial label. If your glucose control results fall outside the expected range; repeat the test. Results that repeatedly fall outside the expected range may indicate:(1)You may not be doing the test correctly; repeat the test, by shaking the control solution vial well and carefully following instructions. Please make sure the test is done within the temperature range.(2)The Control Solution is expired or contaminated.(3)The test strips are damaged or outdated.(4)You may have applied the Control Solution before the blood drop appears on the screen. This will cause incorrect glucose measurement.(5)Meter malfunction.
This manual suits for next models
1
Table of contents
Other BTM Blood Glucose Meter manuals